There are a number of "how to" pages listed above that I set up for DIYers like myself, showing many of the techniques I found on the internet & have used to make lots of exotic wood projects. These include cups, mugs, regular goblets, Celtic-banded goblets, cylindrical "boxes", bandsaw boxes, bandsaw snakes, puzzle boxes, an iPhone speaker, & various home-made chucks & tools. I also wrote a "techniques & calculations" page with measurement guides for different projects. A page devoted to inlay techniques is also included in the contents list above. I included a final list of fun projects, including a backyard pirate ship, observatory, & some kid-friendly crafts. This 1st page shows some of the straight & tulip-lipped goblets I've made over the last few years:
This site is intended as a helping guide for those DIYers who want to make objects out of wood using a home lathe or other tools. I am NOT an expert in anything; I started making 6-foot medieval-style archery bows around the year 2000, but all lathe work is only since August 2021. Included are photos & drawings of my projects with detailed explanations of how to make them & avoid my many mistakes. This site is divided into multiple pages that you can glance through under "CONTENTS" above. Look through the photos to decide what you would like to make, then read the details below each idea. Included are multiple references to outside websites that provide much more expert instruction. I don't ever sell anything I make, but "pay it forward" by giving certain items away to family, neighbors, & close friends.
Made for my wife & kids to divvy up. TOP: 12 straight-sided goblets from various exotic wood types, all identified on this page. BOTTOM: 10 tulip-style goblets (the 2 given away had made 12) with Celtic rings, half with floating rings around their stems; see next page for more photos & DIY info. All goblets have 9-piece checkerboard stems of light & dark wood (maple, poplar, oak, or walnut). Celtic bands are walnut, purpleheart, green heart, padauk, Osage orange, maple, poplar, or red oak, with separate lips & bases added. All are natural wood colors with some photo lighting differences. The inside coatings are all food-grade epoxy, & outside finishes are natural Danish oil with lacquer or epoxy, cured for 1-2 days under 60 psi (4 atm) in my pressure chamber to remove all visible bubbles.
12 of my straight-edged goblets, labeled, all with central posts composed of various wood types. [I had to cut the photo in half & paste to get them to fit into the required 500x500 pixel size for this site.] The colors shown are the NATURAL colors of the wood & are NOT stained that color. I was doing a lot of experimenting with sizes and volumes, but the average goblet size was 7" tall by 2½" wide for this specific design. There are literally hundreds of YouTube sites with info on turning wooden goblets, cups, & bowls. In particular, Kent Weakley has a great site (see external link below) where he gives tutorials on making goblets such as these.
Link to Kent Weakley's fantastic woodturning siteI have NOT been doing this for very long! In fact, I turned my very first "box" in August of 2021. Here are the first 5 goblets I made starting in June 2022. L to R they are birch, purpleheart, padauk (rhymes with "pad clock"), maple, & walnut. These are NOT painted or stained, & the color tints you see are the NATURAL wood colors with the only finish being clear ("natural") Danish oil, which is basically just transparent boiled linseed oil. The central stems are all different and each includes 9 pieces of poplar, walnut, or oak in different combinations. The black color in the glue edging was done on purpose. All are around 7" tall by 2½" wide, with 2½" deep cups. Later on, I hand-coated them with epoxy to give them a better "glass-like" shine. The purpleheart was my wife's favorite until I made a zebrawood goblet (pic below) just over one year later.
Inside four of the straight-edge goblets. The 3-piece by 3-piece central stem is made by gluing together nine ½" by ½" by 8" pieces of wood, alternating the wood types. One of my versions used gray non-sanded grout mixed in with the glue to get the thin black outlines. For a final touch, inside the goblets I use different colors of sparkly mica powder (very small amounts) suspended in a thin layer of clear epoxy to give a nice sparkly effect. This also allows the 3x3 stem makeup to show through when looking down into the top of the cup. Directions for making this style of goblet are all over the internet, with an excellent external link below.
Link to an external website showing how to make a "Staved Goblet" with a central 3-by-3 stemAnother set of 5 goblets starting out. The top picture shows the center 9 pieces glued together, set above the stack of four 3x3x8-inch wood sides (the far left canarywood blank was already glued together). At lower far R, the fresh-cut purpleheart is BROWN; it oxidizes in the air over a few days to turn the characteristic purple color. Bottom pic is after all the pieces had been glued together & the sharp edges cut off & sanded, now ready to turn on the lathe. I have tried various methods to mark a black line between pieces 'cuz I like the look. The mixing of gray non-sanded grout into the glue made a thick paste which required very tight clamping or the line got too thick. I tried black spray-paint before gluing & drying, but that fell apart on the lathe, so not a good idea. After this my son said, "What's with your fascination for these thin black lines?" Well, I like 'em.
In the photo above, the right square-shaped blank had the sharp edges trimmed off to make the next step easier. The drawn black circle designates the planned cylinder shape. The next step involves holding the blank between a pointed headstock spur (attached to the lathe motor) and a free turning "live" center (fitted on the tailstock). You then have to turn the blank into a cylinder & cut a tenon on one side in order to attach the blank to the 4-jaw chuck. In the photo above, the left blank has the tenon made, as well as a rough cylindrical shape cut, & is now ready to be secured in a 4-jaw chuck on the lathe in order to start carving the hollow center and then the final external shape. For the goblets and cups, I made tenons with an external attachment, rather than the internal hollow often made for the wider bowl blanks.
Left above shows the headstock spur holding a piece of oak. FYI, the plastic discs are used to help keep the chuck from getting too tightly attached when you want to remove it. On the right above is a tenon in that piece of oak secured in a 4-jaw chuck. I drilled holes into the jaws to screw the chuck securely onto the tenon after a few mishaps.
The zebrawood goblet on the left WAS my wife's favorite until I made a Celtic-banded wenge goblet, shown on the next page. The zebrawood goblet is 6½" tall & 2¾" wide, and the 9 stem pieces are made from poplar and walnut. I decided to have the zebrawood stripes go sideways. The tigerwood goblet on the right has a poplar and wenge central stem and is 7" tall by 3" wide. Both were first sanded down to 600 grit after which sanding seal was applied. To get rid of the fine wood splinters raised up from the sanding seal I resanded with 600 grit sandpaper, then applied a 2nd coat of sanding sealer. After drying I sprayed with Zinsser Bull's Eye shellac instead of the usual lacquer spray just to experiment. Later I spread warmed epoxy over the surfaces to give that glass effect. The addition of these two goblets in late June 2023 made a total set of 12 straight-edged non-Celtic goblets with this specific design. After this, I started making more Celtic-banded goblets.
In May 2023 I started spreading a final thin epoxy coat all over the exteriors, keeping the epoxy flowable by gently warming the mixing cup with a heat gun, then using the heat gun to smooth out the surfaces after the epoxy application. This was done after first completing the epoxy coating to the inside cup and allowing this to cure for 1 day. As seen above, I inverted each goblet over a paper Dixie cup to apply the outside epoxy coating, as well as adding the printed paper ID stamp to the bottom. The epoxy coatings cured in just 1 day & gave a much more glass-like finish than the multiple layers of sprayed lacquer I used to do, as well as being much faster to complete. An initial spray of lacquer is allowed to dry before the epoxy is done, which helps prevent air bubbles from leaking out of the wood under the epoxy.
This leopardwood goblet also has a thin white veneer layer around the 9 pieces of walnut and mahogany, which shows up as the "eye" on the central decorative bead. It's about 7" tall by 2½" wide and is one of the final goblets to make a set of 12. With one wife and two kids, 12 divides out evenly for the future. After this was completed, I started making more of them Celtic-banded goblets, pictured on the following page. It should be obvious by now that I don't use an exact template to make these vessels identical. I like the unique differences in size, shape, wood variety, and even finishes that make each piece special. One step I have not mentioned involves having the base of each goblet as a solid piece of wood with a tenon carved on the bottom to hold it steady in the 4-jaw chuck on the lathe. This is done with the work after initially making the cylindrical form, before carving out the cup part.
Cherry cup goblet. I made the 9 center pieces out of imported Honduran mahogany and home-grown mulberry root. A thick "Pakistani" mulberry root was invading the nearby PVC joints of my watering pipes, so I cut the root off my tree & used it. On some other cups I had obtained sycamore root from a fence-building company after they had to cut out a large root to make room for our fence. This goblet is also 7" tall by 2½" wide. That base of ornate wood was NOT made by me, & is actually the top of my future coffin. WHAT? Yup, years ago the wife & I went through the Neptune Society & arranged our funerals in advance so our families won't have to worry about doing anything. We were given 2 of these pretty boxes to store our future ashes. These boxes are a heck of a lot nicer than a shoe box & make a nice base setting for my lathe projects.
The left 7-inch-tall goblet with a thin floating ring was "twice turned" & dried from green (wet) wood, sanded to 600 grit, sealed, natural Danish oil (+ a little walnut stain) coated, & is ready for the final coat of clear Zinsser spray shellac. The height of both will be 7", the central holes are 4" deep by 1¾" wide, & the base is fairly wide at 3¾" to better promote stability. The white birch on the right has completed its first rough turning & has the exact same dimensions that the goblet on the left had when the left one was started. The left goblet was first sealed with CA (cyanoacrylate or "super") glue on all grain edges, but the right was left unsealed to compare results. Both were microwave dried from 20% down to 14.8% (left) & 12.5% (right) moisture contents, & neither cracked, so the CA glue step was not necessary. More info about microwave oven drying & "twice turning" is under my "Techniques & Calculations" section later on.
For an excellent YouTube discussion on microwave oven drying, please see the link to Kent Weakley's video below. Although only 1 goblet's exposed grain edges were sealed with CA glue, when drying was completed no cracks had appeared. This suggested that there was no need in the future to seal the grain before drying when using this technique. Because I was worried about cutting into the bottom of the 2nd cup on the right, I didn't turn the base at as sharp an angle as I had done with the 1st goblet. I added a little walnut stain after the natural Danish oil to darken both the goblets a little. Both copper tape bands & external wood were coated with spray lacquer, & the insides were painted black then coated with clear epoxy. I decided to try clear Zinsser spray shellac on the outside.
Kent Weakley's microwave drying video to make "twice turned" bowls (works for goblets, too!)After sanding the bases, I put painter's tape around the circumferences of the bases to make a "bowl" & then poured in a thick layer of epoxy colored with copper mica powder. The next day I added a clear epoxy layer & the paper ID stamps. One more day of drying, followed by my sanding off the painter's tape around the bases (it got stuck), & then I resanded the bottom edges down to 2000 grit. I decided to make the final coat on both goblets with a can of Zinsser clear spray shellac rather than the epoxy or lacquer. Seemed to work just fine. The info on the paper ID says: "Date Completed: 15 August 2023, Body: White Birch, Special: Twice Turned, Handcrafted by: M. Barry Kirk, Please Hand Wash Only, Volume: ⅔ Cup, Not Microwave Safe." My first name is Mike, but for my artsy-fartsy stuff I use my middle name. I don't know why; it just seemed like a good idea at the time. I gave this goblet pair to a neighbor down the street I recently met on a walk; he & his wife are nice people. Hope they can do something nice for somebody else in the future: Pay it forwards!
From mid-September into October 2023 I turned a recently made copper-banded twice-turned birch cup into this 11½"-tall chalice by adding a kabukalli wood base that is 3¼" wide. The blue-tinged center section was done by pouring epoxy mixed with a little blue mica powder (plus a fake doubloon) into the hollowed birch cup I had already dried down to 14% moisture in a microwave oven, then the excess exterior wood was turned down on the lathe. Fine sanding followed by a layer of clear epoxy made this central epoxy section transparent. The floating gold Spanish doubloon I had added to the wet epoxy (it's fake) can be seen on the side view. I also added a second (fake) gold doubloon just under the epoxy layer inside the cup part, which is visible in the top view. 3 decorative metal furniture tacks are spaced around the sides of all 3 copper foil bands to complete the pirate look. This chalice holds exactly 1 cup of fluid. The copper foil tape & furniture tacks (nail parts cut short) will not fall off because they were secured by CA glue & then coated with a thick layer of epoxy. This final clear epoxy coat was used both inside & outside the entire chalice, including the base, giving it a very nice "polished glass" effect plus ensuring it is food safe.
Completed October 4, 2023, this twice-turned birch chalice is also 11½" tall & has a 3½" base; it also holds exactly 1 cup of fluid. I made this out of one piece from a recently cut down birch tree, & after drying the rough-cut & hollowed out branch in a microwave oven, I poured in the blue-mica-tinged epoxy plus a (fake) large gold Spanish doubloon. More than 24 hours later, after the epoxy had become solid, the insides were sanded & the outside final shape was cut on the lathe which also exposed the epoxy band in the center. Once final sanding & staining had been completed, I added the 3 copper foil bands with 3 decorative furniture tacks each. Like the first one, this entire chalice is coated (inside & outside) with clear epoxy & is completely food safe. The final clear epoxy coating, smoothed out with a heat gun, turned the sanded epoxy center transparent.
My son suggested trying goblets with the lip bent outwards, so I turned the next few goblets to look like tulips. 1st on left: The central dark ring floats between similar but attached rings. This 8" by 2½" goblet's cup is made from poplar, with padauk used on the base, & with the stem from sycamore root & nectarine wood from my own trees. 2nd: 6" by 2½" Honduran mahogany cup with a poplar & oak central stem. 3rd: 6" by 2" poplar, walnut, and mahogany (my narrowest) goblet with plywood veneer & with green mica powder mixed into the glue. 4th: Poplar (light & dark) cup with birch and oak stem measuring 5" (my shortest) by 2½" wide.
Bottom has a layer of epoxy colored with red mica powder. After trying this on the initial goblets, I decreased the amount of mica powder to make it more translucent so that you could see the 3 by 3 makeup of the stem while looking inside. I also tried different colors of sparkly mica on other cups.
In July of 2023 I joined this friendly and experienced group of fellow woodworkers that had met the 1st Thursday of every month at 6pm in the Goebel Adult Community Center adjacent to the Thousand Oaks Library. Great presentations every meeting, including one with brightly colored wooden pieces after soaking in Kool-aide! HOWEVER, my own woodwork is not artificially colored: Purpleheart turns naturally purple after air exposure, Osage ("oh-SAGE") orange is a bright orange, & padauk (rhymes with "pad clock") is a brilliant reddish orange. The only "stain" I use is "natural" Danish oil (a clear linseed-oil stain & preserver) rather than anything that adds artificial color, although I will mention if trying out darker stains in rare instances.
Conejo Valley Woodworker's Association WebpageOur Conejo Valley Woodworkers Association was invited to change our 1st Thursday monthly meetings to 7-9 pm at "Woodworkers Retreat" starting in March 2024. This 8,000 square foot building next to Lowe's & Home Depot in Newbury Park in Ventura County northwest of Los Angeles, California has multiple great woodworking tools for daily or monthly fees. The photo above lists some of these available tools, and the location offers a classroom & a safety course, as well as expert instructors for various projects. I am NOT paid or receive any compensation for providing this referral. The location is 3305 Grande Vista Drive, Newbury Park, CA, 91320, phone #805-405-2224, email info@woodworkersretreat.com.
Woodworkers Retreat in Newbury Park, CaliforniaKent Weakley has a great wood turning web page with lots of instructional videos. He has a BA in fine arts, is a national award-winning photographer, and owns Blue Sky Graphic Communication, Inc. I don't get paid to promote his site, I just think it is very well done and he has a huge amount of knowledge to share. Plus, he returns personal e-mails right away.
Another link to Kent Weakley's Turnawoodbowl.com web siteThese goblets have crisscross bands of exotic wood that require a significant amount of time to put together, but the final product is certainly worth the trouble:
4 of the 5 initial Celtic-banded goblets sitting on the bar in my house; I did NOT make the bar top or bar stools. Left: This large zebrawood cup has sycamore root Celtic bands & a walnut top rim, & measures 8¼" tall by 3¼" wide. The core stem is poplar & walnut with angelique edging, finished with an epoxy coat. Center left: An 8½" tall (my tallest) by 3¼" wide angelique cup goblet with a layered walnut & zebrawood top rim. Sycamore root, poplar, and green heart were also used. More walnut with poplar in the stem, plus a final epoxy coat. Center right: This 8-inch-tall green heart goblet was one of my first Celtic knot attempts, after which I was a bit more careful in cutting out more of a section of the blank to allow for the thickness of the Celtic bands. This goblet also has poplar, sycamore root, angelique, & walnut, with an epoxy coat. Right: Oak cup with plywood Celtic bands. My daughter liked this one the best, so I gave it to her to take back to Florida. Currently (end of October 2023) I'm making 9 more of these, but with multi-colored Celtic rings.
L to R: Tigerwood body with Osage orange lip & base, tigerwood body with purpleheart lip & base, & padauk body with green heart lip & base. The padauk goblet is extra-shiny because it has already been epoxy coated & pressure treated. The 2 tigerwood goblets have yet to get the epoxy coat or pressure work. Just completed the turning, sanding, sealing, & clear Danish oil on the far left one today, 22 January 2024. The center goblet was completed yesterday, & the padauk-green heart on the right just came out of the pressure tank after 2 days at 4 atm to allow epoxy curing without visible bubbles. These 3 were the last of the 9 blanks I had made last year. The color tones displayed above against a white background are the more natural colors than some of the flash photos.
Epoxy coatings all done with 4 atm pressure treatment x 2 days, all 5 completed by 25 January 2024. Sizes 8½" tall by ~2½" wide, each cup holds between 3 oz (wenge) & 6 oz (left tigerwood) of fluid. None of the wood is stained, these are the natural colors, although brighter lighting in a different location & flash use made these color tones above brighter than in some of the other photos.
2nd from right is the maple goblet with dark brown tatab lip, center, & base, completed in January 2024. The outer 2 goblets have wenge bodies while 2nd from left has an Osage orange body. Using different woods for the Celtic bands gave a nice effect. All 4 were coated with epoxy & have a Spanish doubloon embedded inside the epoxy in the cup part. Skipped the floating rings on the last 2 of the 4 as nobody besides me seemed to like them much.
The Celtic goblets take a long time to make, as the square blanks have to be cut at a 45° angle with inserts glued and clamped in place, and the process repeated 3 more times before the project is placed on the lathe for turning. I made 2 of these 8" tall by 3" wide zebrawood goblets and gave one of them to my ER nurse friend Mike who had gifted me his thick slab of zebrawood. He told me that his wife was mystified as to how I got the floating ring on until Mike told her I had carved it from the body of the goblet while it was on the lathe. A different Mike, one of the most famous & celebrated wood turners around, is Mike Waldt, and his triple floating ring YouTube video is linked below.
Mike Waldt's Triple Floating Ring YouTube VideoInside one of the Celtic zebrawood goblets. The top edge is walnut, and the rings were cut from sycamore root. Poplar and angelique are the other woods used in this goblet. Getting a lot better at lining up edges & removing all tool marks. This is the goblet I gave to my friend and co-worker Mike about a month after he gave me that large piece of thick zebrawood.
Double layered top rim of walnut & zebrawood, this angelique goblet measures 8½" tall by 3¼" wide. Later I added an inside epoxy layer (with fine mica sprinkles) to this goblet, as well as coating the inside & outside walls with a thin layer of clear epoxy to get that "glass-like" finish we all crave. You can see the tool mark from the Forstner drill bit in the base because I had planned to put an ID into that depression, so I left that hole there on purpose, but changed my mind and added the paper ID to the bottom of the goblet. A more experienced and professional wood working purist would have gone back & finished the inside smooth, but I'm not & I didn't. And that's how you learn that some of your ideas don't always pan out, but life is a learning process.
Looking into the top, the walnut rim is obvious. This was one of my experiments in slow turning on a barbeque rotisserie while adding epoxy as a final coating. Too much work and the epoxy did not stay uniform, and inquisitive bugs would stick on it, so I stopped doing that. Then I tried up to 10 coats of spray-on lacquer. My latest finish looks the best but involves several steps, including sanding to 600 grit or higher sandpaper while on the lathe, then wood grain sealer, sanding again with 600 grit, 2nd layer wood grain sealer, removing from lathe, then 1 coat spray lacquer, & finally warmed epoxy layer with heat gun used to smooth out the surface & remove bubbles. Also added a layer of epoxy with sprinkles after this photo was taken.
Oak main part with black glue around the Celtic rings. The 3x3 (my abbreviation for "three by three") piece stem is made from nine pieces of ½" by ½" by 8" alternating poplar & oak wood. The plywood strips surrounding the 3x3 stem added a unique triple veneer design. There is also a tiny floating ring around the stem. Notes I made on this goblet can be seen in the following "Techniques & Calculations" section. Out of all the ones I had made, my daughter picked this goblet as her favorite to take back home to Florida with her.
Finished on Christmas day, 2023, this is now my wife's new favorite. The body is made from black striped wenge (pronounced "WHEN-gee"), which is DIFFICULT to work with, is exceptionally brittle, chips easily, & the splinters & dust are dangerous, so I wear my usual gloves, work apron, & respirator. Wenge DOES look very nice, despite all the cons, & the wood itself is not toxic. I soaked CA glue inside & out, then sprayed the outside with multiple layers of lacquer. The ID was stuck on the bottom with clear nail polish (it worked great!), then food-grade epoxy was coated inside & out. There were zero bubbles after curing the thin epoxy coating for 48 hours (rather than 24) under 60 psi (4 atm) high pressure. These Celtic bands were made of Osage orange, walnut, red oak, & maple, while the lip & base were both maple. The 9-piece central stem was made from alternating walnut & poplar. This goblet height is 8½" and maximum width is 2¼". The thin shape meant the inside cup hole was purposefully left narrow, so this goblet will only hold a calculated 0.36 cup of liquid at a time (about 85 ml). That's plenty of wine, though! My wife & another person have now told me they don't care for the floating rings, so this and subsequent tulip-topped Celtic banded goblets do not have them.
Lots of steps in making a new batch of 9 Celtic-banded goblets! This photo was taken October 26, 2023, so when looking at the following pictures you can tell making these takes a LONG time! Above, I made the cores out of 9 pieces of either walnut & poplar or walnut & maple to get the chessboard effect for the goblet stems. This photo shows (L to R) main bodies of Osage ("oh-SAGE") orange, purpleheart, wenge (dark, pronounced "WHEN-jee"), maple (light color), & another wenge, & was taken just before gluing endcaps to the tops & bases using different hardwoods. Had to buy another gallon of Titebond III glue! After that I began cutting 45° angles over half the bodies & inserting thin sheets of 7 different types of hardwood to make colorful Celtic bands, then drying each layer overnight. This was repeated 3 more times on each of the 9 goblet blanks, but I saved time by doing these in batches. (I have a LOT of clamps.)
Start with a 3" x 3" x 8" square wood block. This "blank" consists of the central 9 stem pieces, plus the 4 pieces of the outer wood shell, all glued together using Titebond II or III glue. [CA ("super") glue is reserved for smaller applications.] After the Titebond glue is dry (I wait 24 hours), cut one side of the square block at 45° & glue in one flat Celtic band piece, clamping against a straight board until dry. The example above was made using 3-ply rosewood, but my usual Celtic bands are made with ¼"-thick solid wood. Repeat 3 more times & you get the final 4-piece Celtic-banded square blank ready to turn on the lathe. When cutting the 2nd, 3rd, & 4th 45° cuts on your chop saw, remember to cut a little wider to allow for the full ¼" THICKNESS of those Celtic pieces so the bands will line up visually. As you can see, making Celtic goblets takes a long time (about 1 month for each one), so it is easier to do them in large batches as long as you have enough clamps!
Mounted horizontally on the lathe is one of my zebrawood Celtic goblets with a "floating ring". In front are 3 similar blanks before being turned. Their floating rings, a.k.a. "captive rings," are not yet carved from the thick base; these rings are actually moderately easy to carve while the base is spinning on the lathe, and they are not added later. The double "wedding captive ring" design, however, does require one of two formed rings to be broken & then glued back together while interwoven with the first ring. As for Celtic knots, there are lots of these woodturning instructions on the internet, so I selected one of them below. This external link shows the usual technique I use in making Celtic knot (a.k.a. "banded") goblets.
YouTube Video: Turning Celtic knotsCan't see them checker-board cores anymore 'cuz they're hidden away inside. Here are all 9 new Celtic goblet blanks after being lathe turned into cylinders with tenons added to the bases. For the Celtic bands, I used 4 different wood colors on each blank. The far-left horizontal blank was mounted in the chuck on the lathe & also supported by my DIY "steady rest." The central cup-drilling part of that mounted goblet had just been completed here; next will be the outside shaping & finishing. Floating rings are also planned once the entire top part of the cups have been turned. When working this design on the lathe, you need to start at the end farthest from the chuck (the "top") & complete that part prior to moving closer to the base, finishing the cup & floating ring before narrowing the stem. Otherwise, you run the risk of collapsing the completed narrow stem if you go back to working the top. Been there, done that.
6 are left after 3 have been completed. Now we are in November 2023 with these 6 blanks ready for final turning on the lathe. These were already turned into cylinders with exotic wood caps and bases added, plus an extra sacrificial wood base from a Douglas fir 2x4 so that I don't have to waste any exotic wood when removing the bases from the chuck. The next step on these 6 remaining blanks will be drilling out the cup hole using my carbide Forstner drill bit set plus my lathe tools to cut the insides wider. The trickiest part is next, with cutting down the sides to match the inside contour without making the walls too thin or cutting through them! I said this before, but I'll say it again: I start from the far end & gradually advance towards the base in order to prevent a catastrophic stem failure.
Photo on January 2nd, 2024. The maple body goblet at the TOP of this photo has no floating ring & is about to get cut off from the "sacrificial base". Sanded to 600 grit, sealed, resanded at 600 grit, sealed again, then clear "natural" Danish oil inside & out. This goblet has an additional central band of dark brown tatab due to a MISTAKE that I made: I had cut the center hole too wide all the way in, & erroneously thought I'd have "just a little more room" as I was turning the sides. OOPS, cut the goblet in half. So, I cut off the irregular edges of that mistake & glued in a 1" chunk of tatab, same hardwood as used on the lip & the base. This central piece overlaps the maple body on the inside by ½". After lots of sanding, this ended up looking just fine. The 3 objects below are 1 padauk & 2 tiger wood "blanks" that should be completed in the near future.
My sources tell me that Osage is pronounced "oh-SAGE." This photo shows the 1st completed lathe turning of the 9 total Celtic-banded goblet blanks I glued together near the end of October 2023. Body & floating ring (a.k.a. "captured ring") are Osage orange with zebrawood cap & base, stem is walnut & poplar, & the 4 Celtic rings are purpleheart, walnut, maple, & red oak. Height is 9", outside width 2½", inside width 2", & cup is 4⅝" deep. Calculated internal volume is approximately 1 cup which equals 8 ounces (about 240 ml). With this deeper goblet I went for a smoother French curve shaped body, along with a flared lip or "tulip" design. Epoxy internal coating, pressure tank treatment, & base tag addition were also done.
This extremely dark variety of exotic hardwood is supposedly pronounced "WHEN-jee." Here I made a tall "lip" but decided in the future to make them shorter. This project was the 2nd completed lathe turning of the 9 total Celtic-banded goblet blanks I glued together at the end of October 2023. Body & floating ring (a.k.a. "captured ring") are wenge with Osage (pronounced "oh-SAGE") orange cap & base, stem is walnut & poplar, & the 4 Celtic rings are purpleheart, poplar, maple, & red oak. Height is 9", outside width 2½", inside width 1¾", & cup is 4¼" deep. Calculated internal volume is approximately 0.7 cup which equals 5.7 ounces (about 168 ml). Took one full day to turn the blank into this, with sanding sealer, sanding, & Danish natural oil steps done. Project was completed by coating internally with epoxy & pressurizing at 4 atm (60psi) for 24 hours to make all the unsightly epoxy bubbles microscopic and invisible, then adding the base tag with more epoxy. In both of these goblets I added a fake Spanish doubloon coin underneath the clear epoxy coating inside. 'Cuz I'm a Pirate person. Aargh!
For Christmas 2023 I made this Osage orange vessel with a cap & inlaid with my friend Dean's name using my blend of "faux turquoise". The floating ring was taped out of the way above, so the inlay is visible. I also made a similar style goblet for his wife (next photo). If you want to learn how I do my inlays, please go to my "How to Make an Inlaid Mug" page. The caps I made for Dean & his wife also were inlaid, his with fake turquoise, hers with simulated opal, like I did her name. In addition, Dean's goblet has a faux gold Spanish doubloon embedded inside the clear epoxy, while his wife's has an embedded faux silver doubloon. If you're ex-uniformed services (I was an NDMS reservist for 18 years), you know the SILVER rank designations are a full step higher than the yellow brass ones. My own wife will agree: They're in charge!
The purpleheart goblet, on the right, was a surprise Christmas 2023 present for my friend's wife. The body is purpleheart with exotic hardwood Celtic bands & a "green heart" wood top lip and base, with walnut & poplar 9-piece stem. The cap consists of purpleheart with a red padauk (rhymes with "pad clock") finial & padauk inner plug, along with the faux opal circle & opal tip on the finial. These Celtic rings were made from Osage orange, walnut, red oak, & maple. The floating ring was carved from the body, so it is, of course, purpleheart. Her name was hand engraved using a rotary tool & then inlaid with faux opal, which was made with sparkly nail polish flakes mixed with baking soda, solidified using thin CA glue, & then sanded flat going from 60 grit through 600 grit sandpaper steps while spinning on the lathe. To see the exact faux opal method used here, you are invited to go to the "Techniques & Calculations" page. This goblet is 8" tall (9¼" with cap on) & 2¾" wide. Although the exterior measurements are the same as that last 7-ounce Osage orange goblet made for her husband, the different interior cup shape holds a slightly smaller 6 fluid ounces (180ml).
For fun, I bought a bunch of fake metal Spanish doubloons on Amazon & began sealing them into the epoxy insides of my latest goblets & cups. The Osage orange goblet for my friend above holds a fake gold doubloon, & his wife's purpleheart goblet has a fake silver doubloon. Why does the wife only get the silver doubloon? Like I mentioned under an earlier photo, the silver-colored insignias designate a higher rank than the yellow (brass) ones. Us husbands know that the wife is always in charge! As for the interior shade difference, I decided to be unique & used a "dark walnut" Danish oil for the lady's goblet interior (bottom right) rather than the clear "natural" Danish oil used on in inside of my friend's goblet (top left). However, all exteriors received only the clear "natural" Danish oil before getting 4 layers of clear spray lacquer. Making these Celtic-banded goblets is not a weekend project, as they each required 22 pieces of exotic wood that needed to be cut & glued together with Titebond III & lots of clamping, sanding, sealing, finishing, & high-pressure treatment steps (removing bubbles from the epoxy). I used 7 different varieties of wood to fashion the purpleheart goblet, so it helps to have a stockpile of exotic hardwoods. A good lathe with lots of woodturning tools plus a strong shop vac to clean up the tons of sawdust is essential, too.
A DIY plain mug is one of the easiest 1st projects to turn on a lathe. Different shapes can be carved into the outside, while adding fancy handles, burn lines, copper bands, & carving inlays are also fun things to try:
My daughter is graduating from her 4-year pathology residency in June 2025, so I made her this mug out of red oak along with a red oak cap which has a white oak finial. Copper tape with metal decorations was added to both cup and cap. Finally, they were coated with epoxy which was cured for 2 days at 4 atm (60 psi) in my pressure chamber to minimize any bubbles. I had used my laser to carve her name rather than doing it by hand, & the lettering came out a lot sharper.
Finished this large copper-banded tiger-striped oak beer mug in October 2023 for Andrew, my niece's boyfriend, whose hobby is fermenting home-brewed beer. Lettering was done by hand using a Dremel; this was before I bought my laser engraver. The DIY page with all the instructions on how to produce this is under the following heading, "How to Make an Inlaid Mug." The fake turquoise inlay was made by mixing different shades of dark & light blue mica powders with baking soda & thin CA glue, then sanding flat. Painting a black outline before applying the fake turquoise made the letters "pop". The extra-large handle was designed so a gloved hand could hold this, since Andrew lives in Minnesota. The mug is 7" tall, the cup part is 3½" wide, and it holds 13 ounces (= 1⅝ cups). Check out the next page for instructions on how to make your own!
Finished this birch twice-turned "Pirate Mug" in September 2023. It was originally supposed to be a 12-inch-tall goblet which had been dried in the microwave after the initial rough lathe work. After thinning out the stem while on the lathe, I decided to do more work on the cup part, and the weakened stem splintered into unrepairable pieces. Very disappointing, but you learn from your misteaks, so I altered the design by turning it into a 7¼" tall by 2¾" wide cup after cleaning up the base with blue-pigmented epoxy. A (fake) gold doubloon is embedded into the base epoxy but is difficult to see, so I added another one into the bottom of the cup. I decided to call this a "Pirate Mug" after adding the copper bands & metal button embellishments. In October 2023 I turned this into an 11½" tall chalice by adding a base; the new photos are under the goblet section.
I made this oak cup with a lid and handle for my nephew Mathew. Yes, that is how he spells his name, with one "t". The cap was actually part of another cup project that broke, but I saved it and turned it down to make a very nice lid. The shiny "buttons" in the cap are angelique and poplar polished wood with green mica powder added to the glue holding pieces together. The link below is for one video I found that demonstrates a simple method to add burn rings to your lathe projects. His plate ring method is nice, although I prefer not adding fissures to a food plate that could trap food particles.
YouTube Video: Adding burn rings to your lathe projectThe handle was carved out of a piece of oak, which was then glued into recesses Dremel carved into the body of the cup. The design still looked a bit too plain, so I wood-burned decorations in and added a drop of opal mica-colored glue to a small hole I drilled in the top of the handle. Above is a good view of that "opal button" I added to the top of the handle using clear epoxy mixed with "white opal" mica powder. As you can see from the stripes in the wood, this is also made from "tiger oak".
Made this "tiger oak" mug in July 2023 for my twin sister's adult son Donny. This is one of the largest cups I've ever hollowed out, being 6½" tall (with a 6" internal depth) by 3½" wide & holding 2½ cups of fluid. The oak I used for the body was 2 years old and full of cracks, many of which I cut wider & then filled with a blue mica powder /baking soda /sawdust mix cemented using CA (cyanoacrylate or "super") glue. I used self-stick copper tape (used in 3D-stained glass work) around the mug body & externally sealed it with epoxy. The dragon handle was carved out of a deer antler glued onto oak. The "smeared" look of the dark shadows under the lettering was accidental but I think it looks great, so I didn't try to fix it. At the end of September 2023 I added red tint "fire" to the smeared black shadowing of the letters 'cuz I think it looked better that way.
The top part of the dragon's body was carved out of an old deer antler tip which I epoxied onto the oak handle, with the oak part of the "belly" carved & wood burned to show scales. The oak handle posts have thick metal wires going through them for reinforcement, & the ends of the 2 posts go all the way through the wall of the mug for a very secure glued fit. I coated the handle with epoxy to prevent staining or liquid absorption, as well as to give it a smoother feel. I really like the look of the copper bands, so I plan to continue using them in selected future projects.
I started adding (fake) metal Spanish doubloons at the bottom of some of my mugs, sealed under clear epoxy and hardened overnight under 4 atmospheres (60 psi) of pressure inside my pressure tank. No more epoxy bubble problems! The underlying layer of epoxy in the above photo had been colored with gold mica powder, and I added a tiny bit of blue mica "iridescent" powder to the clear layer holding the doubloon. These iridescent spots are extremely shiny which is why the photo looks like blobs of blue. The clear epoxy-coated inside walls reflect the bottom colors, so they also show false colors in the photo. Looks cool, though.
Made for my twin sister Bonnie last year. I tried to get the floating rings to "float" by CA "super" gluing fine clear nylon fishing line to them, but the lines kept breaking. I next tried a bunch of tiny neodymium magnets glued into holes in the base with opposite polarity magnets inserted into small holes in the ring. That idea didn't work! See the next picture for the solution; a drawing of this method was also included in the "Techniques & Calculations" section that follows.
Fishing line did not work in holding up the rings, as it was too fragile. The neodymium magnets (holes visible in the left cup's base) did not work despite opposite polarity magnets glued into the bottom of the ring. So I bent a small piece of paperclip into a "Z" shape, drilled a tiny hole into the ring and also into the base, and glued the metal wire in place to hold the ring steady. Did the same for the 2nd cup, and from nearly every angle, the "floating rings" really do look like they are floating.
Ukrainian colors were appropriate. My ancestry is Ukrainian/ Russian/ Polish/ Lithuanian/ Latvian/ New York City-ian. In many of my cups and goblets, I add a layer of mica colored epoxy to the inside. Looks nice, completely food safe, and sometimes I use clear epoxy with very light sprinkles of shiny mica powder. Because it completely waterproofs the inside, I also began carefully rolling a layer of wet newly mixed clear epoxy over the inside walls of all goblets, mugs, & cups.
A simple cup from nectarine wood decorated with several dark burn lines. These black lines are made from a thin wire held against the area while spinning on the lathe. It helps to cut a fine line in the wood first to keep the wire from drifting. I made this floating ring thick on purpose. I gave this cup away to somebody, I forget who. I never sell my stuff, just give it away. Some of the fruit from our trees are in the background. I give these away to work, family, and neighbors, too. I have lots of exotic fruit trees so get a lot of free wood! My mango tree is 30 feet tall now.
Putting in a new fence the workers had to cut off a large chunk of sycamore root from our tree. Didn't hurt the tree, but I saved the root and let it dry. There were two extra root indentations in the main root, so I filled them up with mica colored epoxy and then turned them on the lathe. Ukrainian colors, of course. I ended up giving this cup to my cousin Johnny. Sycamore root makes a very nice piece of wood and doesn't crack.
One of my first cups, made from oleander wood from my yard, ended up with an excellent finish. Only the leaves are poisonous, right? Later I read that the oleander wood itself will leach poison, not only the leaves as I had thought, so that made this unusable as a cup. I drilled a hole through the bottom to prevent anybody using it to hold liquids. Nice finish, though.
What follows below is a step-by-step explanation of how I did inlays into one of the mugs I made. The method below shows a "faux turquoise" design, although on other pages I also show how I made a "faux opal" inlay. Lots of details, although the first slide's description is a "synopsis" of everything:
This page might be "tl;dr" (too long, didn't read), so here's the quick & dirty synopsis: -- Cut log to length, remove bark -- On lathe cut tenon & rough exterior sizing -- Change to chuck, drill deep central hole & sand hole 60 to 600 grit -- Cut all cracks wider & seal -- Turn exterior body to final dimensions -- Carve lettering & any details, make bottom edge chamfer, paint carvings & chamfer black -- Glue "turquoise" mica/baking soda lettering, sand exterior 60 to 600 grit -- Apply sanding sealer, sand again 600 grit, 2nd sanding sealer -- Coat inside & outside with clear Danish oil, add copper bands -- Cut off from lathe, sand base concave, add handle -- 1st internal layer coat half-way up with "turquoise" epoxy, 60psi x 1 day -- Spray 3 coats of lacquer on outside to seal -- 2nd internal layer coat entire length with clear epoxy + add doubloon coin + add exterior clear epoxy coat (not on bottom), 60psi x 1 day -- Bottom sanding sealer, white latex paint, ID tag, clear epoxy coat, 60psi x 1 day -- DONE!
On October 9, 2023, I decided to make an oak beer mug for my niece Danielle's boyfriend Andrew, whose hobby is fermenting home-brewed beer. I initially figured, with all my other projects, that it might take at least a month or 2 to complete. But it only took 3 days to physically build it with 3 additional days for epoxy curing! I laid out ALL my steps on this page to help anybody who would like to try this DIY project. The very first step was to make sure I got his name & spelling right! (It is Andrew.) The next step was to take a 2-year-old oak branch I had been drying in the garage, cut off an 8" length, & then chisel off the bark using a screwdriver & hammer. The bark came off extremely easily this way, & I saved the large, thick bark pieces for future projects.
The next step involved finding & marking the centers of both ends & tapping a central depression there. Then came mounting the piece on my 12" lathe using the narrow 4-prong drive center as shown above, turning the oak into a rough cylinder shape, & then cutting a tenon groove on one end so I can more firmly attach it to my chuck. This photo was taken immediately before cutting the tenon. My modified 4-jaw chuck holds a work piece with a tenon much more securely than the initial "drive center" required to make the tenon. After this tenon was made, the chuck replaced the drive center on the motor-driven "headstock". (Note: A lathe's "live center" is the free-turning piece held by the lathe's "tailstock" on the opposite end of the wood.) The thin plastic rings visible on the lathe's drive shaft are used to keep the chuck from sticking too tightly on it after it's been screwed in place. Because eventually I'm gonna have to unscrew it!
The tenon had been cut, & the narrow 4-prong drive center was replaced with my 4-jaw chuck. In the above photo 4 small screw holes are being drilled into the wood of the tenon. Occasionally I've seen projects wobble & even slip off this chuck while turning, so I modified the chuck by drilling a hole through the center of each of the 4 metal leaves to allow four 1" screws to very securely hold the piece of wood that I'm turning. Works great and keeps the wood from developing a wobble halfway through your project! In a following photo you can see the chuck screws in place; this project stayed completely rigid on the lathe.
The next step was hollowing out the wood, which I did using my carbide-tipped Forstner drill bits, gradually moving up from 15mm up to 54mm diameters. An extension rod was used to drill out the deeper part of the hole. To get to the final 2½" inside width (= 64mm), I widened the drilled hole with my heavy bowl gouge & long carbide-tipped tools, using a home-made extended tool rest, to reach the final 6¼" interior depth. In the photo above, I used a DIY sanding dowel to smooth out the interior walls, using 60 grit sandpaper advanced up through 600 grit (120 grit was being used in this photo; the work was spinning so it looks blurred). The thin slot in the dowel was cut on my bandsaw & holds the sandpaper tightly, & the narrow dowels sticking out are to keep the end of the dowel from banging into the bottom of the hole as well as keeping my hand safe. 2 of the 3 wheels on my DIY ring support are visible at the left in the lower photo; using this ring support did help ensure the work piece stayed aligned on center. Additional photos of this simple ring support are in the "Home-Made Chucks & Tools" section.
Local oak, dried in my garage, does develop a lot of cracks despite painting the ends to slow water evaporation. (Note that these cracks are NOT worm holes; I learned my lesson to reject any raw wood with worm holes, 'cuz large fat grubs come flying out of the wood at high velocity while spinning. Yuch!) To deal with any large cracks in the wood, I first cut them wider & deeper with my rotary tool wheel attachment, removing all the splinters in the cracks. Then I filled them in with a 50/50 mixture of fine-screen-strained sawdust & baking soda, as shown in the photo above. (I store containers of both light- and dark-colored screen-strained sawdust premixed 50/50 with white baking soda. You can also use colored mica powder instead of sawdust for an interesting effect.) After the dry sawdust-baking soda mix above was in place, I dripped in a lot of thin CA "super glue" which I buy by the pint. Bad fumes, so garage door open, big fan on! FYI, CA glue turns baking soda into a hot plastic which binds exceptionally well with the wood-colored sawdust. If the crack is deep, it's better to do this process in several layers. I also dripped thin CA glue over any & all tiny cracks to strengthen the wood.
The next step is to turn the body on the lathe to shape the final exterior dimensions; note that the interior hole was already drilled to size & sanded. Since I decided to place 2 copper tape bands on the top & bottom of the mug ('cuz they look cool), I turned shallow gullies where they would go & painted those black, which I was in the middle of doing in this photo above. To prepare for even lettering, I marked a 1" wide band around the wood cylinder project with a pencil, penciled in the letters, then went over each with a black marker. Next, I used that rotary tool with the cutting wheel attachment & cut all of the straight edges for the letters. Finally, I changed to a ⅛" wood cutting tip & carved each letter, which was MUCH easier to do by following along the initial straight rotary tool cuts as described above. A laser engraver of at least 20W ("20 watt" laser power) with a rolling stand would make this job a heck of a lot easier (hint to wife & my adult kids for Xmas).
I carved each letter about ⅛" deep so that after filling and sanding them I don't sand off part of a shallow letter. To help prevent accidental tool marks, you can place blue painter's tape over the planned lettering area, although any surface damage will sand off later anyhow. Next, I painted the freshly carved letter slots flat black so that the subsequent letters would really "pop", as you can see in the final few photos on this page. The latex paint I used dried into a thin coat & left plenty of room for the "turquoise" mica powder-baking soda filler. It is OK to smudge the paint onto the edges a bit because you are going to sand off the excess in a few steps anyway. Latex paint dries fast, usually in less than 2 hours, & is safely workable in under 4 hours.
While the black paint is drying, you have time to carve a handle. I cut a slice of "tiger" oak from the same log as the main piece and then shaped this on my bandsaw, then spent some time sanding it into a design I liked. Despite all your plans, you never really know what the project will look like until you are finishing it. Here I'm checking the fit of the handle to the side of the mug & sanding the ends to fit; there are still several more steps that need to be completed before actually attaching that handle. You might notice that this handle was made large enough to fit gloved hands, so I made it 4½" long by 2½" deep. Andrew lives in Minnesota where it gets COLD. Always plan ahead!
After the paint had dried, I mixed several shades of dark & medium blue mica powder together with baking soda (~50/50) & poured these into each carved letter. Then I gently pushed the powder down into the letter depressions, & then (for that turquoise stone effect) sprinkled on a touch of light blue mica, 1 letter at a time. This was followed by dripping in thin CA glue, again 1 letter at a time. Makes a mess, but after finishing ALL the letters I spun the lathe to sand the entire piece, starting from 60 grit & increasing in steps up to 600 grit sandpaper. This resulted in a flat inlaid turquoise stone effect in the letters along with a thin black outline. A coating of sanding sealer was then applied to the entire piece, & after that dried the project was sanded lightly one last time with 600 grit to knock off projecting microscopic wood fibers (caused by the sanding sealer). A 2nd coat of sanding sealer followed. More info on mica powder letter inlaying is shown under my "Techniques & Calculations" heading.
Once the 2nd coat of sanding sealer had dried, I added the copper tape bands. These are actually copper metal foil with 1 side very sticky & is normally used in 3D stained glass work. (My kids once took a summer class in that & I listened in.) After applying the copper tape, I dripped more thin CA glue over it to make sure it stayed firmly attached. Finally, the mug was detached from the lathe by carefully cutting it off of the base using a standard parting tool; I like to lay a thick towel over the lathe bed just in case the piece falls. (I had learned to do this decades ago as a medical student while delivering slippery newborn babies. Never dropped one, so no nasty comments, please.) Next step was sanding the base slightly concave (so it wouldn't rock) & adding a narrow 45° chamfer to the bottom edge. This chamfer was painted black & made the completed mug look like it was floating off the table. Which looks cool!
For this extra-large handle I had decided to add a little decoration, and after using a rotary tool to carve side slots, I painted them black (bottom photo). Then I filled the carved & painted slots in with the same dark & medium blue shades of mica powder-baking soda 50/50 mixture used in the letters. As before, I sprinkled a tiny bit of light blue mica powder on just before dripping in the thin CA glue, which gave it that super nice inlaid turquoise stone effect (top photo). You could probably instead use crushed real turquoise powder, but my method makes this inlay look like cut-to-fit solid turquoise gemstones. One important additional step I took was to drill a hole into each end of the handle and CA glue in 1" nails with the heads cut off (seen in top photo), leaving a small amount of nail projecting out that would go into the cup wall. This added a lot of strength to the handle as well as making a much more secure attachment. Then I drilled the 2 shallow holes into the cup part in the correct places for the nail tips, the handle was pressed into place on the mug, & CA glue was carefully applied. Great fit!
Looking down at the handle you can really see those "tiger stripes" in the oak! I next sprinkled a mix of fine wood sawdust & baking soda into the tiny cracks around the handle joints and then VERY carefully touched a drop of thin CA glue to those spots. With the 2 nails, the CA glue, and this sawdust & baking soda mix, that handle was not coming off! All surfaces were then treated with "natural" (clear) Danish oil. After this dried, the outer mug was given 3 coats of Zinsser lacquer spray allowing drying time between; this helped prevent air bubbles from leaching out of the wood in the following epoxy steps. "Turquoise" colored mica mixed in with the epoxy was then poured inside & the mug was tilted & turned in place to coat half-way up the insides in order to completely seal any tiny cracks in the base & lower half. Once this was cured solid (had to wait another day), I placed a gold pirate doubloon on the bottom; these "Spanish doubloons" were stamped out of metal but were fake coins (duh) that I had bought on Amazon at 60 pieces for $12. On top of this was poured an ounce of clear food-safe epoxy (sprinkled with a tiny amount of iridescent blue mica powder) to completely coat the entire interior of the mug up to the lip, which also sealed in that doubloon coin.
The clear epoxy (with blue iridescent sparkles) inside had just been poured, & I then hand smeared (wearing nitrile gloves) a clear food-safe epoxy coating over the outside of the mug. No epoxy yet for the very bottom (with an ID tag yet to be added), or I would end up gluing the piece to whatever it was sitting on. During this outside wall epoxy application, I CAREFULLY used a heat gun to keep the epoxy WARM & slightly runny; this helped keep the surface smooth & enhanced that glass-like finish effect. A quick heat gun application to the inside also popped many small epoxy bubbles covering the bottom & that doubloon. At this point I made sure to nudge that fake doubloon with a stick so that it was centered on the bottom! Then the mug was immediately placed into my pressure tank on top of a silicone mat (so any potential dripping epoxy wouldn't glue the mug to the tank's wooden base) & allowed to cure for one full day under 4 atmospheres pressure (60 psi) to further minimize any visible bubbles in the epoxy. This treatment doesn't actually make bubbles vanish; it just makes them microscopic & invisible. Following this, I filled the mug with water to check for leaks & measured the exact volume the mug held. I added this info to the ID tag which was dated for the next day & then printed it out in a few sizes that would fit the bottom.
In the past I just glued the paper ID tag onto the bottom with clear epoxy, noting that the printed message never smudged or bled using this method. HOWEVER, epoxy turns the white paper translucent, which means the darker wood beneath can make the print too difficult to read. So, with this mug, I used white paint on the bottom. The base had already been sanded into a concave shape, any wood cracks sealed with CA glue, the bottom edges had already been chamfered at 45° & painted black, & sanding seal had already been applied, so the bottom was now ready for the ID tag. I painted 2 coats of white latex over the bottom & then centered my paper ID tag onto the wet paint from the 2nd coat. The paper absorbed the wet paint without altering the surface print. After the white latex holding the ID tag was completely dry (4 hours), I painted a final layer of clear epoxy over it. This meant yet another day added on to allow proper curing of the epoxy. This got the 60 psi (4-atmosphere) pressure tank treatment again, 'cuz bubbles, even if only on the bottom, ain't pretty. I had considered turquoise-colored epoxy for the area surrounding the ID tag but found this was too tricky to do. Remembering that "The enemy of good is better." Of course, with a laser engraver you could cut a hole in the table underneath & support a longer work piece to engrave the ID on the bottom & skip this entire column.
At this end point I smoothed out the top rim where a thirsty mouth would go by gently sanding with 600 grit, then recoating just that rim with clear epoxy. Yes, this did add a bit of curing time. I subsequently examined the rest of the project for defects & fixed any imperfections. Despite all the steps & curing times, I actually finished this project much faster than anticipated, in only 6 days from start to finish (October 9-14, 2023). This mug is a hefty 7" tall by 3½" wide (not counting the handle), weighs nearly 1½ pounds when empty, & is intended for a serious beer-drinking enthusiast. Which I assume Andrew is, since he's got his own home brewery! The internal volume of the mug is 13 ounces which equals 1⅝ cups. For my metric friends & Lockheed Martin's 1998 Mars Climate Orbiter engineers (look it up if this reference confuses you, although they officially blame NASA for that crash landing on Mars): The mug is 178 mm in height, 89 mm in diameter (excluding the handle), 680 grams in mass, & holds 384 mL of beer (or milk if you're under 21). Looking at the unusual striped grain texture of this wood, you can see why I call this wood "tiger" oak. After uploading this here instruction page, I finally sent this mug by UPS to Andrew in Minnesota. I received an email back with a photo of this mug filled with home-brewed beer on his window ledge. I'm so glad he liked it!
This standard method for making fairly large & deep bowls and containers is shown all over the internet, but I tried to combine the measurement pages & techniques into this 1 page for DIYers like myself:
All the calculations summarized for 8-segment rings with outside diameter from 2 inches to 12 inches, including the total length of board needed. My lathe handles up to 12 inches, which is why I stopped there. This table includes the "cosine" calculation so you can set up your table saw accurately.
All the calculations summarized for 12-segment rings with outside diameter from 2 inches to 12 inches, including the total length of board needed. My lathe handles up to 12 inches, which is why I stopped there. This table includes the "cosine" calculation so you can set up your table saw accurately.
All the calculations summarized for 16-segment rings with outside diameter from 2 inches to 12 inches, including the total length of board needed. My lathe handles up to 12 inches, which is why I stopped there. This table includes the "cosine" calculation so you can set up your table saw accurately.
Very nice segment calculator on this web page, in case you miss it on my "Techniques & Calculations" page.
External link to excellent "Woodturner's Resource" pageRough rings for 2 new bowls, 4"x10". I found the easiest way to sand the rings flat is to double-stick tape them to a round board on the lathe. Holding a 12"x3" wooden paddle with rough sandpaper while running the lathe very quickly flattens each side of the rings. Making several segmented bowls at once allows me to flip back & forth individual rings to help decide the final look. After this photo, I moved the left purpleheart ring onto the right "window pane" bowl & replaced it with a walnut ring. A big advantage of this technique is the ability to rearrange rings before final glue up.
Made from walnut & rosewood. Central "compass" is maple and walnut under a thick epoxy layer. Gifted to my daughter in May 2023, who packed it carefully into her luggage when she flew back to her home in Florida. She told me she's now using it as a fruit bowl, which is exactly what I intended it to be.
My son helped me design this large (and heavy) 8" diameter by 3½" tall segmented wooden bowl, so of course I gave it to him. The walls are maple with the top edge purpleheart, & the base is rosewood covered in a thick layer of epoxy to contain the maple & walnut compass rose. The window illusions are bordered with super hard "massaranduba" (Brazilian redwood), the "panes" are poplar, and the pane edgings are dark walnut & lighter South African guava wood. The guava wood was cut from one of my tropical backyard trees and is quite resistant to splitting. In January & February of 2024 I made a lid for this bowl as requested by my son, including similar "windows," which meant lots of small wood scraps glued together piece by piece, sanded, with new pieces then glued & clamped on. (See the next few photos.)
My son requested a lid for his maple bowl with the purpleheart edge (left above), so I worked on this in January & February of 2024. This time I made the segments from a central "window" of nectarine (from my tree), walnut & poplar edges, & a thin veneer of dark wenge. Thick poplar blocks were glued all around the completed "window", after which I added an outer thick piece of leopardwood, thin walnut (long side), & a thin dark brown wallaba band. The central pieces were made from cross-cut maple, resulting in a wavy pattern. This wedge has 15° slanted sides to make a 12-segment ring. This was done by cutting the completed block of wood on my chop saw with the blade set at exactly 15° from vertical. I cut 12 triangular pieces with 2 extras, which you can see are already penciled in. The segmented ring for the bottom was already glued together & was made of bright red padauk with thin poplar & Osage orange separating pieces.
TOP: The single triangular piece after glue-up dried was then cut on the bandsaw into ½" thick segments. BOTTOM: These were placed into the final circle & the diameter was found to be a little too large for the bowl, as well as each segment being off about 1 degree (oops). As shown in the photo, I drew a line down the long walnut spoke side & sanded down to that line on my belt sander, using a scrap board to keep each slice vertical. After additional fine sanding adjustments to individual slices, the pieces fit together perfectly, and were then glued using a ring clamp while also being kept flat inside my large wooden pressure clamp.
The bright red padauk ring is here glued & clamped in place on the bottom side of the lid. I temporarily placed one of my wood veneer heat-stamped ID tags where I plan to glue it; this will be permanently attached after finishing sanding the padauk ring & staining the lid. The wavy pattern in the central pieces was the result of using cross-cut maple near the early growth area of the tree. The other cross-cut wood pieces which show a distinct grain pattern included the "windowpane" of nectarine, the dark brown wallaba band, & the leopardwood edge. It seemed like a good idea at the time, & the wavy effect from cross-cut maple was a pleasant surprise.
A circular hole was drilled into the center point & a conical live center tailstock piece used to hold it against a flat rubber-coated spinning board. This held securely, even without using double stick tape, & the edge was worked into a thinner band, with the top sanded up to 600 grit. Flipped over for the other side with a supporting central piece of wood (used double stick tape this time), the top edge was then rounded & sanded up to 600 grit. A coat of sanding sealer followed, sanding lightly to 600 grit, and a final coat of sanding sealer applied.
End of February 2024 and the lid shown in place on top of the bowl. Because it was slightly loose, I added 3 tiny walnut wedges underneath the lid lip which keeps it from sliding. Stained with clear Danish oil, then sprayed on several layers of lacquer followed by a coating of clear epoxy.
Using a bandsaw or a set of homemade parting tool guides as shown below, shallow bowls can be made from flat boards. The bandsaw base can be angled to cut up to a 45° tilt, but this results in a flat sided & conically-shaped bowl. After trying this bandsaw method out, I came up with 2 versions of a simple parting tool guide tool which made it easy to form shallower angles as the bowl became deeper; this meant a more rounded bowl. You do need a board at least ½" thick (WRONG: need ¾" minimum), so the cut rings have enough overlap that they can be glued together in a stack. Below I describe how to use either the bandsaw or DIY parting tool guides:
Cut from flat plywood on my bandsaw, which had been set at a 45° angle. After cutting, you stack & glue the pieces together. I used epoxy, paint, & tiny seashells to decorate the picture after staining. The koi was printed on paper in layers, then placed piece-by-piece with a clear epoxy coating. This resulted in separating the body part layers by height to give the illusion of depth. The bandsaw cuts were masked on the plywood by painting a tree over them.
Bottom of the same bandsaw bowl. Glued my paper ID on it, but didn't use epoxy, so the colors smeared a tiny bit. Also, at least one bandsaw cut through the ring is visible. Plus, the bowl sides are a truncated conical shape which is more likely to tip over, so the thick heavy base as shown was used.
Yup. The bandsaw technique works, although it leaves cutting lines through the rings. You can also reset the bandsaw base angle to cut angles narrower than 45° in the wood rings in order to make curved rather than straight sides. However, in practice I found that this was really difficult to set up & do. You need a LARGE $$$ bandsaw plus make yourself a secured DIY base with a center peg to rotate the work on. I did make this but found it somewhat dangerous & with less than satisfactory results, so I started using a different method to make shallow bowls with curved sides (the following slides).
To make a curved-side bowl rather than a 45° flat-sided bowl, the angles and distances from the center of the bowl need to be calculated. My personal decision was to start with a 55° angle at ~5⅝" from the center point, then a 45° angle at ~5" from center, then a 35° at ~4¼" from center, and finally (being careful not to run the parting tool into the metal chuck) a 30° angle at ~3" from center. There is another option: Take 2 or more separate boards and cut them so that they can be stacked into a deeper bowl. That should work, but I still like the idea of making a bowl from just 1 single board. Of course, that means cutting sharp angles at different degrees into the wooden board to get the pieces to stack together with curved sides.
Starting with a 12"x12" board (at least ¾" thick), you can cut out the central 12"-diameter circle, assuming you have a 12" wood lathe for the following steps. Then you can cut & glue the 4 corner pieces together to make a 2"- to 3"-diameter tenon to hold the flat board onto your chuck. Measuring from the center point, a 55° angled cut is made at ~5⅝" out, followed by a 45° angled cut at ~5", followed by a 35° angled cut at ~4¼", with the final 30° angled cut made at ~3" from center. I use a wide carbide parting tool to make the angled cuts. A narrow parting tool tends to catch on the sides; I actually wiggle the wide tool as I'm making the cut to make sure there is enough room so that it doesn't catch. Also, be careful not to run your parting tool into the metal of the chuck while doing that final 3" cut!
Same angles as noted previously, with the distance from the center point more of an approximation than a fixed number. Looking at the bottom drawing cut-away of the final curved bowl, you can appreciate the fudging factor in determining the "distance-from-center" measurements above. Once the bowl is glued into the final curved shape, I like to hollow the tenon & perhaps cut it a little shorter in order to provide a nice stable base for the bowl. Or you can remove it completely if you like. Adding a top segmented circle of the correct diameter will make this bowl a lot deeper. Or you can glue 2 of these together and make a flying-saucer-shaped vase. Or you can drill a few holes in the base to make a spaghetti & pasta colander which you can then wear as a hat for your Flying Spaghetti Monster (Pastafarian) religious meetings.
I used a parting tool in a homemade holder (green metal on wood object above right) to make different angled cuts on a flat board on the lathe. The metal posts fit into the holes on the white plywood guides (left above). The correct distances from the centerline are written on each of the 4 guides, with the edges already formed at the correct length. This allows a bowl with gradually curving sides to be made from a flat board.
I came up with a new tool for cutting the side angles, using pieces of a 2x4, a 1½" diameter PVC pipe, a 3" long by ½" thick metal bar or tube, & 2 heavy nails. The PVC is screwed into the 2x4 at one of the 4 pre-determined angles using 2 short wood screws, and the end of the 2x4 is trimmed to correspond to the approximate distance from the center point for each ring cut.
I made these parting tool guides in March 2024. They serve the same function as the earlier tools I made (see slide above) but were more solid. The 1¾" x 7" PVC pipes allow the parting tool to slide freely into the work, with the 2 nails guiding the metal piece that holds the carbide tip vertically into the spinning flat board. Visible at top right is one of the ½" thick metal posts epoxied into a hole in the bottom of each wooden base, which I made from 2-by-4's. Angles were exactly measured with an electronic goniometer & were set from the center point marker at 3"@30°, 4¼"@35°, 5"@45°, & 5⅝"@55°. This results in a more curved side for the shallow bowl.
The flat board should be at least ¾" thick or, using my following measurements, the walls will get thinned down too much on the lathe. I cut off and then glue the 4 corners of the square board into a circular shape and then glue that into the exact center of the board. Trimmed into an approximately 2" diameter circle, this acts as the piece that secures the board onto the chuck.
This photo shows me using the first angled lathe tool I made, along with a wide carbide parting tool, to cut the 35° angle at 4¼" from center. The previously shown guides were followed to cut the correct angles at the correct distances from center to make a rounded bowl without flat sides. Each ring is cut separately so you don't get the cut lines through them like you get using the bandsaw. In addition, each ring is cut at a more shallow angle as you advance inwards, so the sides of the bowl become curved rather than straight.
Final result after stacking and gluing the poplar bowl rings. There are no cut marks through the rings because the bandsaw was not used, and the sides are rounded rather than conical. These bowls remain shallower than a bowl turned from a solid log would be. You could use additional wood boards & cut more rings, then add them on to the shallow bowl to get a much deeper bowl. The trick is the edges should overlap to get glued together tightly.
Here's the same bowl after woodburning and painting the wood burned marks with clear epoxy tinted with colored mica powder. Why the koi fish swimming around the moon? Read the short story, "The Fishbowl", in my book "Bats, Rats, & Alley Cats Too," available on Amazon.com.
A few discards added to a few smaller pieces of wood can be made into a curved bowl. Above, I selected long flat pieces of maple & padauk, 2 pieces of poplar, as well as thin discarded slices from zebrawood, poplar, & walnut. A slice of Osage orange was too short for the width, so I cut ends at 45° from 2 separate scrap pieces and mated them as shown above. Using only ½" thick boards turned out to be a mistake, as shown below.
Lots of clamps used to glue all the pieces together from the previous slide. I usually use Titebond II or III. Side clamps pressed the edges together, while a 2-by-4 clamped down the top center kept the final board fairly flat. The idea here is to produce one flat square board from multiple types & pieces of wood.
The central point of the resulting square board was marked, a 12" diameter circle drawn, then the board corners and edges were rough cut on a miter saw to be just under 12", which is the maximum diameter that fits my lathe. The board was mounted on the lathe using a tapered "live [free turning] center" against the previously marked center point, then turned flat.
I took various sized grit belt sandpaper (here 36 grit) & attached them securely to a long wood board, as in the photo above. Any flat work, like the surface of this glued board I planned to turn into a bowl, can be more easily sanded perfectly flat using this technique. Obviously, the lathe has to be running, & I normally hold the sandpaper flat against the board with my right hand while wearing a leather glove.
The 4 triangular corners of the board that had been cut off were glued together, both sides sanded flat, edges trimmed & rounded, & the piece then glued in place in the center of the board to act as a tenon for the chuck in the next step. Above, a 60° angled "live center" (a free spinning support) on the tail stock helped hold the freshly glued tenon in position while it dried overnight.
This time I used the 2nd parting tool holder that I made using a 2x4 & PVC pipe. Looking down you can see the tip of the carbide parting tool projecting from the PVC holder while held vertically by the 2 nails (top left in photo). The outer rim of the bowl is being cut at a 55° angle at a point ~5⅝" from the bowl's centerline. The other cuts were done next to make a total of 5 pieces: the base & 4 rings. At lower right a soft pad was placed on a "live center" (along with an extension rod) on the tailpiece of the lathe in order to further stabilize the spinning disc during cutting.
The rings can be rotated to whatever pattern you want. In this case, I tried a few designs but settled on keeping it simple with the bottom right version. Next step was gluing the stack together, after which another turning on the lathe & sanding would be necessary to even out the bands into one smooth surface. The most difficult part, cutting apart the rings, had been accomplished without a problem. Or so I thought . . .
"Left of bang" refers to the time just before disaster hits. There I was, minding my own business, getting ready to even out the new bowl's inside wall while it was securely mounted on my lathe. I even used 2 extension rods to hold a padded free turning "live center" (visible in photo) to make sure I had enough elbow working room. Started at 600 rpm, then moved down to 125 rpm (REAL SLOW) to do a little additional fine tuning. Thought it looked good but wanted it to be a little better. (Remember: "The enemy of GOOD is BETTER.") Which is when my 12" nearly completed bowl went BOOM (next slide).
Could also call this "Right of Bang," meaning what you see after the "BANG" (timeline characterized as moving from the left to the right). Hmm, interesting. I teach my resident physicians never to say "Oops" when something bad happens while you are talking to a patient. Instead, when something goes wrong (a "therapeutic misadventure"), much better to say, "Hmm, that's interesting." Back to woodturning: Realized that my mistake here was to use ½" thick board rather than a minimum thickness of ¾", plus forgetting that "the enemy of good is better" when I had decided to do that last little touch-up. I did find all 5 main broken pieces after a 10-minute search through my garage woodworking shop; not a fun "learning experience". I figured out that the ½" wood boards were too thin to start with, & also that I had too aggressively cut too far into the bowl on the innermost ring attachment point, causing catastrophic failure at the weak points with bowl pieces scattering all over. So now what? At first, I was just going to throw it all away, assuming I could even find them all, but then decided to figure out how to fix it as best I could. Isn't everything a learning experience?
Bottom view after piecing together & using thin CA glue to repair the mess. I also used sawdust + baking soda + thin CA glue to seal any larger cracks & holes. I did not like the orange stain on the light wood smeared off of the red padauk, so on this already super thin bowl I resanded the maple & poplar areas to get rid of the orange stains. Finally, I added a circular disk of purpleheart that I had laying around & made a much more stable base, as you can see above.
At first I was not going to bother with epoxy but then decided that the bowl was too thin to survive regular use & that a thick layer of epoxy would greatly improve the durability of the bowl. I did add iridescent red and yellow mica sparkles to the epoxy for fun & giggles, & it actually turned out fairly nice. Most of the accidental red padauk stains had been sanded off, too, & we left the wife's car out in the rain to clean off the inadvertent red wood dust coating. Learned a lot & got a useful item. Next time, I'll start with thicker wood! Or maybe glue several pieces together after cutting the angles. Or perhaps . . .
The side view (top photo) of the purpleheart base. Better stability, stronger, covers up the earlier problems with the base. I think this bowl turned out just fine, despite being destroyed & having to piece it back together. A thick layer of epoxy made it food safe as well as reinforcing the thin walls, and now we use it in the center of the kitchen to hold apples, oranges, lemons, & all kinds of fruit.
Got a WeCreat 20W laser engraver/cutter in mid-November 2024, but didn't start actually using it until December. To make this shallow bowl from 1/8" bass wood plywood made for laser work, I first engraved the "tree of life" design I made for my ID stamp using medium power, then on 100% power cut the 2 supports and the spiral. I added a few spots of superglue to hold it in shape when moving it around. Looks nice in the kitchen!
Also made from at least 2 varieties of wood, a checkerboard pattern is a lot of work but really fun to do! The first 5 slides are different patterns with the width in millimeters to 1st cut on a bandsaw, in case you want to try out a different design. You do need to make 2 platters at a time in order to alternate the wood types:
Both platters finished, each about 11 inches in diameter, and looking fine. Hard to believe from this photo that they are both flat! I used a blowtorch to try to prevent bubbles after pouring a thick layer of clear epoxy on the surfaces, but many still formed. This was frustrating, so I used a Dremel to drill out all the bubbles and then poured another thinner layer of clear epoxy on the surface; the separation line between layers was invisible. This time, without air leaking from the wood, there were very few bubbles. These two 11" plates would have been too large to fit into my 9"-diameter pressure chamber that I bought later.
The bottom view shows the two segmented rings I placed there. I poured a thick clear epoxy layer into the base, but this time was able to prevent a lot of bubbles trapped there by first painting the wood surface with multiple coats of sanding sealer. I also used a single spray of lacquer before the epoxy coat, and I think that made a big difference in preventing bubbles forming. In July 2023 I bought my paint pressure tank that I converted to a sealed tank that will hold compressed air for 24 hours at up to 4 atmospheres (60psi), & then used it for epoxy-layered objects that would fit inside. I've taken 2 hyperbaric chamber courses in which we were pressurized to 3 atmospheres multiple times; just glad I'm now outside the tank!
Not really "boxes", but nice small containers useful for jewelry, rock collections, or whatever. I do recommend trying out the "flocking" technique for any inside surfaces, as the results look exceptionally nice:
No, it's not to keep bandsaw blades in! A "Bandsaw Box" is actually a decorative box with a central drawer to store jewelry and other small items. You use a bandsaw to cut out all the pieces from one chunk of wood, which is how you get the name. The hardest part is cutting out the inside drawer from the piece of wood; a narrow bandsaw blade is a must. As you can see above, the outside wall does spring out a little on its own, which is fixed when you glue and clamp it. This is the first step in making a bandsaw box for my niece. Many of my boxes are made from oak, although this one was cut from a neighbor's discarded birch log. Below is a very short video showing how to make these "bandsaw boxes"; the video wasn't done by me, of course, but I follow the same procedures.
Short Bandsaw Box VideoSame birch bandsaw box with the pieces placed together just before gluing. They all came out of one piece of wood, so there should be no problems fitting them together. The 1st step is cutting off the outside back piece, followed by cutting the inner circle. That inner piece has the front and back cut off and then the central part is hollowed out on the bandsaw. The front & back are then glued back onto the central piece while the outside back is glued back onto the large piece. Because of the final flocking step (fuzzy felt-like colorful material glued inside), I ended up sanding the insides a tiny bit more to make sure they would fit together again. They did.
Same birch pieces during glue-up with Titebond III. Rough sanding inside the smaller piece had been completed, but the outside sanding would have to wait until this glue-up stage was completed. This birch box was always intended to be given to my niece Danielle, which is why her name was engraved on the front (see next photo). I used blue mica powder from Pour Girl Art's Meyspring Geode Art to fill in Danielle's Dremel-engraved name.
The previous 3 photos show the initial stages of making this white birch bandsaw box, which culminated in this final piece for my niece Danielle, completed in August of 2023. I included (epoxy-mica) 3D-painted tulips & green flocking, then added more of that green flocking (to simulate grass) to the sides of the thick piece of stained oak bark I glued to the base. Flocking does add a nice touch, but these were made of finely chopped nylon fibers which meant that it took an entire week for the underlying glue to dry! The walnut "shingles" on the roof were cut & glued on, then stained. A tiny piece of cotton made the fake smoke in the zebrawood smokestack. I have lots of exotic wood leftovers from previous projects, so why not use them?
The drawer slid in fine despite the extra layer of flocking coating the box insides, & the side "windows" look nice. I added a thick layer of clear epoxy to the front & sanded down the edges to be transparent. The round rosewood door in front completes this "Hobbit House" design. I finally UPS'd it to Danielle (who lives in Minnesota) at the end of September 2023. I put 3 metal Spanish "pirate" doubloons (fakes) into the inside part as a gift to her boyfriend Andrew.
This is the very first one I made, and it is oak. I carved my wife's name on it and gave it to her after completion. Did royal blue flocking inside and outside of the drawer, as shown, and used a dark finish. Later boxes I ended up using a much lighter stain. The wife's name was engraved using a Dremel and then filled in with colored mica powder and CA glue.
When my daughter returned home to visit from being a doctor in Florida she got this box. Her name was inlaid using a Dremel to cut the letters in and mica-colored epoxy plus CA glue to fill it in, followed by a sanding down to 3000 grit and Danish oil. The last step was woodburning and painting for the leaves and flowers using mica mixed into epoxy to get a 3D effect for the leaves & flowers.
Typically, turning a so-called "box" (it's actually a cylinder) is one of the 1st things a new lathe owner tries. Because making a lid to fit snugly can be initially daunting for the beginner (me just a few years ago), the "Techniques & Calculations" page that follows (see index above) shows several methods to more easily carve out the base & lid. These wooden "boxes" are lots of fun to make, & there are tons of shapes, burn lines, & decorations you can play with:
The first project when you get your lathe is usually the traditionally "box," really a cylindrical wooden bottle. After buying a lathe to make 9 wooden belaying pins ("pegs") for my backyard pirate ship in the summer of 2021, I started seriously doing wood turning in August of 2021, and that bottom left "box" was my very first project. Then I was hooked.
Burn lines look nice, done by holding a thin wire against a tiny indentation cut into the box as it is spinning in the lathe. Here is one of the short videos on how to make burn marks on wood lathe projects.
Link to YouTube Video: Making burn marks on your lathe projectThe thick layer of clear epoxy to the top looked very nice after lightly sanding the edges. (The bottom looked nice, too.) I engraved my son Ryan's name using a Dremel and then filled it in with mica colored epoxy, after which it was sanded flat before staining the box.
This page includes DIY instructions for making your own locking cryptex cylinder as well as 2 puzzle boxes I made for my kids. Fancier puzzle boxes are available on the internet sites I list:
My wife ordered me a WeCreat 20W laser engraver/cutter machine on November 17, 2024, as an early Xmas present, & it arrived about a week later. I bought the 2W IR laser as well as a high-volume fan attachment & set it all up in the garage. Ducts led the exhaust out of the garage & I did some creative sewing & made a heavy black cloth cover for the machine. Finally, I added 2 pieces of 2x4 to lift the machine off the table & make removal of the dustpan under it much easier to accomplish. One of my first laser engraver/cutter projects was this "Apprentice Maze Puzzle Box" with the design featured on "Makerdesignlab.com". This photo shows some of the intricate inner mechanisms you have to glue together to get this puzzle box to lock & unlock. I cut extra 1/4" buttons & glued them on to the single-layer buttons used in the design, as trying to move everything was difficult when the design buttons were recessed.
Maker Design Lab link with free laser engraver softwareI laser engraved my daughter's name & the date I started work on cutting out the pieces from 1 of the 2 pieces of 3mm bass wood that came with the WeCreat machine. I did have to add a lever to the side to make this work easier & included several pins to make turning the maze in the top of the box easier to do. In this box, you have to guide the red pin from the edge of the circular maze to the center, using the side lever while turning the maze. Only when the red pin is exactly in the center will the side buttons move to release the locking mechanism & open the box. Great design, although I ended up downsizing the parts which led to problems with tolerances. This meant lots of hand carving with a scalpel & sanding to get everything to work right. Started cutting the wood on December 2nd, finished everything the evening of December 8th, 2024.
YouTube video on how to open this puzzle box.My 1st cryptex cylindrical box with 7 disks. Like from Dan Brown's book (followed by the movie) "The DaVinci Code." The rings were made out of bocote wood which is VERY hard & brittle, & the end caps were another hard wood called tatab. Total dimensions were 5½" by 2½", & the internal drawer holds 3½" by 1¼". I wrote the 7-letter code onto the hidden drawer so the cryptex could be easily reset to reinstall the drawer. The bottom ⅓ layer of the drawer is wood to better hold the CA glued nails in place.
The top pic shows the completed pieces before putting them together & gluing on the top end cap. Internal parts don't show when closed, so I made them out of black plastic pipe. The removable drawer was coated internally with blue flocking, & the 7 pins (seen in the bottom view of the drawer) were made from nails. I drew 4 cryptex-making plans with YouTube references that can be found a few pages over under the "Techniques & Calculations" section.
I built this puzzle container in June 2018 for my son Ryan. It is a complicated box to make & requires a few tricks to open it. First you have to bang it on your hand to disengage the secret metal rod inside; the rod is held in a 2nd hole in the lid by a magnet, which prevents the lid from being slid open. Once that rod is disengaged, you have to counter-intuitively diagonally slide off the lid of the box to open it.
Here it is, partially open by sliding the lid diagonally. The hole containing the metal pin is easily seen. The pin is normally loose within that hole and engages another hole in the lid where it is held in place by a magnet that is glued inside the lid. This keeps the box from sliding open until it is banged (hard) to release the pin from the magnet & clear the lid to slide open.
For this photo I took the metal pin out of its deep hole in the base & placed it into the much shorter hole in the lid against the magnet. This shows that when the pin is in the way it engages both base & lid holes & you cannot slide open the lid. The hard part is remembering how to open this puzzle box 5 years after you made it!
John Witt is a member of our Conejo Valley Woodworkers Association & has several YouTube videos up, including one on making a "magic cube". I played with several of these at our last meeting & plan to make my own box someday. Each box is made to look like a die with dots from 1 to 6 on each of the 6 sides, & by turning the box in number sequence (see the video) you can unlock the secret compartment inside.
John Witt's YouTube Instruction SiteHere are the front & top-down views of an idea I had for a puzzle box. To open, first push down the left carrying handle to disengage the magnets holding it in place. (The hinge on the bottom of the wood base for the carrying handle should stabilize it for carrying.) Next, slide the exposed metal button located under that handle towards the rear of the box. This runs through the inside of the side wall & disengages a pin holding the front left leg in place. Finally, pull that left front leg towards the left (only about an inch) to pull the wire that is attached to the metal release latch located inside the front wall of the box. The lid should then be able to be rotated open on the hinges in the back.
Same box, side view. This shows how the carrying handle, supported by a piece of wood, can be pulled downwards on the lower hinges (magnets held it up). This would expose the metal slide button; when moved to the left, the slide disengages the front leg so that it can be pulled out & activate the release latch.
Only made one, which I gave to my brother-in-law who built his own giant wooden speaker system for his home. I made him this much smaller iPhone speaker with blue flocking inside:
I made the main part from the last scraps of leftover zebrawood but had to finish the base using maple. There was a hole at the attachment site I didn't like, so I fixed it with CA (cyanoacrylate or "superglue") after applying a mixture of sodium bicarbonate ("baking soda") and colored mica powder.
Cutting out the insides was complicated, and I had to split it in half first, rout it out, then glue the parts back together before staining and flocking. The bandsaw box shown below was flocked at the same time. I ended up decorating the bandsaw box with woodburning and painting after the flocking step was done.
Included is a link to a well-known site demonstrating how to make one of these puzzle wooden snakes. They use a removable eye block to take it apart, & I came up with a removable tongue instead. Then I got inspired and made a bunch of wooden snakes using a new mechanism that I had developed, with a removable "mouse" that fits inside the jaw; pulling the mouse out of the snake's mouth by its tail allows the puzzle to be disassembled:
Here are 2 bandsaw snakes I made in March 2023. Painting a snake-like color scheme, including a lighter color for the tummy, helps when you want to put the thing back together. Below is the best YouTube video showing how they make Peter Chapman bandsaw snakes in the Blue Ridge Mountains.
YouTube Video: "Making the Zebrawood Snake Puzzle"Here's how the wire tongue goes through the hole in the lower jaw, which is wider in the vertical direction to allow movement. Then it fits into the hold in the top head piece at the back of the throat after fitting that into the slot in the neck, so that the metal wire that holds it in place supports it from below. The mouse fits into the "belly" that is carved out of the neck segment. The mouse tail can be longer if you want.
I CA glued a wire cross-wise in the neck to help the tongue wire stay in place and not fall out. You can see the wider hole behind the jaw piece that allows the mouth to hang open. Tolerances were quite loose when making this second snake and future snakes could be tighter fitting.
Another shot of the wire on the base of the tongue entering the snake's mouth. The slot in the mouth is wide in order to allow the mouth to open fully. Later (see below) I changed the design to incorporate a wooden dowel turning inside an exact fit hole in the head to act as the jaw hinge. These snakes were completed in March of 2023.
On August 11, 2023, I came up with this new jaw locking design. The first diagram shows how the bandsaw snake jaw attaches to the wooden dowel stuck through a hole in the head. I found using a 1¼" dowel for the snake body & head worked well with a ⅝" dowel for the jaw hinge. However, despite the >50% circumference around the jaw hinge, it tended to get loose, so I had to add a metal wire for support underneath.
The mouse hole was drilled in the back of the throat, & a Dremel was used to hollow out the head & jaw more so that the mouse would fit better. When everything is put together, the mouse keeps the jaw from sliding sideways. Remove the mouse, slide off the jaw, & then the usual steps to take apart the puzzle can be done.
Here is a close-up of a snake head with the jaw removed. With the jaw in place, the mouse fits easily into the snake's mouth, slides back between the jaw hinges, & then the mouse head fits snugly into a hole drilled into the back of the snake's throat, where it locks the jaw hinges in place so they can't slide out. Closing the jaw keeps the mouse in place & the puzzle locked. The solution to my version of the snake puzzle starts with opening the jaw, pulling the mouse out by its tail, then sliding the jaw sideways to disengage it from the snake head. After this, the rest of the body can be taken apart by sliding the individual pieces off.
The 2 mice that end up in the bandsaw snakes are on the left, while the third mouse doesn't count. OK, it does count, but in binary. Plus, it has a longer tail. In the next photo on the right above, I completed the short fat snake on August 17, 2023, and the thin yellow one on August 21, 2023, using the new mouse insertion jaw lock mechanism I had invented.
Here are 2 of the completed snakes incorporating my new method of locking the puzzle with a wooden "mouse" inside the snake's throat. You pull the mouse tail to pull out the mouse, which then disengages the jaw, which then will slide sideways & off. The remaining body pieces slide off in order. I made the lower fat brown-green snake short so I could more quickly demonstrate the new design when taking the puzzle apart. The tongue was made from scrap red linen with clear epoxy soaked into it, allowing this to dry on a silicone sheet. One day later it peels off easily & can be cut to shape with scissors.
Here the jaw is on the bottom right, with the circular dowel glued in place to provide a hinge that slides out sideways. The "mouse" gets stuck into the hole in the back of the snake throat, & that keeps the jaw from disengaging. To put it all back together, start at the tail which is at the top left of the photo. Despite using a new, narrow 1/8" bandsaw blade, the pieces fit together loosely. I added black duct tape & trimmed it to fit to remove all the laxity when put together. Numbering each piece makes putting it all together so much easier!
Why not? I put tiny fangs in the mouths as well as jingle bells on the tails. The heads were made triangular by cutting off the "cheek" areas at an angle, flipping them around & regluing, then sanding smooth. Both snakes were around 15" long before adding the ½" metal bell "jingles". I also added a metal wire on the piece behind the jaws to help support them. The top color was darker than the bottom, & I copied the back patterns from several photos of rattlesnakes on the internet.
Mouses' views of the open snake mouths. I used metal wire for the mouse tails to help push them into the snake mouths so the handler wouldn't get accidentally "bitten" by the teeth. The fangs in the lower copper snake are just carved wood, but the fangs in the top blue snake were carved out of tiny pieces of deer antler.
11 pieces total, including jaw & mouse. The heavy wire on piece #3 (just in front of the mouse) can be seen better in this photo. I ended up adding support wires to both of these snakes to make sure the jaws would not accidentally fall off before removing the mice & sliding them sideways. The tail in this copper rattlesnake has thirteen ½" metal bells sewn on, as well as a metal tube with BBs inside for a louder rattling sound.
Lined up & happy! The two on the left have tongues that pull out to release the jaw, while the four on the right have mouse tails to pull out to release the jaw. After the jaw is removed, the rest of the snake puzzle is designed to fall apart. By making the body longer and with more pieces, the puzzle difficulty increases tremendously if pieces are left unnumbered. Since these are ultimately made for kids, the numbers on each piece make a huge difference in solving the puzzle, especially when parents are asked to intervene. Painting patterns on the snake back & stomach helps orient pieces to put it all back together again.
While the demo I'm showing on this page took me only about 10 minutes to make, this is because I've already made over 80 of these and have a pre-existing setup, so please forgive my overly positive attitude. It might take a person on their first attempt around 30 minutes to actually complete one. Why use PVC? Because real bamboo splits and weathers outdoors quickly, so I started making fake bamboo that I have used for multiple different outdoor projects. This is not an original idea: I found this technique years ago somewhere on the internet & copied it. I sped up the process by using a blowtorch to heat the PVC (done outdoors, produces lots of fumes) rather than a heat gun. The 2" (inside diameter) by 10" upright PVC was the current project, while the horizontal stacks of 1/2" ID (inside diameter) fake bamboo PVC stakes I made years ago. Using the blowtorch rather than a heat gun to form the "joints" this time was MUCH faster but did leave a lot of soot around the fake joints. However, I did get it done in just 10 minutes like I had planned, not counting oil stain & final clear coat drying times.
For this specific demonstration I used a short piece of 2"(ID) wide by 10" long PVC pipe. This was the same method I have used to make a bunch of fake bamboo poles from 1/2" PVC which hold up the plant & tree IDs in my fruit tree orchard. First step, start with a length of white PVC tubing & remove any printed markings with a paper towel & acetone (always in a well-ventilated area, of course).
Next step is scratching faint grain lines by running a belt sander LENGTHWISE along all sides of the plastic pipe. In the photo above I used a stationary sander, but for longer lengths of PCV I have used a portable sander. You just have to scratch a bunch of superficial lines along the PVC pipe to simulate a natural-looking grain.
Normal bamboo has frequent joints irregularly spaced along its length. To accomplish this effect, I ran the edge of an angle grinder at one point while rotating the pipe. You don't want to cut all the way through, just mark a thin depression all the way around. Repeat the line every foot or so, making sure to space them at slightly different distances to look more natural. These lines will be compressed & both edges flared to appear like a natural joint during the next step.
Again, this must be done outside with excellent ventilation (& I also had a large fan running to blow harmful vapors away from me). You can use a heat gun on the joints to avoid the dark soot stains that I got from the blowtorch, but the heat gun is a SUPER SLOW process requiring at least 10 minutes application to each joint. In my quick demo above, I used a small blowtorch held in a stable stand to soften the PVC around each joint. I ended up with black soot discoloration, which can be sanded off when done. However, I actually like the dark soot effect, so I left it in & smeared the soot into the scratched grain lines from the sanding step. In the background you can see a few of the 80+ plastic plant identifiers that I had just made to replace my old tree ID labels; I tend to work on several projects at once.
Once the joint was hot enough to soften the plastic, I pushed the ends of the PVC towards the center in order to form a flared edge adjacent to each thin joint line made by the angle iron. Be sure to wear leather gloves so you don't burn your hands from the hot plastic! The flared sides expand & form easily around the depression you had previously cut. Once the flared joint looks good, cooling it off quickly in water keeps your hands uninjured from hot plastic. With longer PVC pipes I like to apply a tiny angle at each fake joint as they cool to make them look more like real bamboo. I could have sanded or scrubbed off the extra soot but chose not to because I liked the dark effect. Another fun thing to do is to add a few small brown burn marks to the PVC to give it more character, visible above. I did wipe off some of the excess dark soot around the joints & spread it into the "grain" after this photo was taken to improve the look. This is art, not science.
A light brown oil stain was rubbed into the sides & then carefully wiped off using a paper towel (following the length of the PVC to accentuate the grain lines). This adds a nice color effect and mutes the darkened joints a tad. Oil stain dries quickly on the plastic (not counted in my 10-minute count down), and when dry, you have made a length of faux bamboo that will last practically forever in an outdoor application & often fools people into thinking it is the real deal.
To finish this project, the next day I sprayed a clear coating over the light brown oil stain on this short demo pipe. In the photo above, lying by the base of the upright 2" PVC pipe are a pile of 1/2" by 3' fake "bamboo stakes" I made years ago out of PVC. Looking back, I could have made the flared joints wider. This week I pulled them all out of the ground to replace their worn ID tags.
These plastic plant IDs replaced the old ones and were supported by 1/2" PVC faux bamboo stakes, such as these examples that were hammered into the ground in front of one of the Fukushima Kumquats. My backyard is full of exotic trees, and I set these 80+ stakes to hold plastic ID tags in front of most of them. Someday I'll write a website with a discussion of what rare fruit trees are easy to grow and which are a pain.
The heavy wire frame had been spray-painted black before bending it into an archway. This galvanized & welded wire is often sold as "hog wire fencing" in home improvement stores. The trellis framework base was made of PVC pipe which was first treated to make this faux bamboo. I had used a heat gun back then, but the fake bamboo joints were not as flared as I now prefer. The horizontal piece is 1" ID (inside diameter) while the vertical piece is 1.5" ID. Yellow & black plastic & wire ties have held the structure together for the last 10 years, & waterproofed cords were wrapped & tied around a few spots for a more authentic jungle-built look. Passion fruit vines grow fast & love to climb, so you do have to pull the vines off adjacent trees every few weeks and twist their tendrils around the wire frame to keep them in place.
The passion fruit vines have quickly grown & covered the archway. These plants are real, of course! I did include a piece of authentic bamboo as part of the construction & used to ask visiting friends if they could tell the real bamboo from the fake. Everybody (& I mean EVERYBODY) thought the fake PVC stuff was the real thing while they thought the actual bamboo was fake! After many years the real piece of bamboo split and fell off from weathering, while the PVC stuff still looks great. Most of the framework has been covered by the climbing passion fruit vine, & we pick large numbers of passion fruit every year. Cut a dozen open, scoop out & grind up the insides in a blender, filter out the tiny black seed particles, add water & sugar, and you get fresh passion fruit juice.
Here are listed several methods used in making some of these projects:
Be aware that lumber is measured in "nominal" lumber sizes. These are the names of the size but NOT the actual size! Nominal names are supposedly what the size of the wood was prior to dressing & kiln drying, and there is a lot of shrinkage. So, when you buy a "1-inch board" you are actually getting a thinner board. In the example above, this 1-inch poplar board was measured at exactly 0.75 inches. A 2x4 is actually 1.5"x3.5". Just be aware!
This 4-jaw chuck has extra holes in the leaves that I drilled for screws (green outline arrow) to better hold the wooden tenon in a heavy project. The red outline arrows indicate the small space that should always be left between the base of the chuck and the tenon of the working piece. The blue outline arrow shows how the tip of the chuck leaves securely touch the base of the tenon. Of course, rules are made to be broken, as noted in the next (older) photo.
Occasionally the work would suddenly slip off my chuck despite cranking it as tight as possible. One solution involved drilling holes through the center of each chuck leaf and then using these to screw the chuck securely onto the wood tenon. I KNOW, normally the top edge of the chuck should be in direct contact with the flare of the wood, & with the tenon end not quite touching the chuck's base. However, here I used a tenon which was cut much too deep ON PURPOSE. This was because I had planned to use this screw method which holds the work MUCH better & also allows me (when finished turning) to cut off the piece from the chuck much easier. Old Chinese saying: "There are many routes to the top of the mountain, but the view at the end is the same."
Turning the lathe at a slow speed while sanding with a small drum internally on an extension rod on a power drill works better than the previous slide's method. The above photo shows this in action on a Celtic-banded goblet. The outside was roughly cut into a cylinder, then the central 4"-deep hole drilled on the lathe, then the inside sanded & completed. To form the outside goblet shape, I placed a free turning "live center" on an extension rod (projecting from the tailstock) into the base of that hole to keep the piece perfectly aligned, as well as using the steady rest shown above. The external goblet shaping should be started from the far-right end of the piece (closest to the tail stock) & gradually moved down towards the chuck end or bad things can happen! In other words, don't carve the stem until the cup part is done (oops, I've done that).
To make the illusion of your floating ring actually floating, I tried fine nylon fishing line (failed) & multiple tiny neodymium magnets (failed). Then I got the idea to connect the ring with the base using a paperclip wire painted black & bent into a "Z" shape, as diagramed with a red wire above. It worked! In normal use that wire is essentially invisible because of the slight downward angle you are viewing the cup.
These 2 "wet" blanks were cut from green birch & had their first rough turnings to prepare for microwave oven (1200W) drying after watching Kent Weakly's "Woodturning Twice Turned Wood Bowls" link below. Cut from the tree only 1 month previously, the 4" diameter birch logs both started out on the exposed ends showing 20% moisture on my pronged meter. After the 1st lathe rough cut, I treated one birch blank with CA glue used liberally to seal all exposed grain edges, while the other blank was left untreated. (It was an experiment!) The drying step only required 30 seconds microwave every 4 to 8 hours for 4 days. Both went into the microwave together for the exact same times, and after this drying step was completed, neither showed any cracks.
Kent Weakley's "Woodturning Twice Turned Wood Bowls" YouTube videoThis meter was useful & cheap, with findings reproducible on multiple measurements. After initial turning & microwave drying, the non-CA-glue-treated blank showed 12.5% moisture, while the CA-glue-treated blank measured 14.8%. Internet sources recommend turning at 12% to 15%, so these results were perfect. Better yet, no cracks developed in either piece, so now I think the CA glue exposed grain pretreatment was not necessary.
In May 2024 we cut down a large dead "live oak tree" (it wasn't) at my house & I saved several one-foot branch segments. Moisture content was 27% & needs to get down to 12-15% before any woodwork can be safely done. I immediately painted all cut edges with white latex paint to slow down drying from the edges which helps prevent cracking. I then used a black marker to label each piece with the date cut & wood type & will allow these logs to dry over 1 year.
Above are 2 photos placed side-by-side. Left is 1 of 7 pieces from my neighbor's red oak, cut in November 2023. I allowed it to dry but didn't paint the ends, & after 6 months there are only a few small cracks, while the moisture content went down from 24% (not marked) to 16% in May 2024. On the right is one of 14 live oak 12"-diameter logs cut in May 2024 & immediately painted with latex over all cut ends (see previous photo). Moved them all to a rain-protected location to dry out over the next 12 months, & I measured the initial moisture content at 27%. I'll wait for this to get down to 15%, & then they should be workable. I'm thinking about bowls & maybe a few mugs?
The "Woodturners Resource" page has an excellent segment calculator, so I put in this referral to their website.
Link to "Woodturner's Resource Segment Calculator" webpageI like to flock. These two were subjected to "royal blue" flocking inside, and it was very easy to do. I did learn to first spray paint the same color BEFORE applying the thick colored glue, because then there are no obvious wood-colored spots peeking through. The flocking is usually made from finely chopped nylon, and you should wear a respirator when using this product.
I took various sized grit belt sandpaper (here 36 grit) & attached them securely to a long wood board, as in the photo above. Any flat work, like the surface of this glued board I planned to turn into a bowl, can be more easily sanded perfectly flat using this technique. I normally (when not taking this photo) hold the sandpaper flat against the board with my right hand while wearing a leather glove. The next step is cutting the flat board into rings that are then stacked together to form a shallow bowl.
These plywood pieces measure the exact distance from the centerline to the cutting line to turn a flat piece of wood into a much taller rounded bowl. Each piece has the correct angle measured out. I wrapped a piece of metal hanger (used in construction) over a block of wood with 2 metal tubes in the base. One tube goes into the banjo (tool rest holder) and the long white metal tube holding the thin carbide cutter slides through. Hope that makes sense! It works great for making shallow bowls.
These 4 new guides were made in March 2024. Not shown is the ½" thick metal post projecting from each of the bottoms, used to hold the device in place with the "banjo" (the part that connects the tool rest to the lathe). A "parting tool" slides through the PVC pipe with the carbide tip placed between the final support (2 nails) in order to cut the selected angle into the flat wooden plate. This technique is useful in making the following shallow bowls with curved sides. I did try the 45° bandsaw method, but the bowl you produce ends up with straight conical sides instead of the more natural curved sides that results from this method.
Here it is in action. The carbide cutting tool is held at the correct angle and starts at the correct position to carve the angles. Instead of 45° flat sides, this results in nicely curved, "rounded" (but shallow) bowl walls. These photos are repeated from the "Kitchen Bowls" area in case you missed them.
Several layers of sanding sealer on the exposed wood helps prevent bubbles. Warming the cup holding the epoxy using a heat gun thins it out and makes it easier to pour. Using a flame on the newly poured epoxy also helps get out bubbles. When I still have bubbles after the epoxy hardens, I Dremeled them out, then poured a thin layer of clear epoxy over it. Bubbles were gone! Since this writing, however, I finally bought & converted a 2½-gallon paint sprayer into a pressure container that compresses epoxy bubbles into microscopic size, where they are invisible.
Whenever there was a "sketchy" area of thin or fragile wood, I followed the advice of others and pretreated with CA glue. This was especially true when working on the pith ("juvenile wood") center of wood like birch, where I would rub a fine sawdust & baking soda mix into the exposed coarse pith fibers before applying the CA glue (in a well-ventilated area). Sanding after this step produces a much better result with a smooth finish.
A cryptex was referenced in Dan Brown's "Da Vinci Code" book. These are my notes taken after viewing several DIY cryptex videos, in particular Carl Jacobson's excellent YouTube link below. Making a cryptex seemed to be a complicated gambit, but after watching several videos, I figured I'd try it. I had to divide my diagrams into 4 parts, and this 1st part shows how to cut one rotating disk from a 2½" turned cylinder of wood. Obviously, you can make any size you want, but the central 2" diameter hole after sanding slips snugly over an internal 2" plastic pipe.
Carl Jacobson's 1st YouTube video on making a cryptex locking deviceThe "Z"-shaped cross-section for the ring is NOT used by everybody. However, it fits together nicely & is easy to clean up on the lathe, so I copied this design. One person who does not use that "Z" shape is Josh Wright. I do like the way he makes his rings from long strips of wood & then slices them off, as shown in his video below. He also uses a metal tube as part of the center mechanism.
Josh Wright's full cryptex videoHere is a ring seen face on. The extra "fake holes" in the ring was suggested by one YouTuber, as they cause a catch when a cryptex crook tries to feel the ring slots by rotating them. There are several ways of placing lettering on the outside of the rings; I like Monica Guillaud's wood burning method linked below.
"MissCreativeGem" (Monica Guillaud's) DIY cryptex ring YouTube videoNot the greatest drawings but they helped me figure out how I would design it. Several YouTubers used plastic & even metal internal parts, & because they will not externally show on the completed piece, I figured I'd use a 2" plastic pipe as part of the center. You can still follow the design by making hollow wooden tubes, but they won't be as strong. This is supposed to be a type of safe, you know. Below is Carl Jacobson's 2nd cryptex video ("Part 2") with his additional insights after making the first video.
Carl Jacobson's "How To Make a Cryptex Part 2"For each of my first projects I had printed individual paper ID stamps, identifying the date completed as well as what wood was used. By attaching them with epoxy glue in the slightly hollowed-out goblet base, the white paper became translucent, and the ink stayed in place without bleeding.
Here it is epoxied to the base of the leopardwood goblet. I included date made (when I cut it off the lathe), cup & stem wood types, and volume of fluid the cup would hold. After printing I cut slots from the paper edges towards the center to allow epoxy air bubbles to escape as well as allowing the paper to conform better to the hollow goblet base. Now that I converted a 2½ gallon paint sprayer into a resin pressure container, that pesky air bubble problem is resolved.
Since I have been giving many of my projects out to relatives & friends, I again altered the bottom ID paper stamp (which gets embedded in clear epoxy) to include the "Hand Wash Only" & "Not Microwave Safe" warnings. A dishwasher & a microwave would both heat up the wood too much & risk a crack. I also changed the font sizes to make the messages easier to read. I got tired of trying to cut circles in paper accurately, so I changed that outer ring to an octagon.
Top shows using a rotary drill to hand carve an "n" into the base of a goblet. Bottom shows painting a thin black coating into the letter "a" on the goblet base. This is dried & filled in with a mix of colored mica powder & baking soda before using thin CA glue to solidify the inlay.
Blue tape removed & letters sanded off up to 600 grit. This view is after several layers of lacquer, & still needs polishing. The mixture of color shades helps with that "faux turquoise" effect. This goblet is planned to be given to the director of my meditation Zoom site, in time for the December 2023 holiday season.
I tried many different methods to make fake opal. Snips from cotton balls, chopped up glittery streamers, iridescent mica, opalescent mica, & a choice of epoxy or CA glue were all mixed together in different configurations, but they just didn't work out. Finally, I settled on a large amount of fingernail glitter with a few chopped glittery streamer pieces & added a small amount of baking soda. A tiny amount of additional baking soda was then sprinkled on top to fill any tiny holes, followed by the CA glue. After sanding flat, success! While the next photo does not do this justice, the actual effect when looking directly at the result was exactly what I wanted.
An interesting problem showed up in the winter after pressure treatment of the interior epoxy coating. Traditional methods used to minimize bubble formation in curing epoxy include blowing with a heat gun or treating with open flame, although the overnight pressure chamber in my garage seemed to work well during the summer. However, as the weather turned colder (November & December), the epoxy took longer to cure, which meant removing the pressure-treated projects after only 24 hours left air bubbles seeping out of the wood & into the epoxy, as shown above. Longer sessions would probably help by giving the epoxy more time to harden. Another technique I tried involved several applications of sanding sealer, then stain or Danish oil, followed by spreading thin CA glue over all interior wood surfaces, then pouring in the epoxy & pressure treating. I suppose the best method would be to leave the piece inside the pressure pot for a few days to a week to allow the epoxy to fully harden. Not using pressure would work, but then you can see the macroscopic bubbles that formed in the epoxy layers. Or maybe only use these goblets for bubbly champagne?
More techniques used in making some of my projects:
Turned ⅓ of my garage into a woodworking shop. Lots of wood & steel cabinets & benches, plenty of lighting. Giant fan hanging from the ceiling in the back, 4-foot lathe set up on the large 2-by-4 wooden bench on the right. Plenty of handy electrical sockets distributed around the benches. Extra-long pieces of wood & PVC supported by suspended ceiling racks. Table saw & 12" compound sliding miter saw on metal rack table directly in front. Raw wood drying on 2 bottom shelves in front left.
You can buy lots of exotic wood samples over the internet, although I did pick up some very nice stuff from Rockler's in Pasadena, California. Here are some of one batch I had ordered, along with store-bought poplar, walnut, & birch. The thick slab of zebrawood on the top left was gifted to me by my work friend Mike.
Each goblet is made with 9 central pieces, each ½" by ½" by 8" long, as shown here. I then use a single edge razor (right side) tapped in with a hammer to perfectly mark the "X" at the center, then use that center marking for a center punch marker (left side). The exact center is critical to identify on both ends of the blank prior to setting it on the lathe, as this step will determine how closely the sides of the finished goblet's stem will match.
Titebond III, non-sanded black grout, and a bunch of glue-ups waiting for the lathe. Mixing the grout and glue makes a mucky mess but looks great in the end. On the shelf in the back are plenty of oak as well as different types of wood I have cut from my trees. Since I have a large exotic fruit orchard in the backyard, plenty of exotic wood cuttings get to dry out in the garage. This area was later rebuilt with much stronger heavy steel shelf units. I marked the ends of the 9-piece stems with a code to ID the wood types. W* = walnut, M* = maple, P = poplar, O = oak, G = mahogany, and B = birch. I wrote out "Honduran Mahogany" on the larger pieces.
I start with the 3x3 (9 pieces total) inside block for the stem, then glue on the exotic wood for the main body of the goblet. By leaving a space in the middle I can glue on different types of wood to eventually become a contrasting floating ring. These 4 blanks will now get additional 45° angled cuts (a total of 4 times) with thin pieces of a different type of wood sandwiched between in order to make the Celtic-style bands. That Celtic style is a lot of work!
Here is the purpleheart goblet's initial glue-up. Easy to see the 3x3 central piece. I used fine black non-sanded (means no sand added) grout mixed into the glue to get the black lines between pieces of wood. With no sand, the grout is a powder, and mixes easily with the glue. I did try black spray-paint on the wood before gluing, but that just fell apart on the lathe. For other colors I bought a bunch of mica powder that also works quite well in epoxy.
I really liked the internet photo of a pair of purpleheart goblets on "Building a Staved Goblet," so I printed it out as shown & copied the design. I did do very careful measurements which are written all over the paper. I think it worked out very nicely, and this first purpleheart goblet I made was immediately claimed by my wife as "hers."
Link to an excellent set of instructions on "Building a Staved Goblet"Here is the final purpleheart goblet, which is my wife's favorite. It is 7 inches tall by 2½ inches wide. The 9 parts of the stem are alternating poplar and walnut. I made the black lines between the pieces using a small amount of "gray" (it turns black) non-sanded grout mixed in with the wood glue. I had also altered the goblet design a bit to make the cup part deeper.
Finishing turning one of the 2 zebrawood goblets with a floating ring on the lathe. The 3 below are other types of exotic wood plus the 2nd zebrawood waiting their turn. I do like those floating rings, and everybody who sees the final product cannot believe they are carved from the same piece of wood and not glued on later.
The padauk (pronounced "pad dock") wood is very red and does leave a lot of colorful sawdust, but I like it. The blackened glue is easy to spot holding everything together. Here the padauk is glued around the 9 pieces of wood in the stem base, which in this case is composed of alternating walnut and oak.
Some woodturners get a nice finish by coating their stuff with epoxy and slow turning it as it dries. I tried this with a barbeque turning device with a piece of wood stuck over the metal rod and inserted into a goblet. The finish came out OK but not as nice as I expected, plus taking forever to dry. Then I tried just spraying with up to 10 coats of lacquer, but I still did not get that "glass-like" finish. What I ended up doing was hand-coating (using gloves) a thin layer of clear epoxy followed by smoothing it out using a heat gun, as warmed epoxy flows faster. This worked out very nicely and was a lot easier to use than those previous methods. This picture is of one of the two zebrawood Celtic goblets with floating rings that I made. My friend Mike had gifted me a nice chunk of zebrawood, so I gave him one of the two goblets.
This technique works quite well, using an extension on a hand drill with a sanding drum. The drill & the lathe are both run simultaneously to sand the insides. I did make a simple dowel with a slot to hold sandpaper & sand the inside, but I think this power tool method works better.
A ring cutter is useful in cutting a well-rounded "floating" (a.k.a. "captured") ring. Or you can make your own using a small Allen wrench ground into a hook shape (shown in my "Home-Made Chucks & Tools" section that follows). To make a ring, you start by leaving a solid disk projecting from the center of the stem part of a goblet. Then round out the OUTSIDE, followed by sanding all the way up to 600 grit, because once you complete the cut inside & the ring separates from the stem, it would be extremely hard to sand the outside ring. However, the inside of the ring is easily sanded by taping strips of sandpaper rough-side-out to the stem, and then holding the ring steady while spinning the lathe. And that's how you make a "floating ring".
This floating ring is being completed by forming the outside first, connected to the stem by a thin piece of wood. The outside of the ring needs to be sanded before cutting it free. As you can see in this photo, there is a band of wood still holding the floating ("captured") ring in place until the outside sanding step is completed. This cup is made from wenge with an Osage orange rim & base.
You have to sand the floating ring's outside before detaching it from the stem. This photo illustrates one way to do this. Once cut free, wrap & tape sandpaper rough-side-out around the stem & hold the freed ring steady as the lathe turns. This sands the inside part of the ring.
Here is the completed wenge & Osage orange cup after staining with clear Danish oil & finishing. The box on the top right in the photo shows the gold Spanish doubloon (it's fake) inside, sealed into the epoxy coating. I have a pile of these metal coins which I have been sealing into the inside bottom of my cups for fun. The bottom boxed inset is the base with the printed paper ID tag attached after soaking in epoxy. The stem is walnut & poplar, & the Celtic bands are purpleheart, poplar, maple, & red oak. This cup was completed on 12 November 2023 & holds 5.7 oz (0.7 cup).
In November 2024 I bought a WeCreat 20W blue diode laser engraver/cutter with the 2W IR laser, the rotating rig, & the extra air pump that allows me to vent all smoke and odors out of the garage. Here are some projects that are fairly easy to complete.
My first project on the WeCreat Vision 20W blue diode laser engraver/cutter I bought in November 2024. You have to turn the maze embedded in the top lid while moving the side lever to guide the red pin from the edge of the maze to the center, after which the 2 side buttons are freed & can be slid to their open position to unlock the lid & open the box. Leave the red pin in the center of the maze as in this photo, & the box is always open.
Made this 2nd necktie from the packs of walnut plywood my daughter sent me for Xmas. I like the interesting "living edge" design, although it does not bend as easily as my previous wooden tie. Changed the initial "knot" at the top into an engraved banjo & notes which I then filled in with white paint.
My 3rd wooden necktie, this one made from birch plywood. The flexible "Bowling Pin" design on the bottom was a little fragile, & it broke near the top while fine sanding using 600 grit sandpaper. You have to sand these hinges horizontally, not vertically! I glued it back together with superglue, but a stain resulted. I'll try to sand that off in the future. The top design is "Wave", & like the "Bowling Pin" design, was downloaded for free from Obrary (see link below). I designed & glued a circular "tree of life" to simulate the knot of the necktie & glued it in place. I then used 2 1-foot pieces of black waxed string tied onto the 2 slots at the top to tie this necktie around my neck. It is a necktie, after all.
Obrary link to multiple free living hinge patterns.Made these 2 wooden neckties for 2 of my friends. The left USMC tie is basswood & has an anchor "living hinge" design I came up with using Inkscape, with the window showing a closeup. Below is a wave design I got from the internet. The right necktie is made of birch & has a more standard linear "living hinge" design. Both ties bend slightly, like a regular cloth tie would move.
This is a long, "cabinet-hinged" box I made for my 3 neckties, with stick-on blue felt covering the insides. The photo shows it open & closed. My laser bed (WeCreat Vision) was not large enough to get the entire 18" inside, so I made 2 pieces for the top & 2 pieces for the bottom. Then I had to hand-adjust each tab to fit the top 2 pieces & bottom 2 pieces together using Inkscape after regenerating the box with sharp corners rather than loop or backarc corners. The front & back side pieces also had to be made as 2 parts that were glued together. The difference in the 3 possible corner choices is not visible until you maximize the view in Inkscape. The actual box generator can be found at BOXES.PY using the link below.
The "hinge box" with cabinet-style hinges on BOXES.PY.These 2 photos are the open & closed views of the box I made for my Air Force/InfraGard friend to house his tie. Like the other ties, these were quite fragile, so after I got the felt I backed each necktie with either blue or red stick-on felt to strengthen them & help prevent breakage. Worked pretty well. If you have never heard of InfraGard, check out the link below. Each necktie has an adjustable shoestring to tie it around the neck, which once adjusted is easy to put on & take off using the magnetic clamp.
InfraGard link to the Los Angeles Chapter home page. This is a cooperative effort between the public & the FBI to help safeguard our U.S. infrastructures. There are no dues & it is free to join, but you have to pass an FBI background check first.Similar long box as the others, this one lined in red felt. Has was a U.S. Marine Corps Intelligence Officer & is also an InfraGard Los Angeles member. To make this box, I used the same technique to glue together 2 pieces for the top & 2 pieces for the bottom, along with 2 pieces for front & back sides. I glued in reinforcements & this seems to hold up very well. Each of the bottoms of all 3 of these long boxes have 6 one inch felt pads to protect any furniture they are placed upon. I was not in the Marine Corps but have a lot of respect for them. While I did spend 18 years as a disaster reservist in the Uniformed Servies (in NDMS), I'm not sure if the term "retired" is appropriate for a U.S. Marine, as once you are a Marine, you are always a Marine. Semper Fi!
This hinged beard comb box includes plus 2 basswood beard combs I made for an acquaintance with a huge white beard that I met on my walks through our neighborhood. I'm planning to hand it to him on one of my walks as a surprise. It's great to be in a position where I can "pay it forward". The design for this box came from "BOXES.PY", an internet site which has tons of free templates for all sorts of boxes you can download & then laser cut from ⅛" plywood.
BOXES.PY site with multiple free SVG files to make all sorts of boxes.7 layers total in the lid (1 is on the inside) in this layered round box I made for my wife on the last day of 2024.
The plans & files for this "Layered Lid Hinged Round Box" were obtained from Freelaserfiles.com.Here it is opened with the message engraved on the bottom. I made these engravings quite deep & filled the central heart with red paint. The design was very nice, although I added a piece of brown leather to mask the back panel which had the hinge tabs glued into it. Playing around with the file took a day to get the pattern to fit onto the three 16"x12"x⅛" walnut plywood boards I had to use for this project in my WeCreat Vision 20W laser engraver/cutter, but it only took 6 hours to both cut the pieces & glue them together (using Titebond 3 of course) on December 31st.
Build video for this Layered Lid Hinged Round Box on YouTube.I made this small book box out of 3mm basswood for my son. The projecting pieces were made from extra 1/8" bass wood that was cut & then glued in place. I engraved his name on one side & glued a piece of leather inside the bottom. I especially appreciated the "live joint" edge that allows the wood to bend easily. I added the upper & lower narrow scroll inlays to fill in the blank spaces and made 2 more to cover the top & bottoms of this book or iPhone holder.
Similar design as at left, but a little larger & with 3mm walnut plywood as the main body & 3mm Baltic birch plywood as the overlying cut design. The folded "living edge" cover was made to fill my WeCreat Vision nearly edge-to-edge, so without adding tabs & gluing pieces together after cutting, this is the largest book-style box I can make. I made this highly ornate style for my daughter Arielle on 21 January 2025. I experimented with Inkscape to add more curly figures to the rounded side end panels, paired off with the main curly figure I found on the internet, & added a few curly things to her nameplate & to cover the sliding lock. The dark body is walnut & the light-colored panels are Baltic birch. This particular "FlexBook" design from "BOXES.PY" included the locking latch that is visible in the photo.
The "FlexBook" page under an English-language "BOXES.PY" site in Germany.Once I received my stick-on blue felt order, I added this to the insides of Arielle's "book box". This came out quite nice, I think. Inside box dimensions are 150mm by 100mm. This worked out very nice & was a heck of a lot easier & faster than the flocking technique I have used in lining bandsaw boxes.
Laser cutting out the intricate designs for the "living edge" boxes in ⅛" walnut plywood. I copied the large panel design off a free internet site, but made the smaller versions, including the rounded edge, using a program called Inkscape. This free program lets you move points & lines around, draw curves, & do all kinds of funky things like the paid programs do.
I made these 4 "living hinge" book-style "flex" boxes over a few days from 3mm basswood & 3mm walnut decorations. I came up with the 2 Buddha designs and the other 2 logos & added them on. The basic "FlexBook" design was copied from the free "BOXES.PY" website (link below), then I glued on the decorative designs made from ⅛" walnut plywood. If you are interested in making your own boxes with a laser cutter/engraver, "BOXES.PY" is a fantastic web site with multiple different box designs, & you can change the box dimensions as well as the burn (a.k.a. "kerf") thickness, which determines how tightly the pieces fit together before gluing. It is also important to fill in the material thickness in the appropriate box to make sure the tab holes are not too wide so they will fit correctly. The output format choices include SVG, DXF, gcode, lbrn2, pdf, plt, ps, & svg_Ponoko.
The menu page for the "BOXES.PY" free box designs.Tons of left-over cutouts from the decorative artwork. I save these scraps in a box & was able to take a few of these to glue on as additional decorations (blue circles & arrows). To draw the line engraved flower in the lower photo, I used the basic design already in the decorative artwork. Look carefully & you can find that same flower copied off the top photo (red arrow).
One of the 2 Buddhist meditation themed boxes I gave away to my "natural meditation" teacher & his wife. The artwork came out better than I had expected. I used a Buddha design that I found online & messed around with on WeCreat's "MakeIt!" program, using the "Offset function" (set at zero) to exactly trace out the drawing, then used the laser's cut function to cut along the tracing. This was made easier by first outlining the cut areas by hand in black, which gave the image a lot more definition. This method gives you a clean outline of any drawing. Then I used my 20W blue diode laser set at 100% power with a speed of 75 to get a deep engraving into some 3mm basswood. Normally I sand off all burn marks afterwards, but the diffuse smokey color was a nice surprise so I left it exactly like that. Then glued it onto red felt that was cut to fit the circle I had left in a pattern I had found online. The rest of the fancy artwork was done by me using the original as a basic plan and then manipulating the points on each line using Inkscape to get the sides, front, & area surrounding the lock to also have interesting designs.
The red felt lining was easy to do and looked good, as well as helping to support the "living edge" folding part of the box. The basic box design, without all the cut engravings, can be found at BOXES.PY. I set this up to be 150mm by 100mm inside dimensions, as this fits inside my WeCreat Vision nicely.
Working BOXES.PY webpage, with the boxes illustrated here under "Boxes with flex" & "FlexBook".I made another one with red felt for my wife. These 2 photos show how you can label "OPEN" on the tongue of the sliding mechanism, & "LOCKED" on the part underneath that gets exposed when the slide is closed & the word "OPEN" is hidden. Opening the slide exposes the word "OPEN" and covers the word "LOCKED". It worked.
Using my 20W blue diode laser to mark coated aluminum business cards worked out great but lining them up in the laser meant taping them down to keep the cards from moving due to the airflow coming out of the air assist. I tried using a foam board with parallel lines drawn on it, but taping the cards in place was tedious. Then I came up with a better idea (photo above) of using two ⅛" boards glued together, the top board with square holes & round holes, & the bottom board with only the round holes which are used as finger grips to remove the cards. I can do 9 cards at a time, & this design worked out great! Since the WeCreat Vision I own has a limitation of 16" by 12", I did consider cramming the cards together in a tighter array of 4 across by 4 down, but decided to go with this design shown above which means a shorter processing time.
Wifey wanted a hat box to transport her large-brimmed knit hats that she gives out as gifts, & her creations measure up to 16" across & 5" tall. Problem: my WeCreat Vision has a bed 18" by 12", so cutting a round container for 16"-diameter circular objects (hats) required some planning. I ended up using the "joint panel" edge found in the "Misc." objects in the "BOXES.PY" webpage mentioned previously on this page. Made a 4-part flat base & flat lid, plus a 4-part flexible band for the circular wall. I used thin strips of wood glued to one edge of each of the 4 "living edge" panels, each140mm x 319mm (5.5" x 12.6"), then glued them together to get the 50.3" (1,277mm) circumference for the 16" diameter hat box. I made a solid flat base with a 3mm narrower ring on top to glue the living edge wall in place. After drying, I added a narrow top ring to stabilize the walls before adding the cover. It worked.
Here is the hat box opened. I "cheated" & used metal hinges after experimenting with wooden hinges, which were simply too large & messed up the "simple to use" plan proposed by the wife. I cut the lid in half using an S-shape (a.k.a. Yin-Yang) for fun & completed the project on 23 February 2025. Made a 3D engraving for the center piece.
This is the laser engraved wooden central label for wifey's large hat box. I used the 20W blue diode laser in my WeCreat Vision set at bitmap engraving at 100% power and 100 speed. This setting gave a deep engraving, although for the deepest cuts in other projects I've gone down to 100% power & 75 speed. The quick trick in getting the irregular edges was to grab the detailed picture off the internet, incorporate it into your design, & then use the "Offset" function in MakeIt! with the 0-margin setting plus the sharp corners' choice, then set that outline (but not the central artwork) for cutting. The central "Tree of Life" was redrawn by me using multiple pictures off the internet as guides, then using the "Invert" filter to flip the black & white. This way the tree stands out from the background.
Grand Master Denny (Hawaiian Kenpo) will be promoting 2 senseis to Grand Master status (10th degree blackbelts) on 31 May 2025, so I made him & those 2 newest highest-level dudes flexible-binding, laser cut & engraved "keepsake" boxes. Because 4 other Grand Masters will be present, I decided it would be nice to make each of them a box, too. Every time I make these, I add little things that I haven't tried before, like the colorful outside felt visible in this photo. I was running out of red felt, so I also used green and blue felt. I did engrave different central pictures for each box, depending upon the background of the recipient, and their names are engraved on both the front panels & the inside back panels.
Felt lines the insides of each box. This one I made for Grand Master Celic Peoples, & I asked Denny if he would present these boxes to the other Grand Masters. Of course, I'm giving Denny his box on 29 May 2025 because that's the date he is being inducted into the Martial Arts Hall of Fame in Pasadena, California. I only reached San Dan (3rd degree blackbelt) in Kenpo & that was many years ago; I've been busy doing other stuff since.
Fun to make some of your own tools and chucks:
The 1st Longworth chuck just prior to blowing up. I always wear a heavy-duty respiratory face shield along with a full body gown that ties around my neck, so I rarely get injured. I do keep duct tape and CA ("superglue") in a drawer next to the Band-Aids, though, to hold the smaller lacerations together while finishing my work on the lathe.
The steady rest can be pushed back out of the way as shown here. It is one piece but doesn't have to be completely removed from the lathe. This is my new green "Grizzly" 12" lathe on the left, with the cast iron base of the old broken lathe bolted onto the end on the right. A little grinding work & it fit perfectly, extending this lathe setup to 4 feet. I repainted the old lathe base to green later.
When forming a container with sides from a flat piece of wood, you can use a bandsaw and cut 45° angles, but you leave cut marks and the sides of the finished product end up straight rather than curved. These angled measuring devices I made for my lathe and fit on the wood and metal cutter holder. The holder has 2 metal rods projecting from the base, so the angles stay accurate. In addition, the degrees and exact distance from the centerline of the flat wood blank are indicated.
Here is an example of how I use my angle and distance markers to cut a curved bowl from a flat piece of wood. This picture shows the 35° cut made using a thin carbide cutter mounted in a metal pipe, with the cut being made 4¼ inches from the center point, all marked on the angle marker.
This shows my first 12-segment & 16-segment wedges for a table saw sled. I got this idea from an internet site, but I found the sled to be too large and cumbersome, as well as difficult to shape the wooden wedges at the exact correct angle of 15° on both sides. So, I built a new sled.
Here's the new table saw sled, standing on its end, and the electronic angle finder shows 0 degrees. Poifect! The metal & wood piece the angle finder is standing on are at exactly 90° to the table saw blade cut. I have 2 runners on the bottom that fit nicely into the table saw T-brackets so no wiggling, and that finger clamp is positioned to hold the last cut pieces in place.
Useful for turning bowls. The central screw goes into the center of the wood base &the spikes hold it firmly in place while working on the outside of the bowl, with a final tenon placed in the bottom center. This tenon can be an inside or outside fit. When finished with the outside of the bowl, unscrew and reattach it to a 4-jaw chuck using the new tenon. Then you can carve out the inside of the bowl.
Tennis balls work great for jam chucks, and these are cut to different sizes to fit over various dead (motorized) or live (free spinning) centers. The Dowel Center was easy to make, and the embedded razor marks the center of a dowel after several strikes against it. The wire between tennis ball halves is for burning lines into the wood spinning on the lathe.
1" dowel rod with a longitudinal cut (used my bandsaw to make sure that cut was thin), useful for holding sandpaper in a curled position while sanding the insides of hollow pieces being spun on the lathe. I also drilled a bunch of cross-wise holes to hold a tight-fitting dowel stick in order to prevent the far end of the sanding stick from contacting the base of the drilled hole. That extra step might not be necessary in most cases, but I had already dried an inch of epoxy inside the piece I was working on and didn't want that surface messed up from the stick or sandpaper.
MAKING & USING A PRESSURE TANK, AS WELL AS ANY TOOL OR POWER EQUIPMENT AS SHOWN ON ANY OF MY OR OTHER'S INTERNET PAGES, IS INHERENTLY DANGEROUS AND CAN GET YOU SEVERELY INJURED, PERMANENTLY MUTILATED, OR KILLED. THE FOLLOWING PHOTOS & INFORMATION ARE NOT INTENDED AS INSTRUCTIONS, BUT ONLY ILLUSTRATE WHAT I USED FOR MY OWN PERSONAL DEVICE.
READ & UNDERSTAND THE PREVIOUS WARNING. I wanted to get rid of those small air bubbles in my resin pours, so I finally (in July 2023) mail-ordered a cheap $80 2½-gallon paint spray chamber (rated up to 80 psi) & modified it as per directions you can find all over YouTube, with just 1 example linked below. A handful of uncooked rice was added inside to absorb water condensing from air pressure changes. A 9½" diameter plywood board was then placed inside ('cuz the metal bottom is concave), & I covered this with a 9½" circle cut from a silicone sheet (makes dried epoxy removal much easier). The 2 external shims & 90° bubble level made sure the tank bottom remained gravity flat. I did use silicone spray (WD-40 also works) on the top seal; the finished tank held pressure at 40 psi for 4 hours on the very first try!
"Mad Nerd Workshop" YouTube Video on making a pressure tankREAD & UNDERSTAND THE PREVIOUS WARNING. After taking the paint tank out of the box, I took EVERYTHING off the top plate, then replaced only the “essentials”: The pressure safety relief, the on-off ball valve, & the manometer dial (the regulator attachment I understood is not needed so did not use it). I did have to buy 2 brass hex bushing adapters: a ¼” NPT male to ⅛” NPT female reducer to connect the thin pressure gauge pipe to the 3-way aluminum adapter that came with the tank, and a ⅜" NPT male to ¼” NPT female reducer to connect the wider paint outlet to the relief valve. I already had an extra ¼” NPT quick air coupler for my 6-gallon air compressor, & I bought a roll of yellow Teflon tape that was specifically designed for gas tight joints. A sliver of red duct tape was placed on the dial between the 40 psi & 50 psi marks as a reminder, as this range is the pressure that most YouTubers have recommended for resin casting. I’ve used this tank multiple times now, & it is able to hold pressure for over 24 hours.
Lots of fun projects I did with my kids:
Around the year 2000, here's my daughter learning to solder together a "bug bot", an autonomous moving device that goes forwards & turns when the wire "tail" sticking up in the back touches an object. It will run around the house and amuse the kitty. There are a lot of pre-made solar bot kits, but I really liked the bare minimum with no plastic parts and just the electronics to put together. Less gimmicky.
This old computer mouse found a new life as a mobile robot, powered by that 9 volt battery with side motors to move. The two photocells in the "ears" turned the mouse towards the light, while the whisker bumpers turned the mouse around when it bumped into an object. The on/off switch is in the middle of the butt.
My kids & I built this Trek Cart when they were still in elementary school. This idea was copied from what the Boy Scouts used more than 100 years ago, where they would take similar "trek carts" to carry their equipment when camping. They could carry tents, Dutch ovens, and all kinds of stuff. Their "Trek Carts" were actually based on the old Mormon Trek Cart design from a time even longer ago. Although I'm not a Mormon, this cart idea was great for carrying lots of stuff to campouts if you could borrow a trailer to haul the large cart to camping locations. We used this Trek Cart on many campouts when my son was in the Boy Scouts, and it was VERY popular with the kids! We especially liked the "Conestoga wagon" appearance with the tarp over the top.
Here is just one of many times we brought the Trek Cart to a scouting event. This one was at Empty Kettle Ranch in Thousand Oaks nearly 25 years ago. The body was built by me & my son, while the 2 wagon wheels were made from layered plywood with wooden posts by me & my daughter.
We used a steel construction bar around both wheels and this metal piece is still intact today. On camping trips, we would throw everybody's camping stuff into the open wagon & underneath (note the bottom "fishing net" used to hold more stuff), and one scout would sit up front as the "driver" while two others would be the horse team and pull the wagon by the front 2 by 4 which had a crosspiece at the front end. The Boy Scouts really enjoyed it! I always hoped others would copy the idea to continue the tradition, but fancy individualized backpacks took over.
I didn't remove most of the stuff I store inside, just opened it up to show how I use this Trek Cart now to store garden things. The bottom shelves store sprays and chemicals, with the top right has cubby holes for pruning supplies. A Conestoga-wagon-type cover is tied down over steel ribs that make the top. A 2" steel axle goes through the base and the two homemade wagon wheels.
My son Ryan and I used to make 6-foot English long bows. We built quite a few; this one pulled at 50 pounds. We made it in 2002 & it's hanging on the wall over a homemade bodkin arrow. We have 2 more longbows hanging on the walls of the house, along with some other (fake) medieval-era items.
There is a law that says that once you have reached 65 years old, you are required to learn to play 5-string banjo. Hard to pack a full-size one in a suitcase, so here are the first 2 traveling banjos I made. Since these don't have a faux hide soundboard, I suppose you would have to technically call them "harps." Naw, they're banjos.
Musical saws are a lot of fun to play, so I built a case for them back in 2009. I bought a professional musical bass saw back then but use my store-bought Stanley crosscut saw more often. I also found that a yardstick bent and wrapped with lots of thin (6#) fishing line actually works much better than my cheap cello bow. Just have to spend some time initially waxing the strings with bow wax. And instead of using my fingers to bend the metal saw tip, I simply attach a small C-clamp and hang on. Much easier on the fingers! Duct tape over the saw teeth vibrating near your privates is not such a bad idea, either, unless you favor a high soprano singing style. Now would be an excellent time to look up "castrato" in Wikipedia.
Here is my FAKE Russian 10 kiloton nuclear warhead, made from an old garbage disposal with computer wiring glued in. Easy to write nuclear warnings in English and have Google translate it. Of course, one of the paragraphs in Russian translates to, "If you actually believe this is a real nuclear warhead, you are an idiot."
Bought a leak-detection microphone (left bottom) on the internet when our pool appeared to spring a leak & made a simple PVC holder. Wanted to get an immersible one and found a great website which showed how to make your own DIY hydrophone from cheap parts, so I made a few. They do work very well.
YouTube video on making your own DIY hydrophone.My kids built this stained glass piano all by themselves as a Christmas present for their piano teacher. I enrolled them into a summer stained glass workshop to learn how to do this. Back in the "How to Make an Inlaid Mug" section above, I referred to the technique used here of taping copper foil to the edges of the glass to enable the glass pieces to be soldered together.
When kids were younger, they took a stained glass workshop. I followed along & later made my own 3D dragon out of stained glass which flaps his wings when you pull his chain on the bottom. Again, the copper tape used to solder these glass pieces together found a new life in decorating my woodwork.
My kids & I built this 10' by 10' base Tiki Hut elevated tree house in between the fig and peach trees. This last summer (2023) the Lapins cherry really took off and we were picking cherries from inside this tree house. The hanging chair is a favorite for visiting kids of my coworkers who come for one of my pirate adventures.
Starting out as a Sago palm growing on the edge of our driveway, my son and I removed it 25 years ago and used a chain saw to carve it into a giant 4' tall head. We enlisted the neighbors to help carry it up the hill to the top, and then covered it with concrete since the palm fibers were rotting away over the years. Named by my young daughter, Mr. Toilet Head still stands (on his neck) overlooking Tiki Hut, next to the row of 9 banana plants and in front of the passion fruit vines.
Our Beaumont Macadamia tree drops lots of nuts, so I built this wire mesh screen underneath which directs the dropped nuts down to a bottom center plastic jug. Keeps the squirrels away and lets me collect the nuts for peeling (need to remove the green husk) and then drying. I bought a heavy-duty Macadamia nutcracker because these nuts are HARD!
My brother-in-law had a coral reef salt-water fish tank, so of course I had to get one too. This was many years ago with my young son standing next to this 50-gallon tank in our old house. I had to extend the top and put in halide lighting along with a special Venturi protein separation system in the base. This was a HUGE amount of upkeep, and I ended up selling the system to a coworker.
We have a lot of fruit trees in the backyard, including this nearly 37-year-old mango that I grew from seed, started when my son Ryan was born. It didn't start producing well until only a few years ago. I have been thinking about constructing another page detailing some of the more exotic fruit trees you can grow in Southern California. Meanwhile, below is a YouTube video link to the "Mango Tree House" surrounding this large mango tree.
Short mango tree house video on YouTube, shot in June 2021.The "Aargh-O-Naut" pirate ship my kids & I built in our backyard, with functioning rigging, including a skeleton steersman, dog, & stow-away. A carbide cannon is fun to make, although loud when fired so I rarely shoot it. The locked treasure chest has a secret compartment that pops open when you figure out how to unlock it & read through the hidden directions on releasing it:
Built a platform years ago to reach my two apple trees on our backyard slope and made it into a pirate ship. Added a YouTube video with "REAL PIRATE MUSIC" at the link below.
Short <30 second video of the pirate ship we built in our backyard.First mate "One-Aye" being attacked by his faithful dog, "Boner," while attempting to steer the ship. The rigging is real and does work in raising or lowering the sails. When I first built the ship I wanted to add wooden belay pins to hold the rigging in place, but they were expensive to buy. So I bought my first lathe and made them myself! All of these were hand turned on my lathe.
Long ago this observatory was built from a kit in my backyard to house my moderate-size telescope:
We built an observatory from an "Explora-dome" kit many years ago. The Italian steel spiral stairway and guardrails completed the build, all according to code. The structure was also heavily reinforced to conform to local codes, including a "snow load" (and this is Southern California).
Link to "Exploradome" siteGreat for stargazing, and the 10-inch Meade Schmidt-Cassegrain LX 2120 (f/10 focal length) telescope. This was built from an "Explora-dome" 10-foot by 10-foot square kit, which I added a 1-foot base around the entire structure to in order to bring up the entry door height to 5' 2". The dome rotates around on rollerblade wheels and is extremely easy to turn. Since this photo I added a low wall to block the sight of the dome, due to my neighbor's request not to be able to see the observatory from one window of their upstairs top stairway, 'cuz they didn't like it. But they eventually moved & peace returned to the neighborhood.
DIY focusing masks made from 5-gallon cans and strips of painted wood or wire. Left is a Bahtinov mask which makes a diffraction grid, a Hartmann mask which produces 3 images that need to be focused together, and a "Fly Screen Bahtinov" mask which uses a fine wire mesh to produce a diffraction pattern. The aperture mask on top with the single hole is used for sharper moon or planetary viewing. I added a ring to the hole to securely attach my sun filter, so now I can also look at the sun during the day and see sunspots.
I built 4 plywood tables for the corners & painted them red. Supported nicely by the walls so there is lots of room underneath. Also placed a string of red LEDs surrounding the dome for night use. The sheet metal walls that came with the kit were all covered with drilled plywood painted flat black, which lets me mount things and provides extra insulation.
Here's the telescope inside the 10-foot by 10-foot observatory. I know, it should be on a tall pier that goes deep into the ground below. The platform is sturdy enough that I don't need it. Plus, the wife said, "NO". The plastic shelves hold a powered air filter, as well as a power inverter and a deep cycle 12V marine battery that stores energy from the 40W solar panels outside.
Available on Amazon.Com are a few short-story books I wrote, with my son adding 2 tales to the 3rd "Bats, Rats, & Alley Cats" book:
My first 20 sci-fi/fantasy short stories were originally published in 2005 and republished with a new cover and new artwork on Amazon in 2022. You get to meet bumbling electronic butlers, learn about Sam's exotic tropical plants, put on a pair of self-healing shoes, and learn why cats lick their paws. I did the cover artwork to include themes from several of the stories inside. The book is in English, 175 pages, meant for ages 12 and older, available as paperback, hardcover, or Kindle eBook.
Link to softcover "Bats, Rats, & Alley Cats" on Amazon. Both a hardcover and a Kindle eBook are also available on Amazon.Com.30 funny but strange short sci-fi/fantasy stories, each with an unexpected twist. Includes backyard pirate ships, a doctor's unusual house call, a trio of underwater salvage dudes, crafting "alternative" pieces of exotic wood, and an alien abduction from the alien's point of view. I did the cover artwork to include scenes from several of the included stories, & each story ends with its own silhouette drawing. Intended for ages 12 and up, English, 246 pages, and available as paperback, hardcover, or Kindle eBook. My son & I are currently writing stories for a third "Bats, Rats, & Alley Cats" book.
Link to softcover "Bats, Rats, & Alley Cats Too" on Amazon.Com. Both hardcover & Kindle versions are also available.My son wrote 2 & I wrote the remaining 25 new sci-fi-fantasy stories for this 3rd book. I also drew silhouette artwork that was placed at the end of each story, and I designed the cover. [Unfortunately, the picture displayed above needs to be low quality because of the 500-by-500-pixel limitation on photos on this website.] We published this book under author name "M. Barry Kirk" on Amazon.Com in May 2024, & I ordered 30 author copies (sold at the base printing cost) & gave them out to friends & family. We've saved over 30 new story outlines for the upcoming 4th "Bats, Rats, & Alley Cats" book which I expect to start writing next year.
Here's a link to this 3rd paperback book. Again, both hardcover & Kindle are also available.Not exactly a poem & it doesn't rhyme. This is a short story, intended for young children, about trust, friendship, & sacrifice. I wrote it back in 1995 for my kids who were then quite young. We were playing under an oak tree in a park & found one particularly interesting old oak leaf next to a fresh acorn lying on the ground, so we made up a story about them. I finally decided to publish it after all these years & chose Amazon. I plan to add pictures in the near future & publish it as a regular kid's book. At this time, it is only available as a Kindle eBook on Amazon.Com.
"A Leaf and an Acorn": So far, only a Kindle eBook is available, but we're planning on adding illustrations & making this into a true children's story.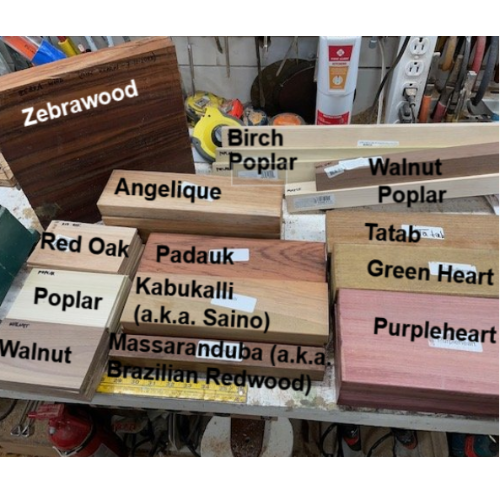
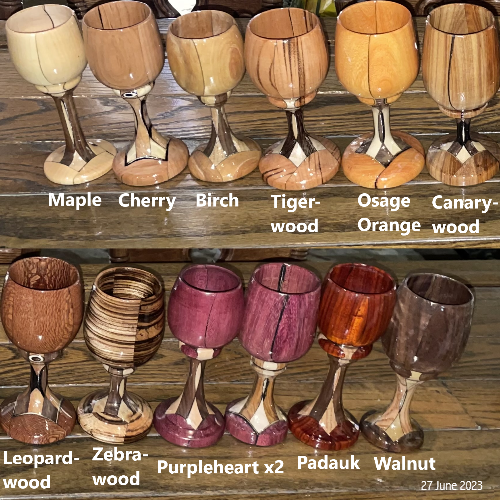
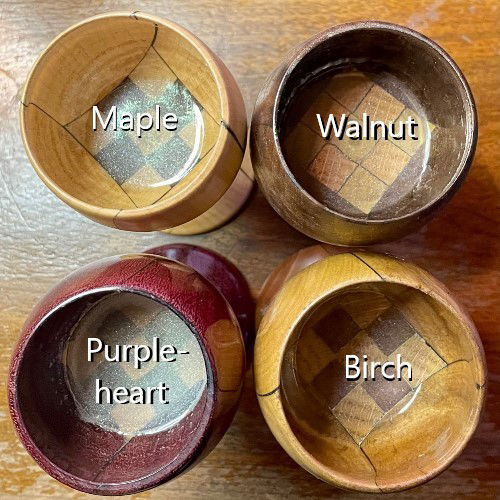
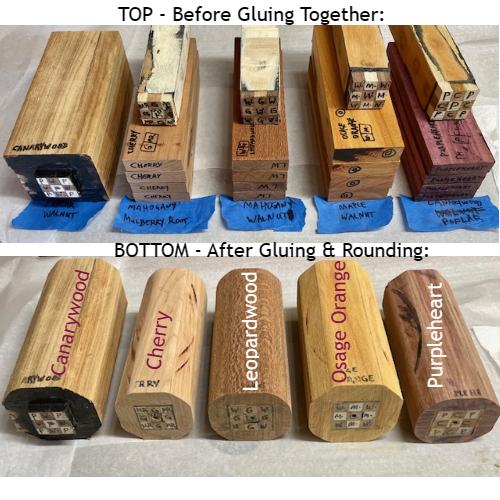
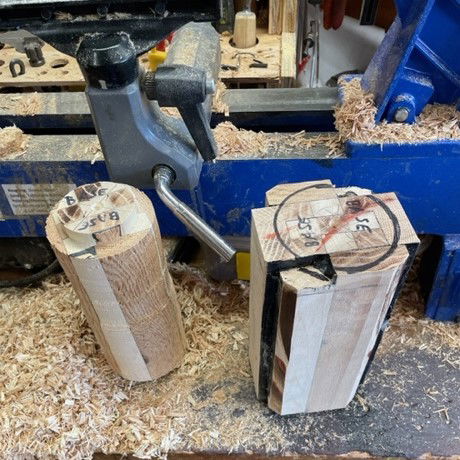
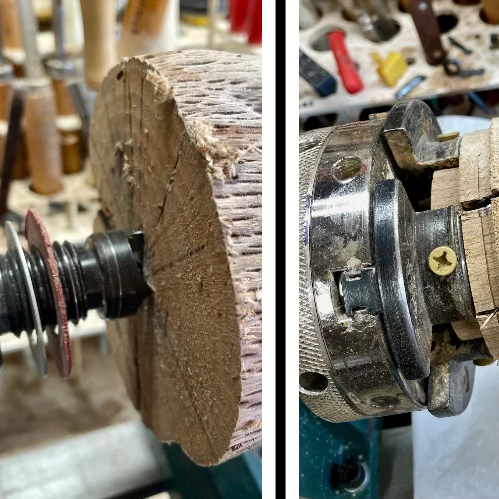
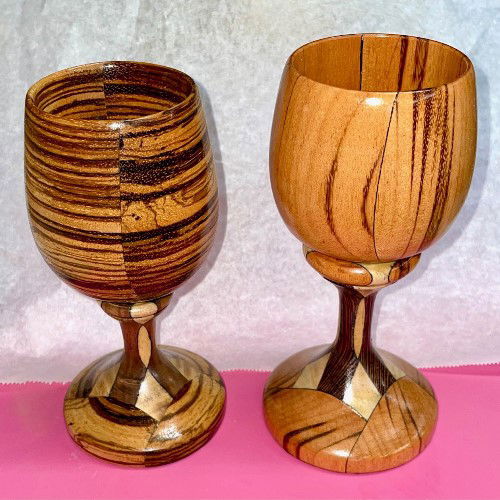
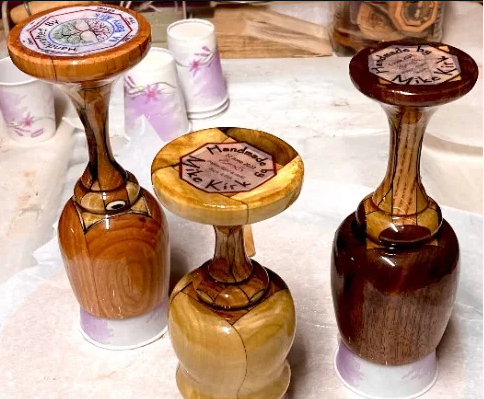
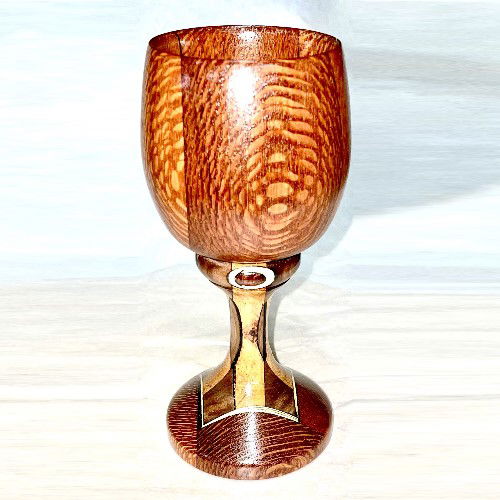
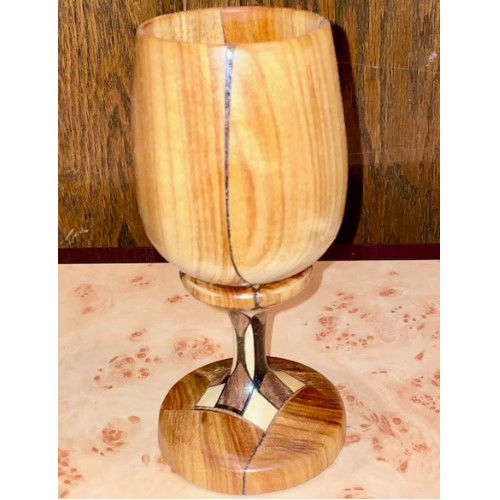
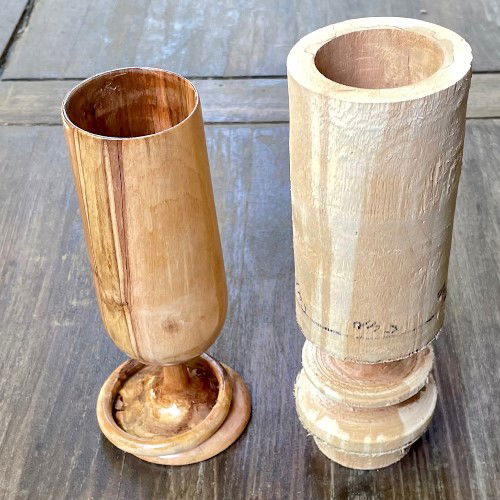
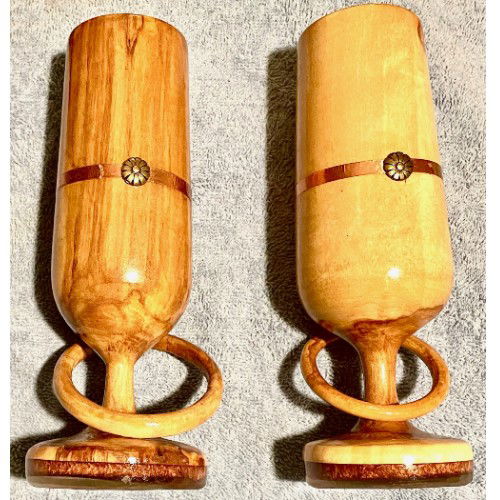
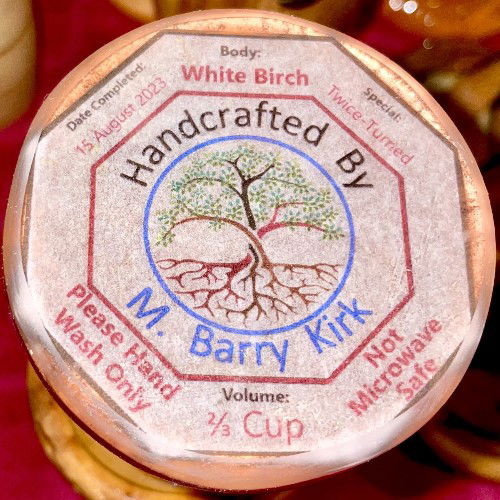
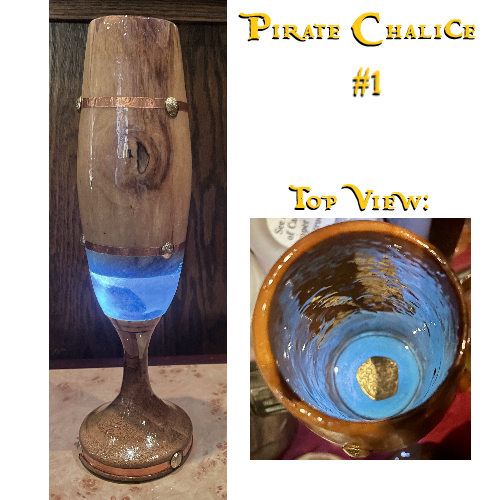
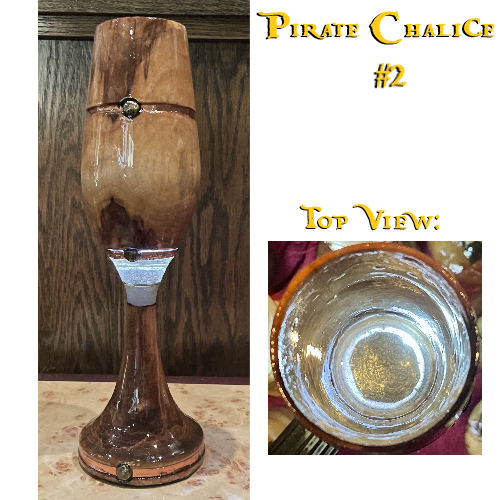
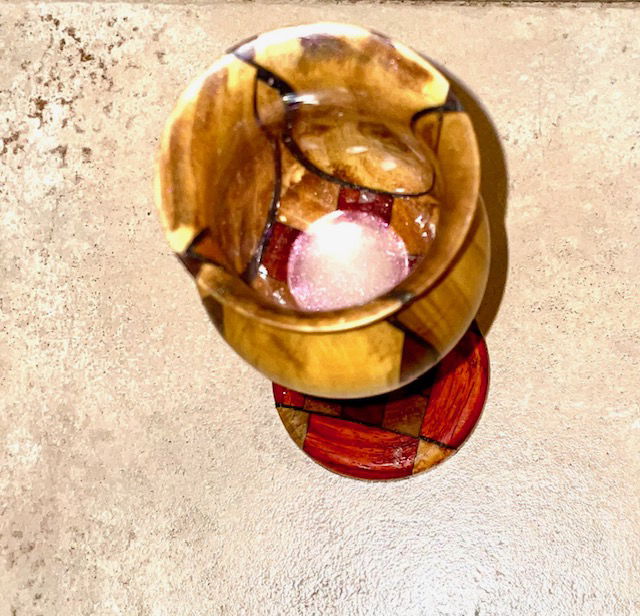
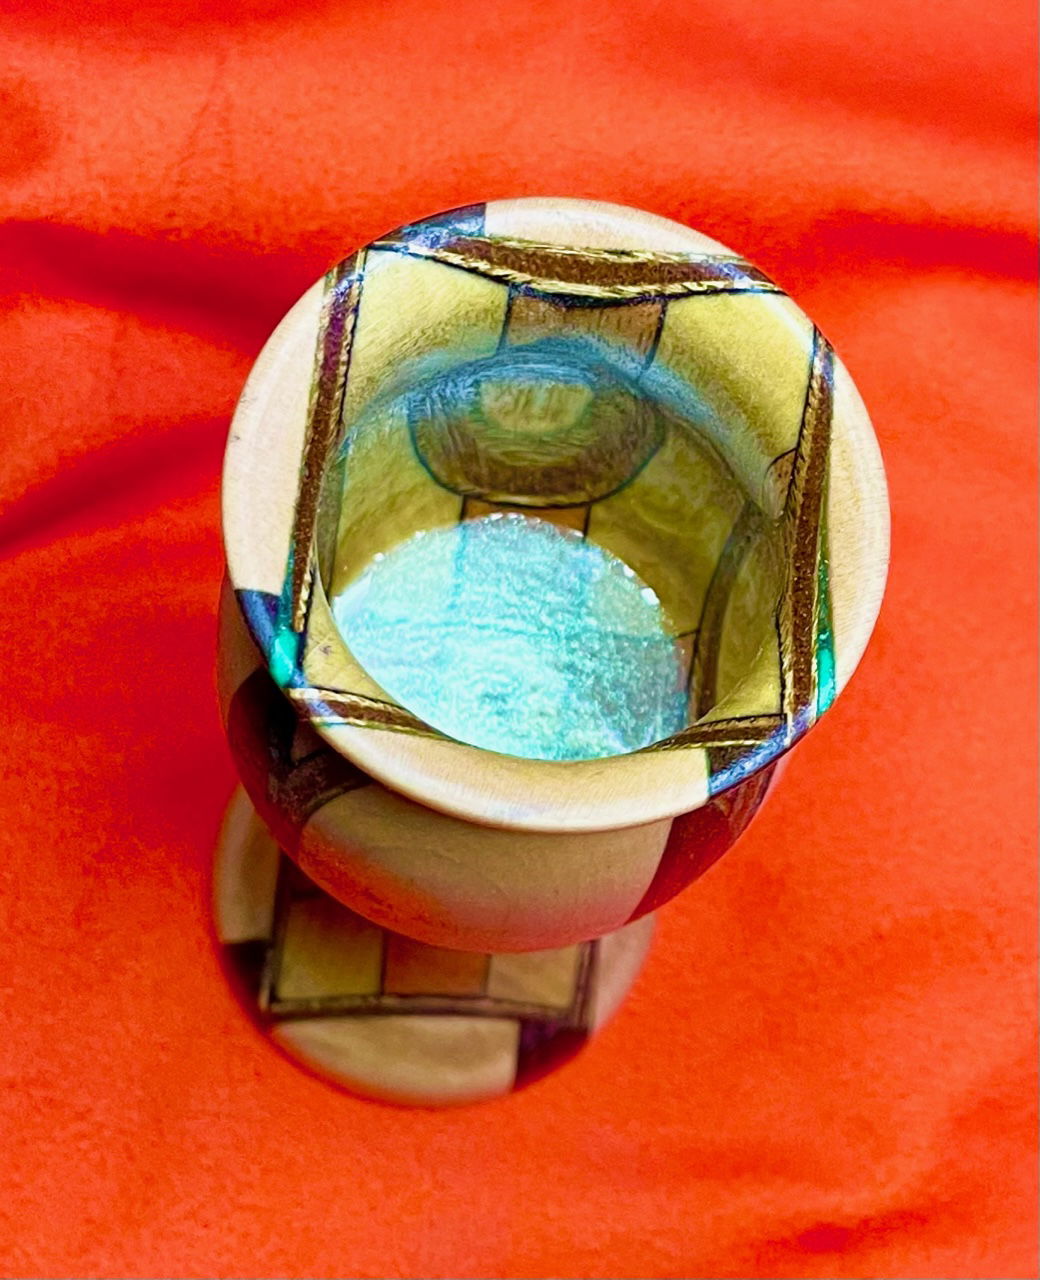
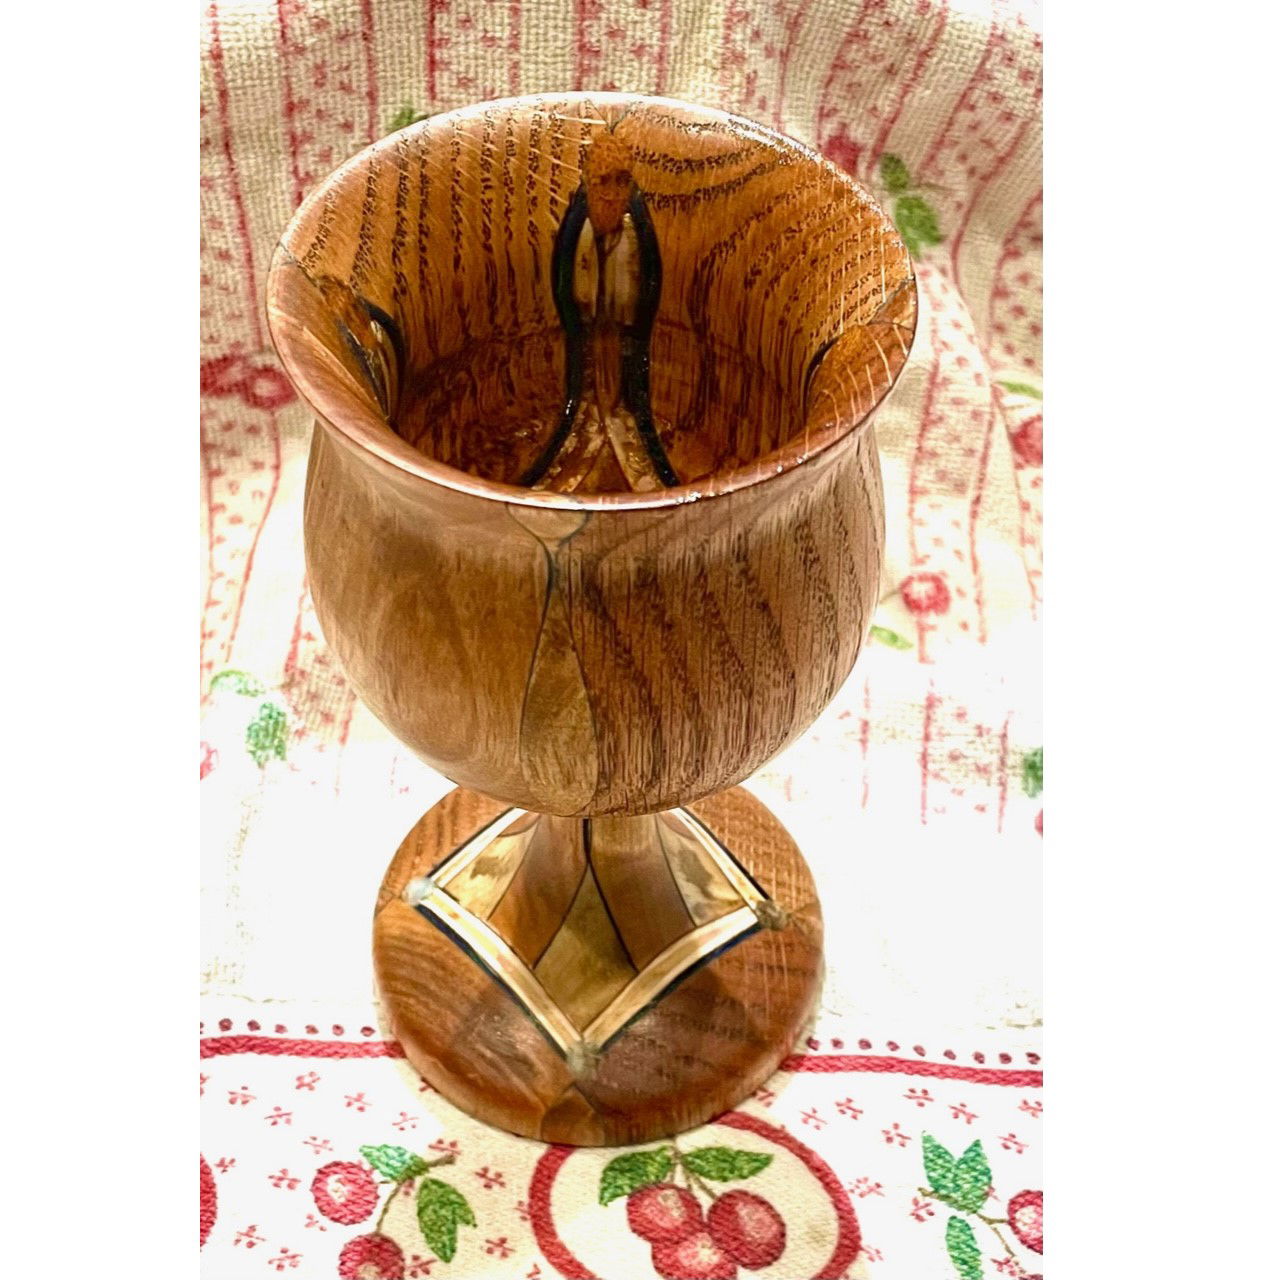
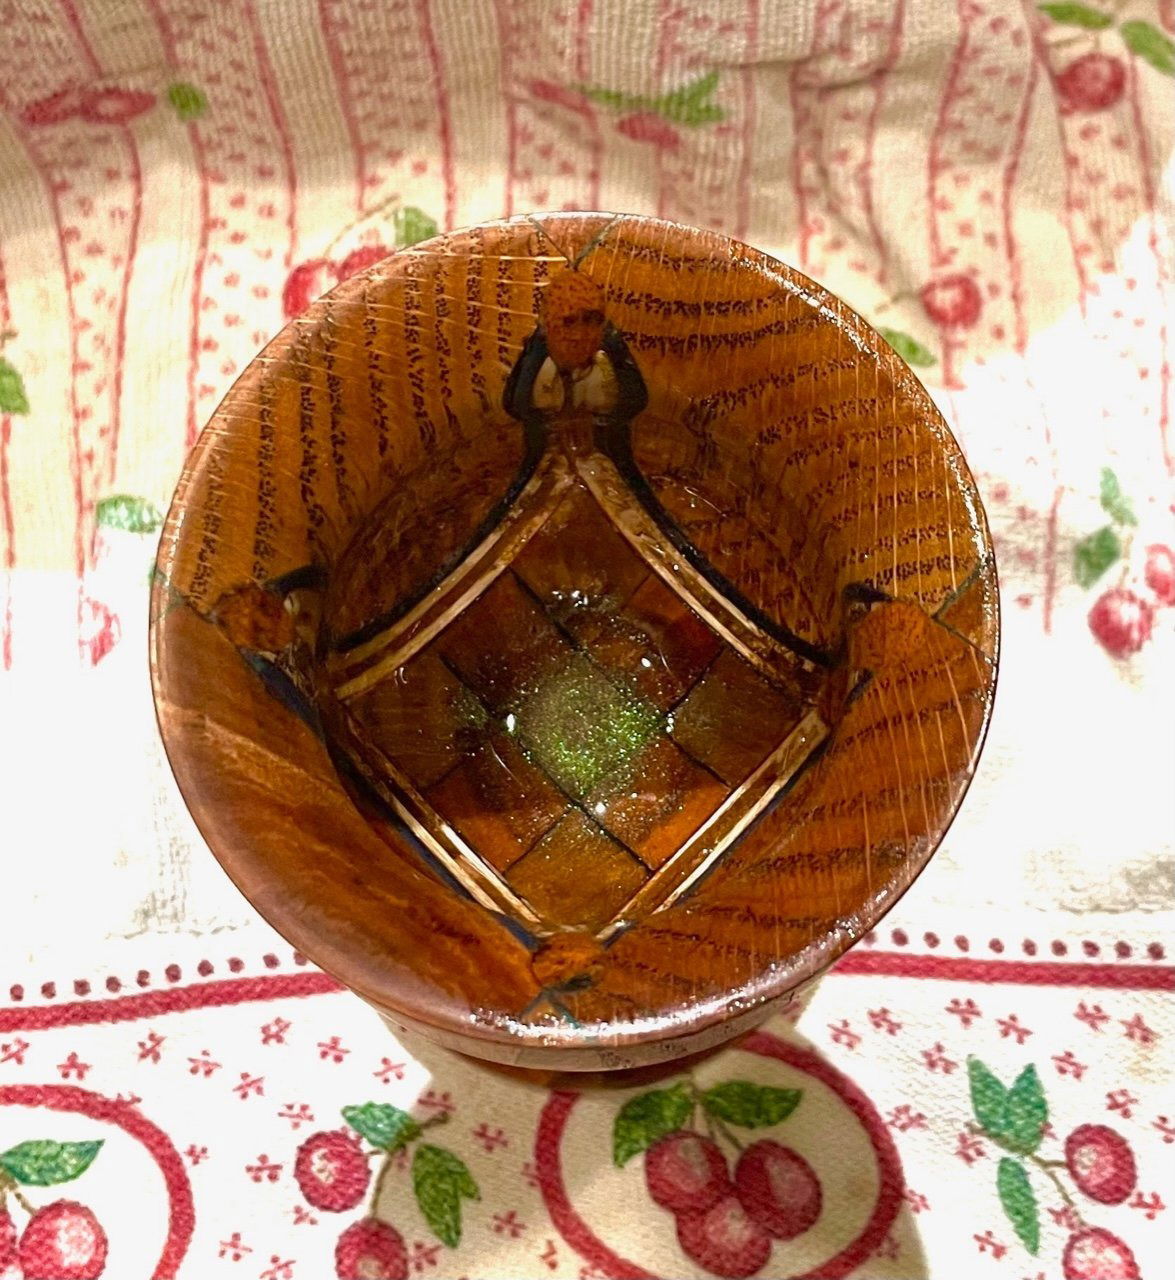
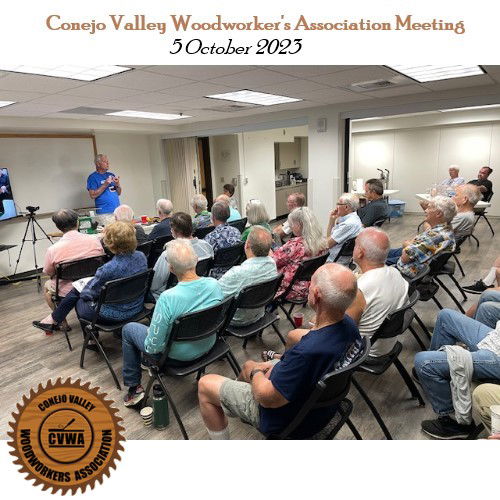
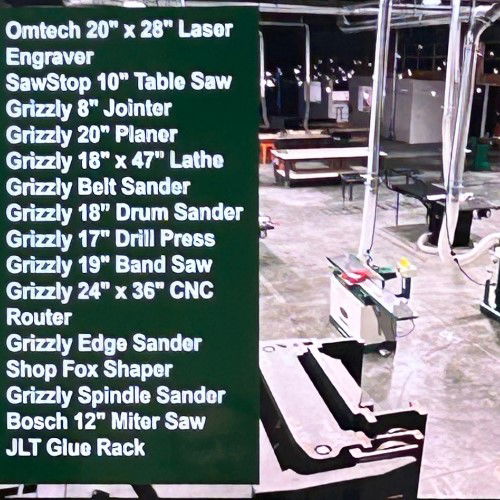
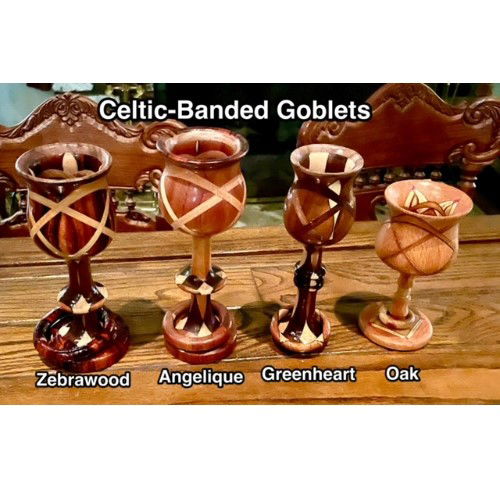
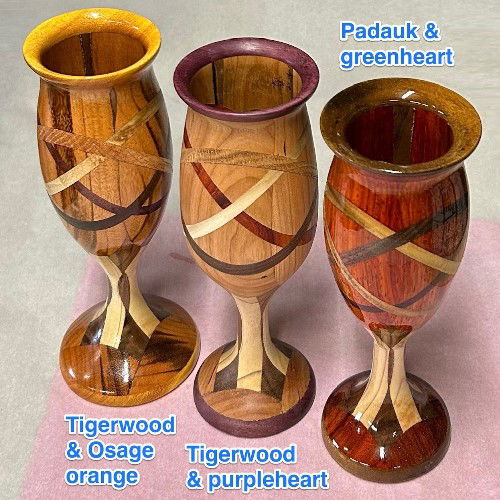
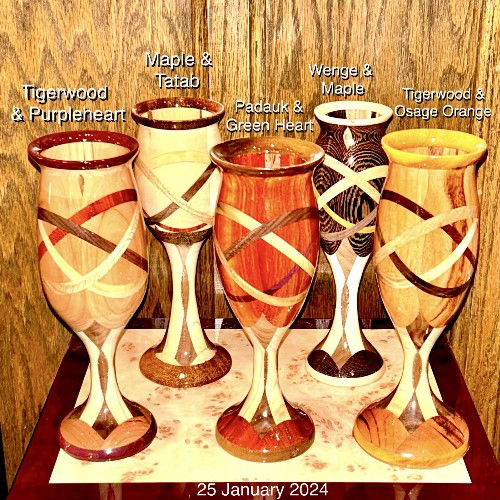
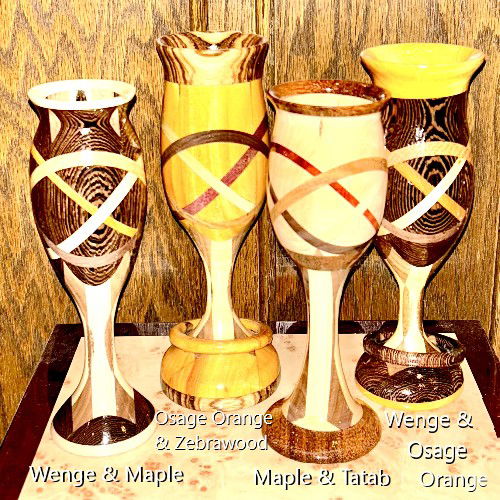
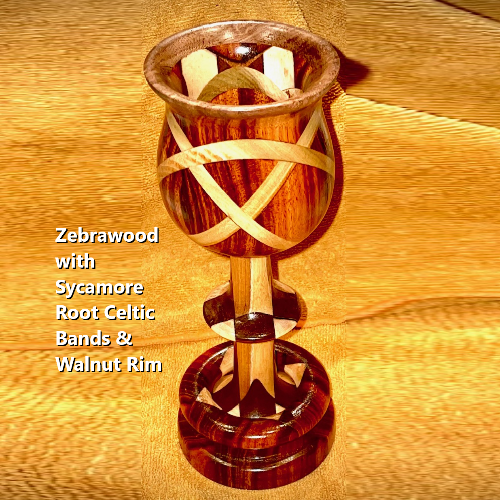
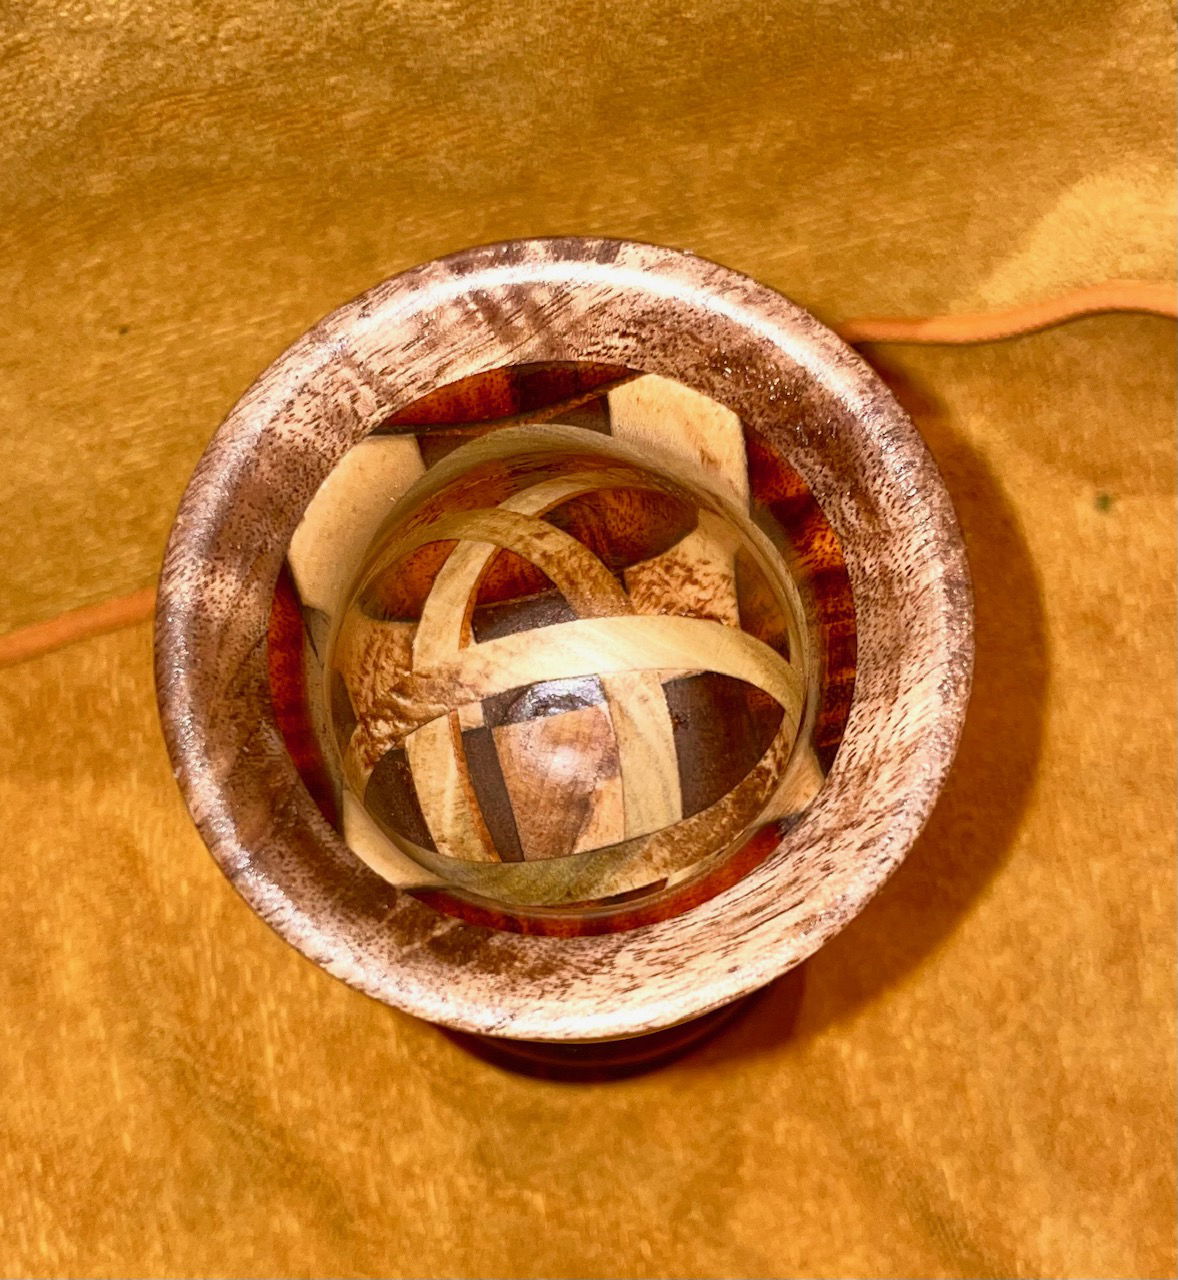
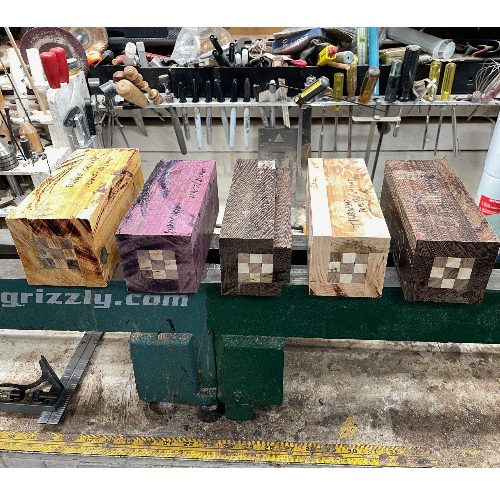
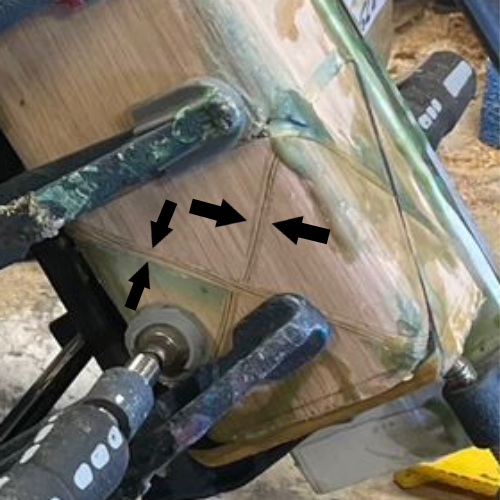
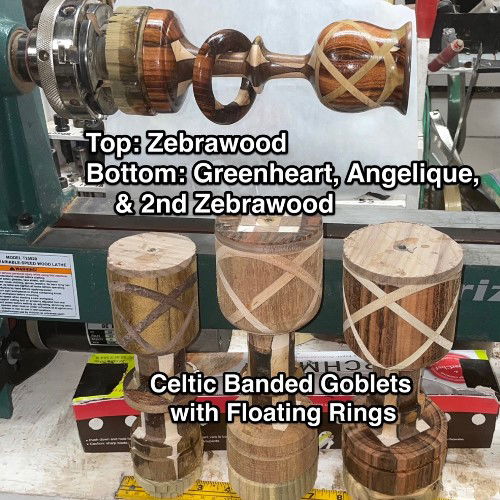
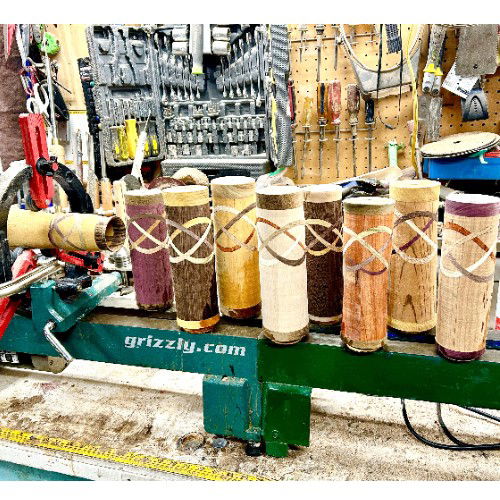
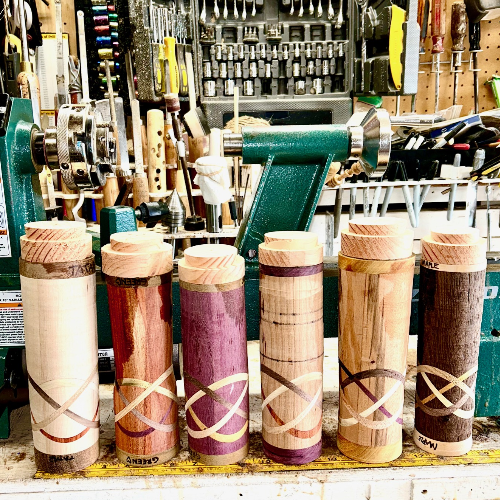
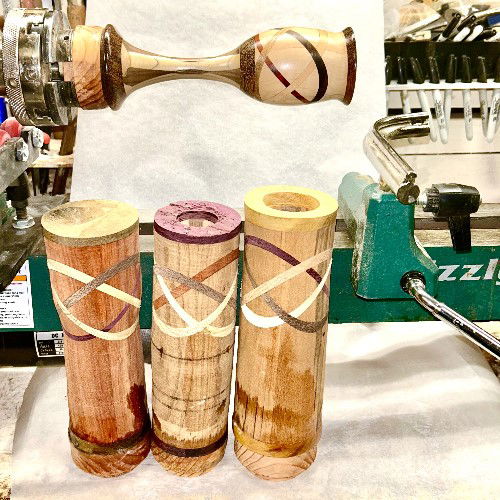
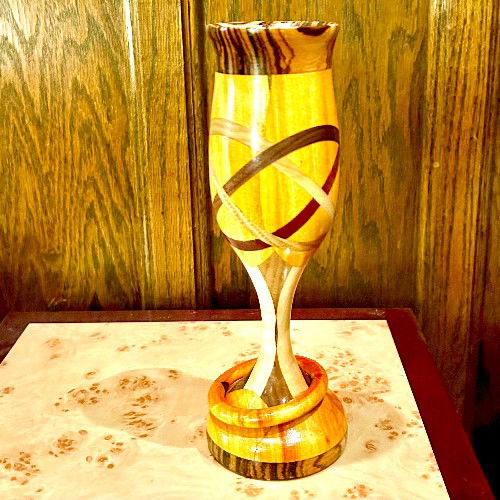
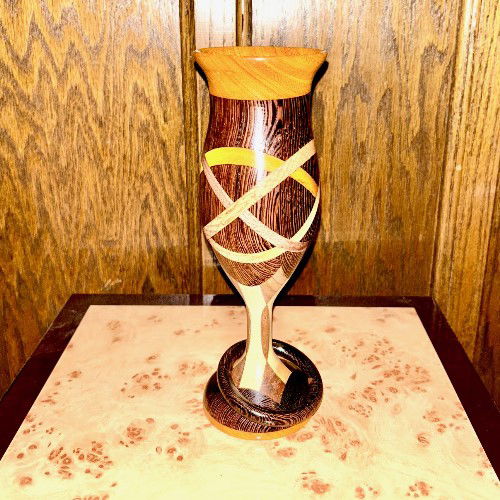
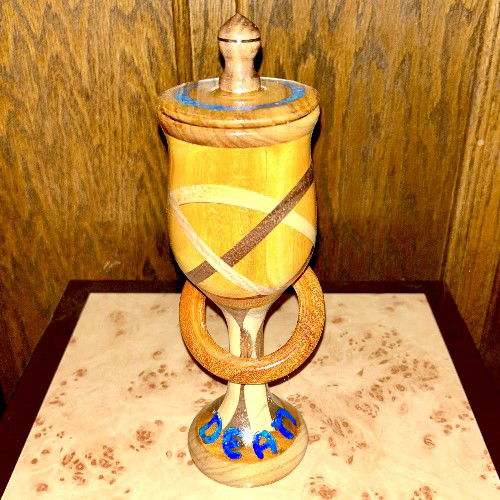
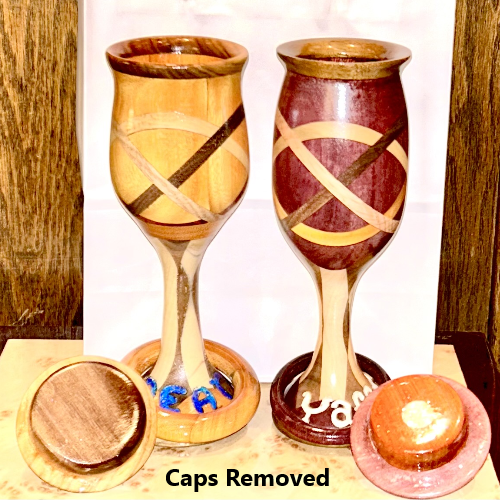
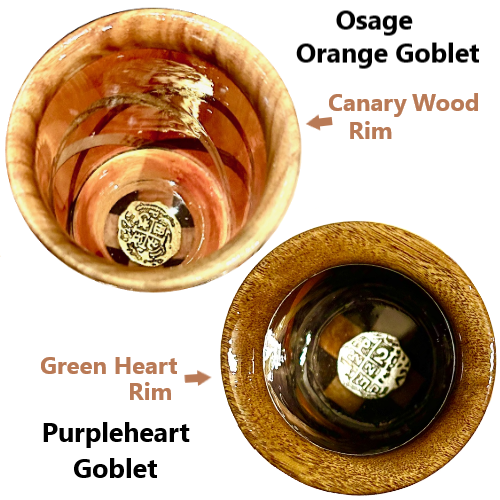
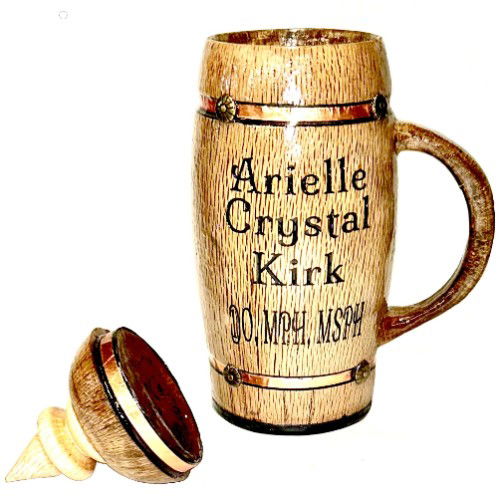
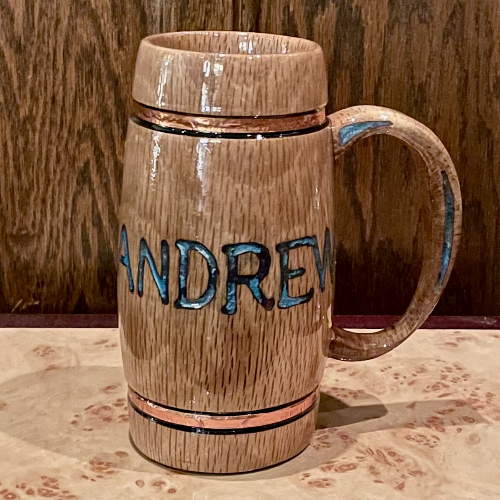
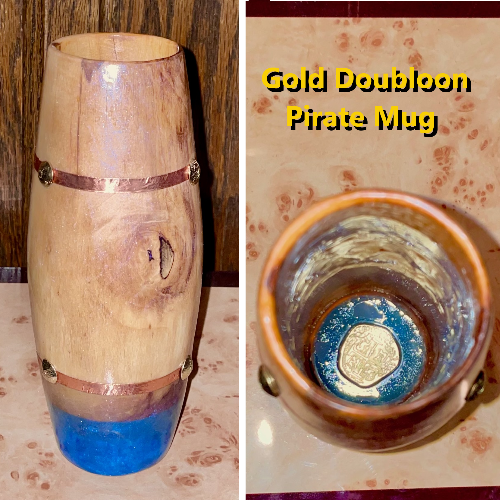
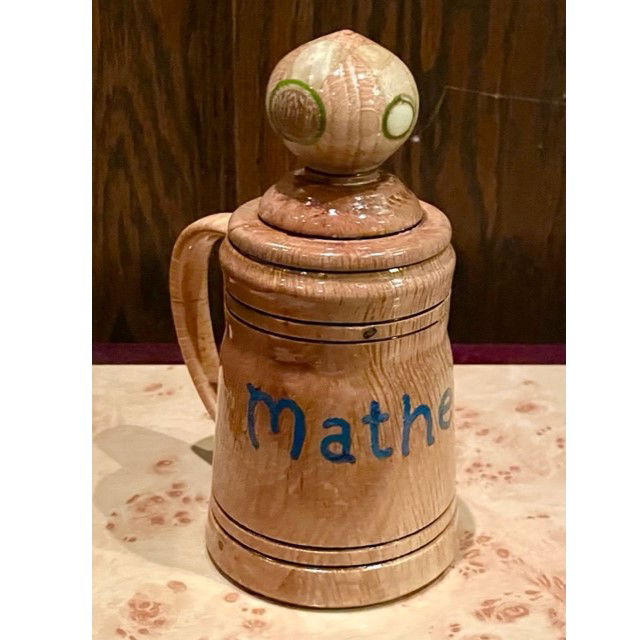
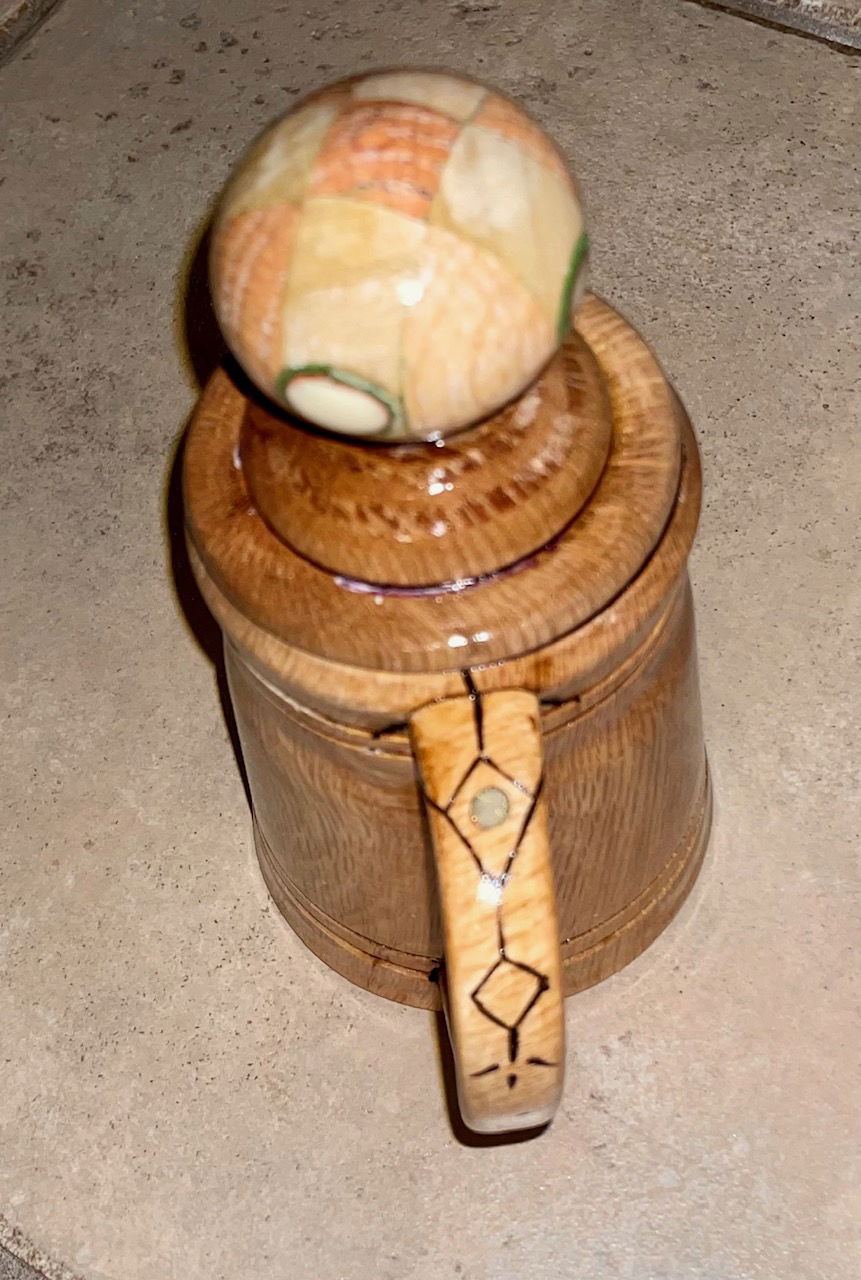
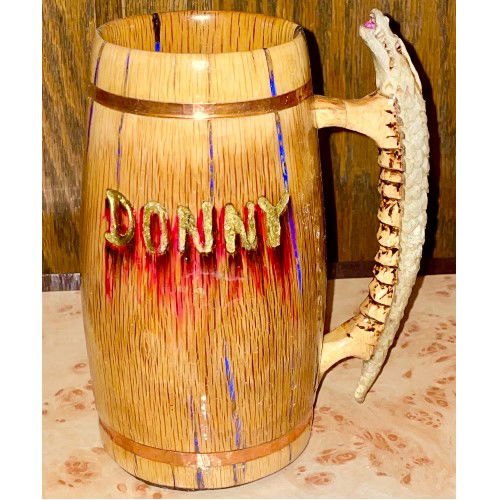
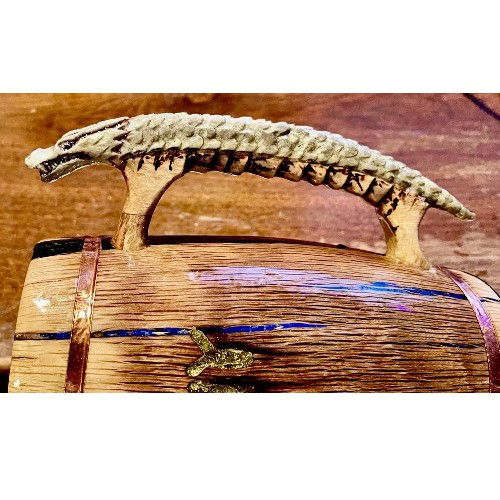
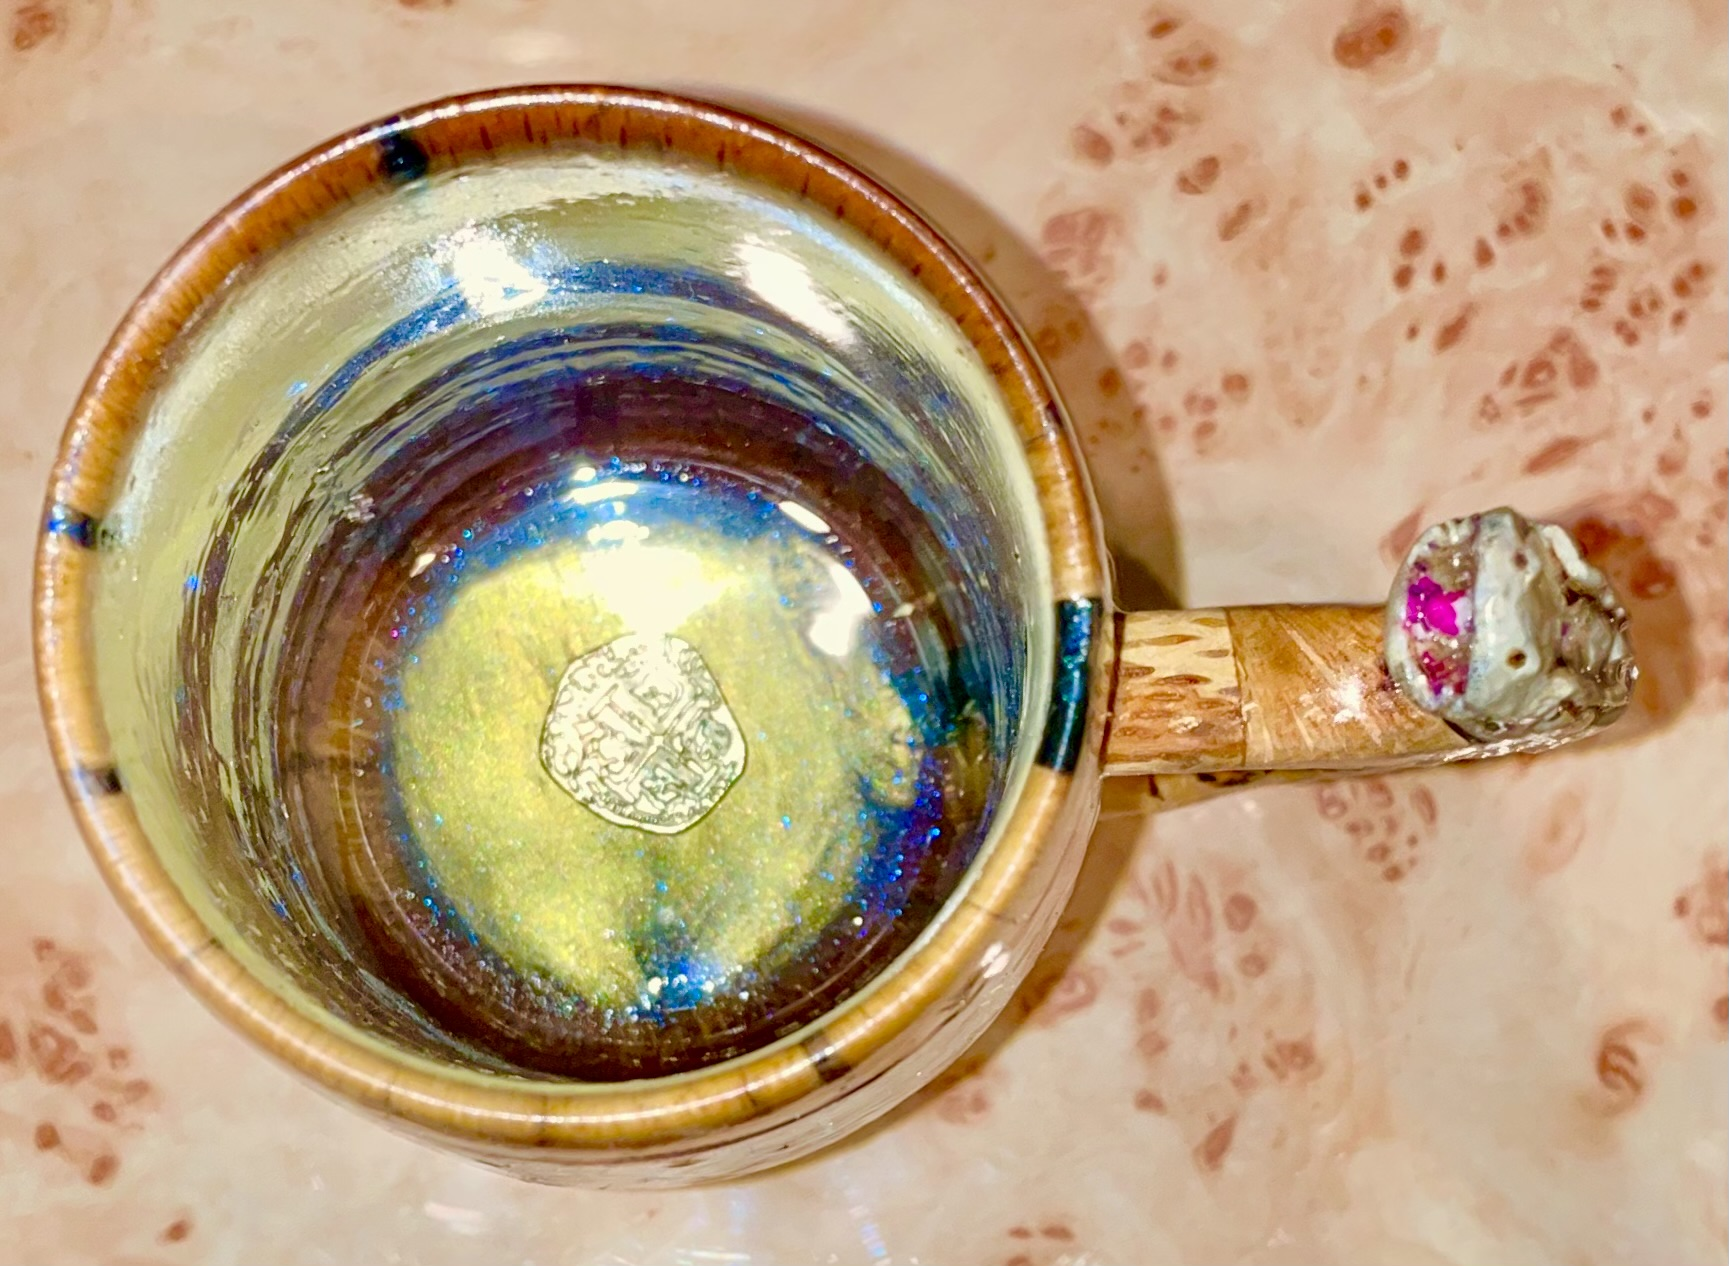
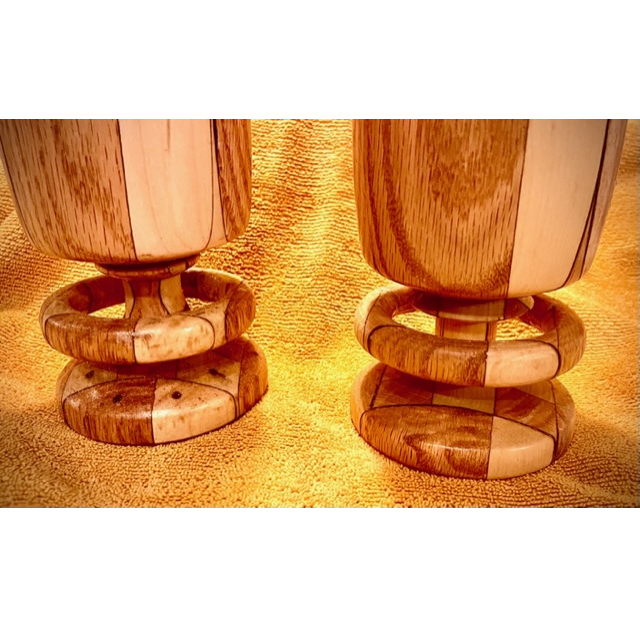
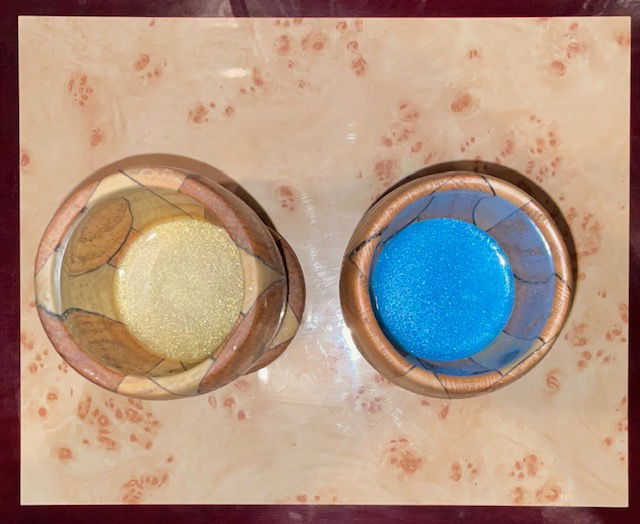
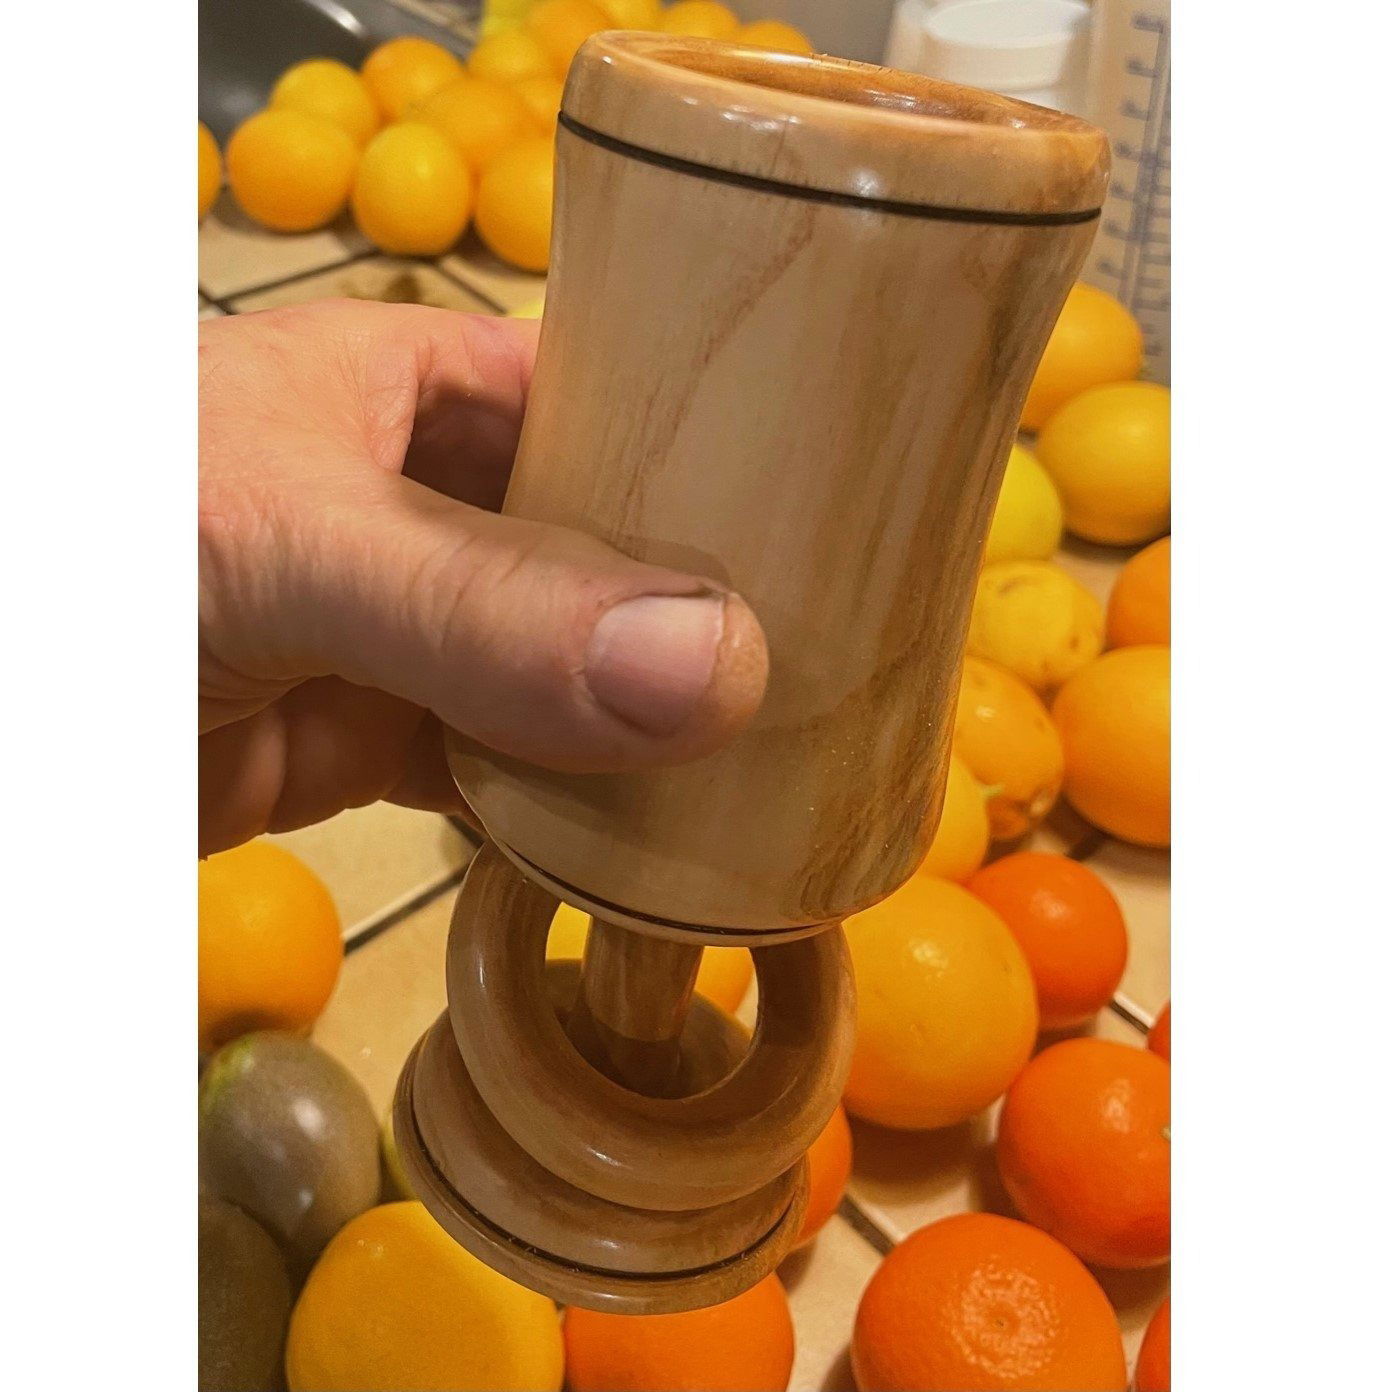
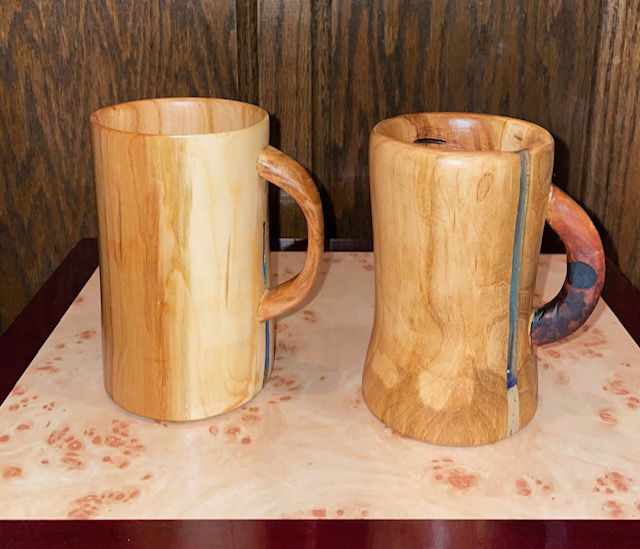
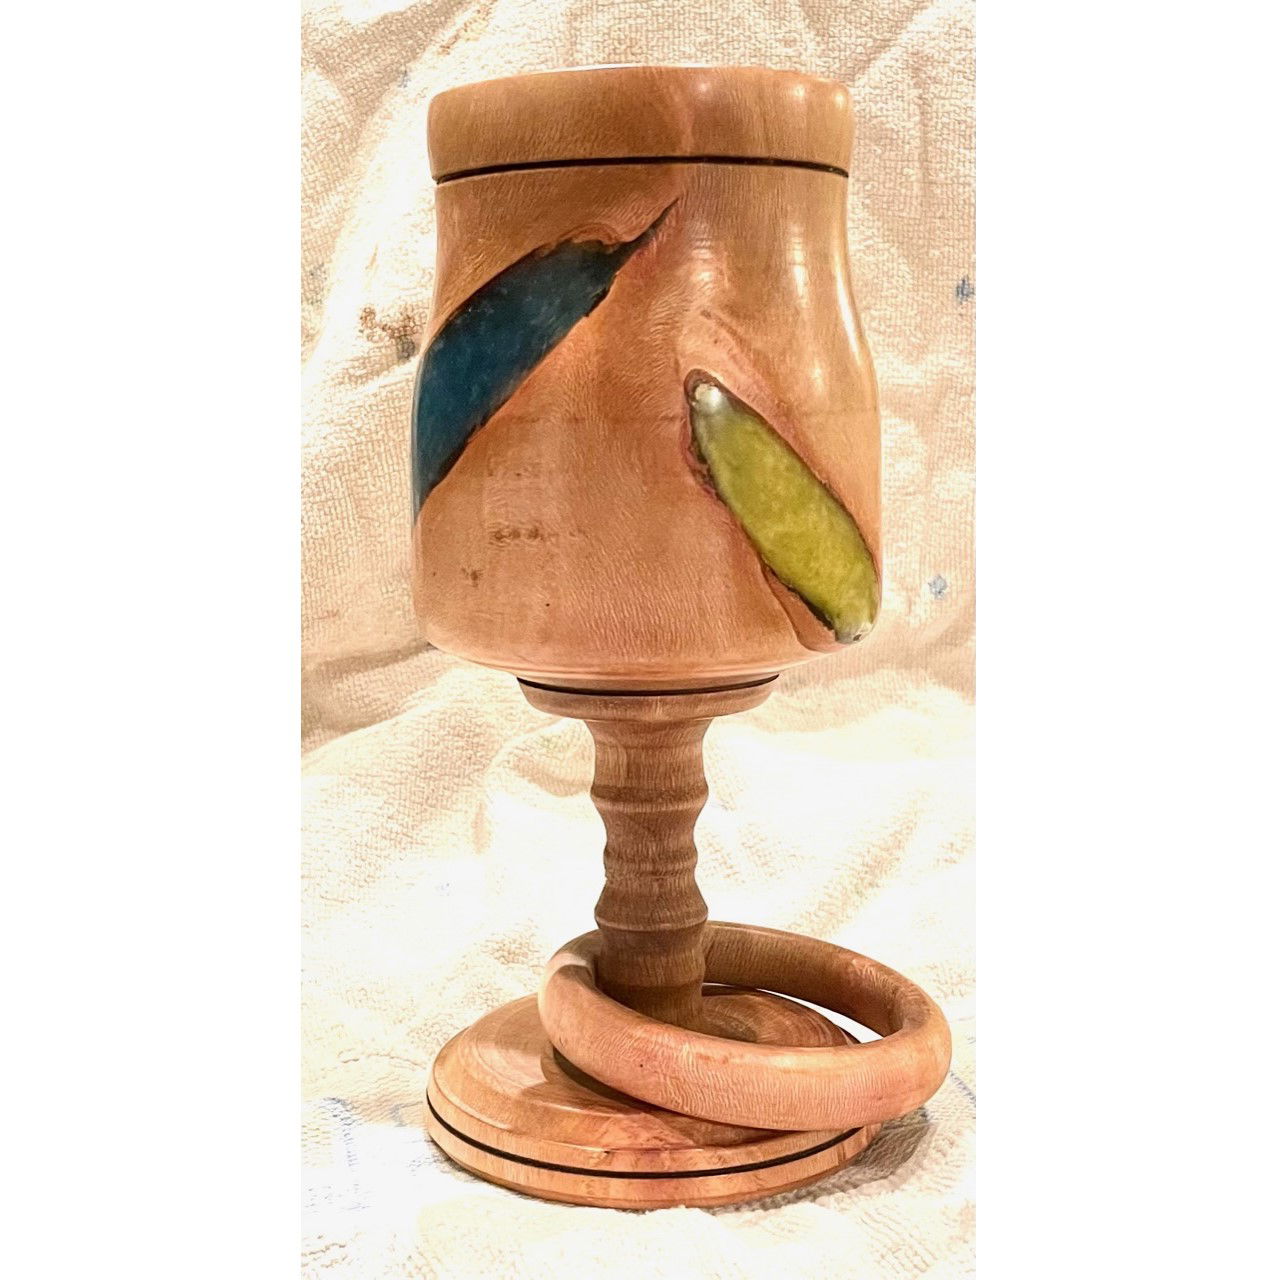
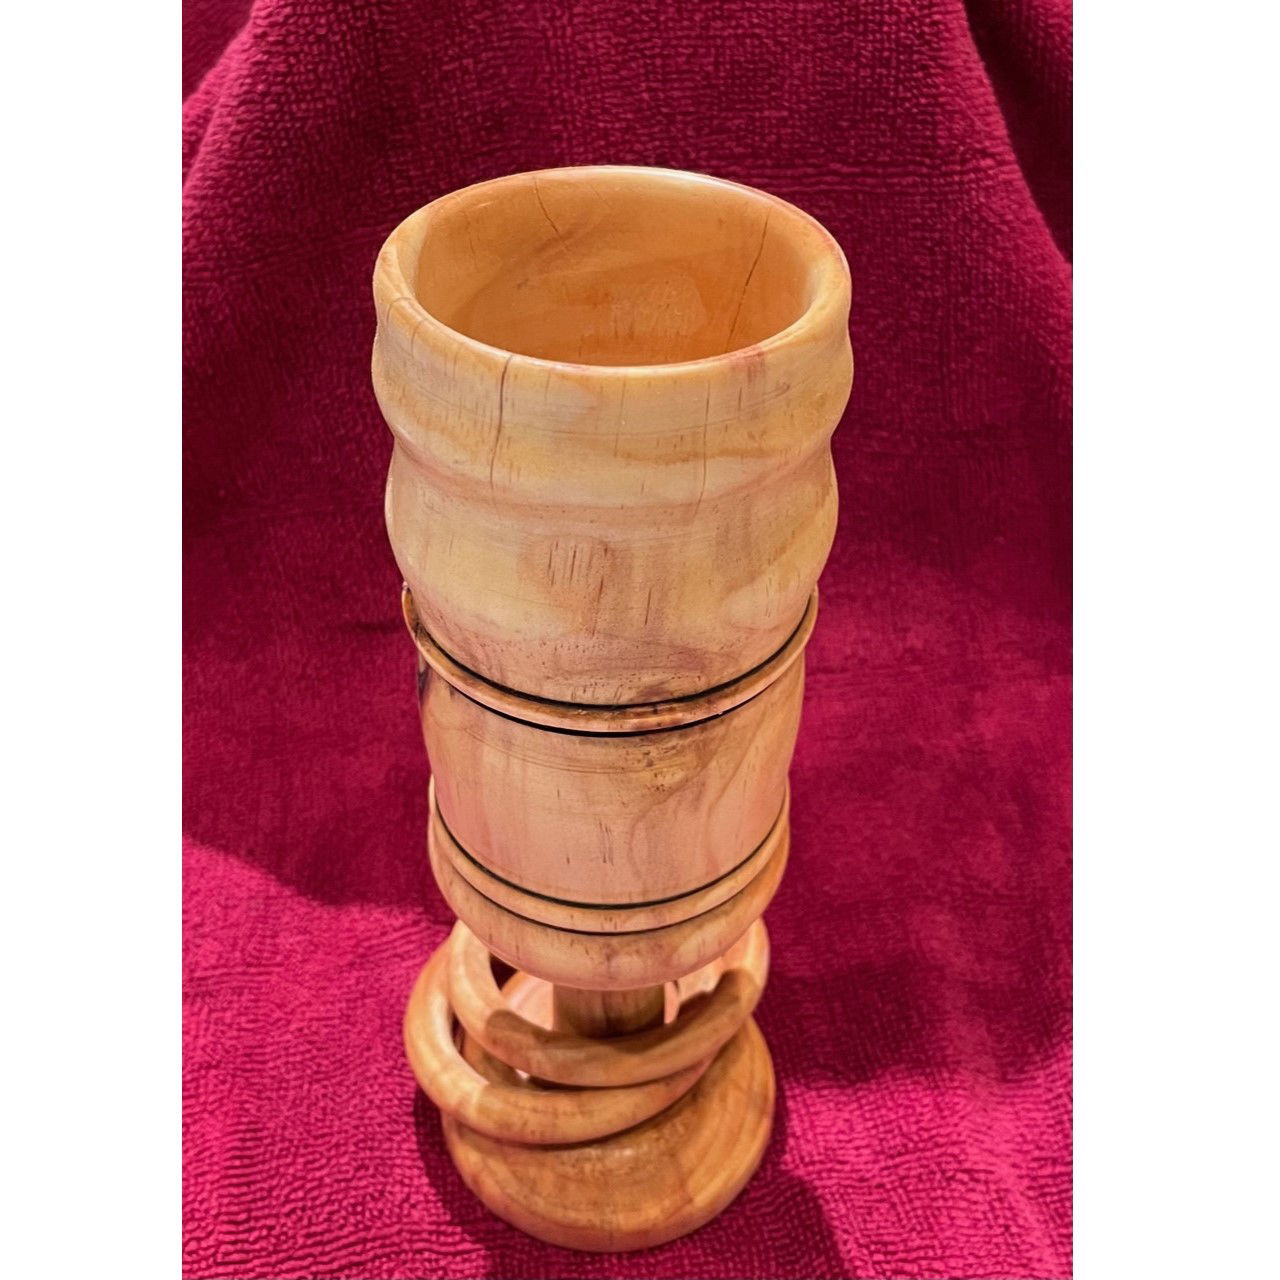
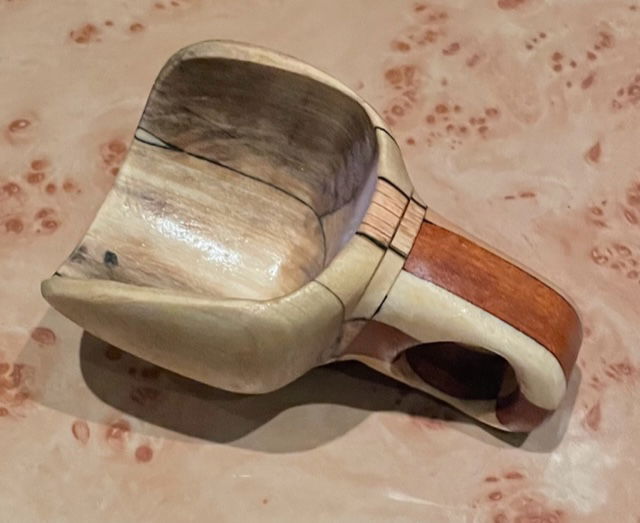
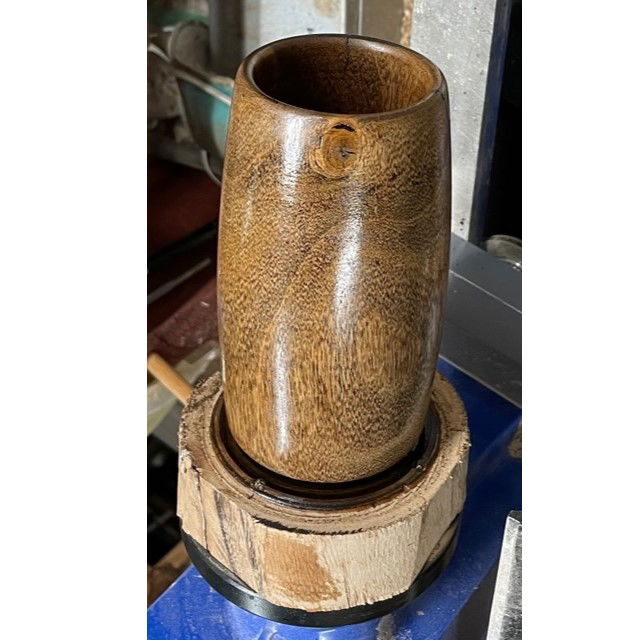
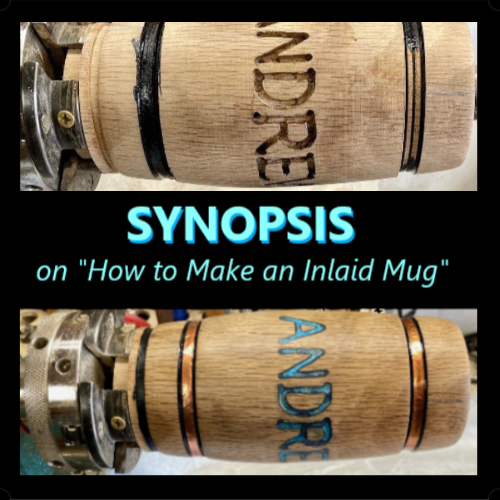
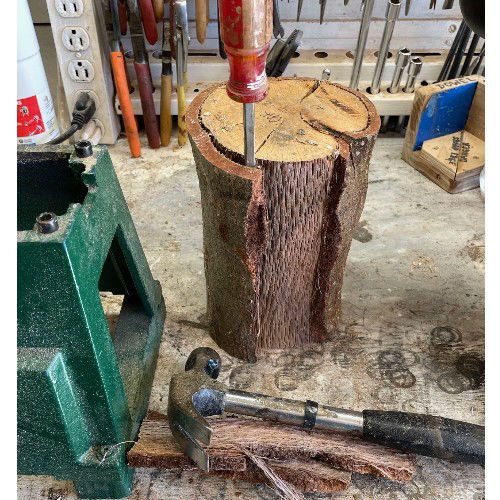
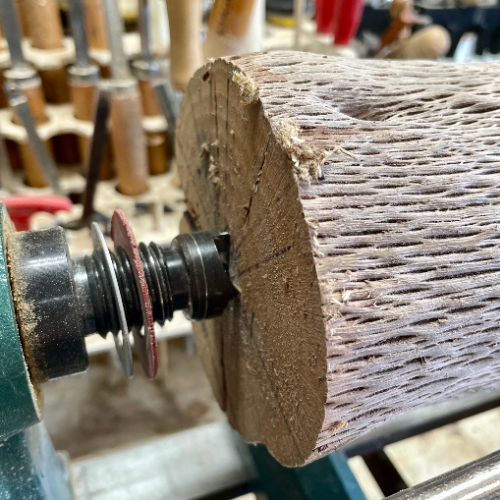
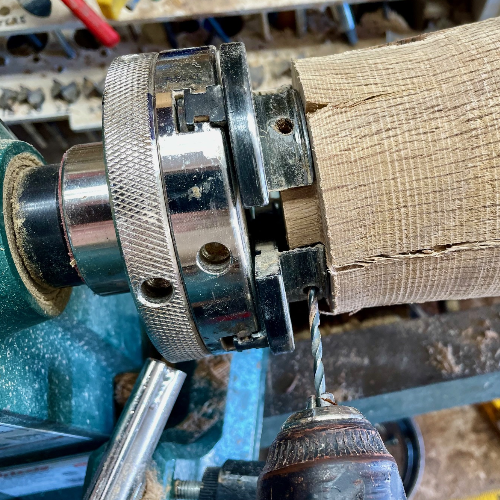
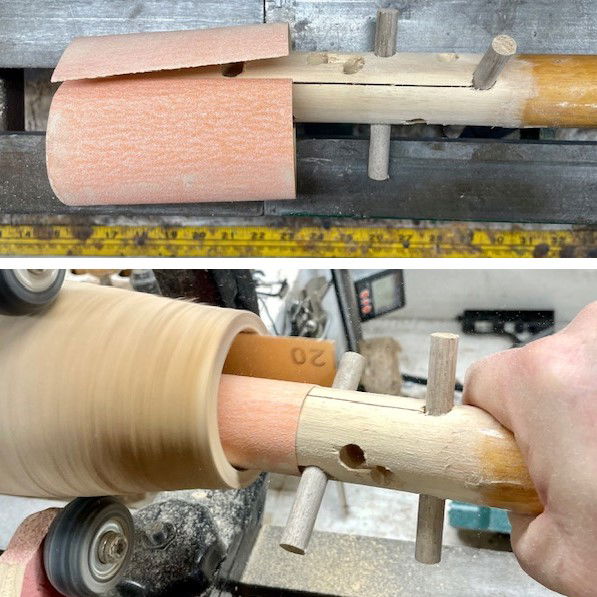
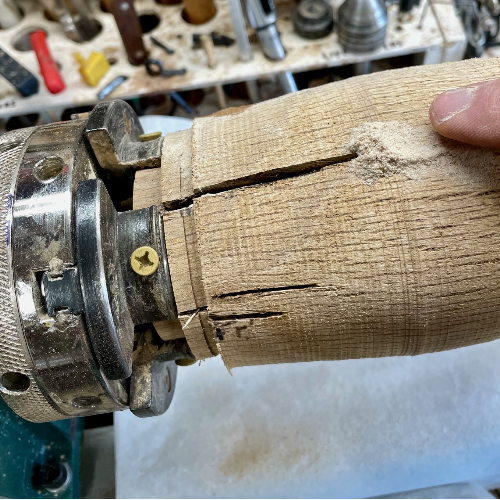
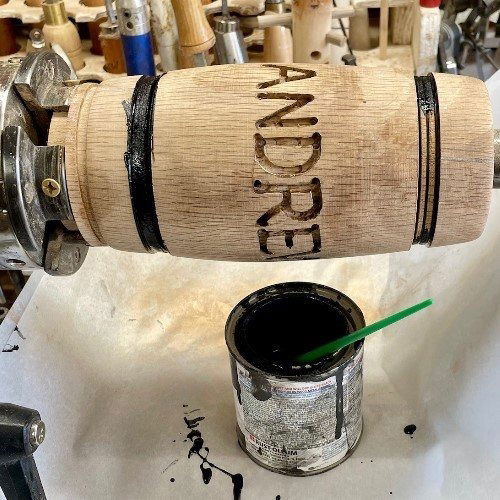
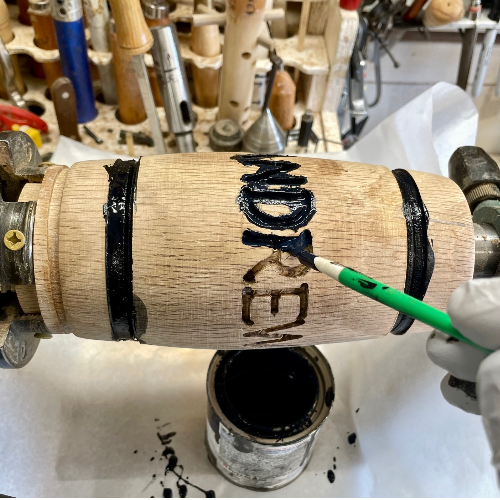
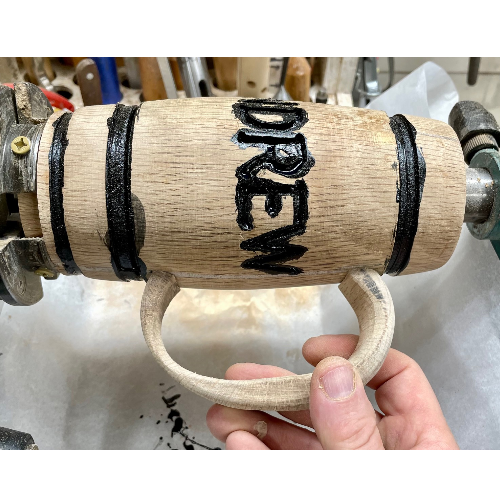
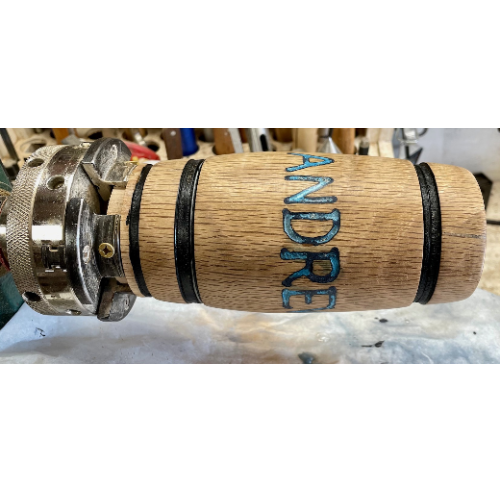
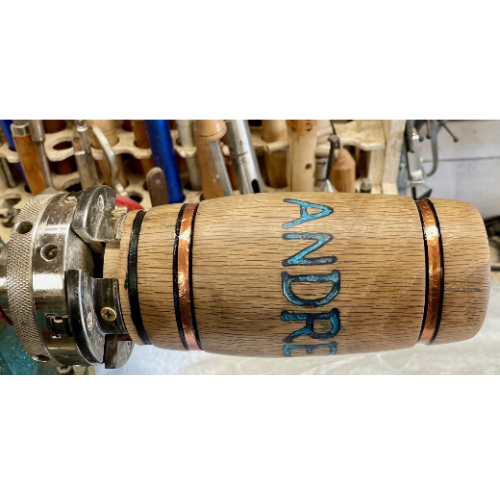
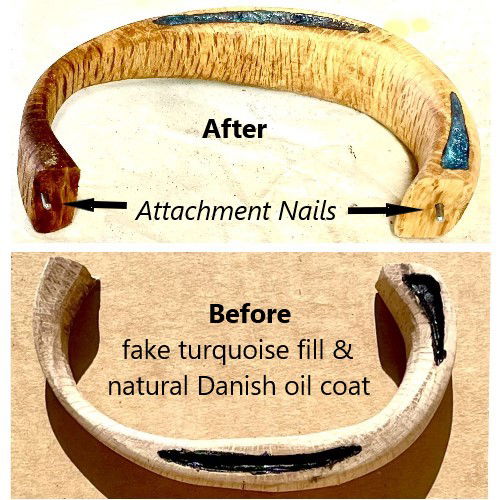
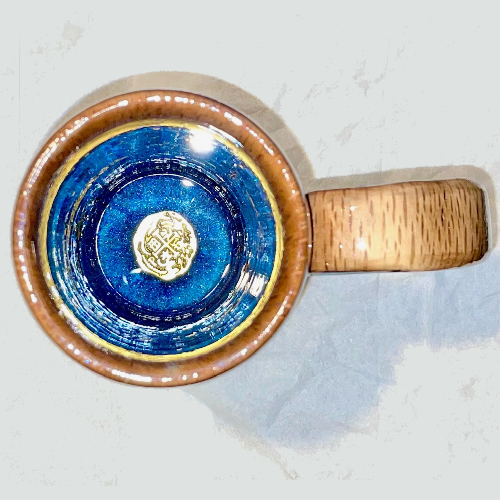
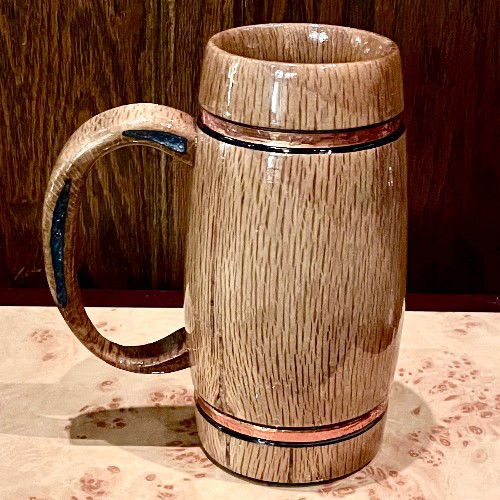
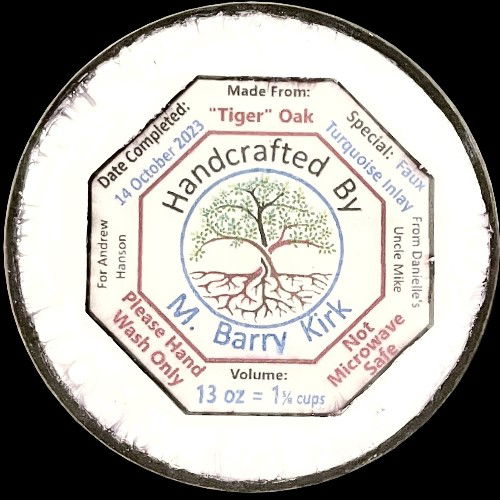
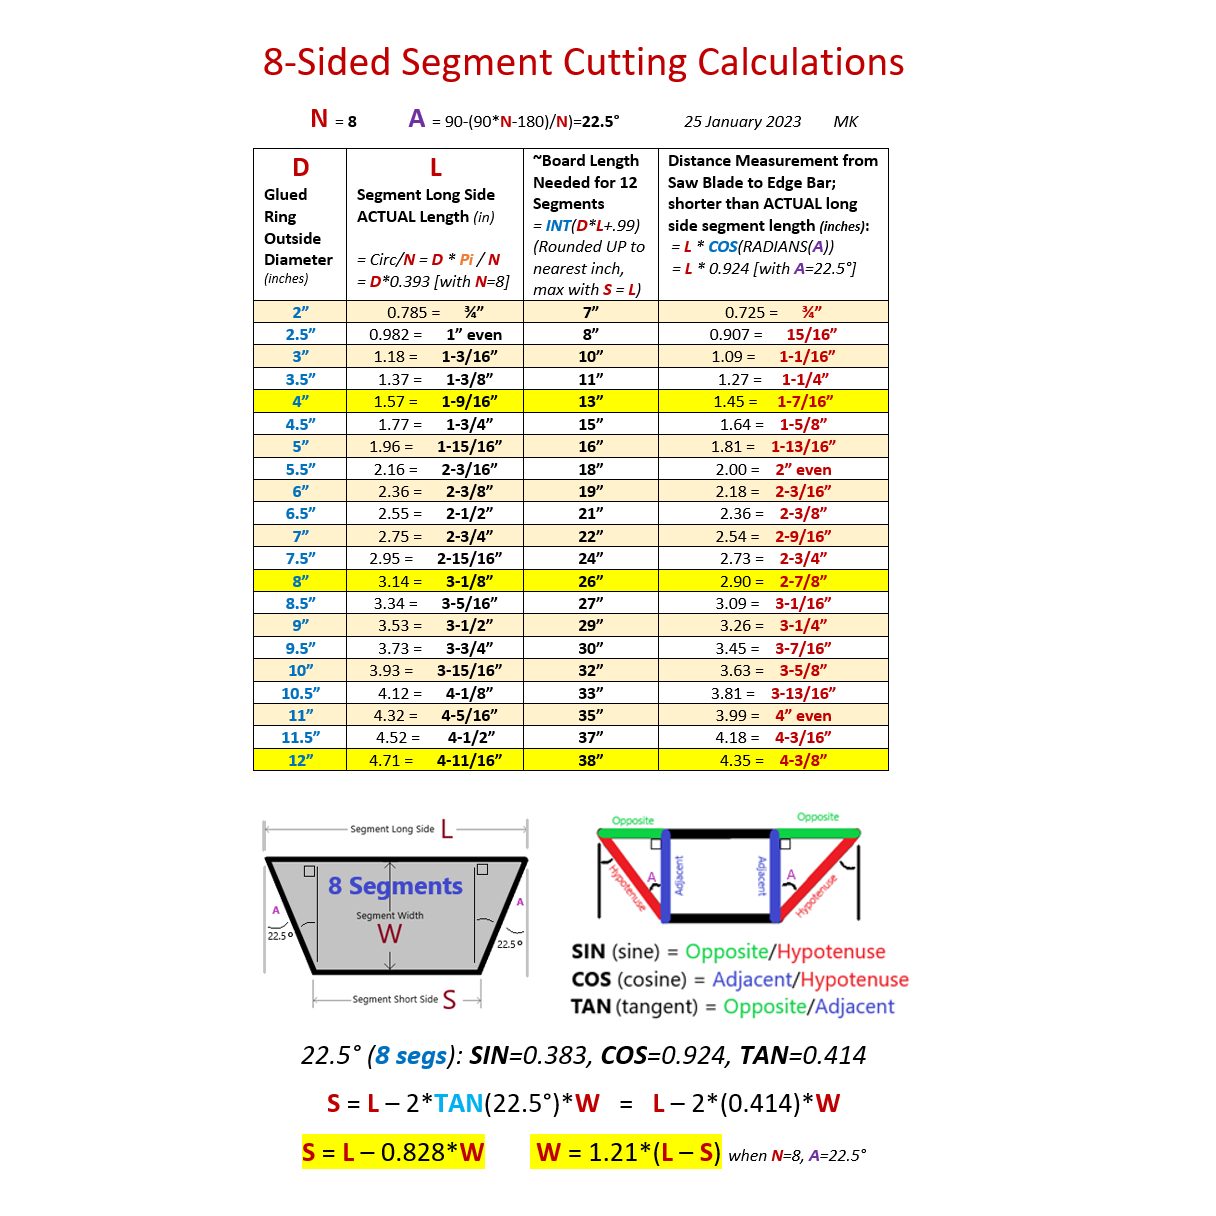
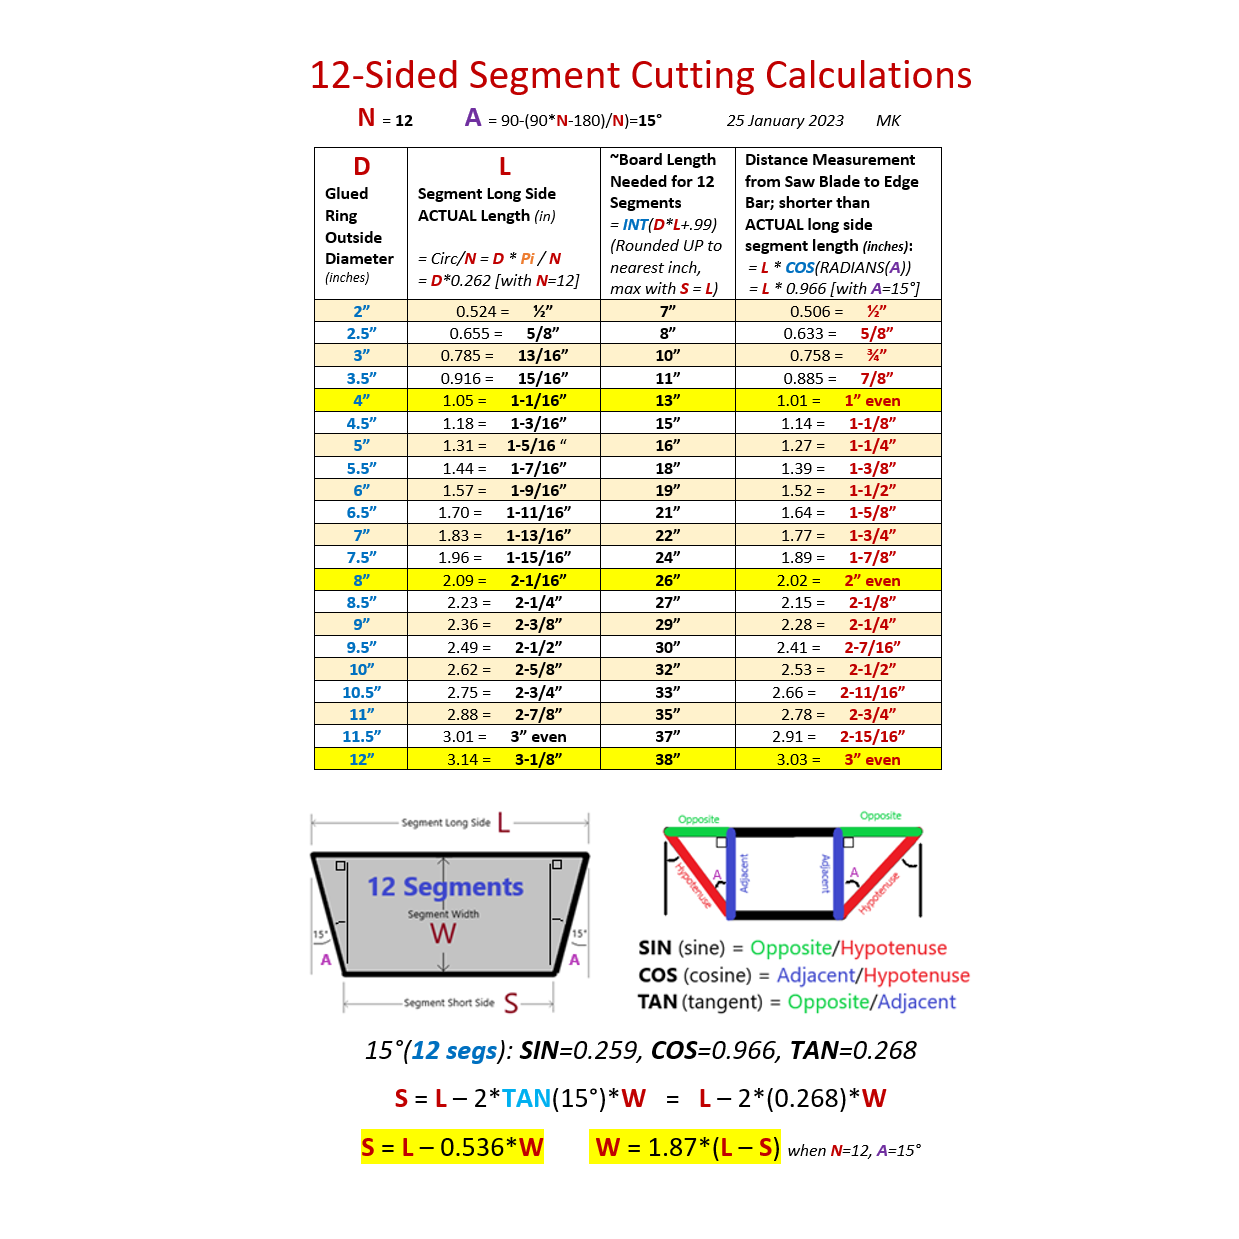
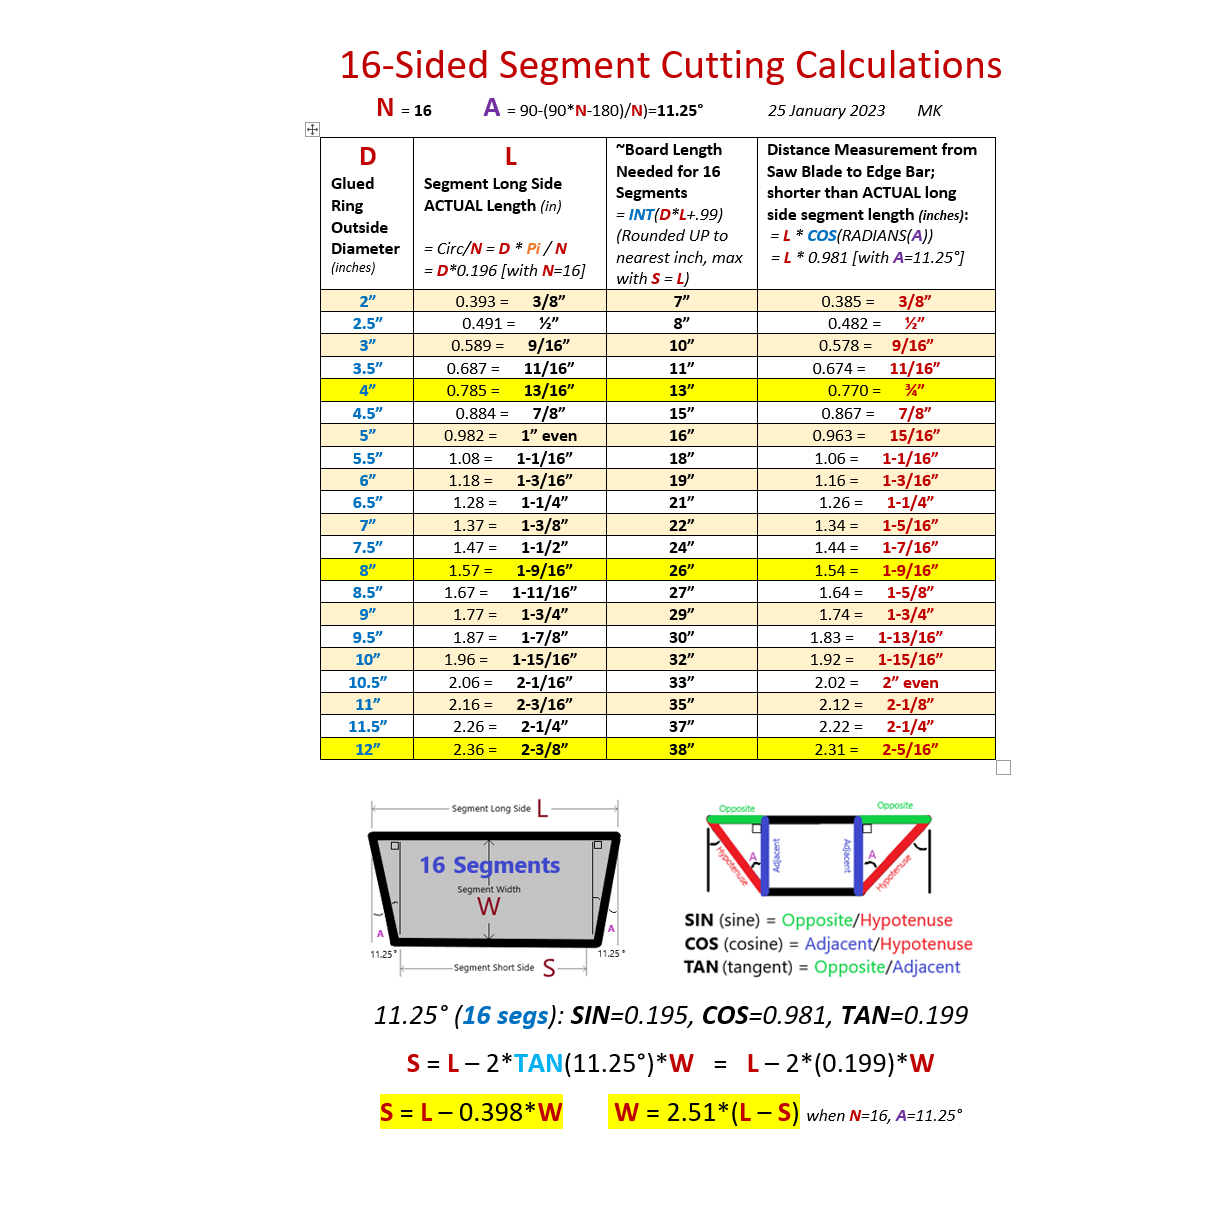
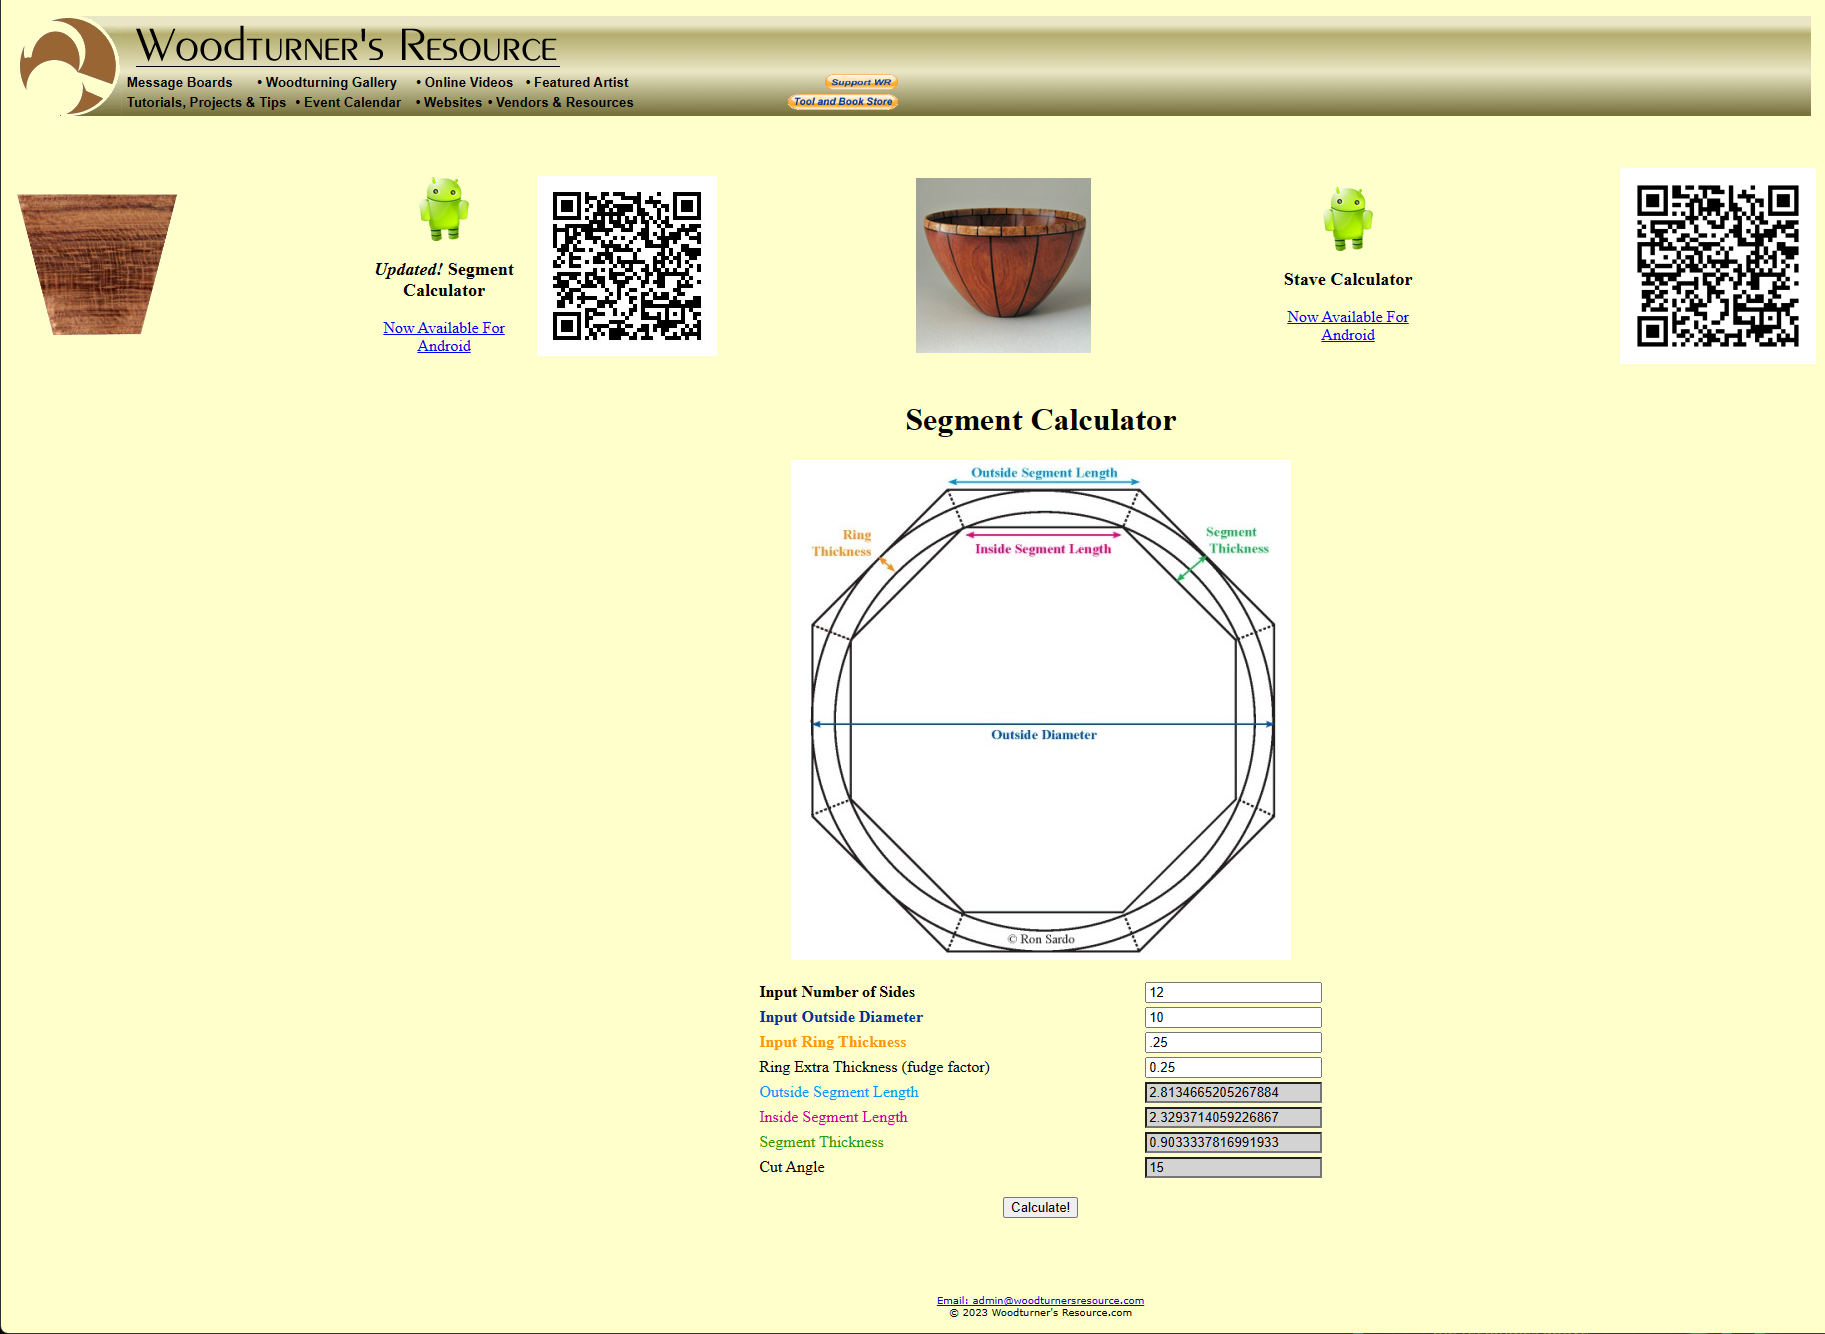
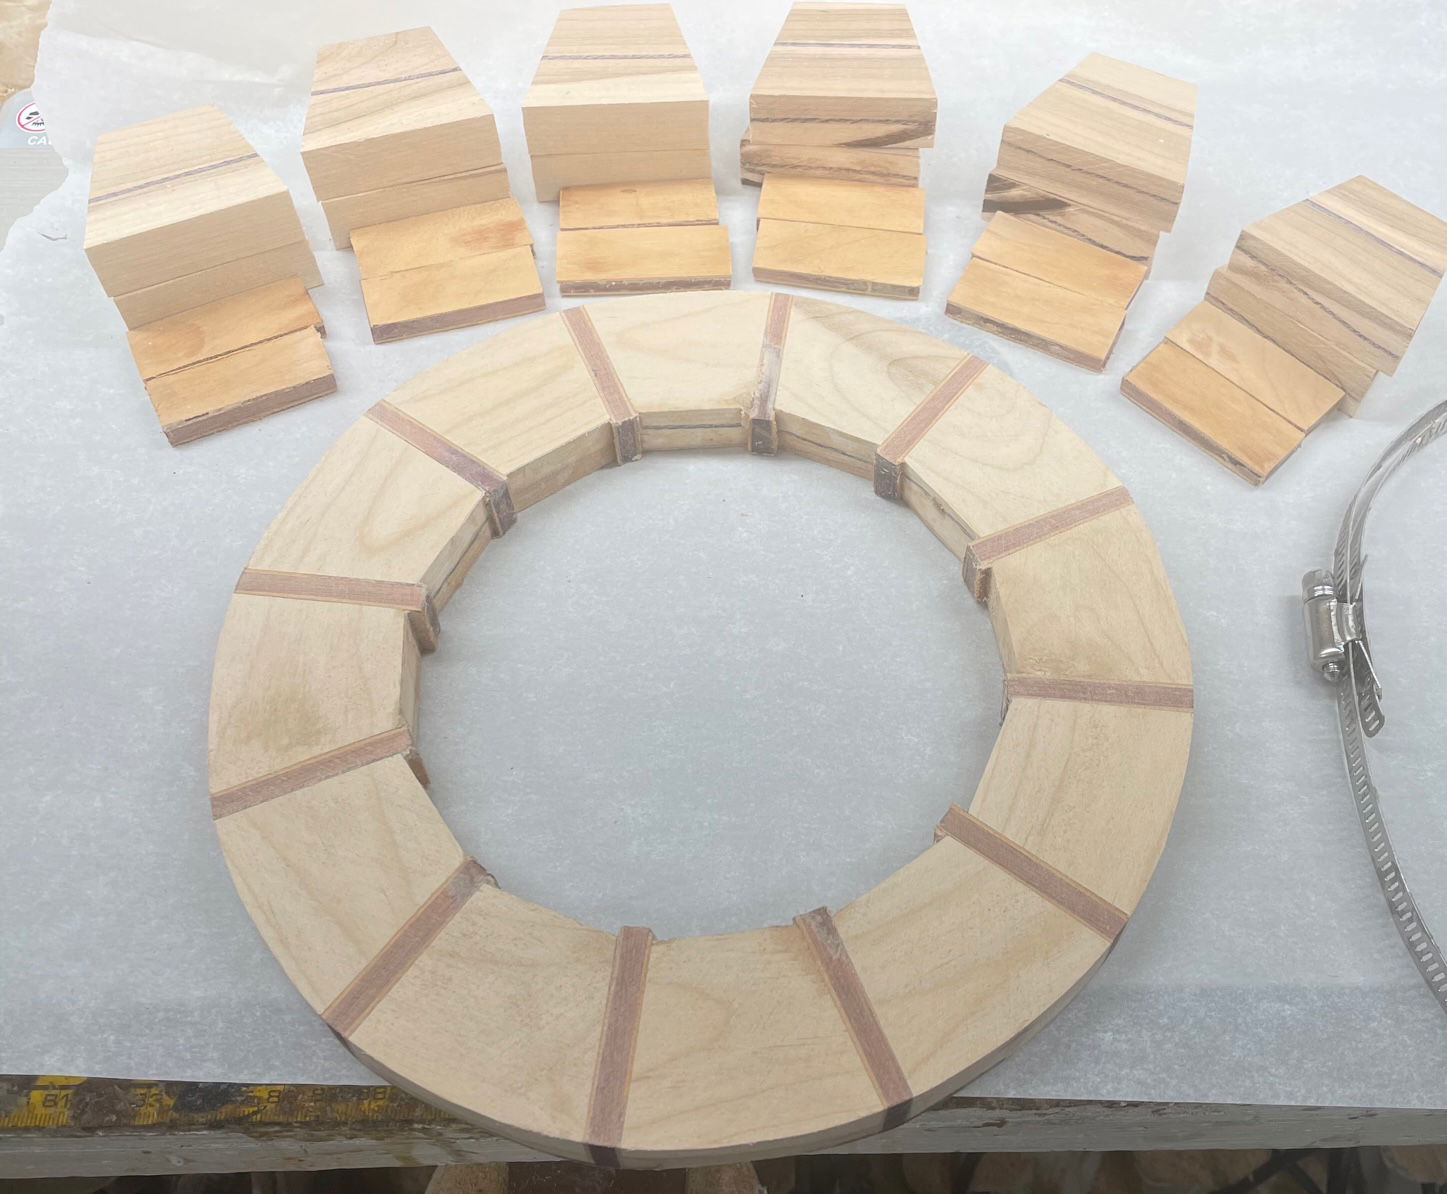
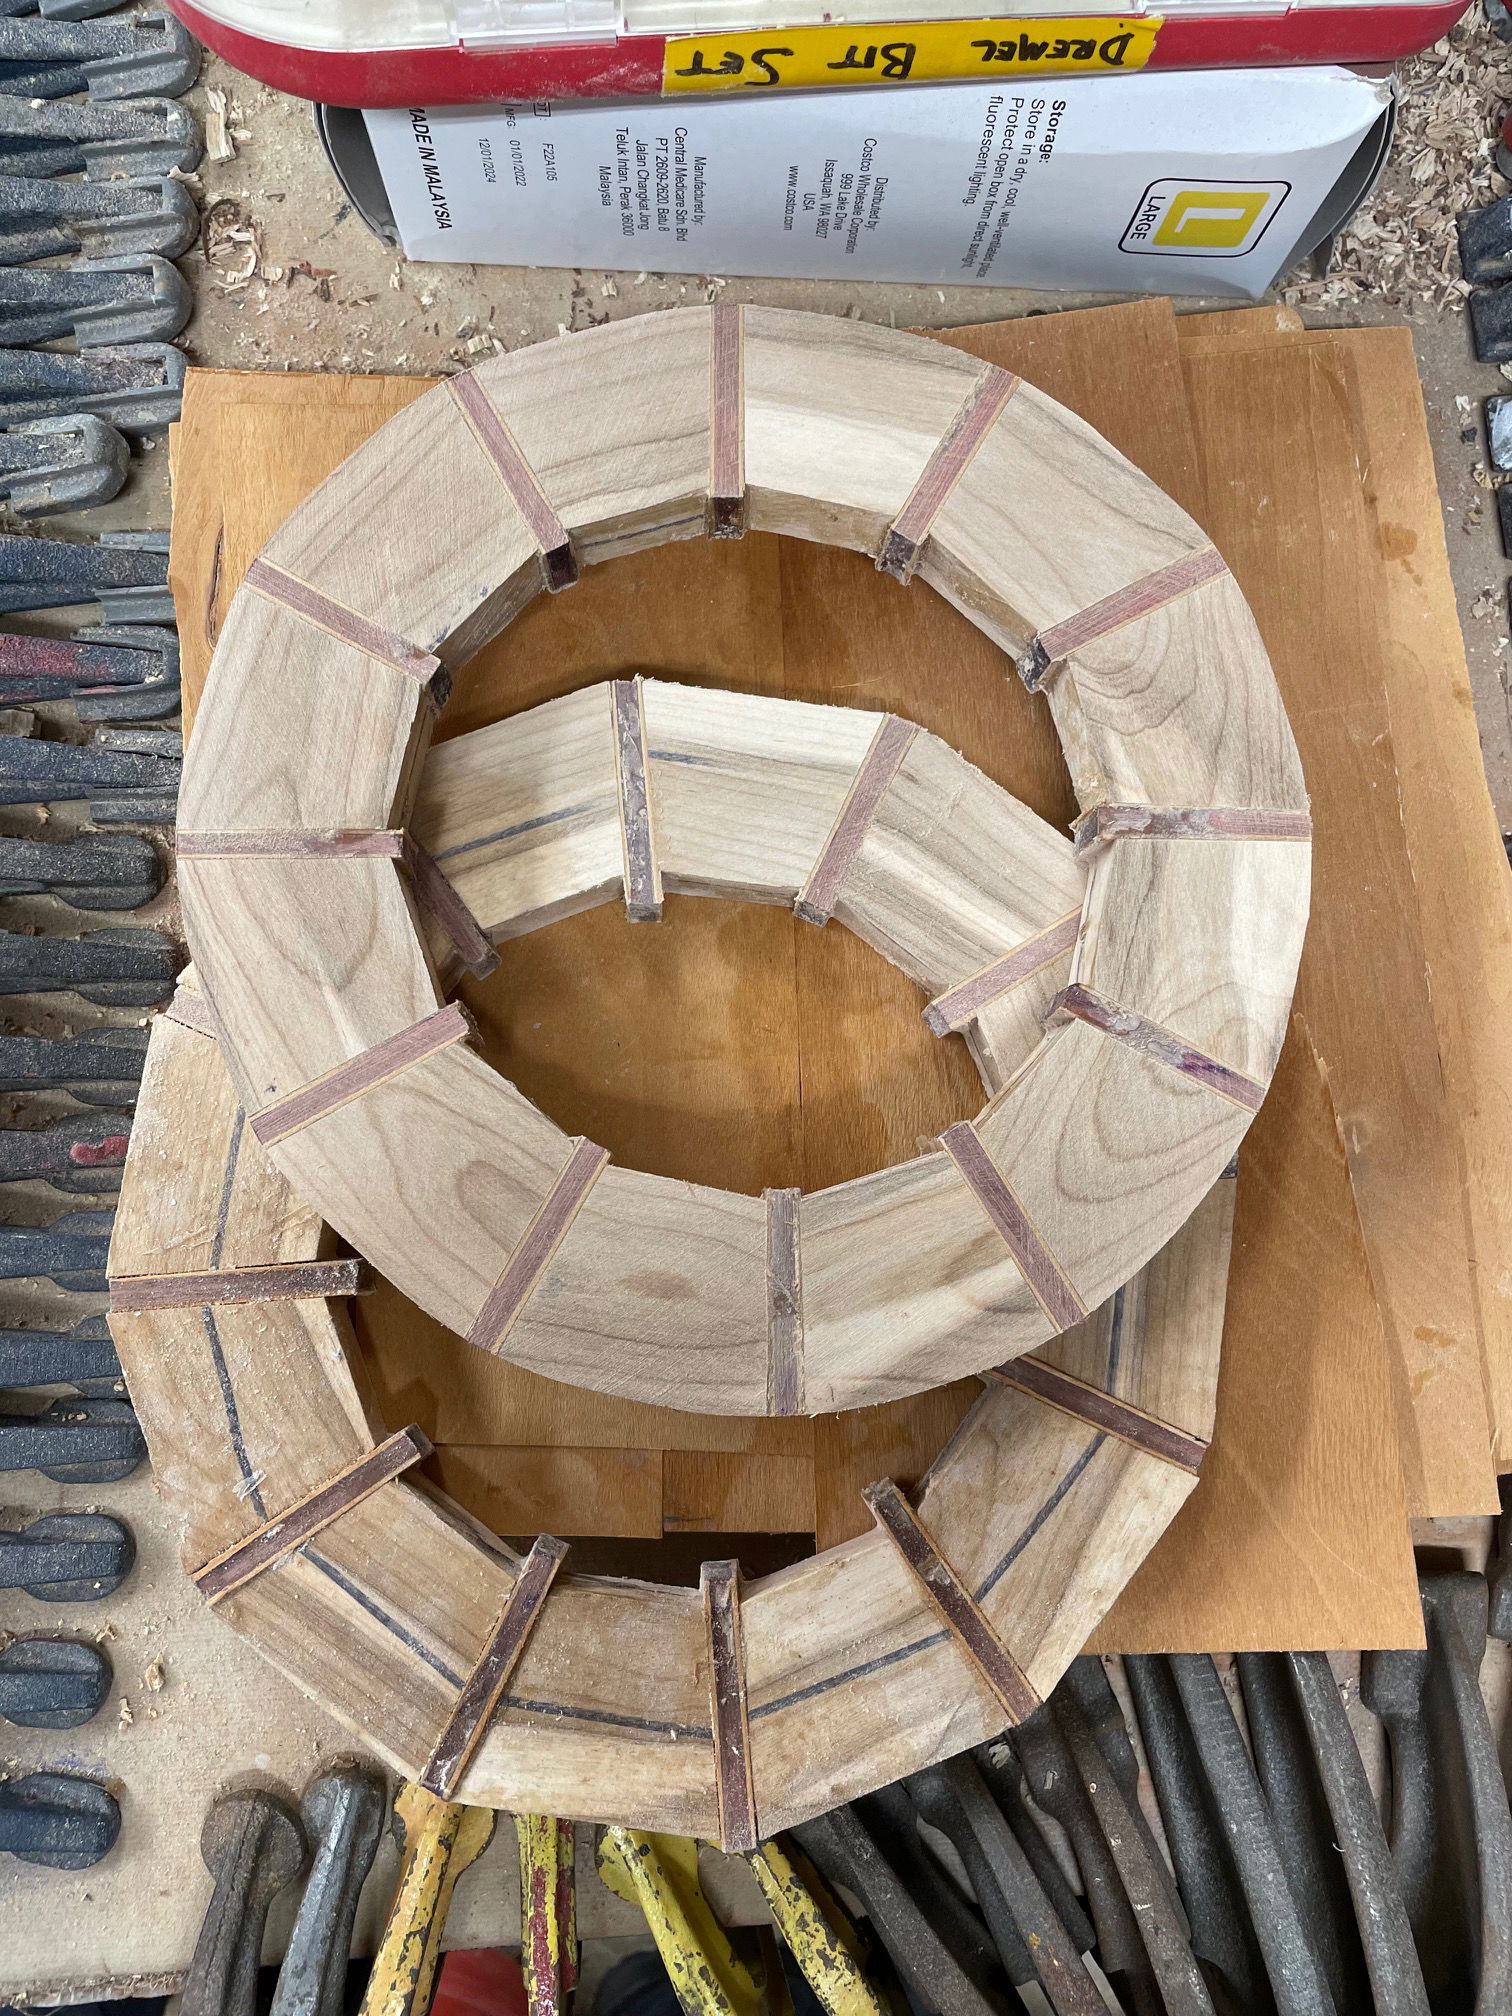
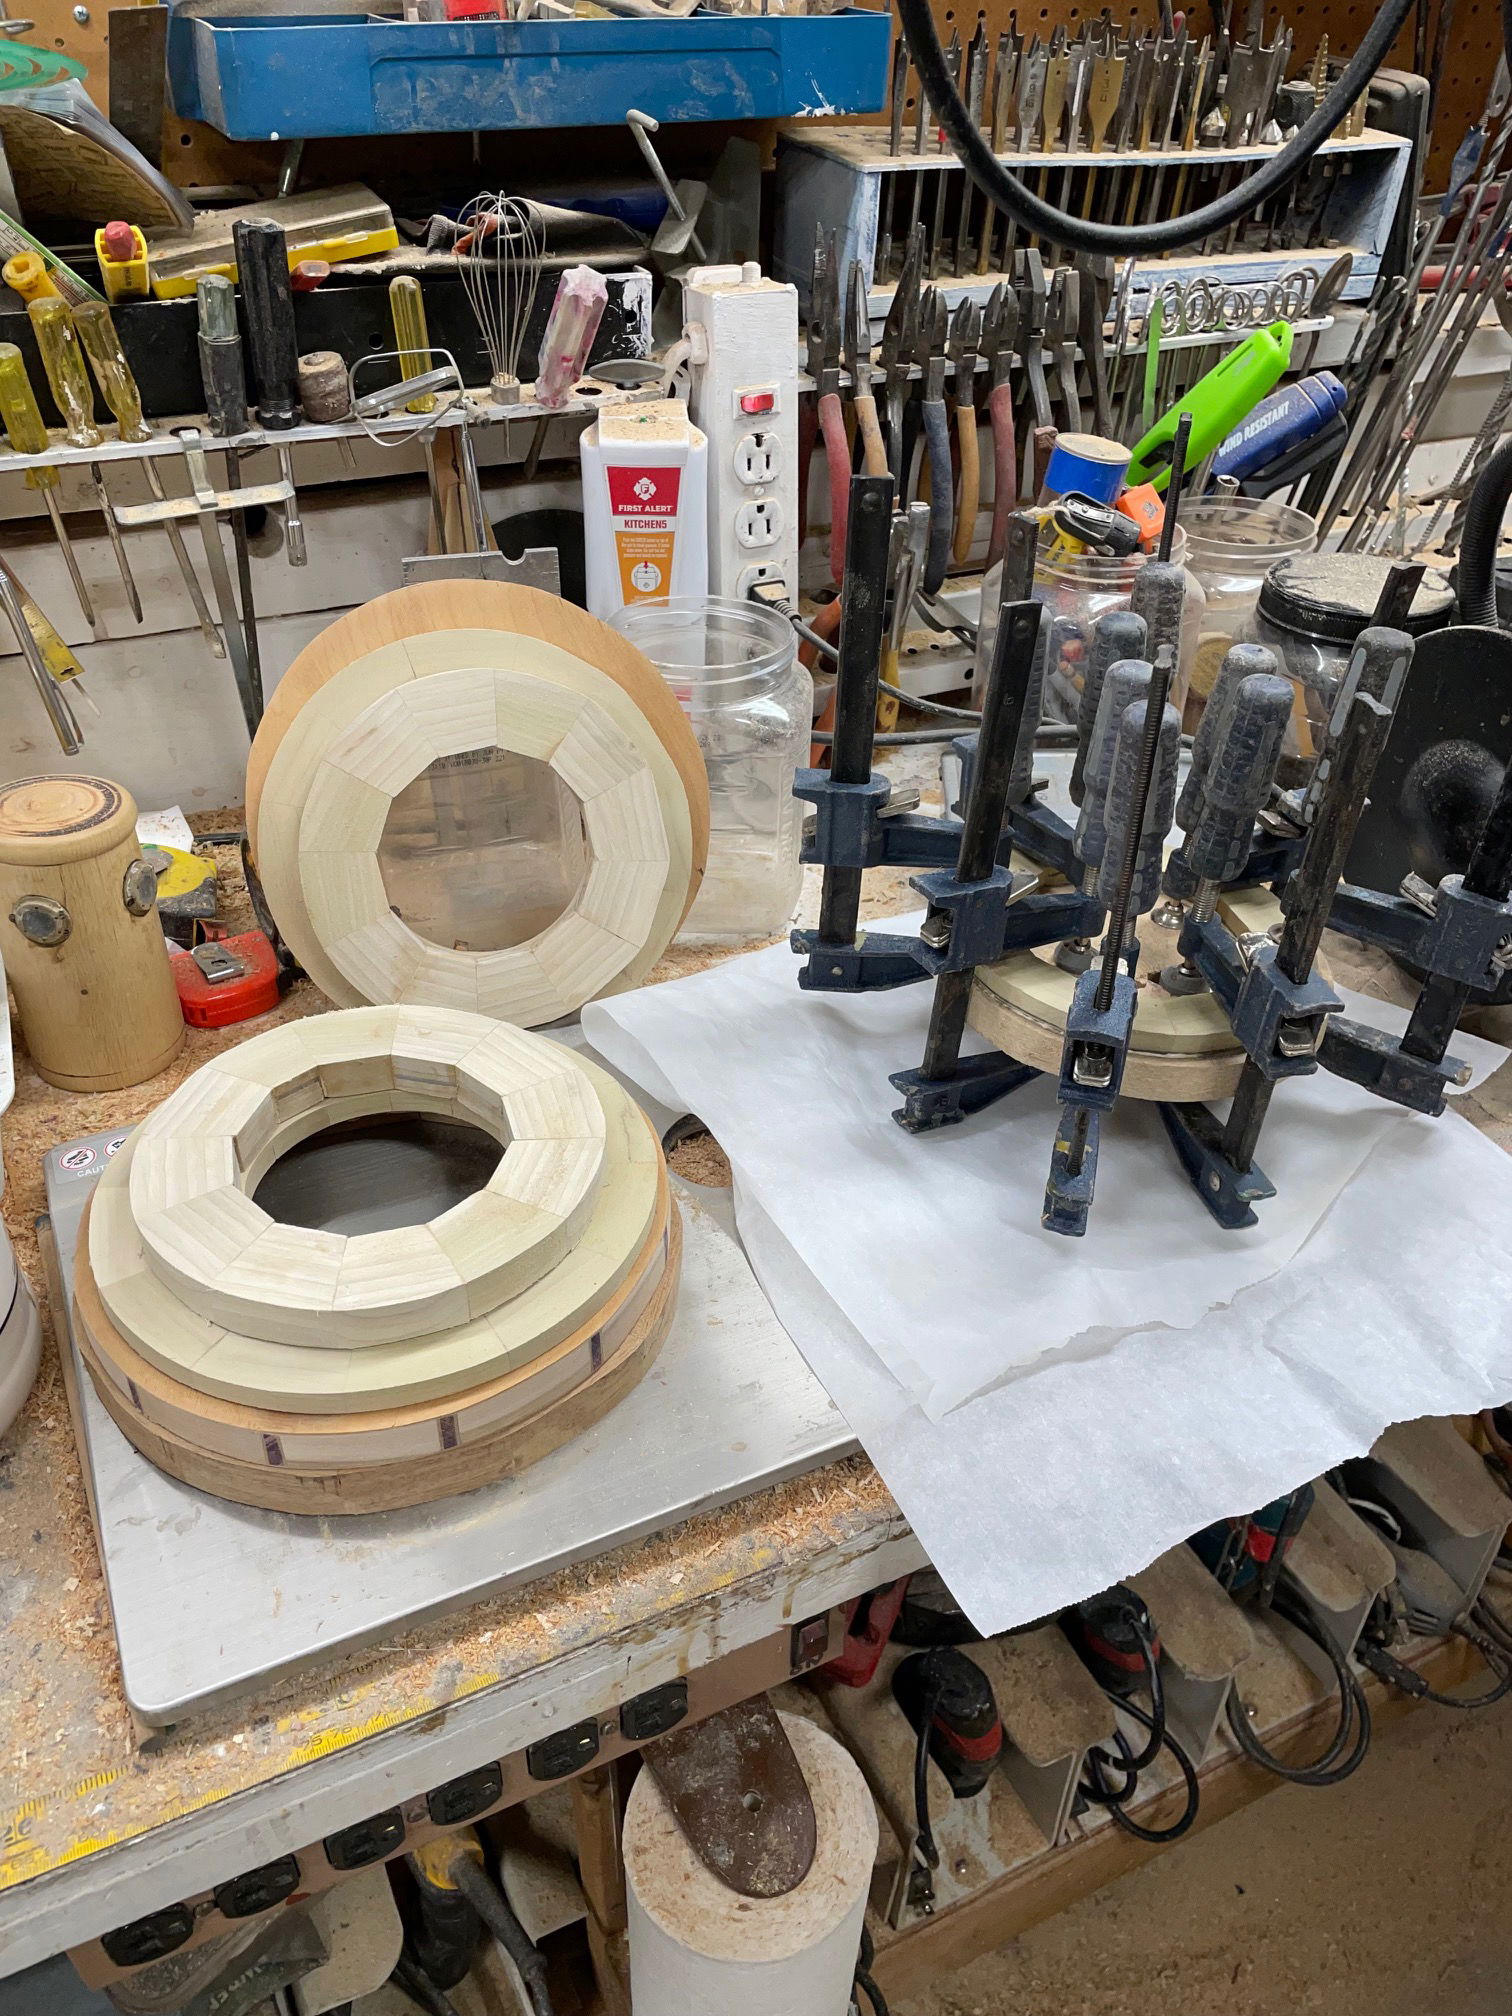
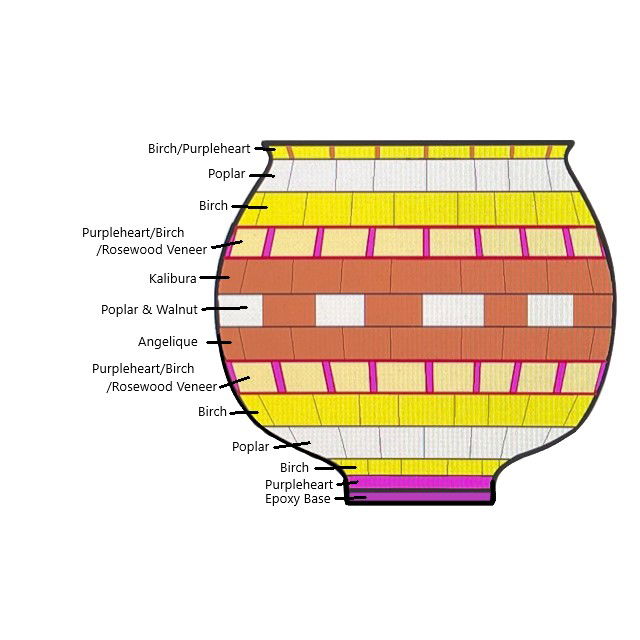
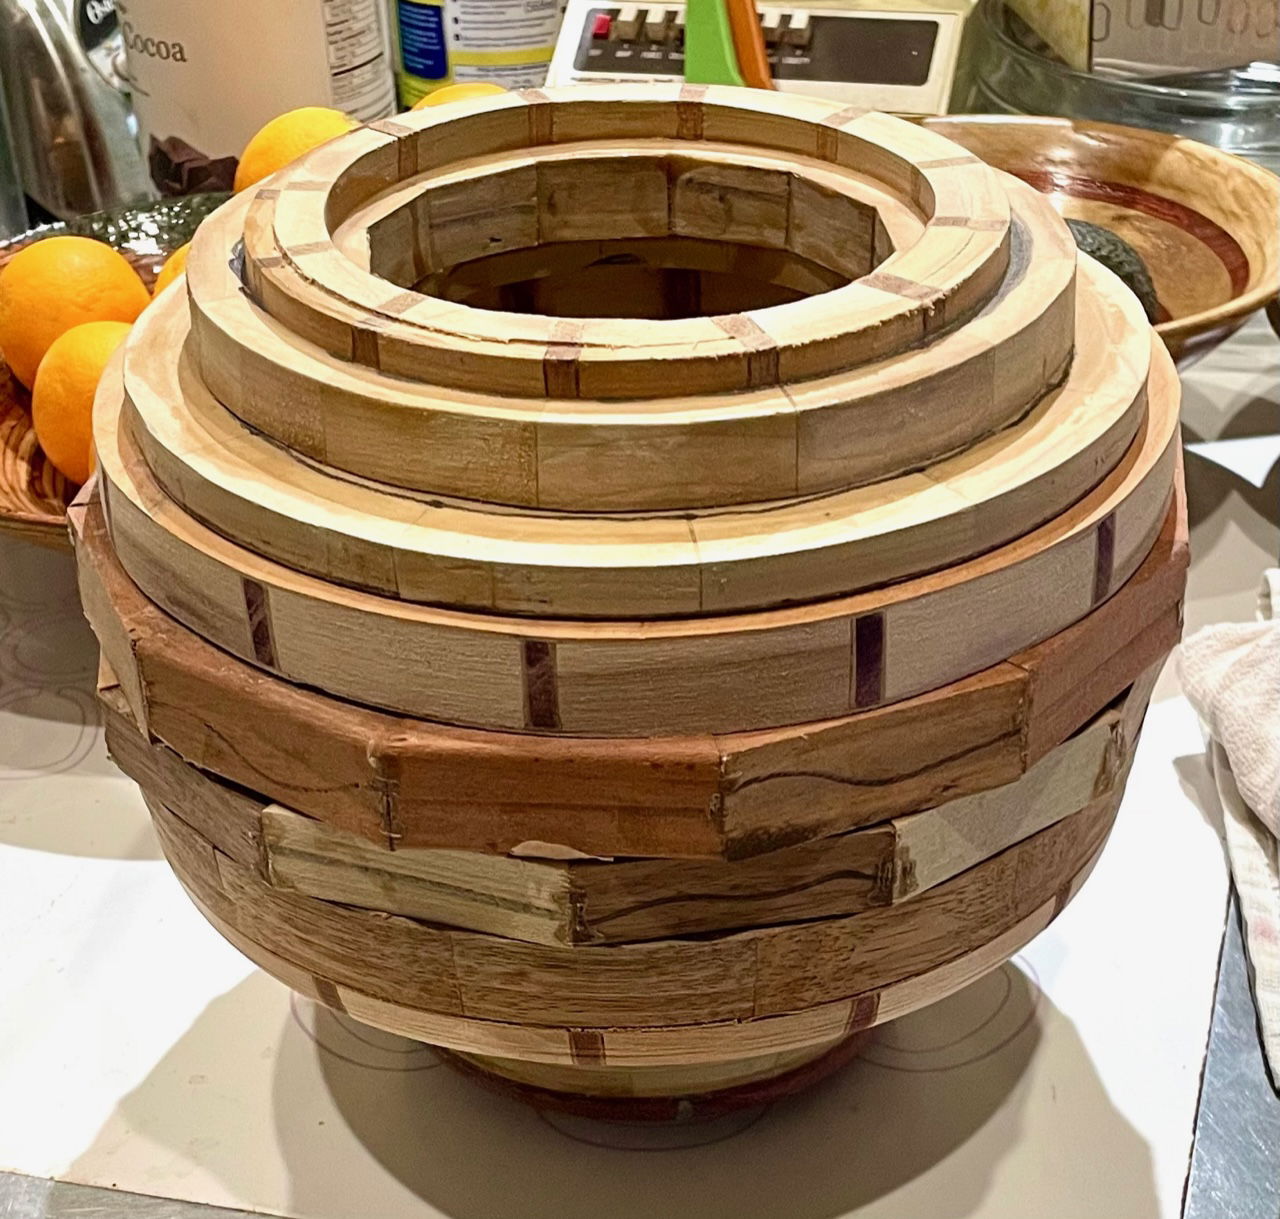
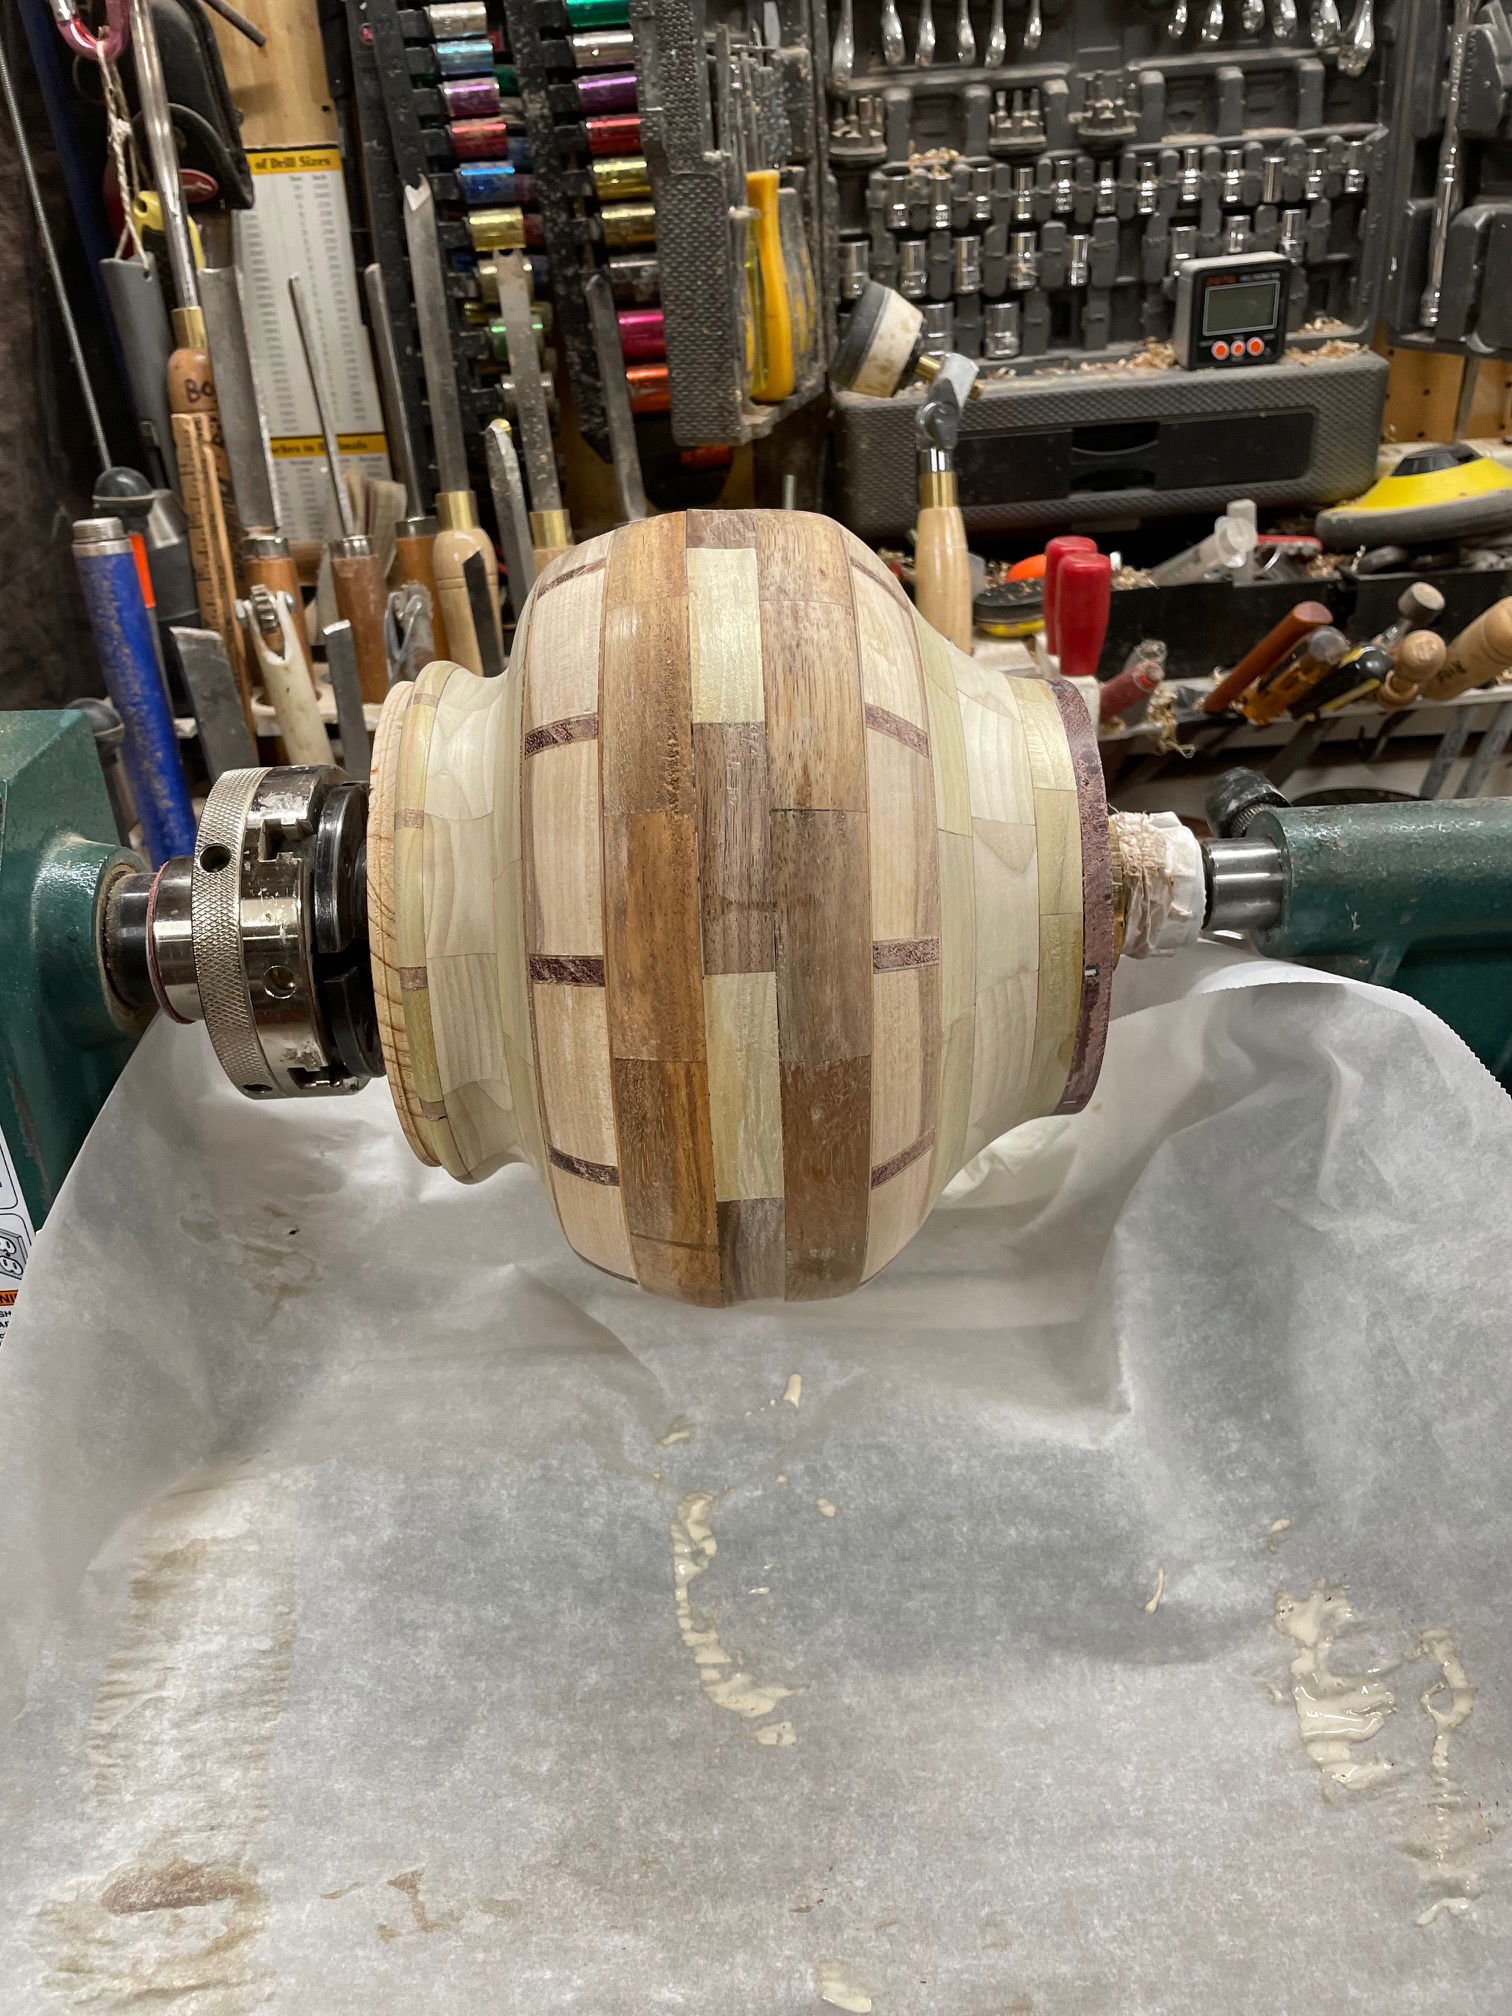
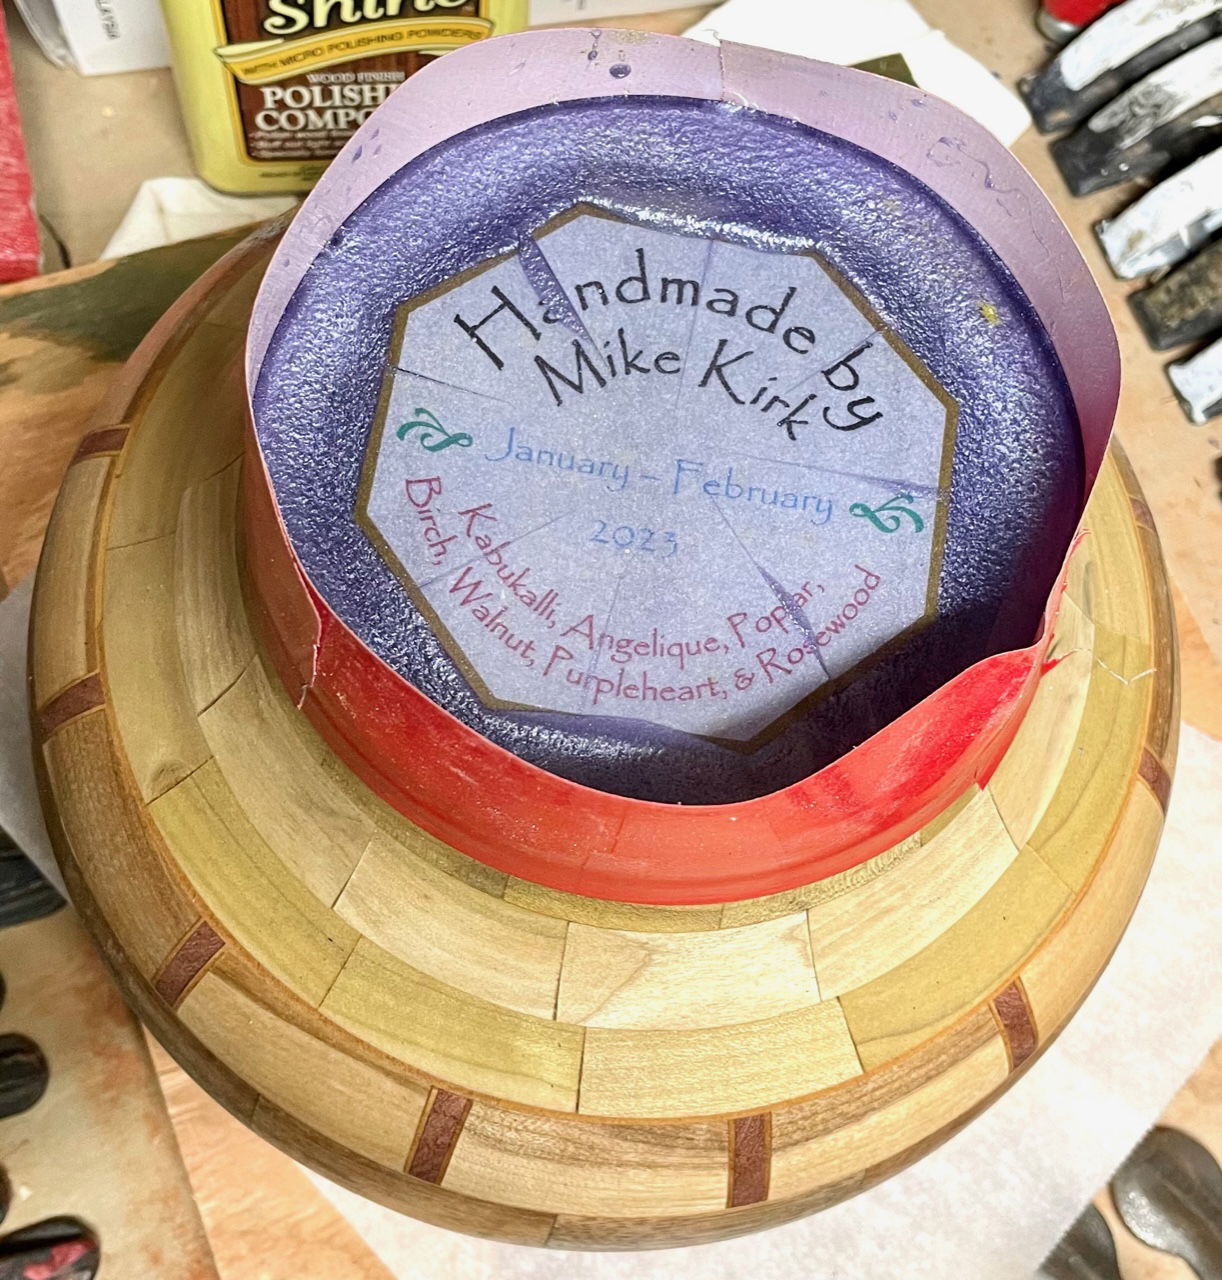
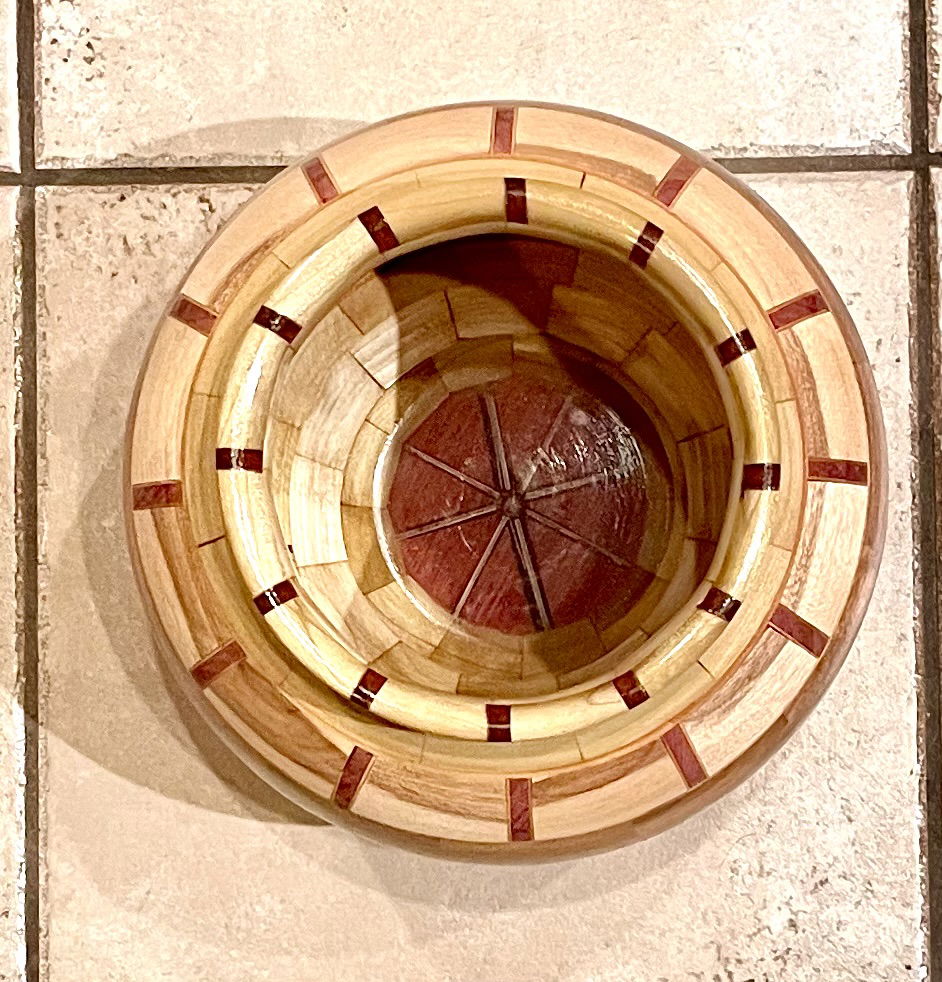
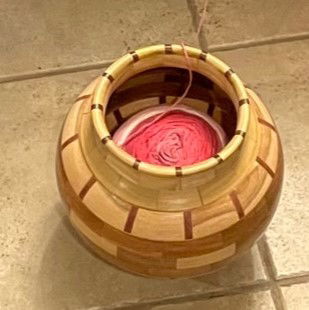
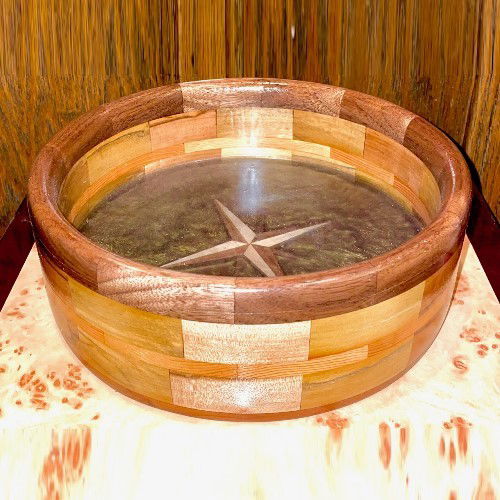
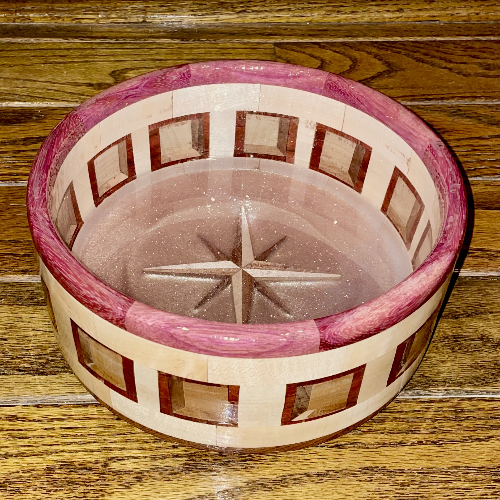
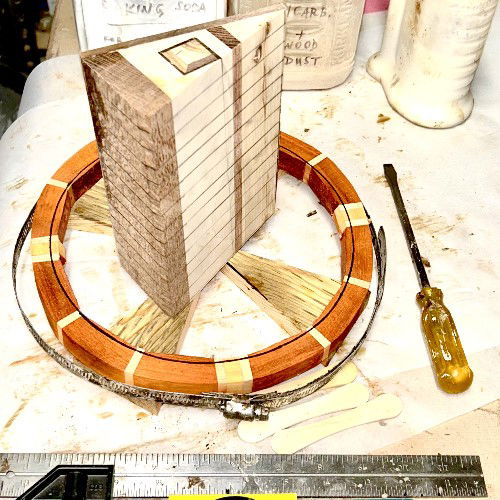
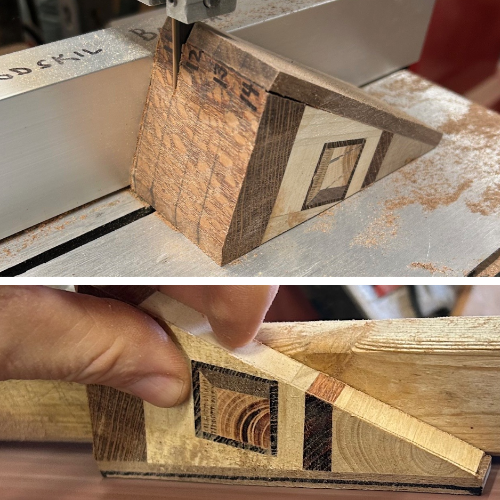
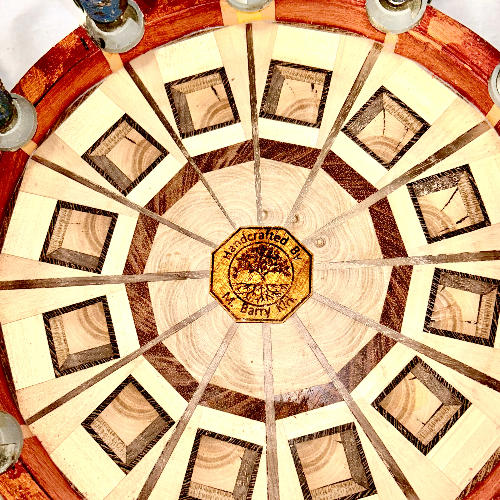
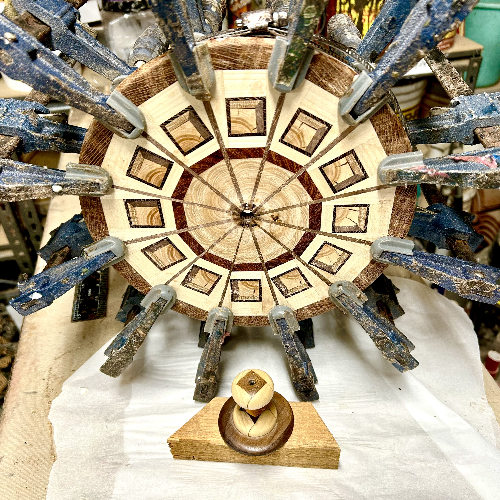
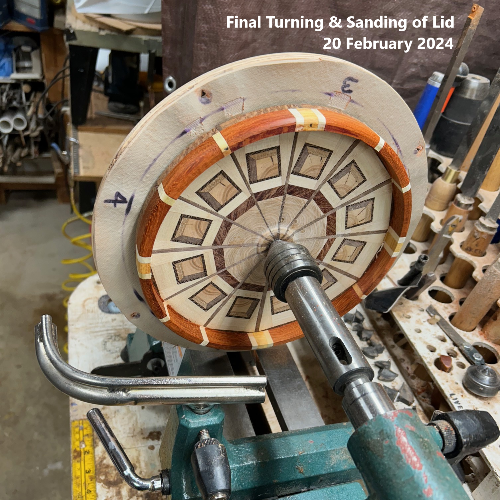
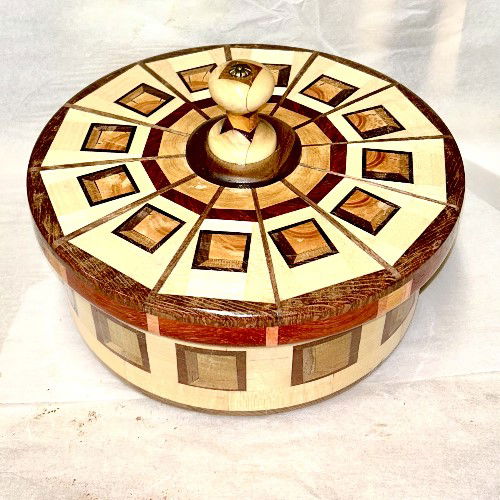
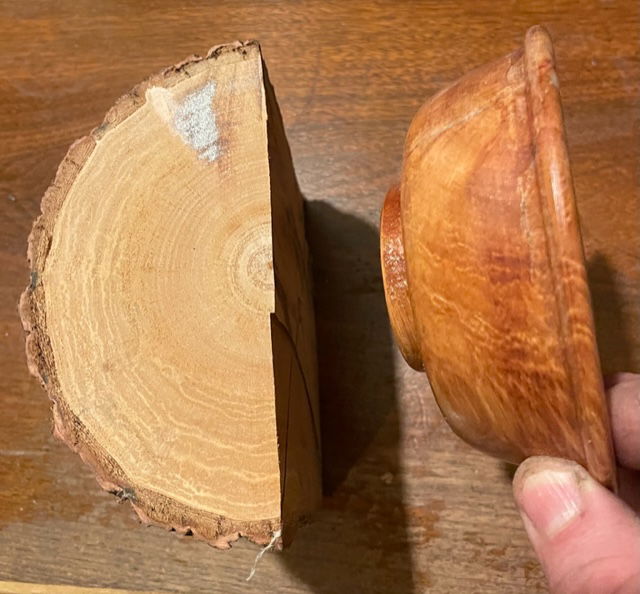
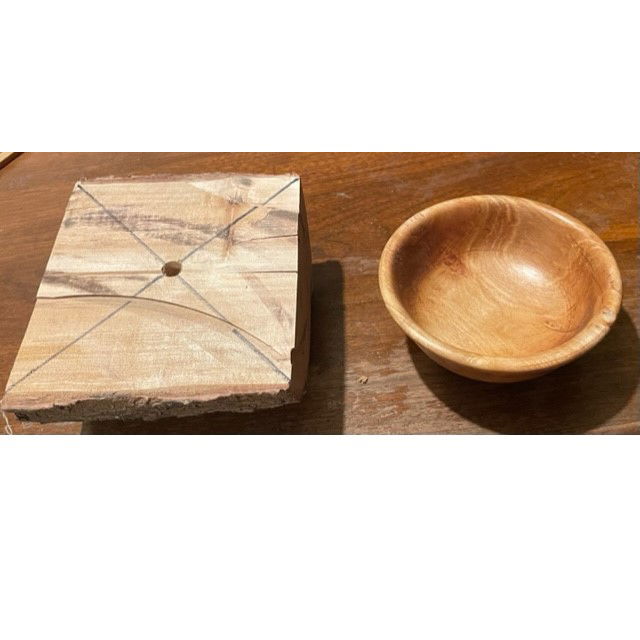
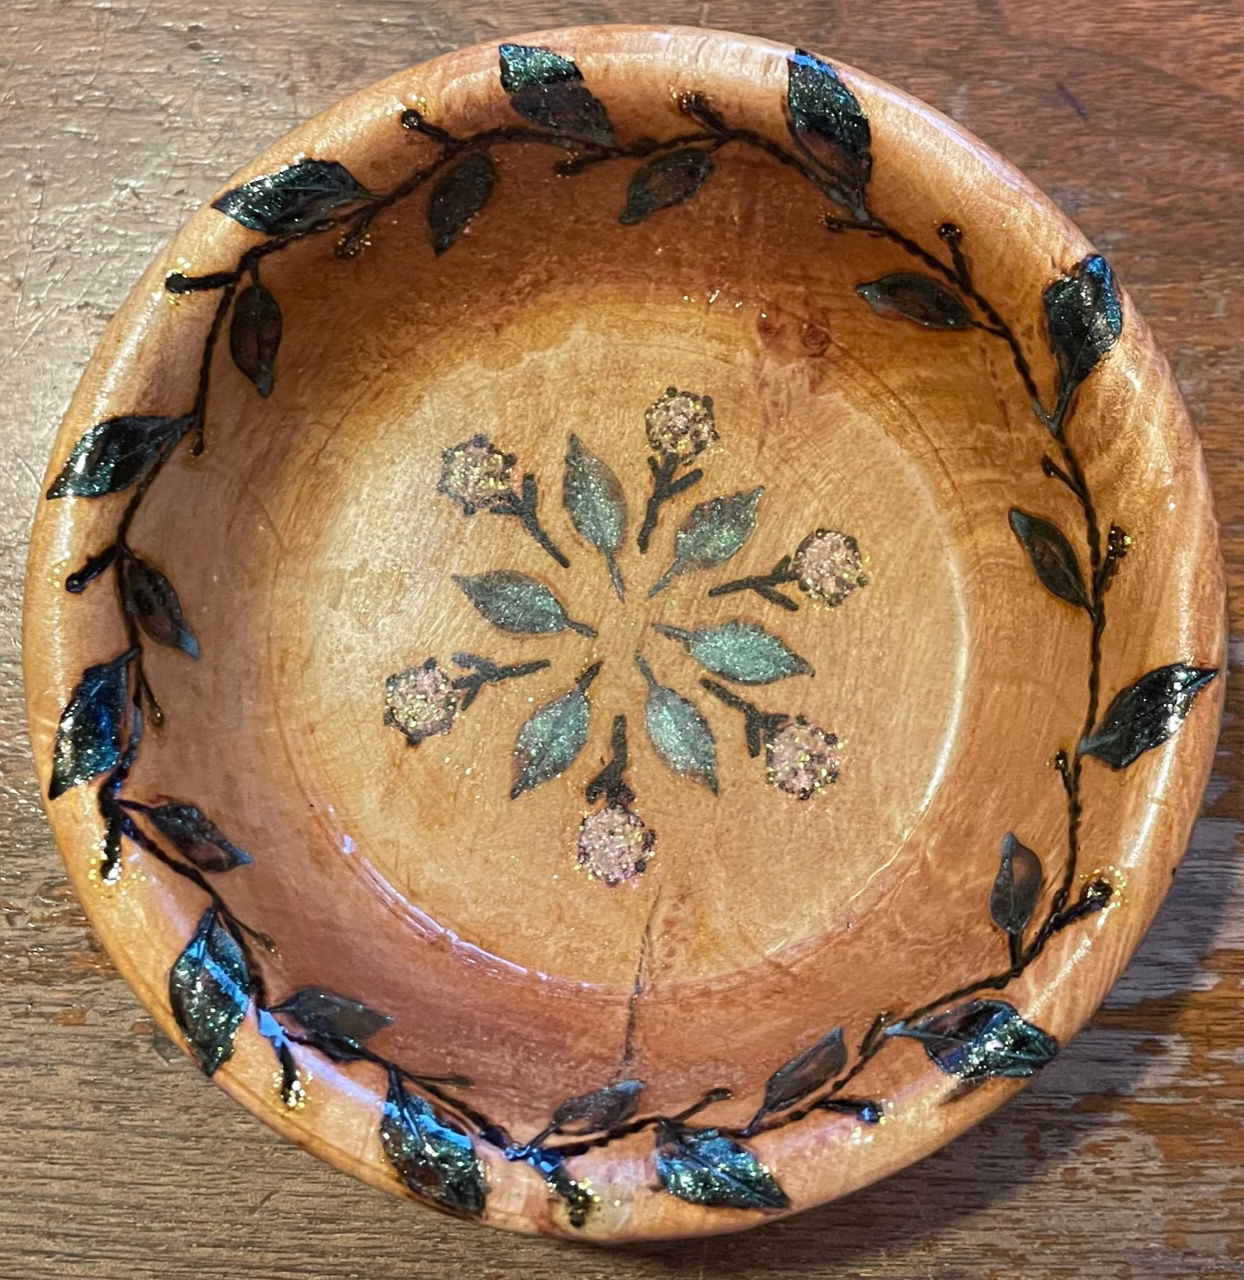
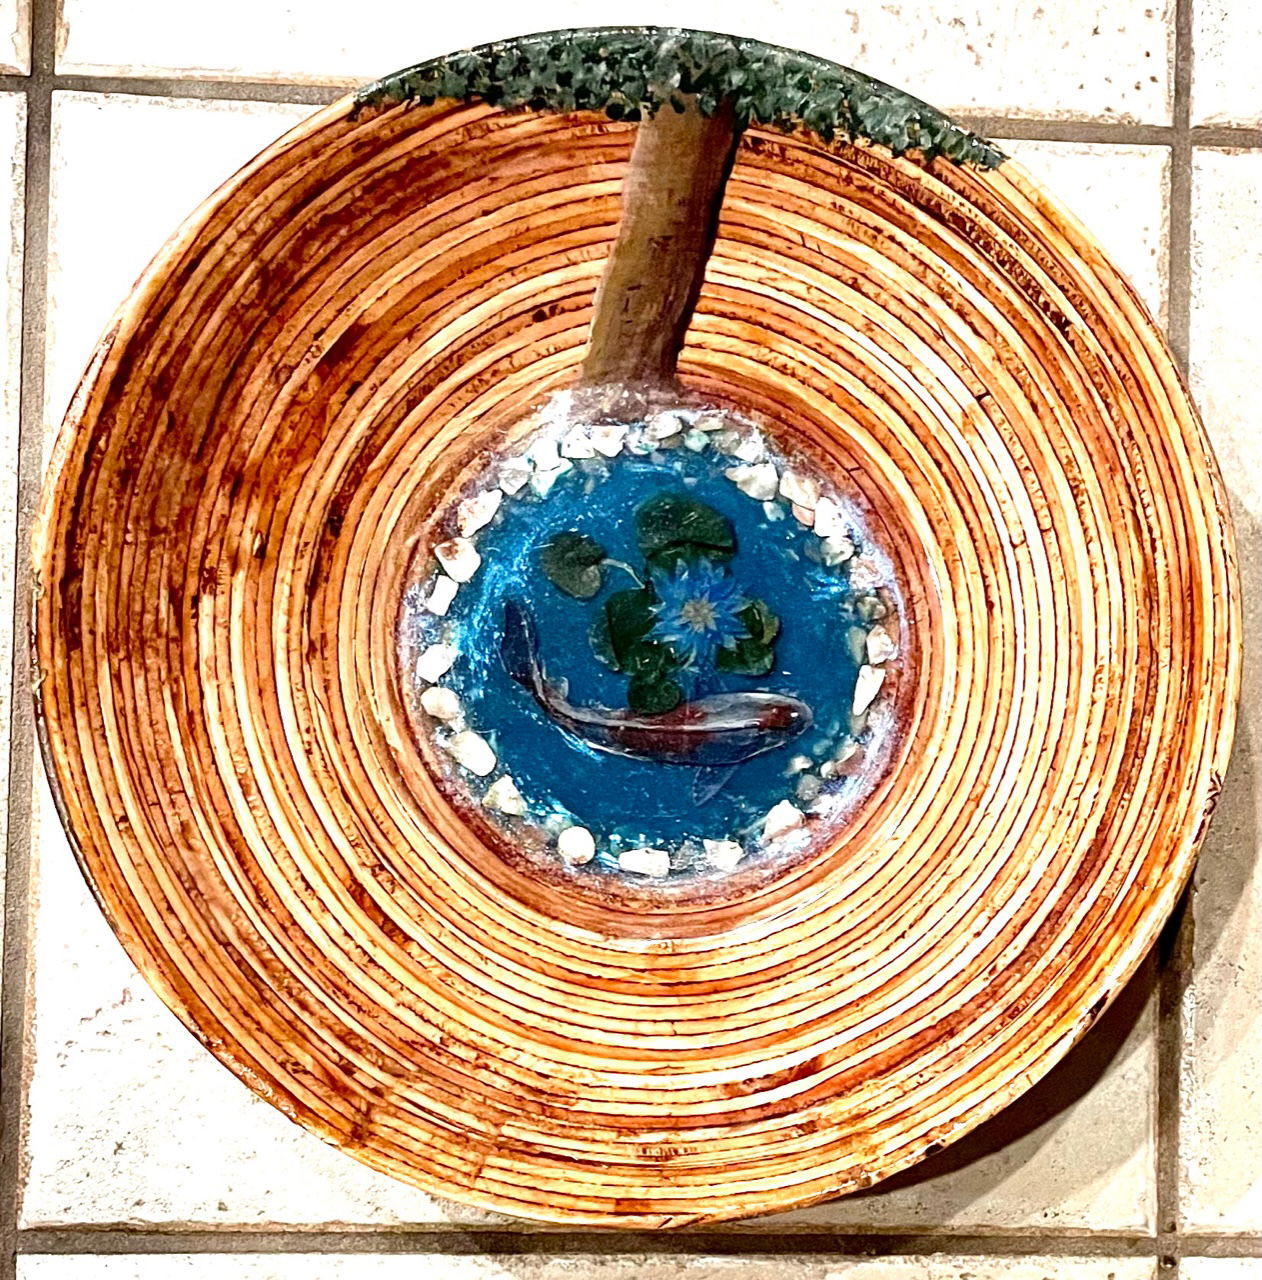
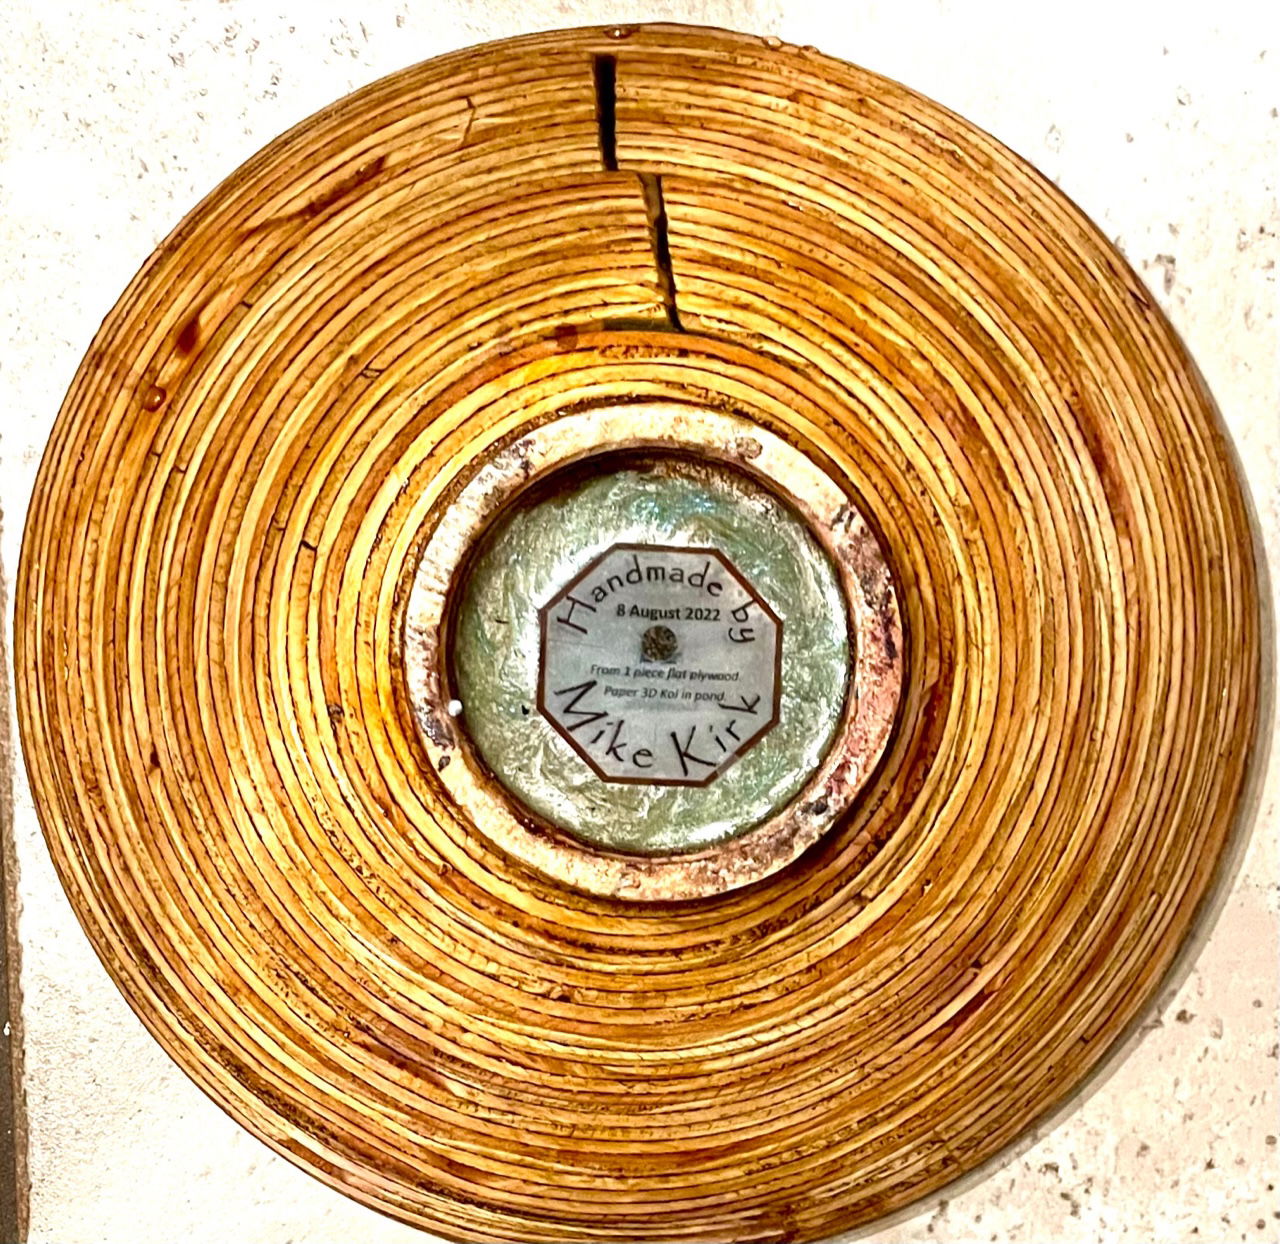
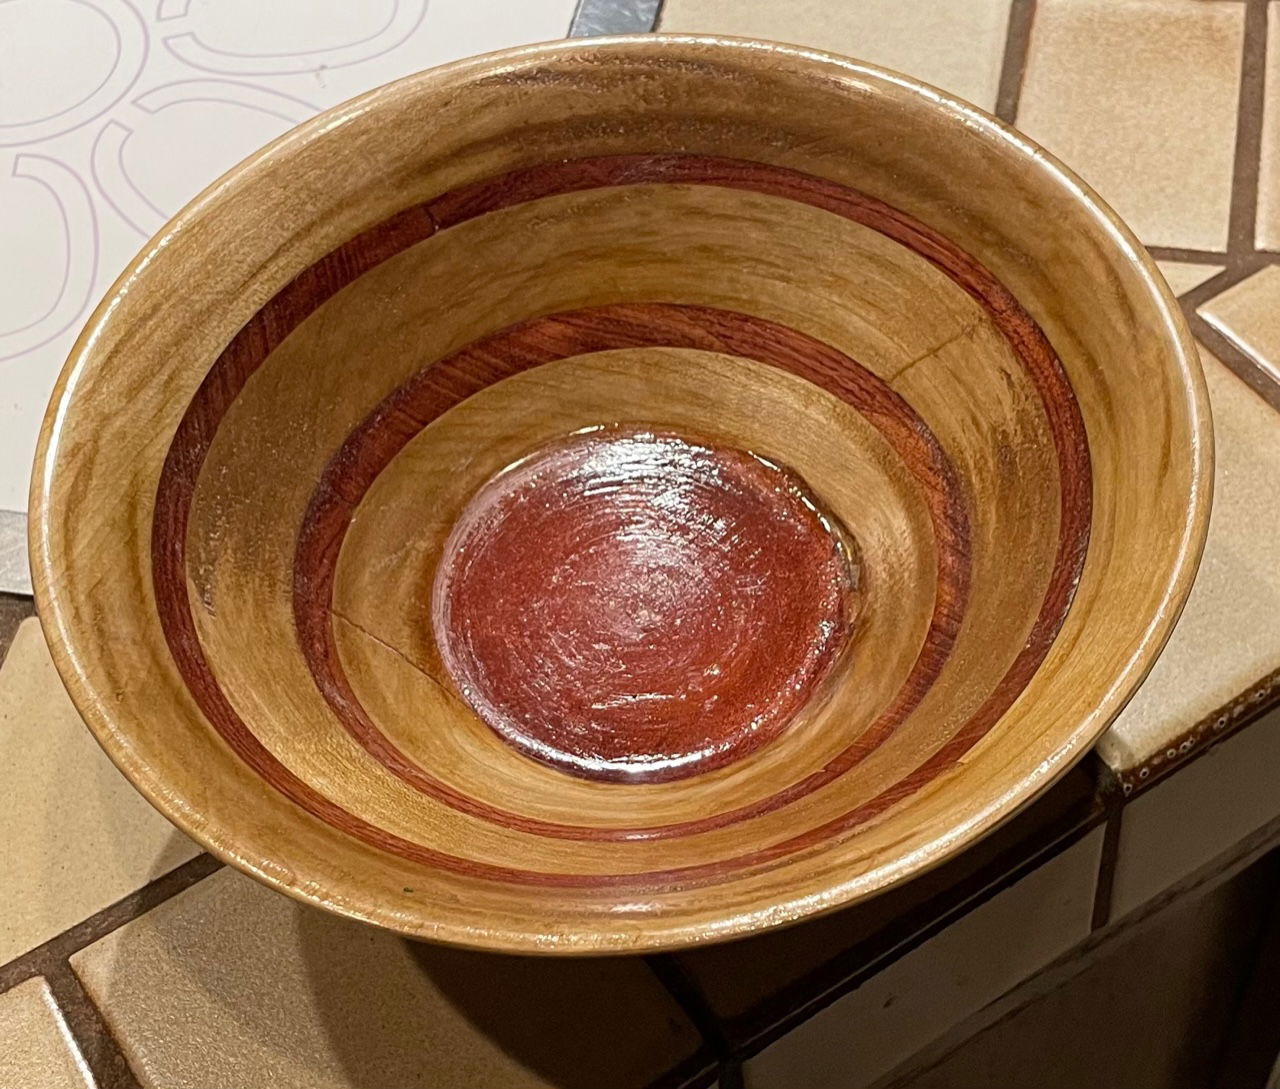
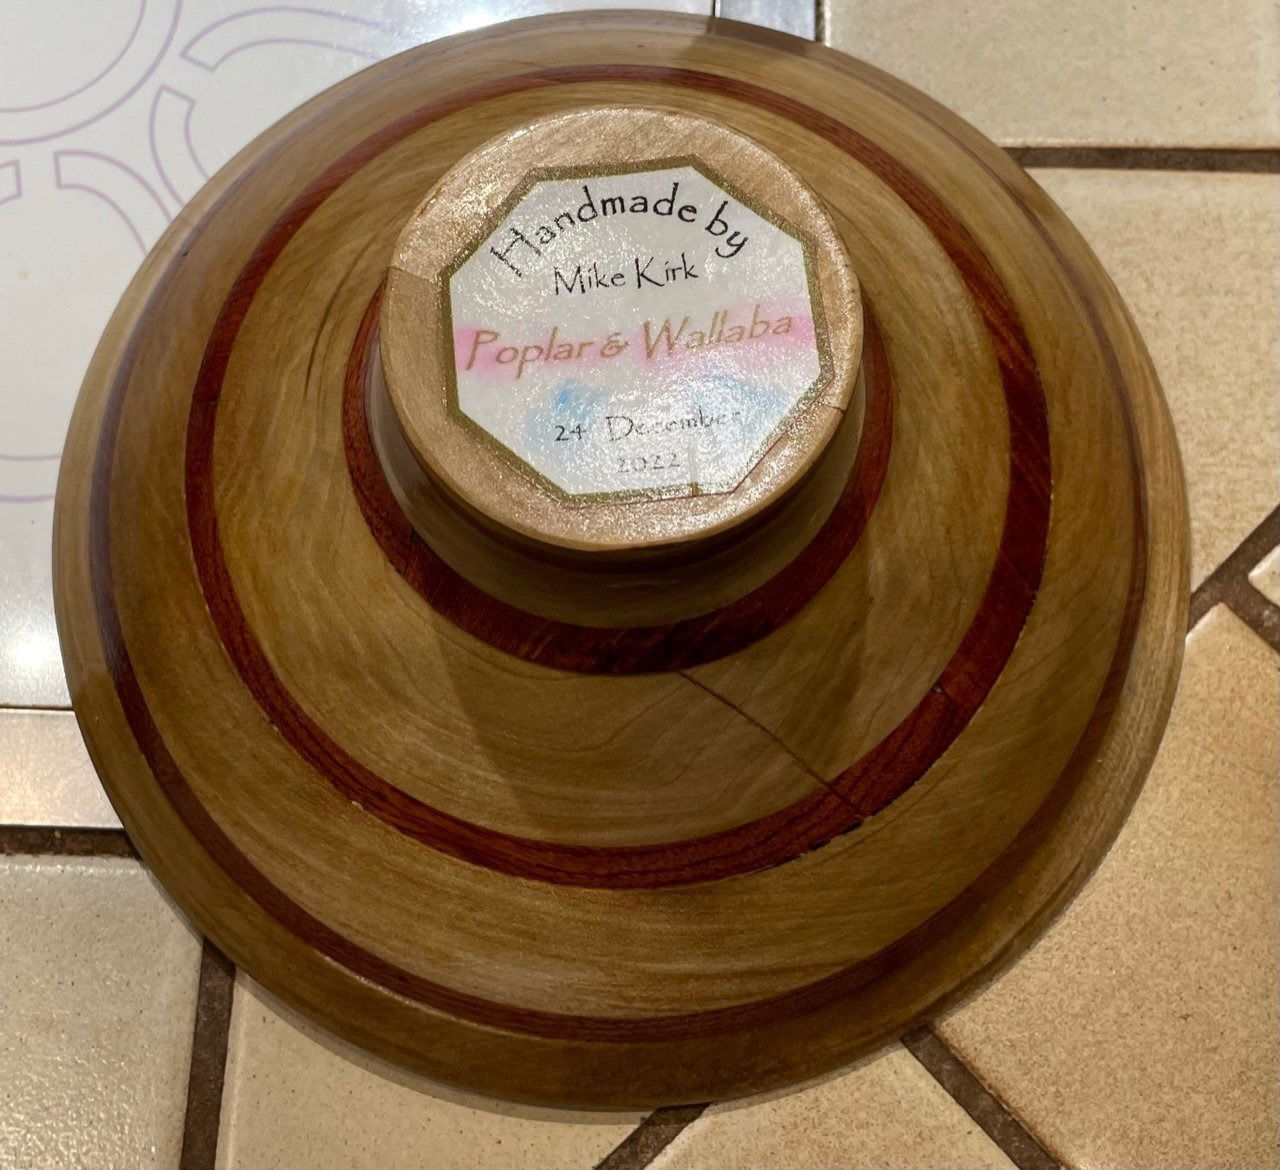
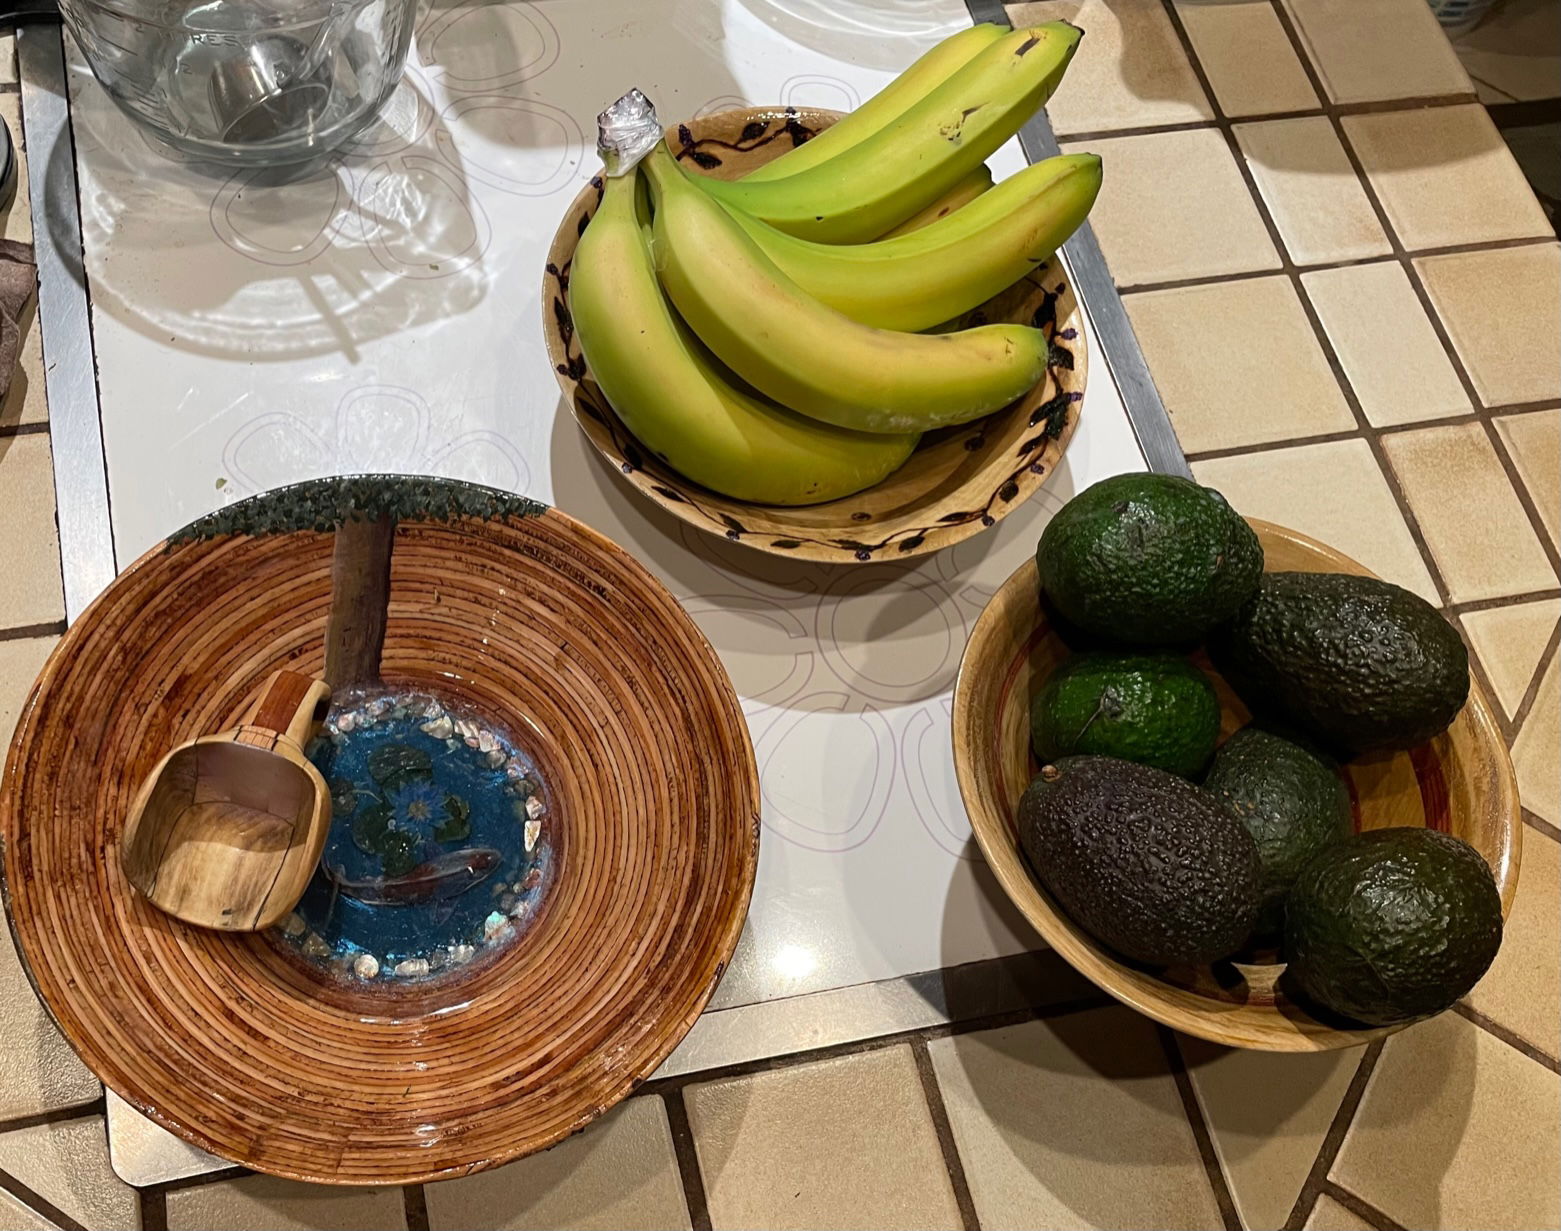
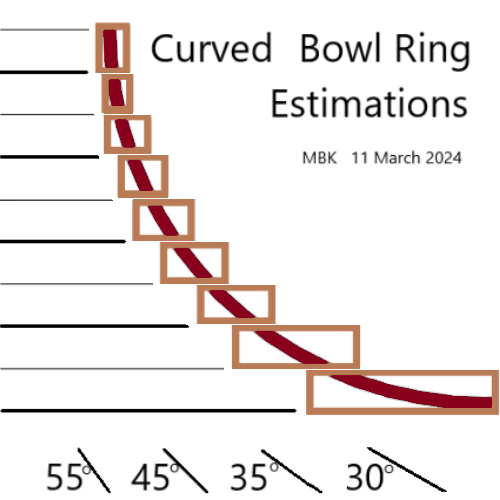
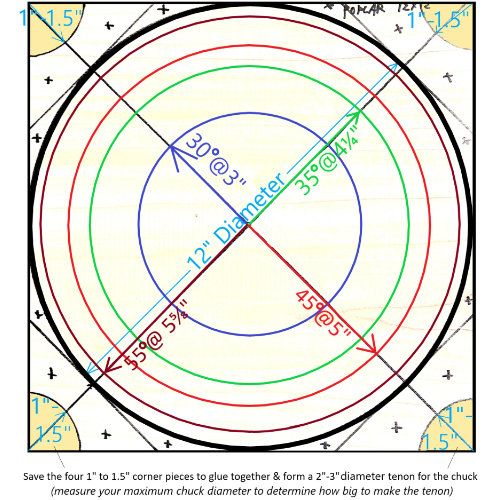
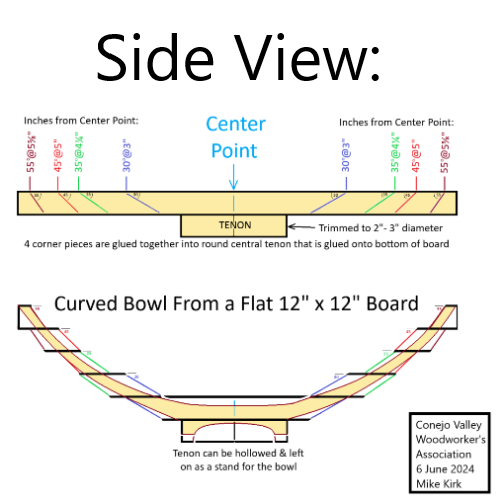
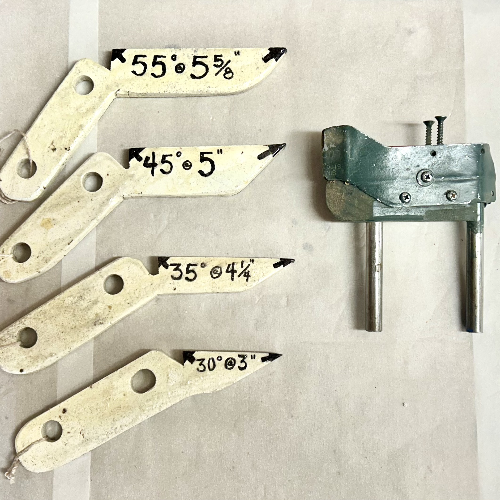
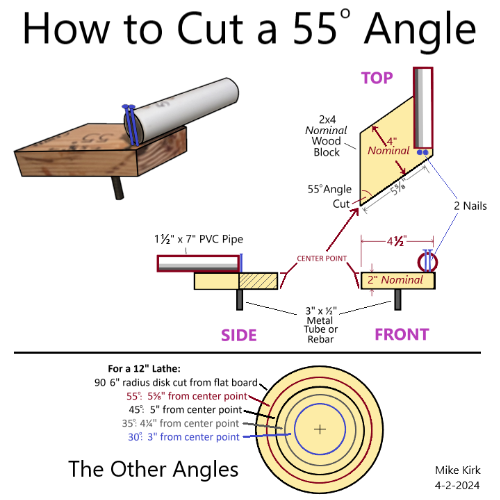
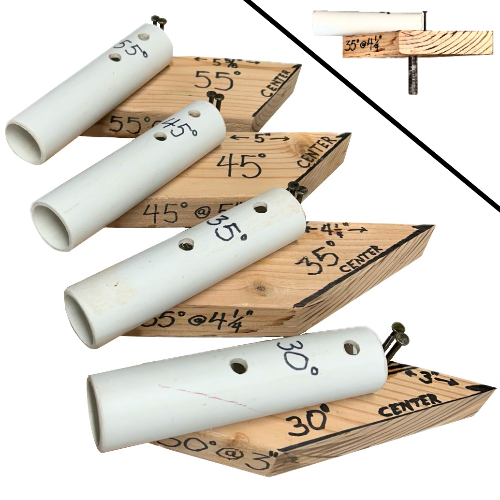
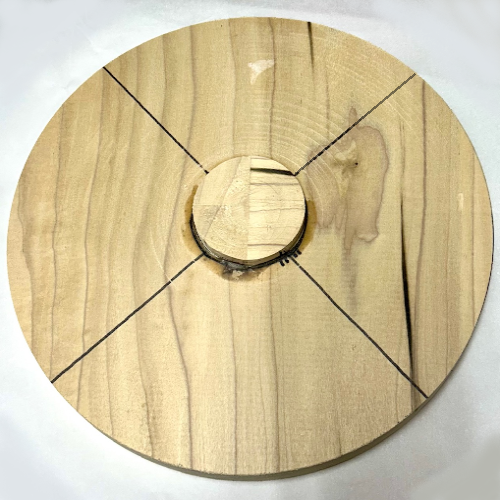
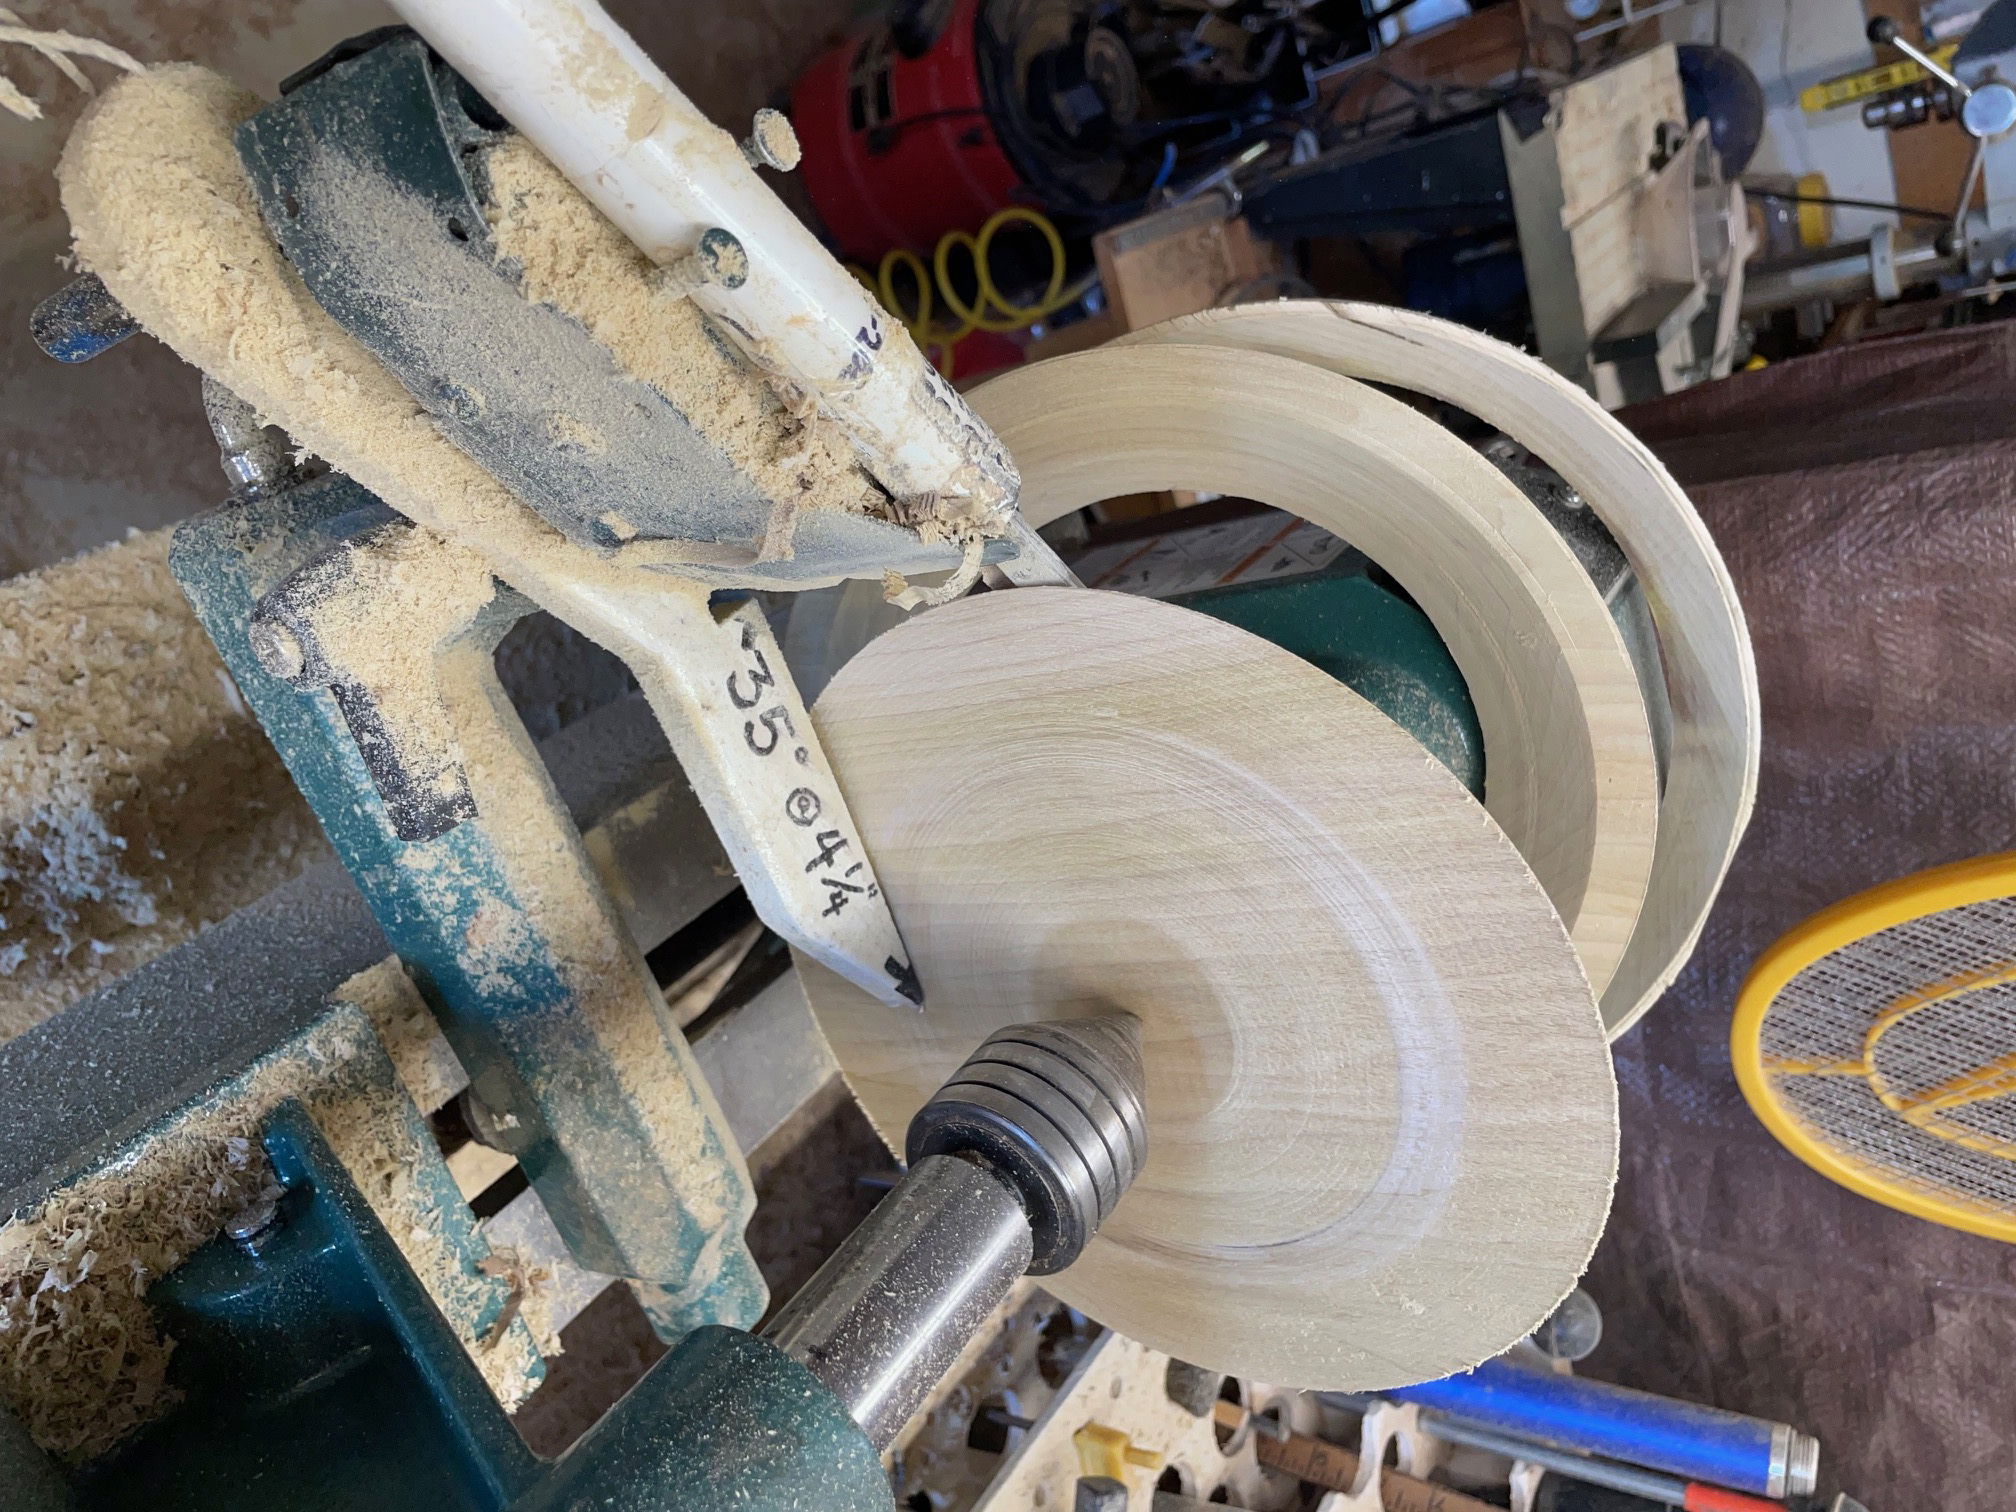
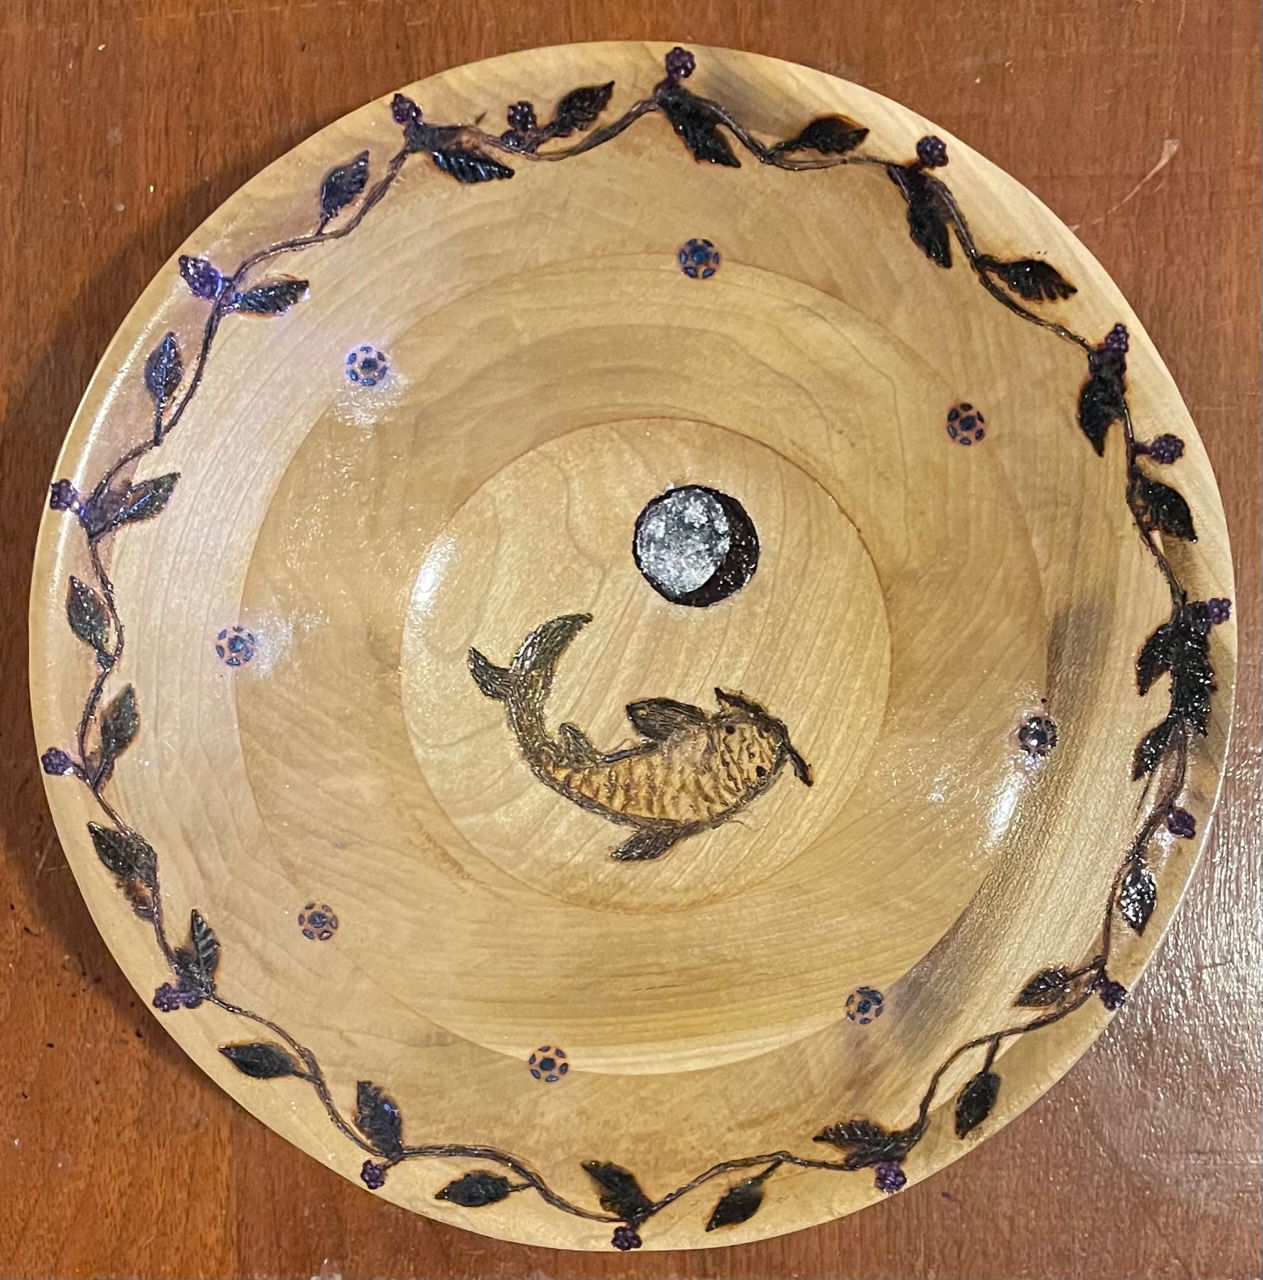
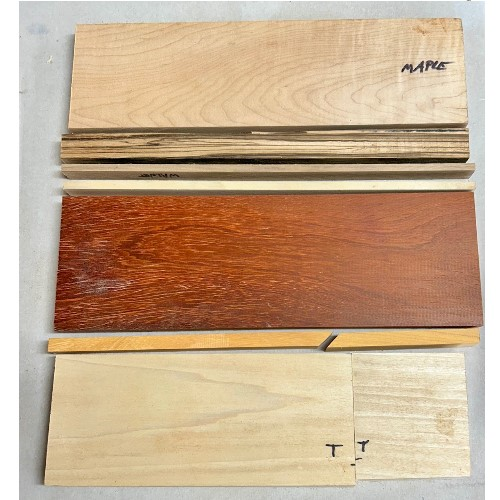
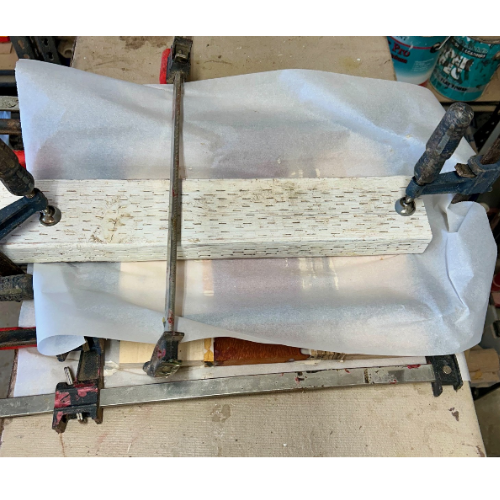
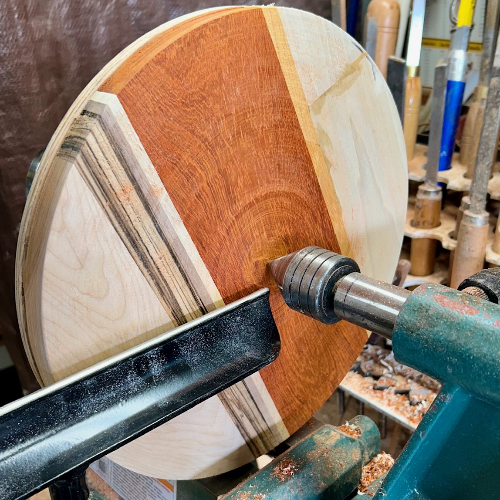
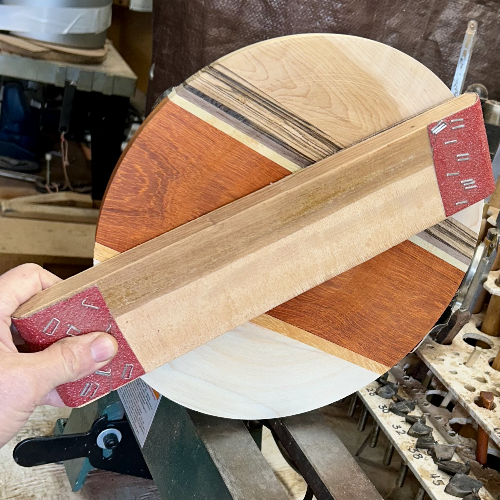
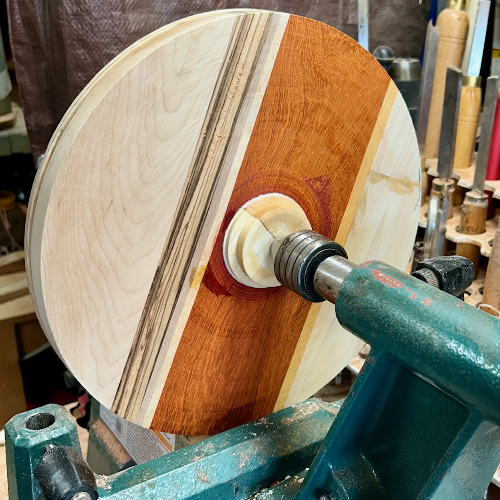
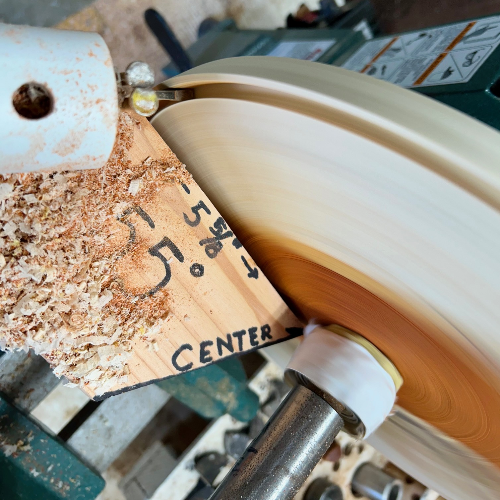
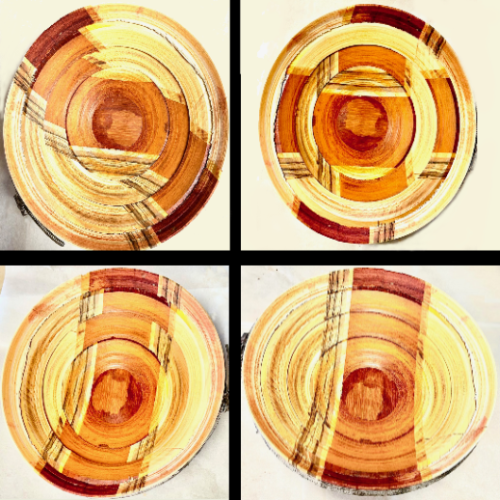
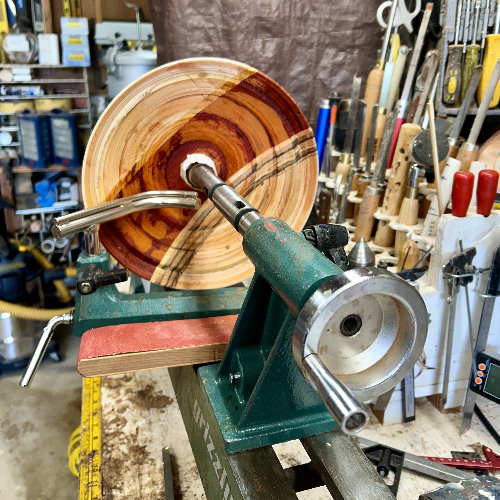
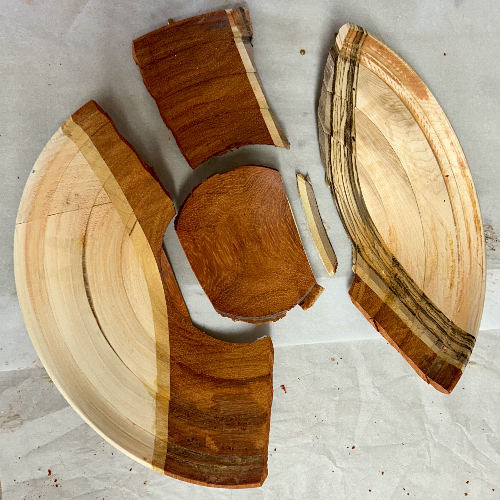
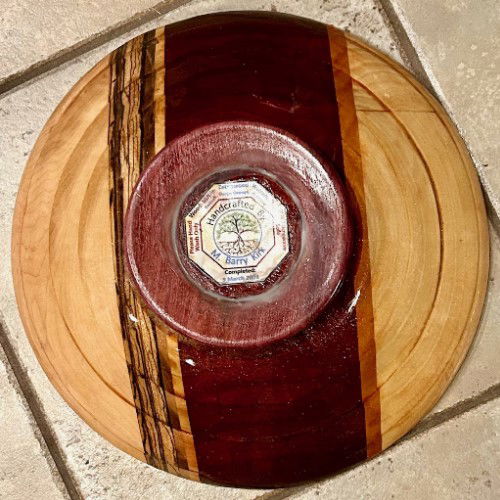
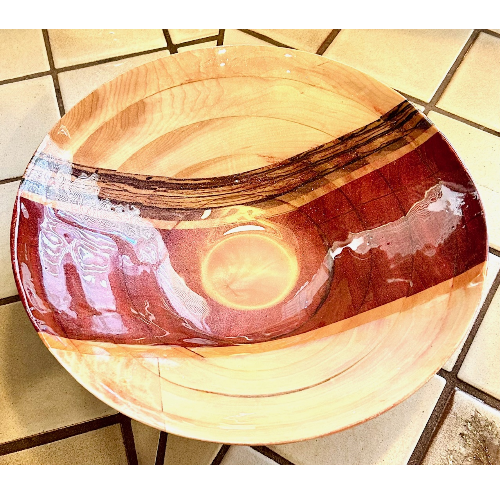
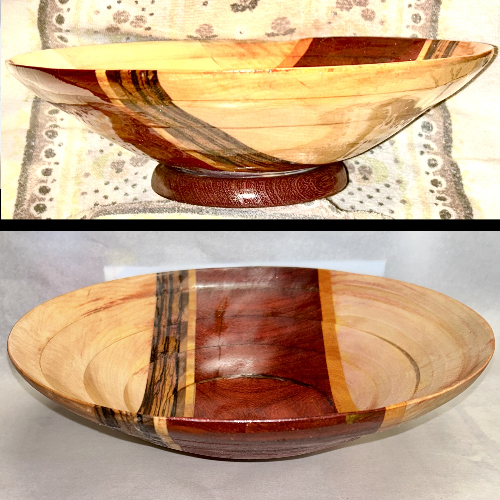
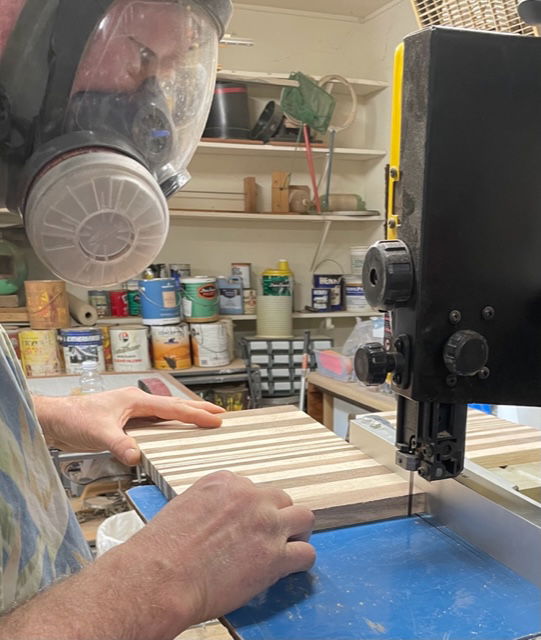
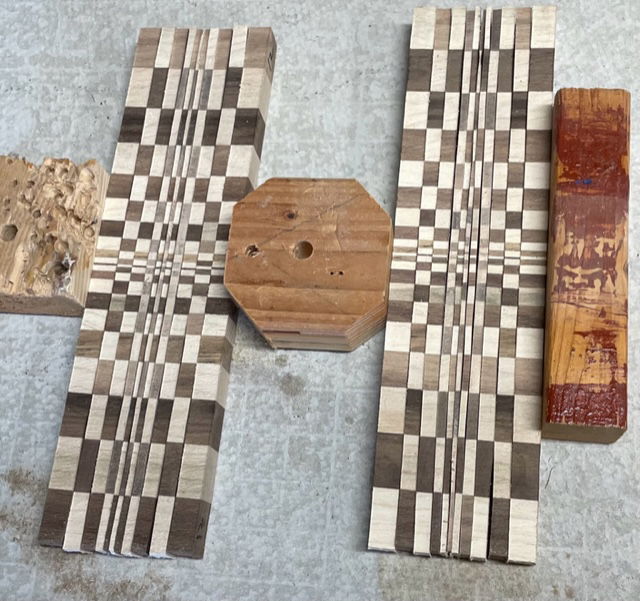
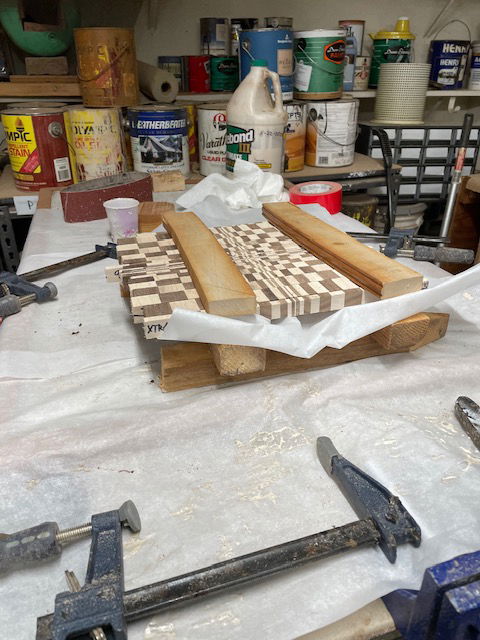
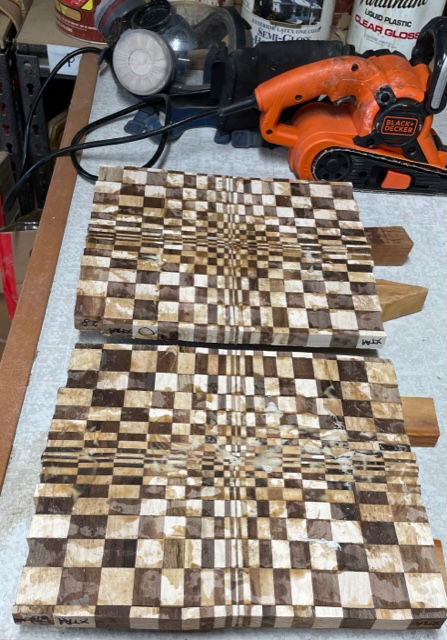
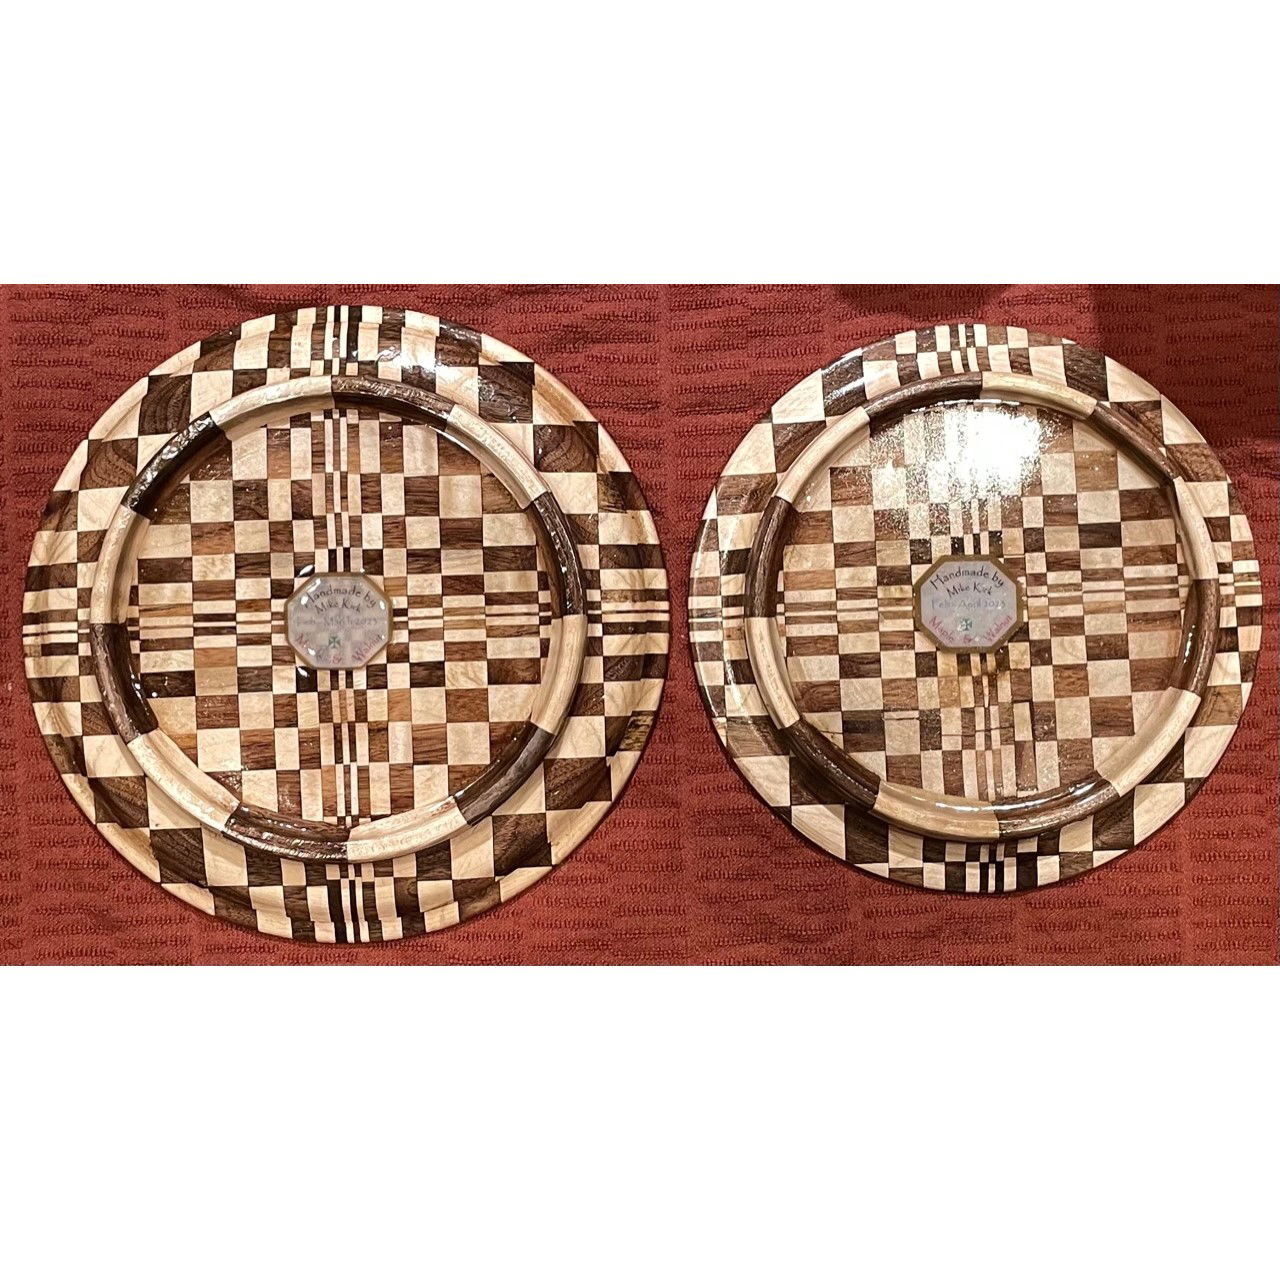
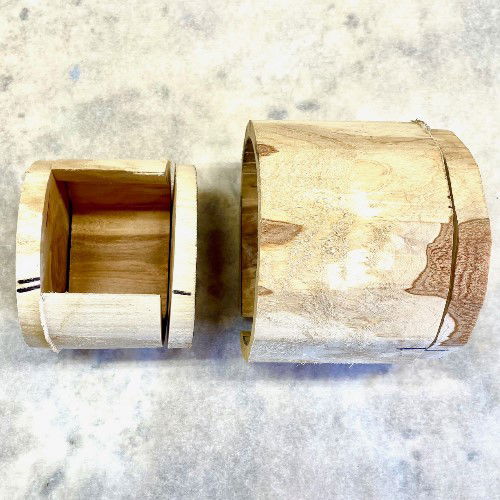
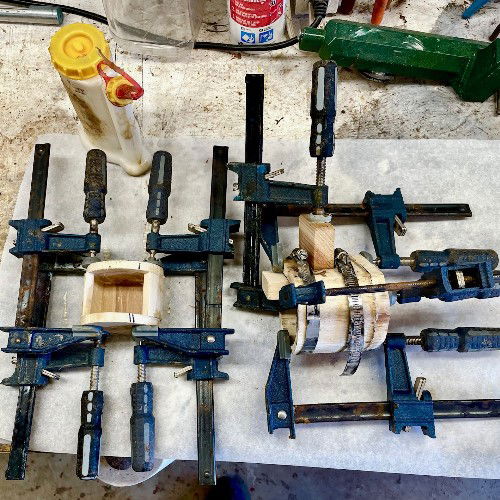
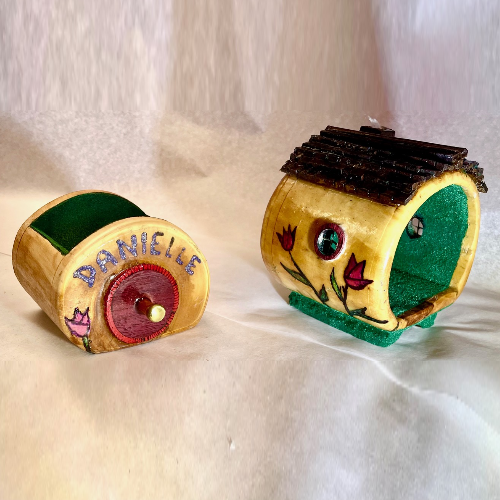
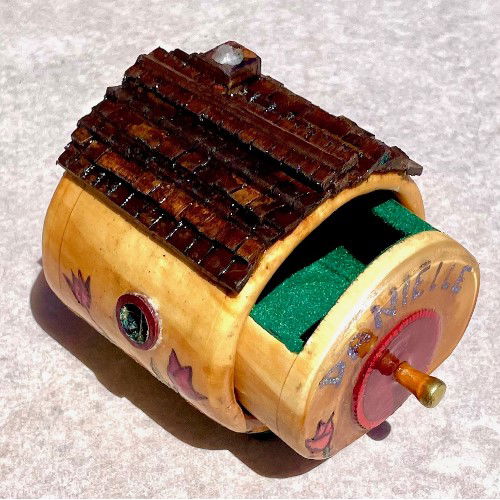
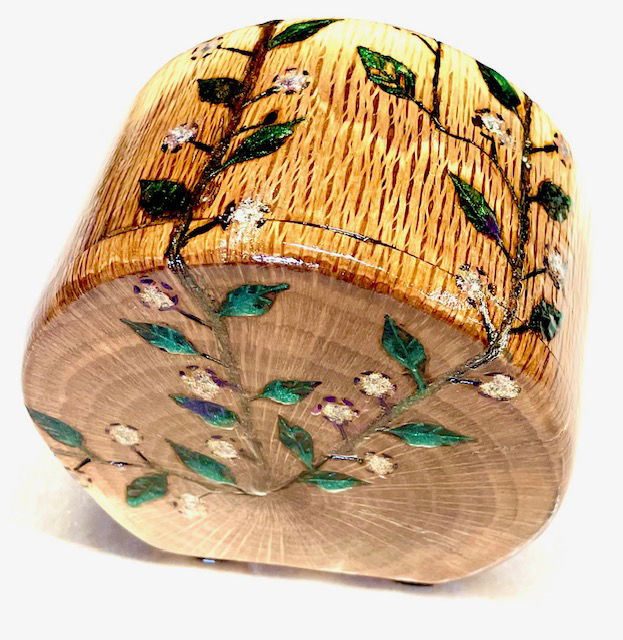
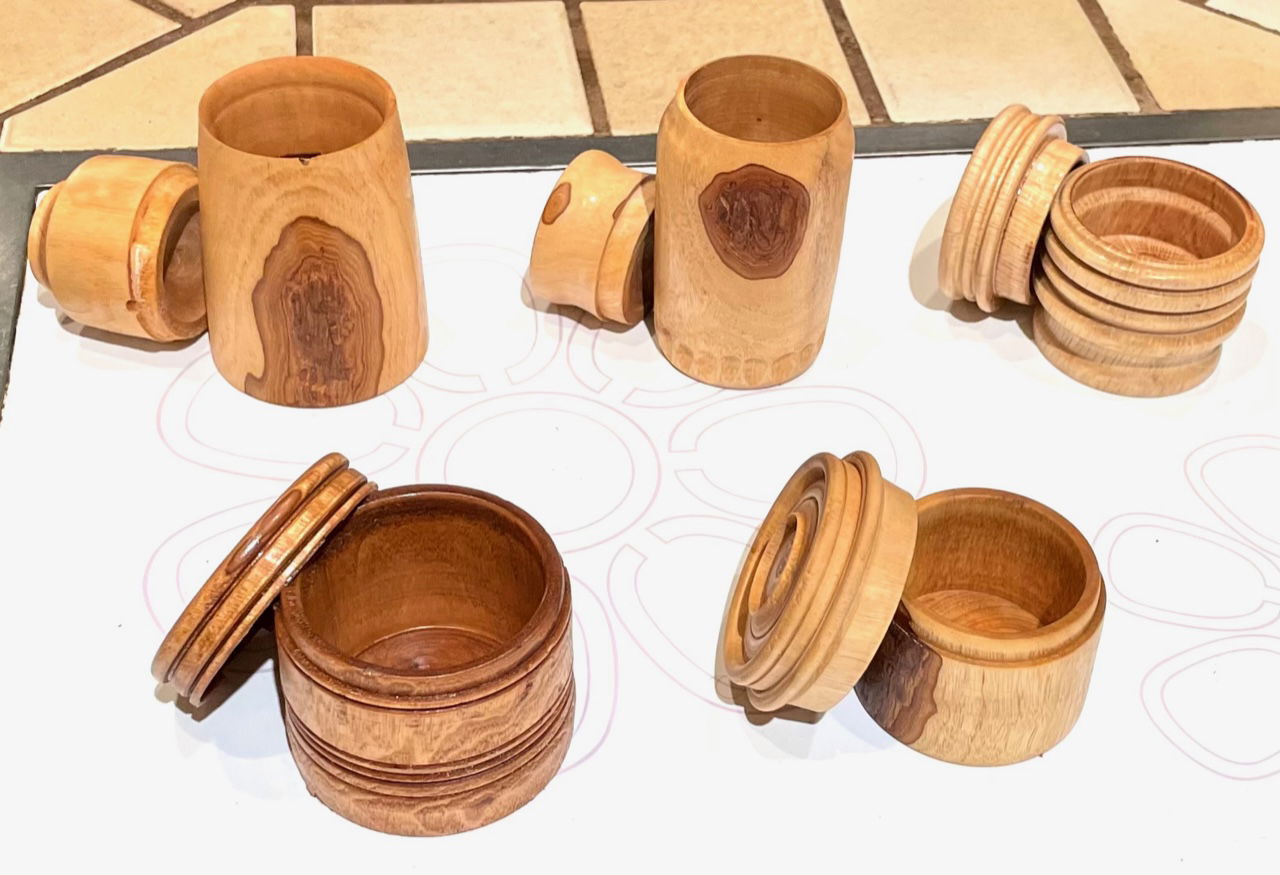
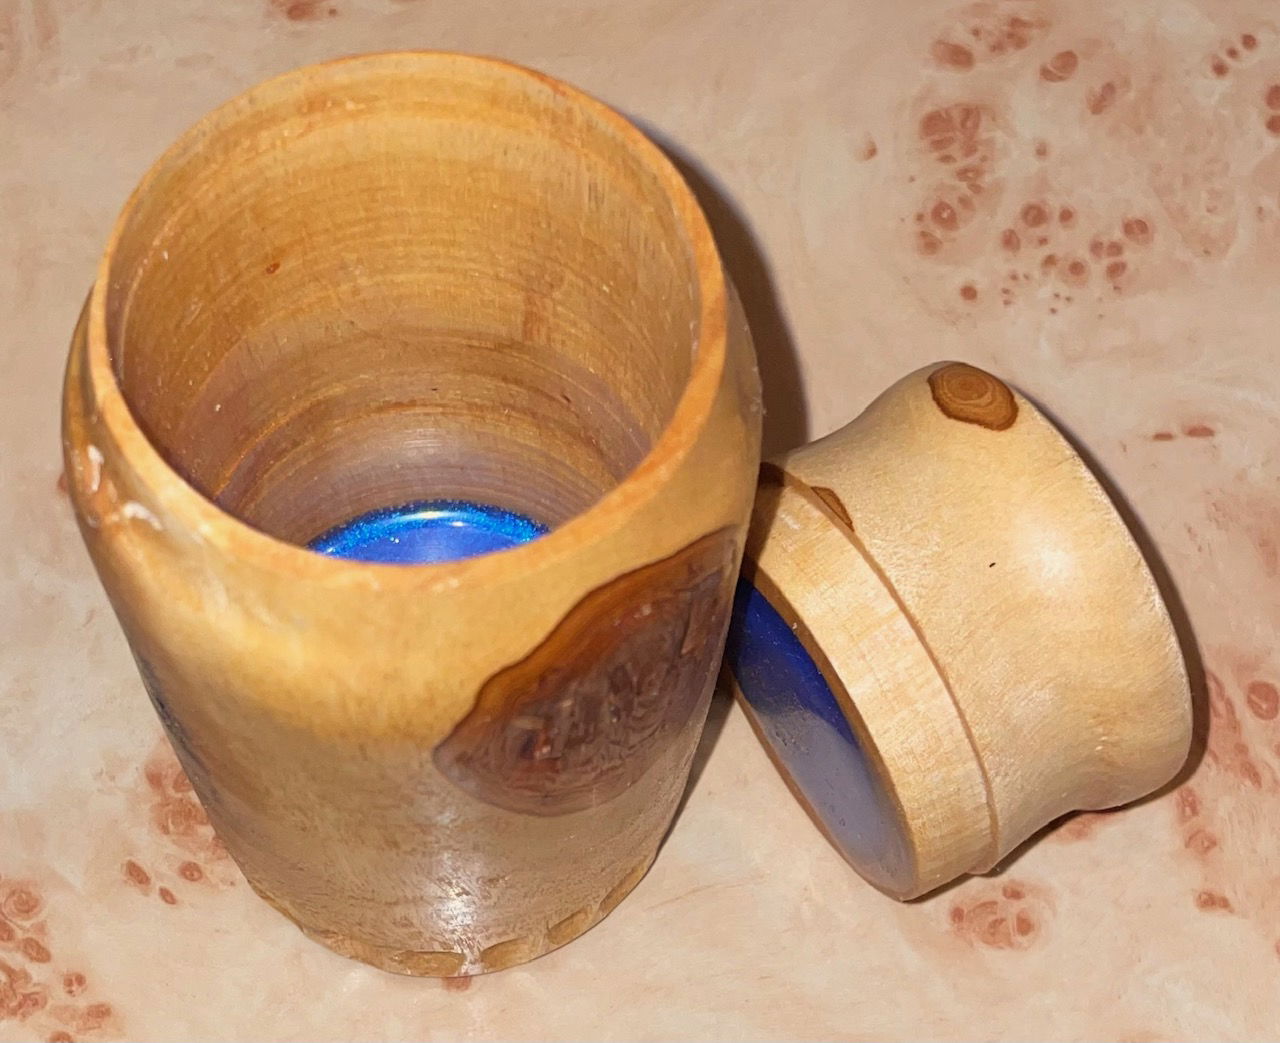
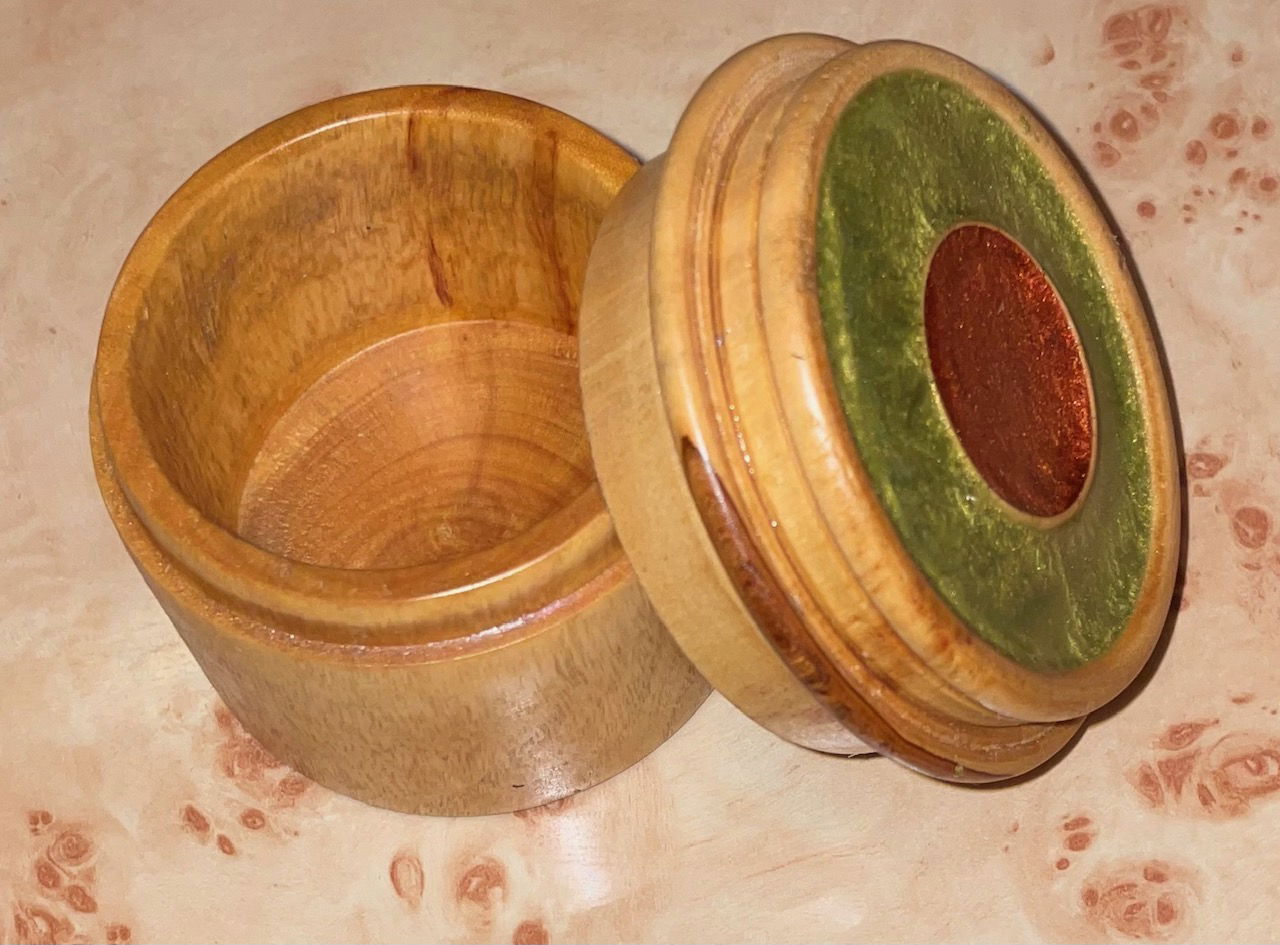
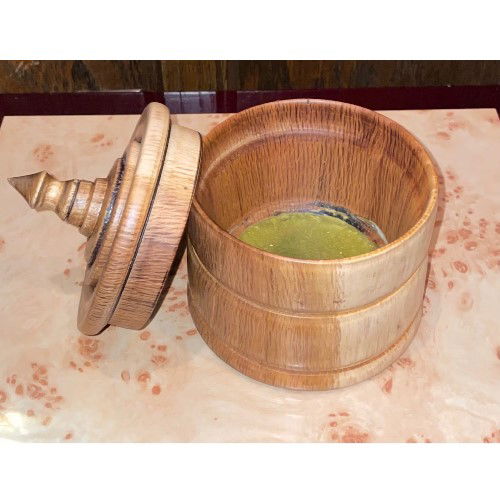
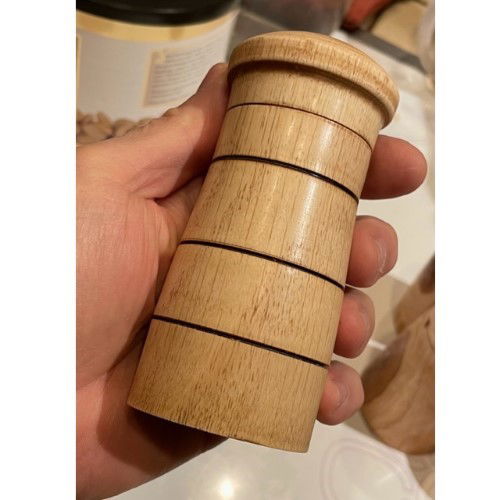
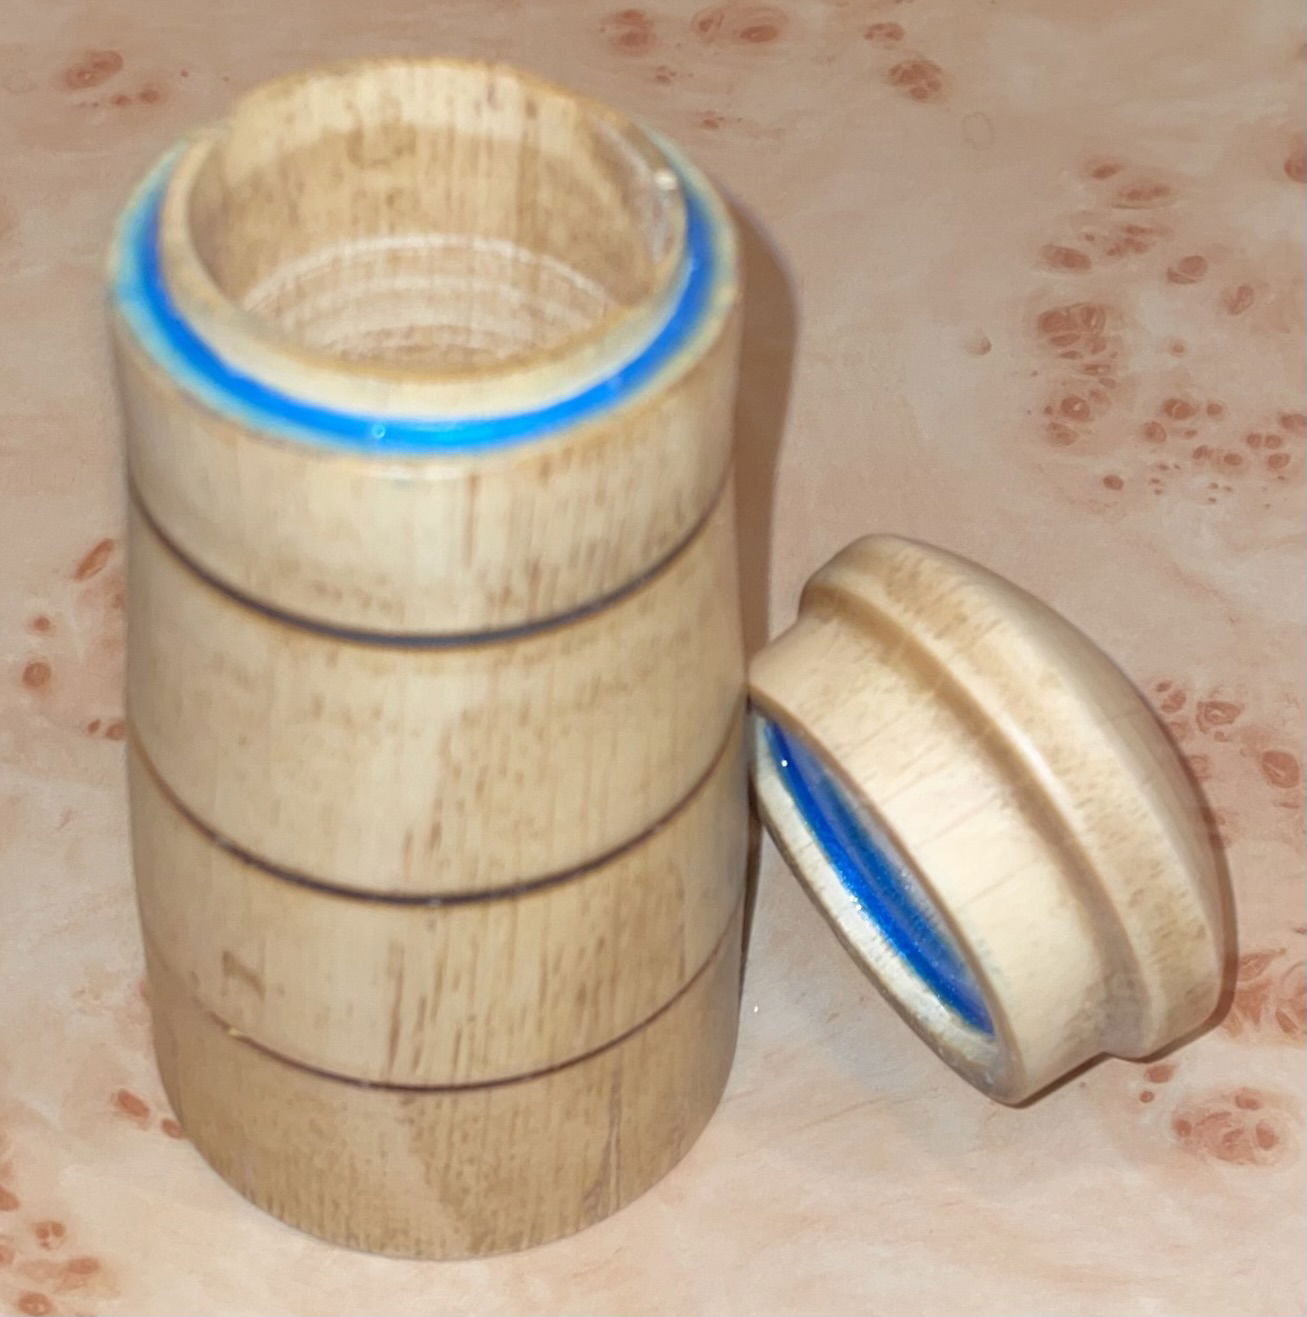
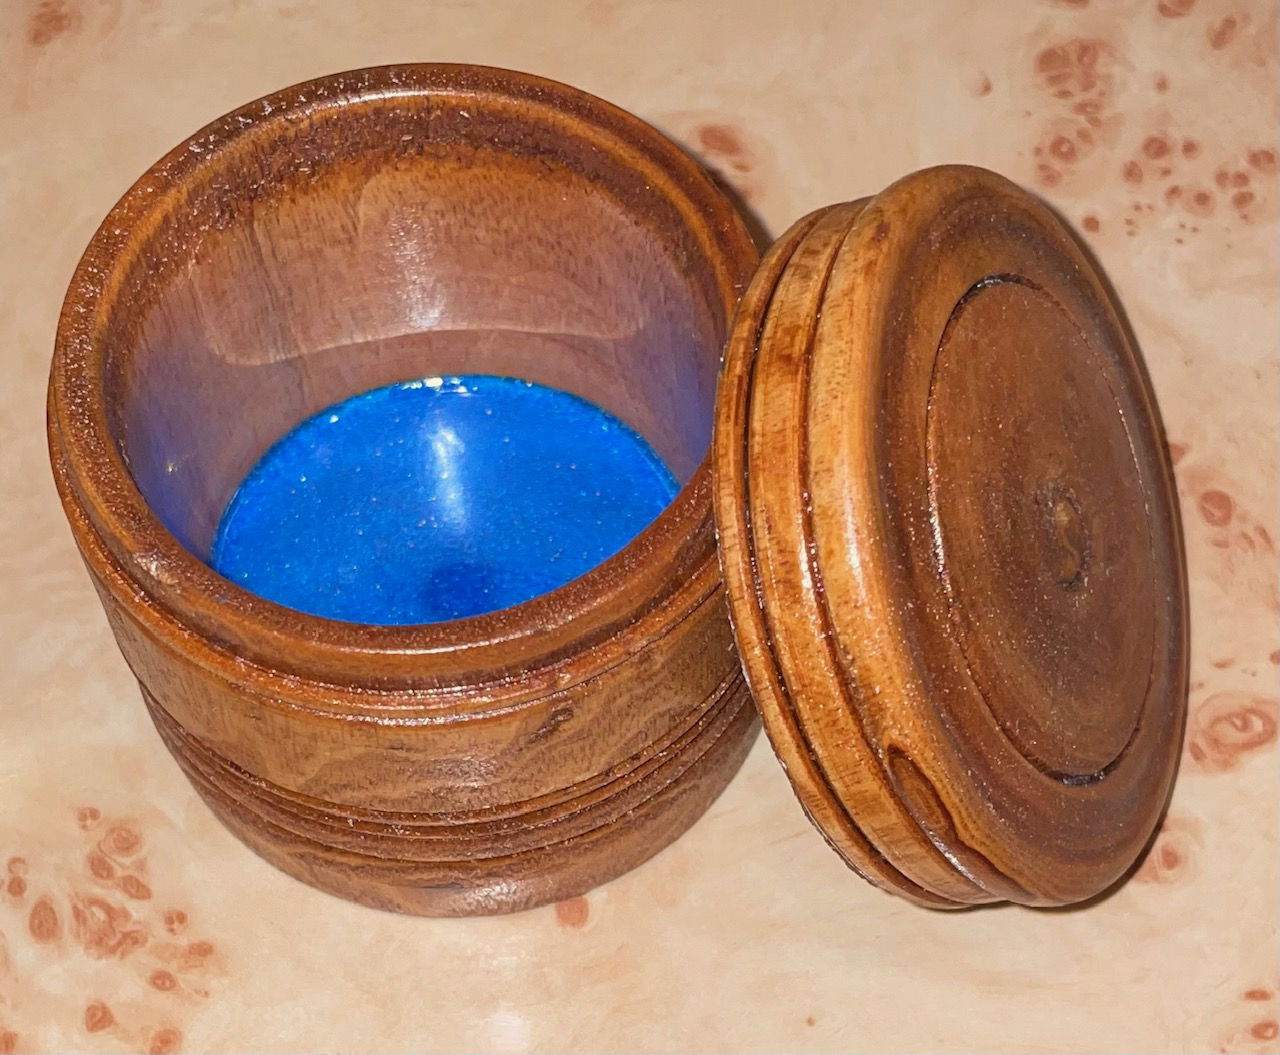
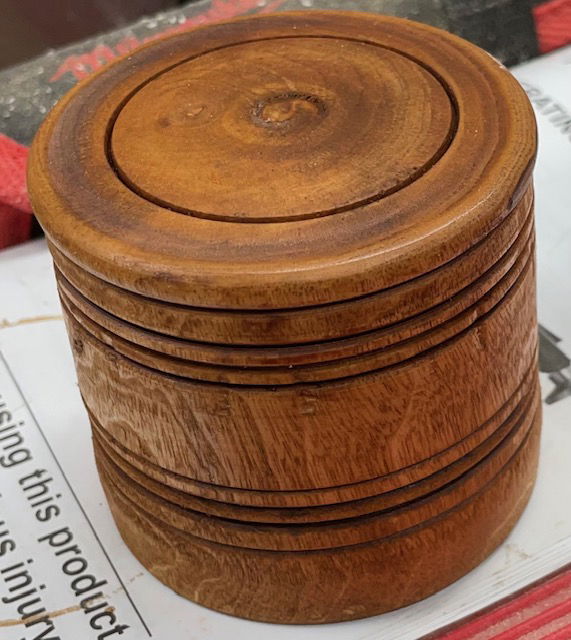
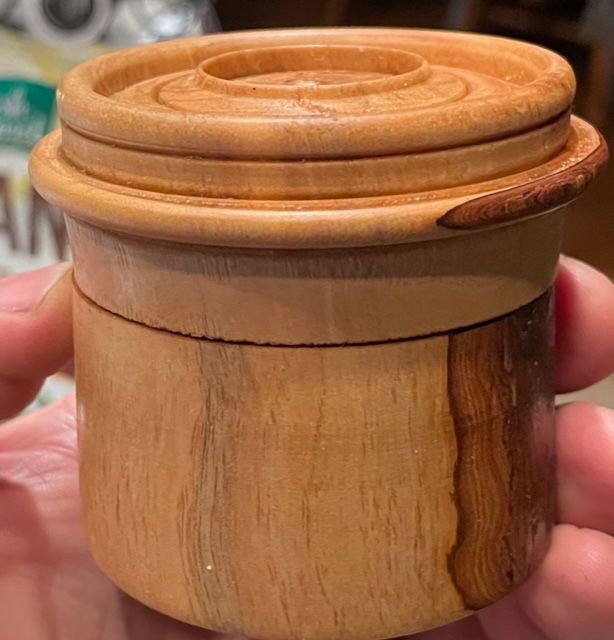
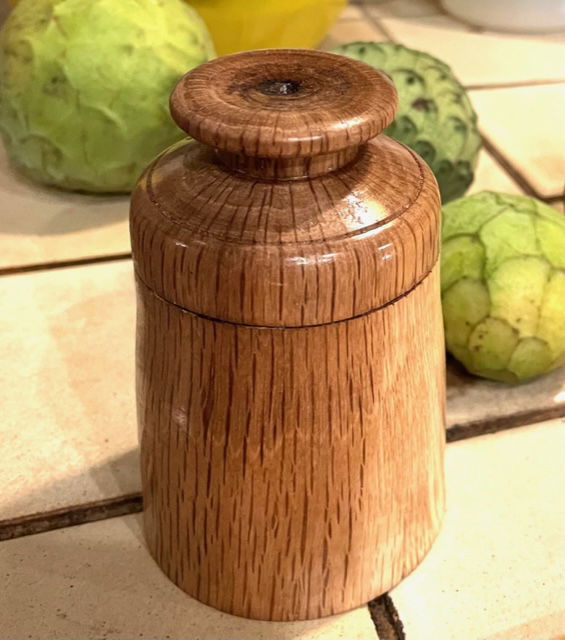
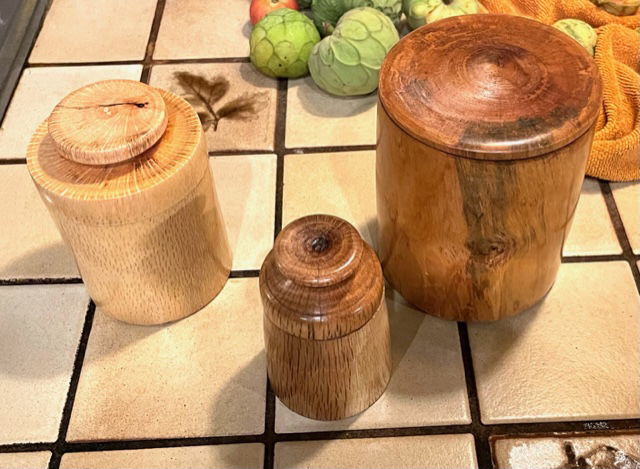
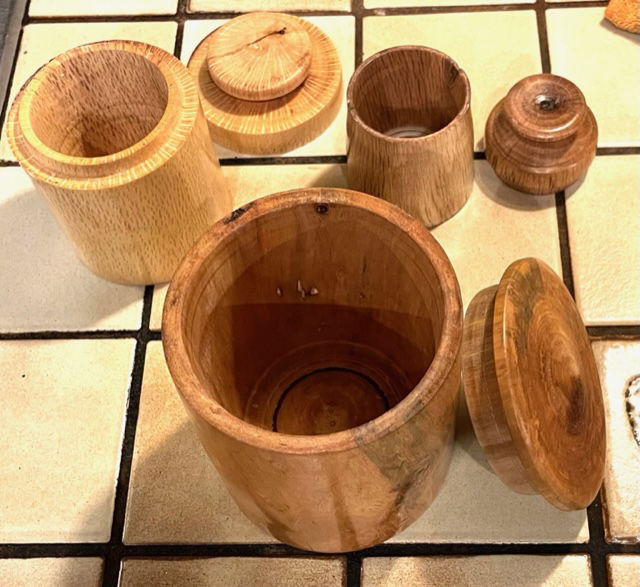
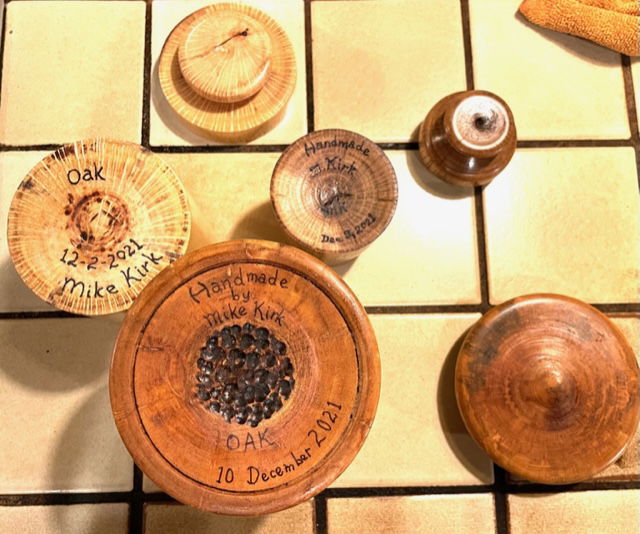
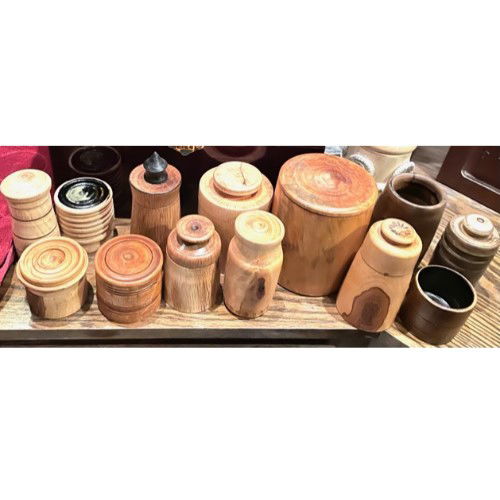
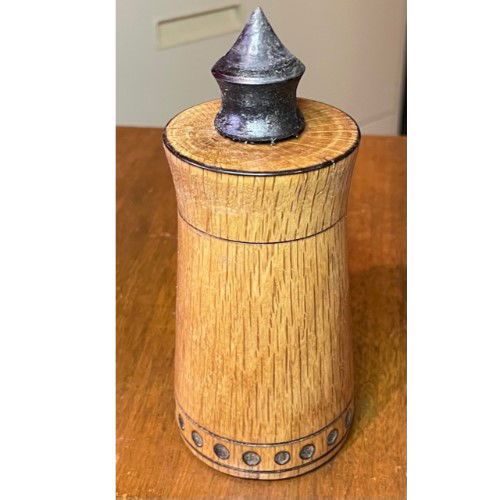
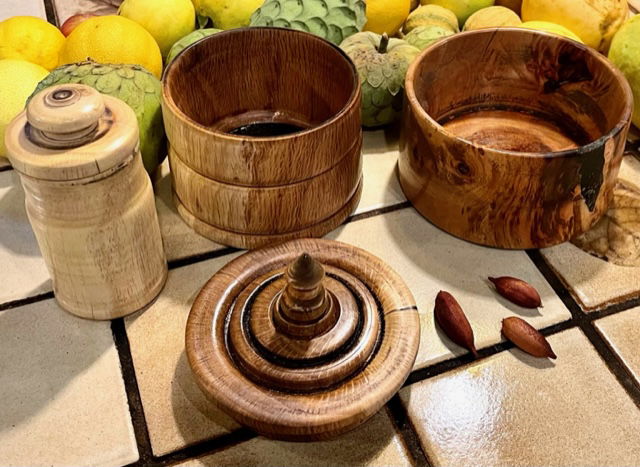
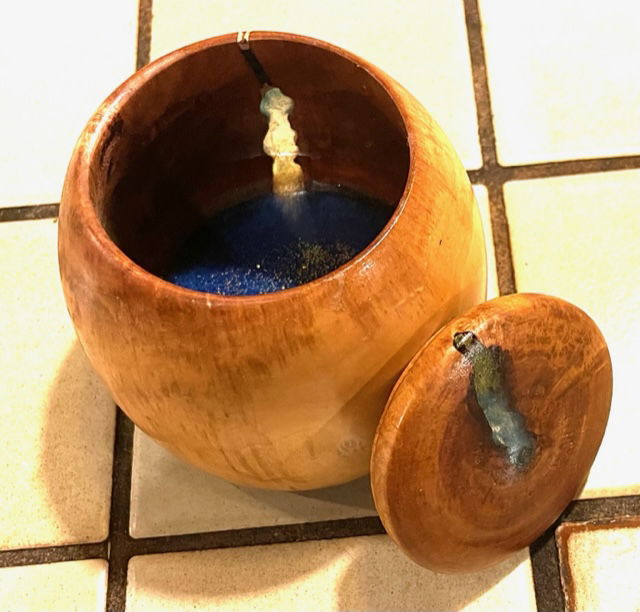
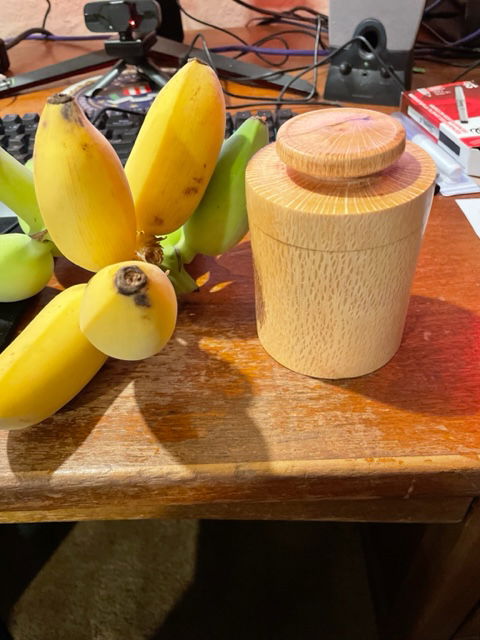
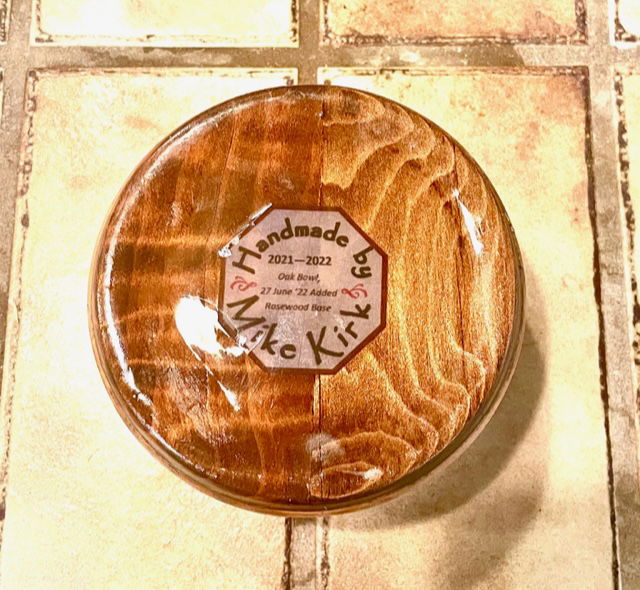
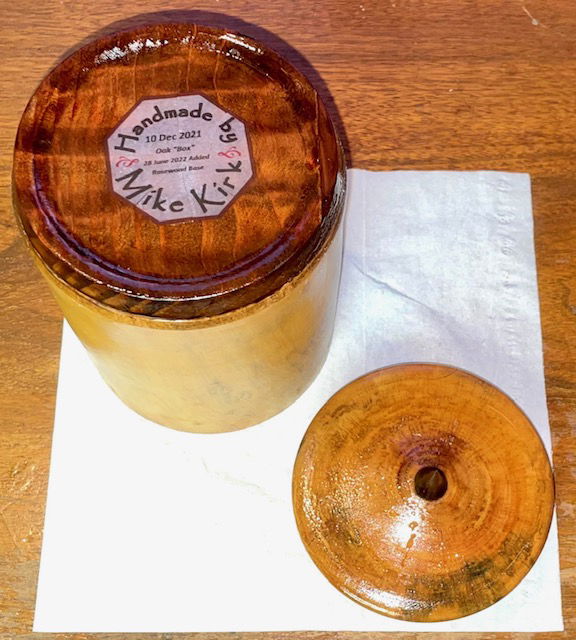
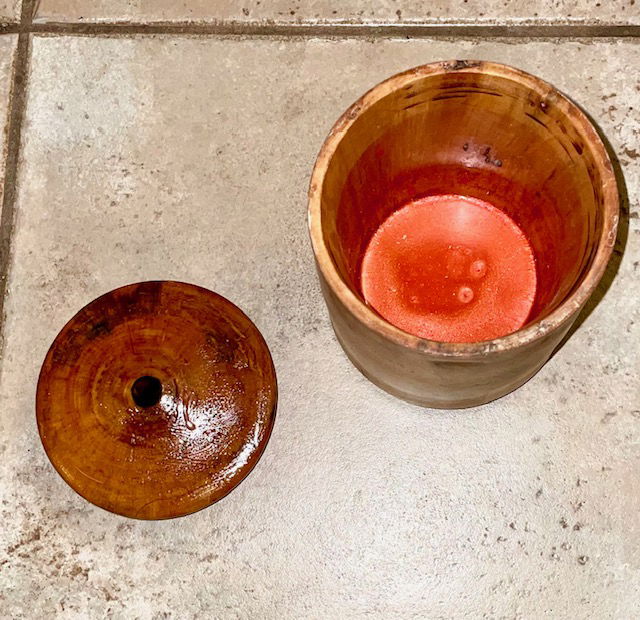
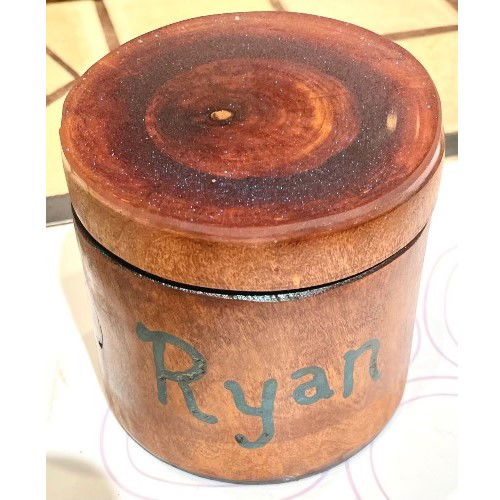
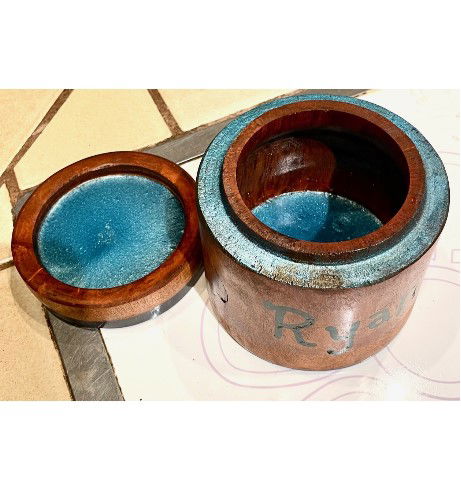
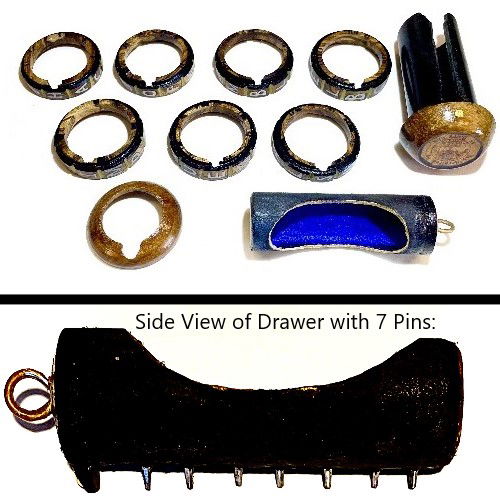
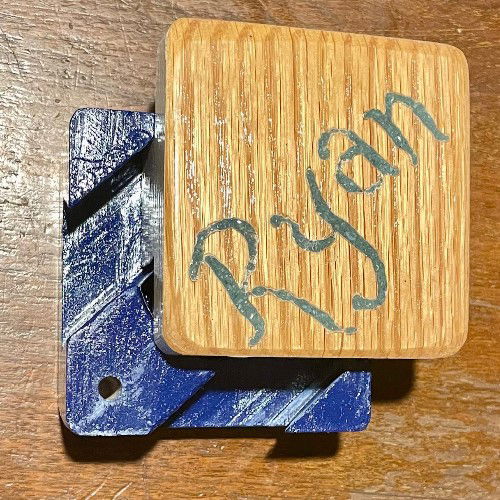
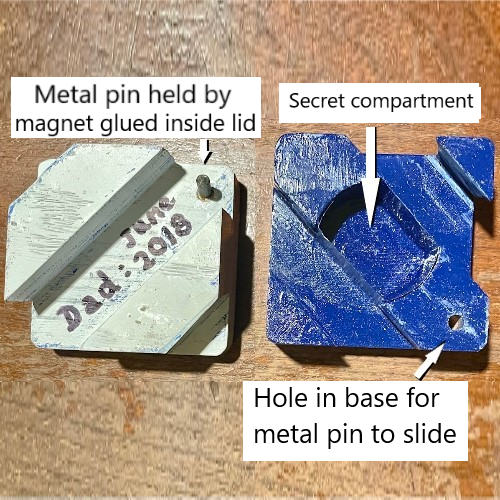
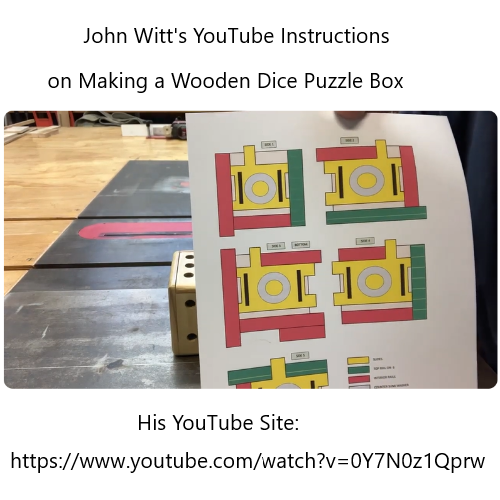
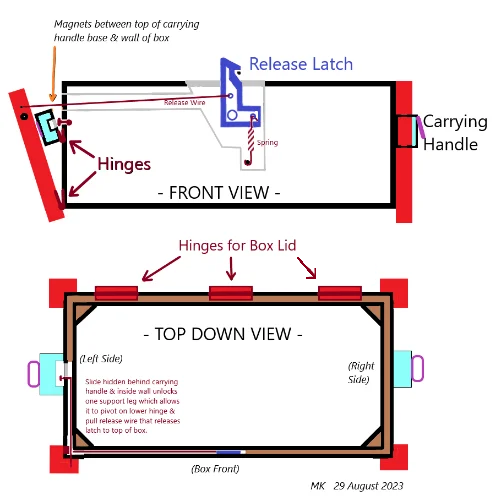
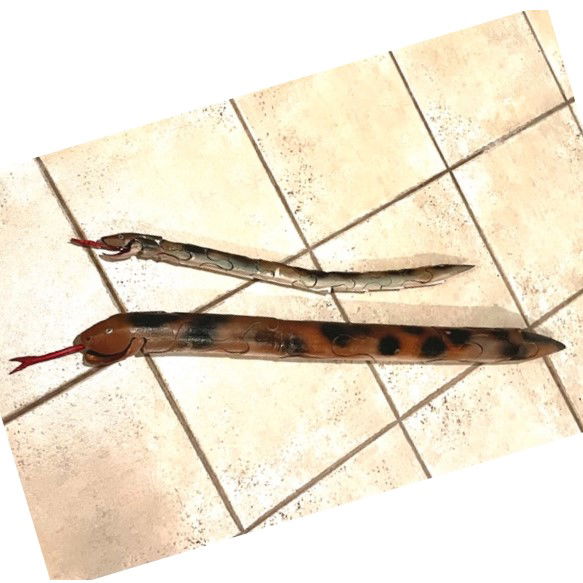
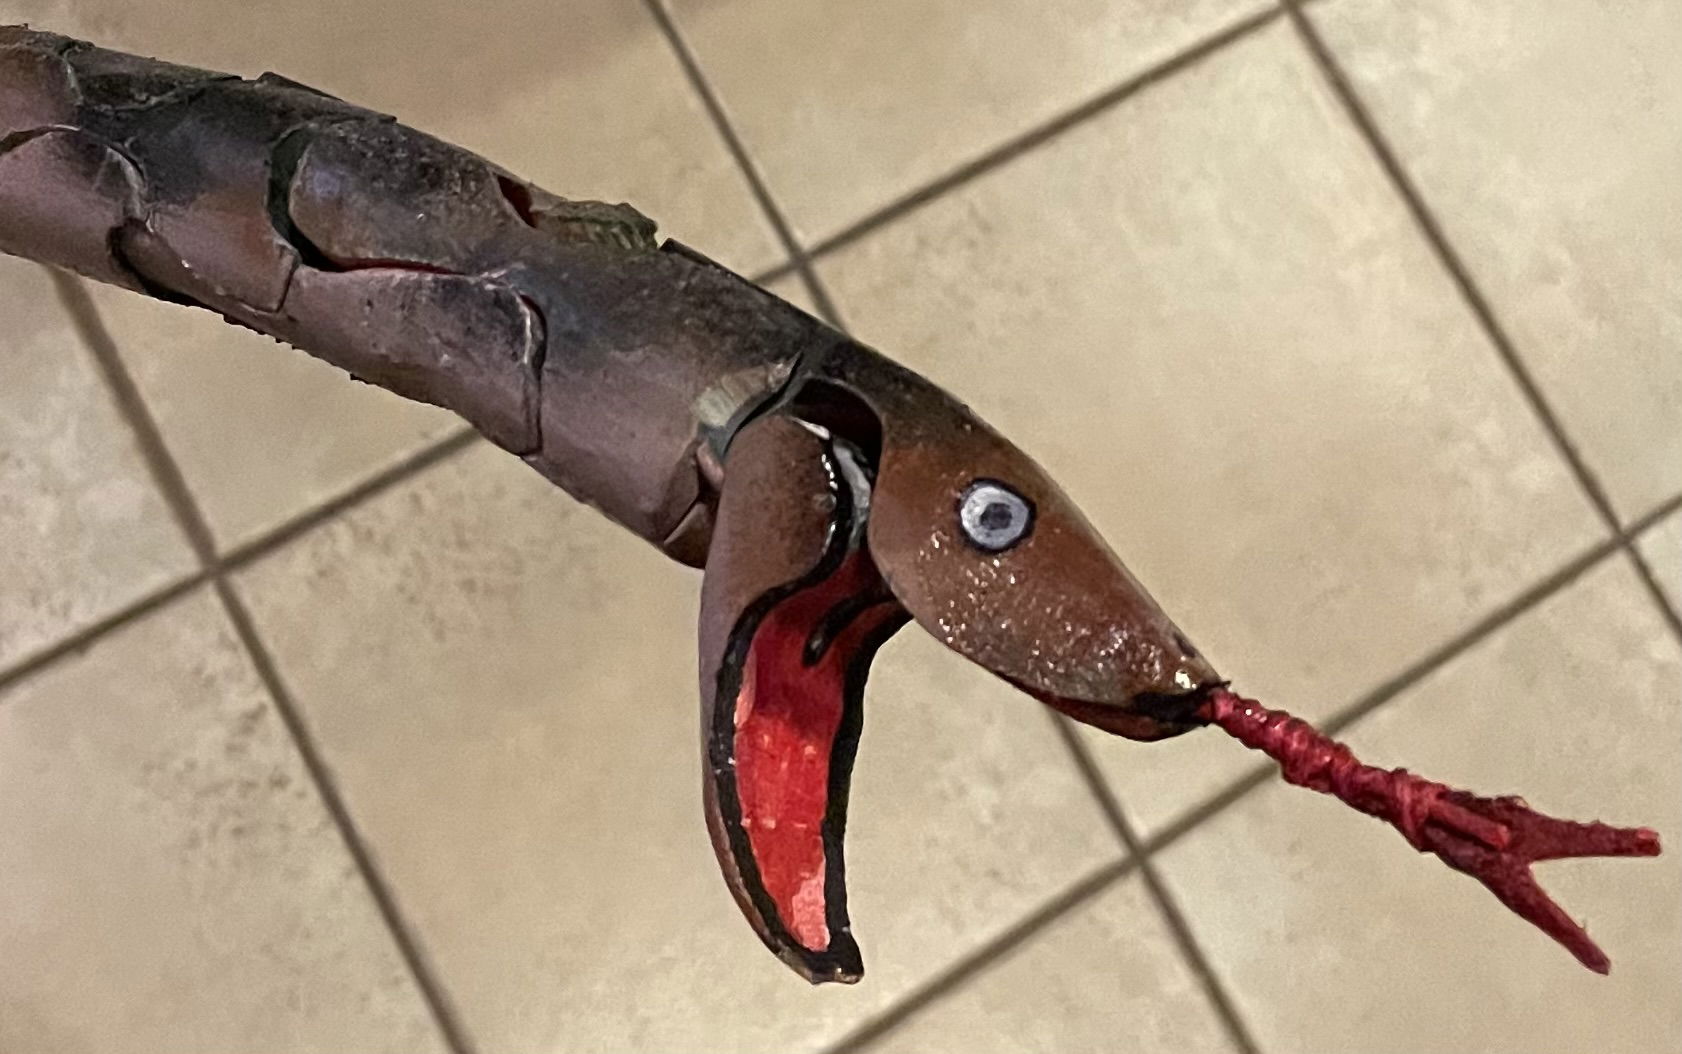
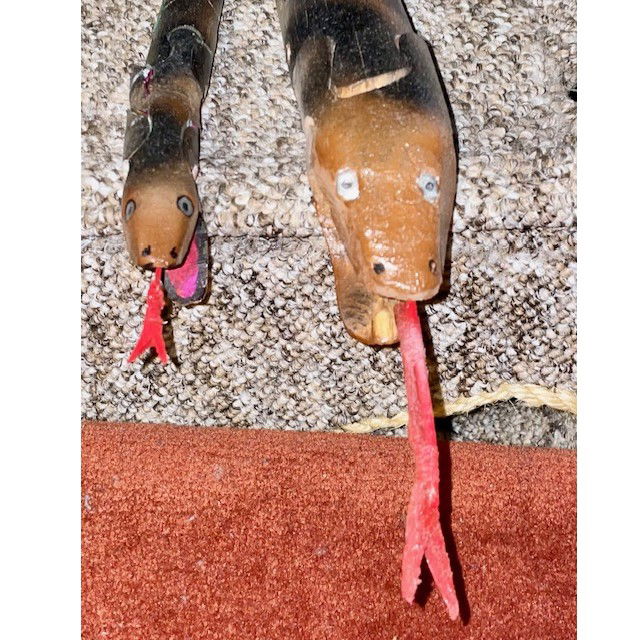
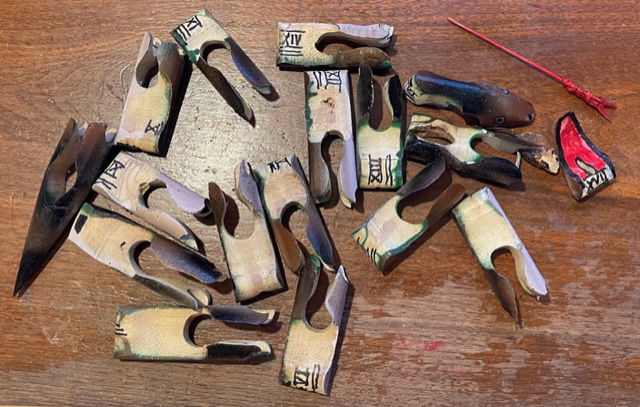
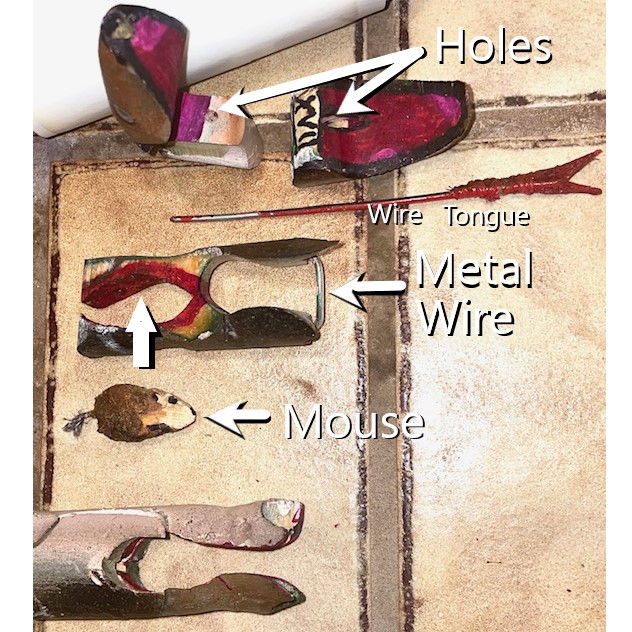
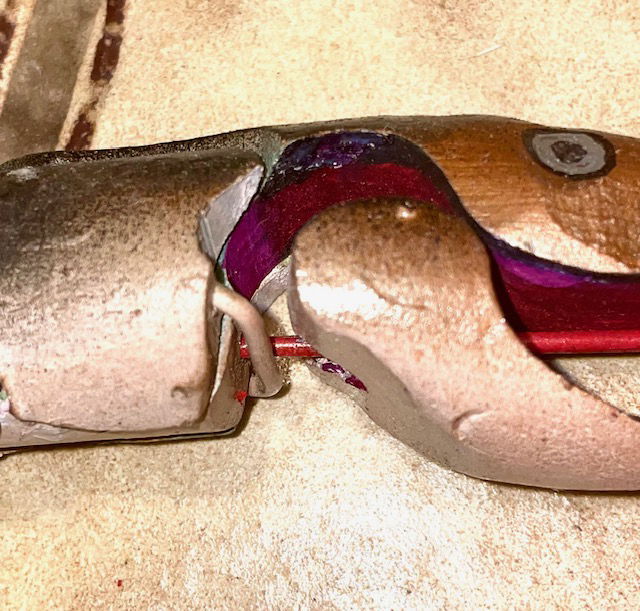
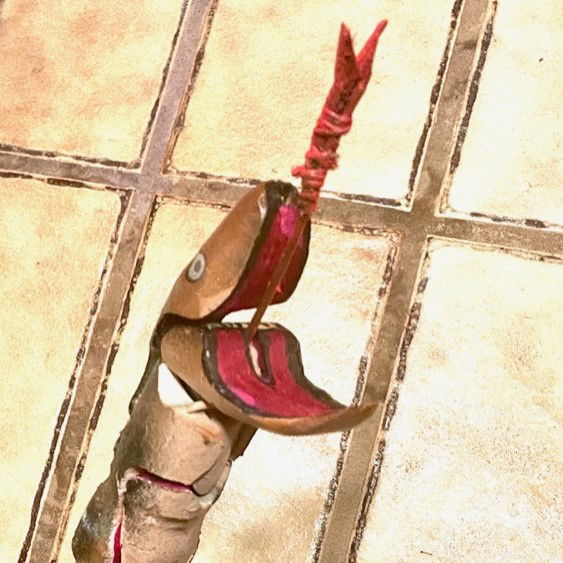
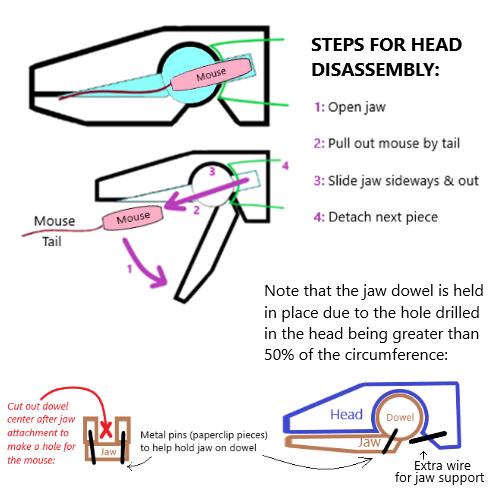
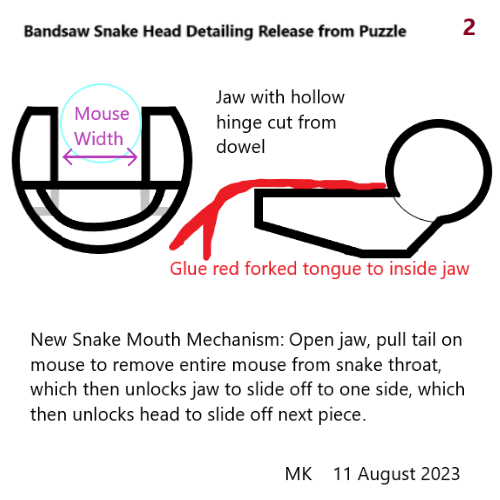
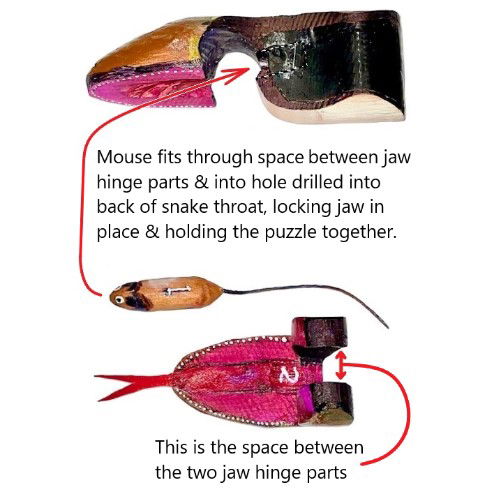
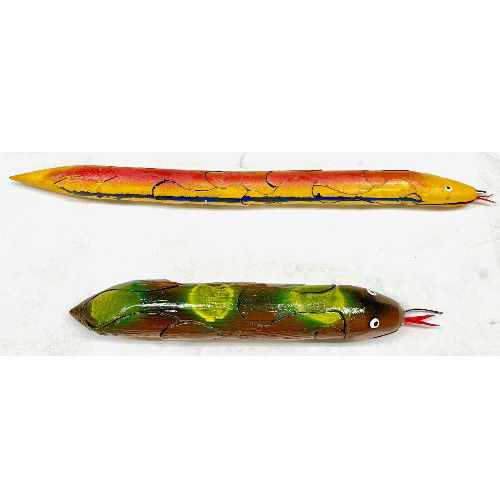
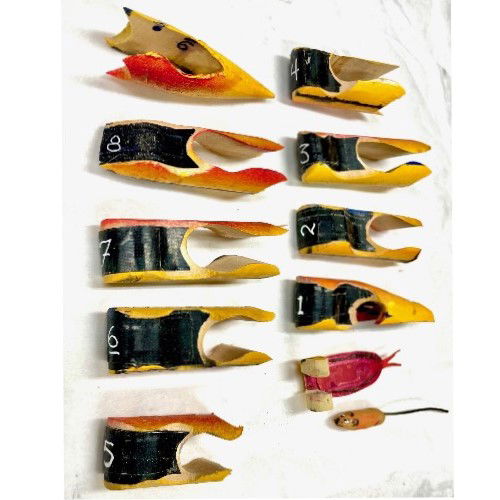
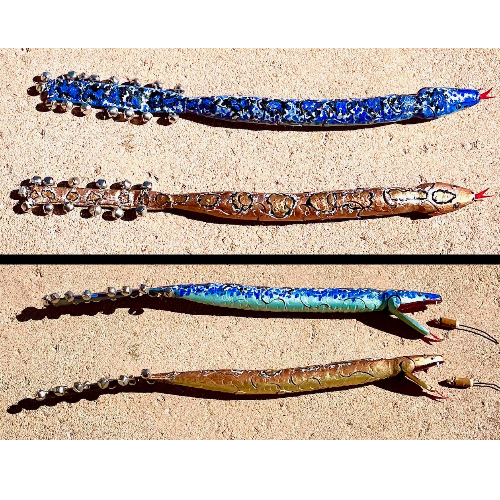
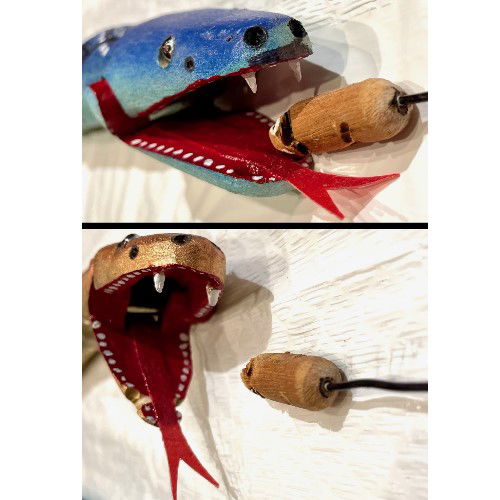
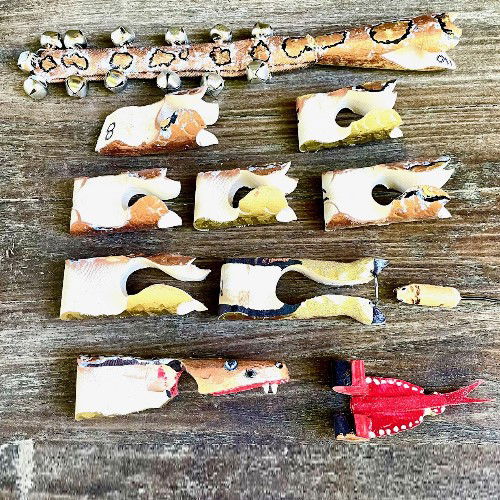
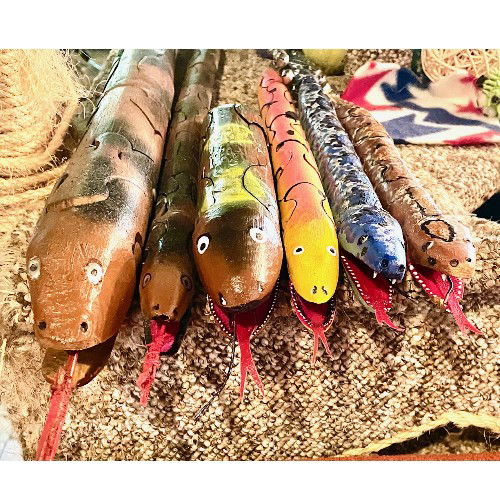
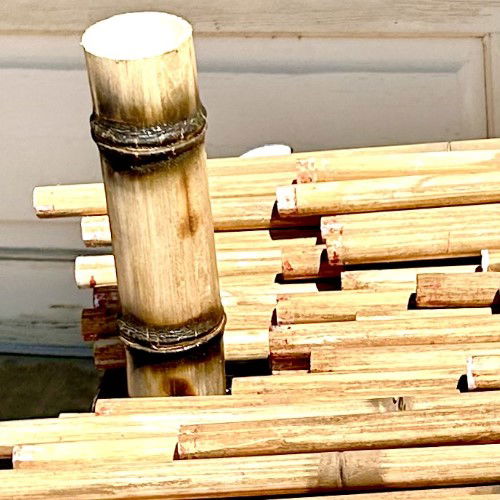
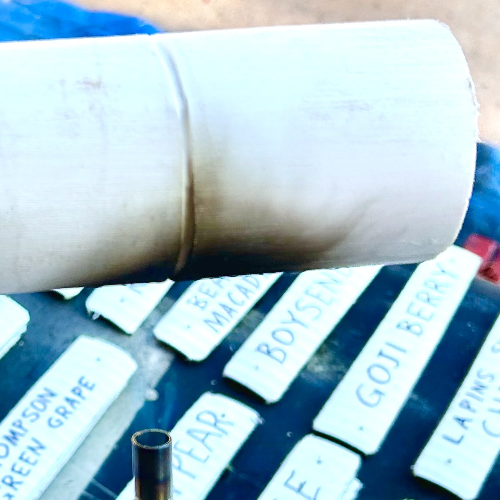
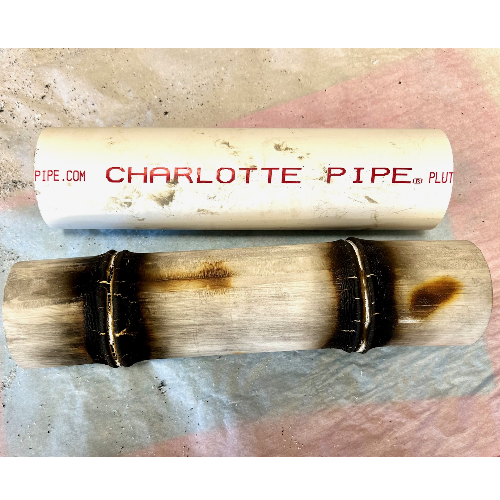
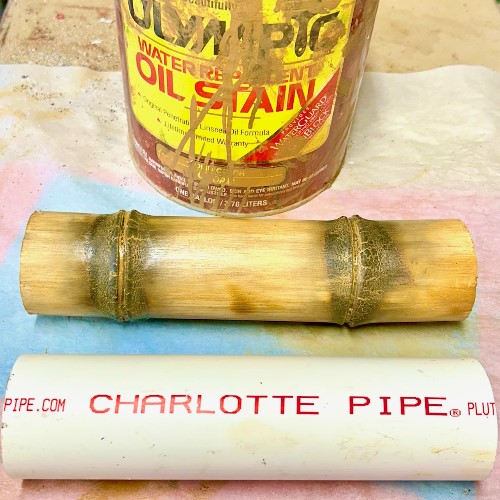
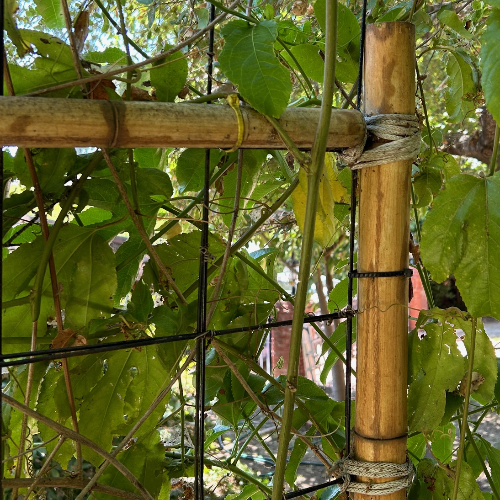
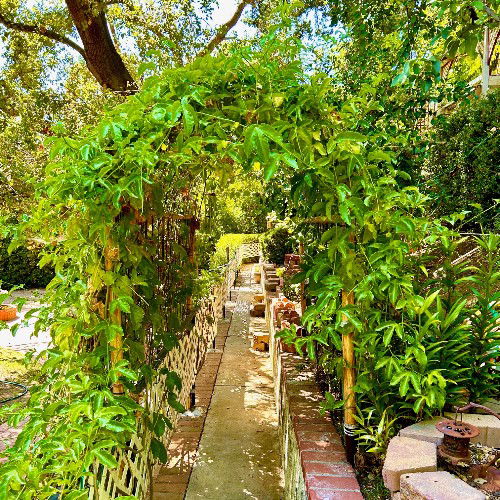
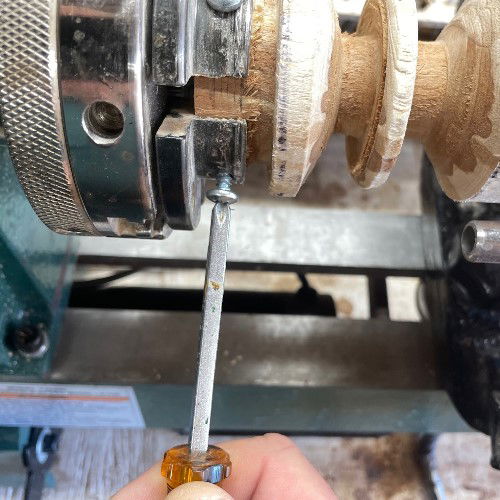
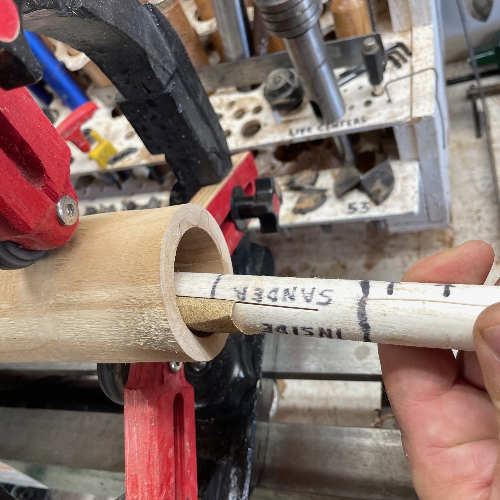
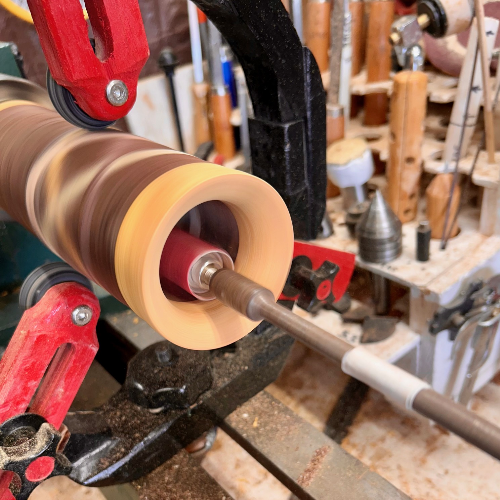
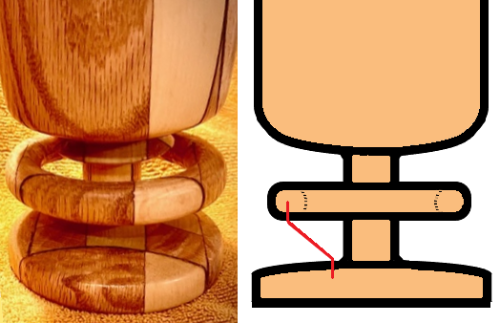
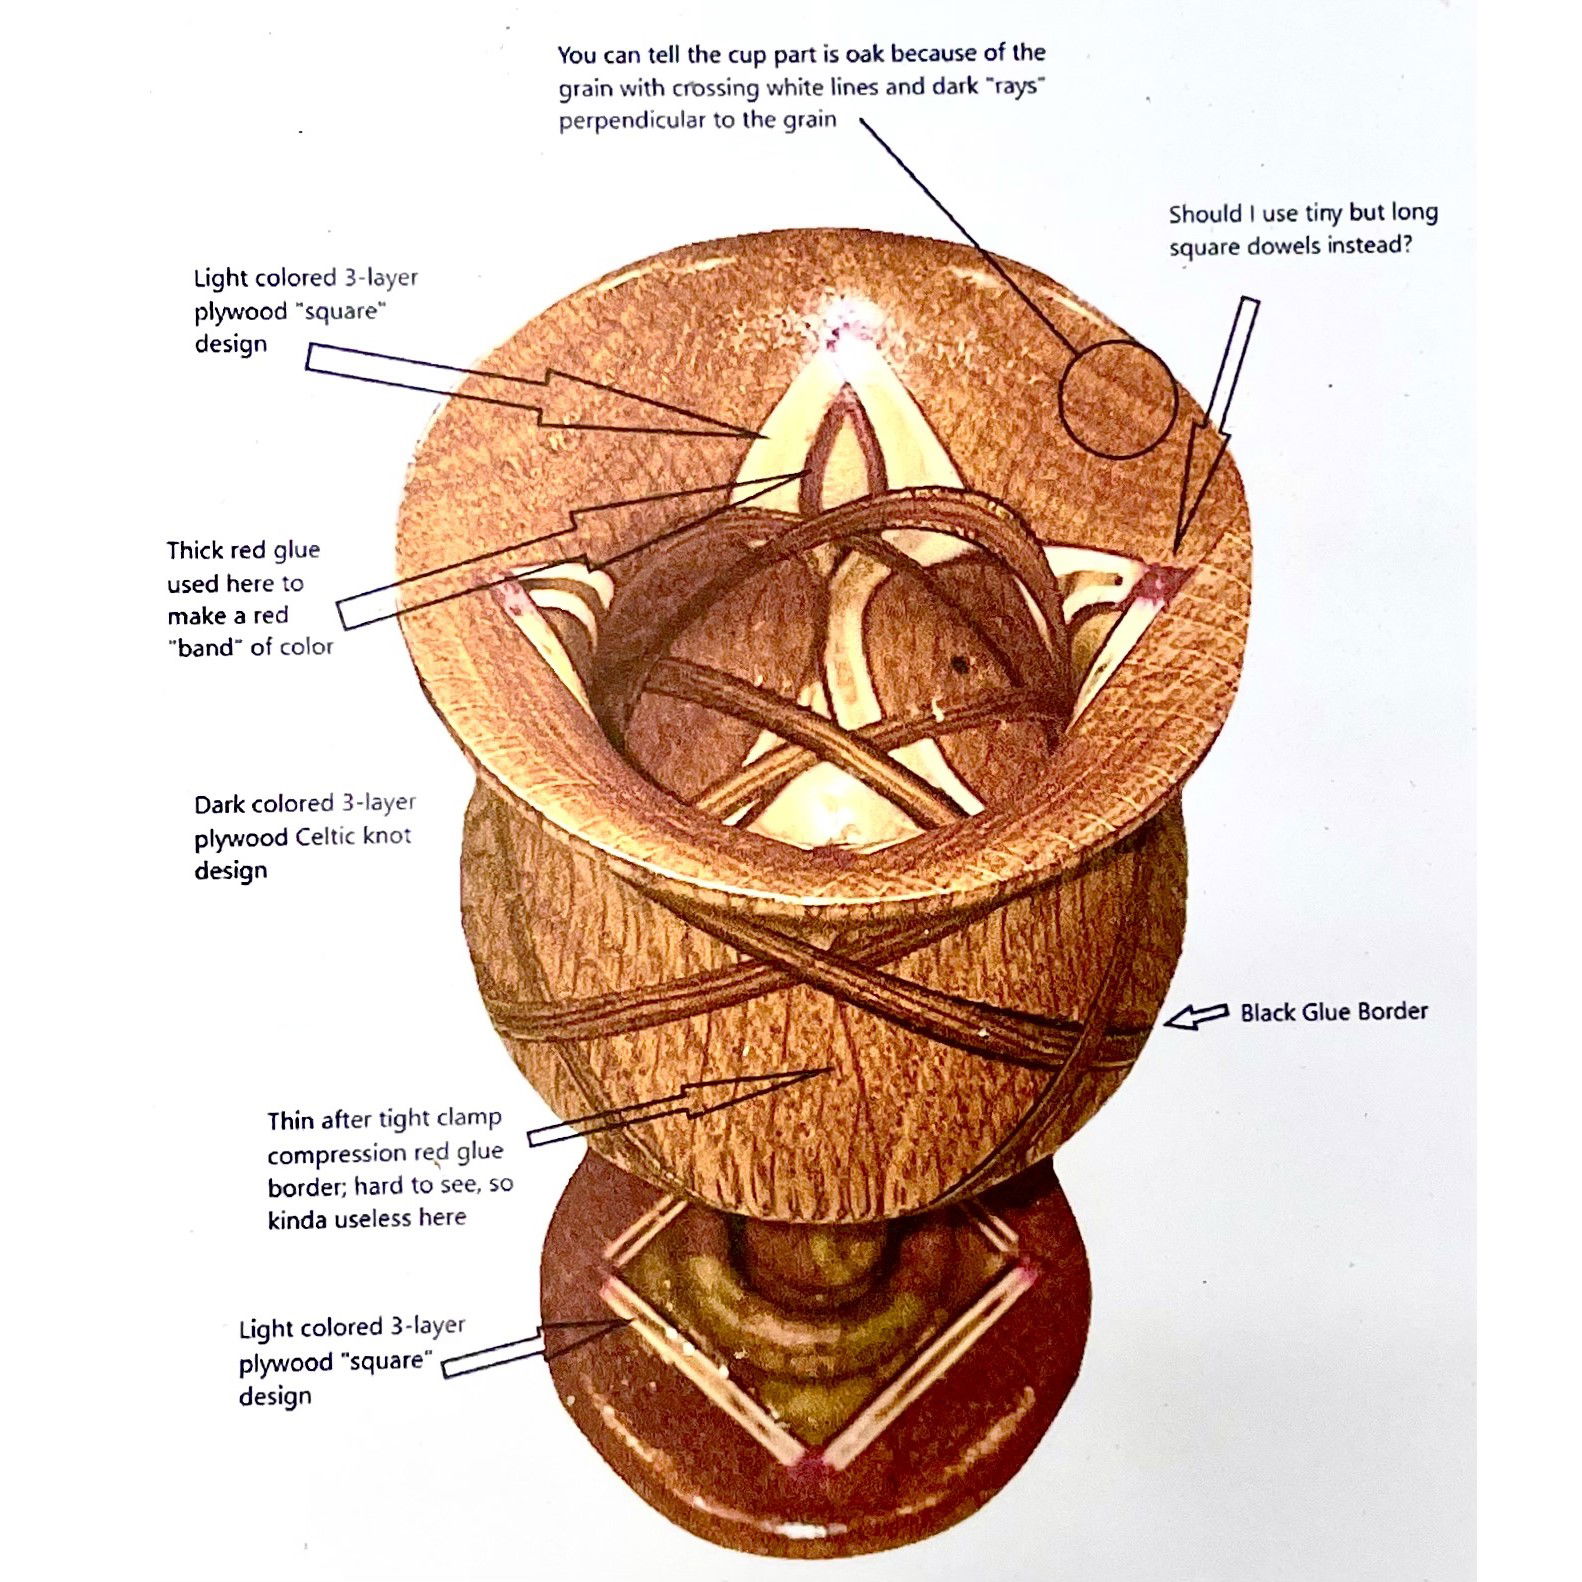
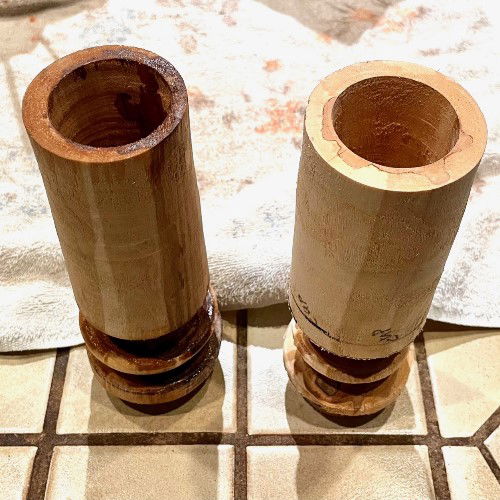
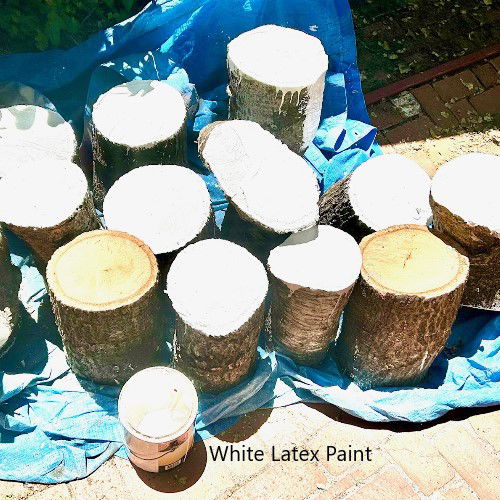
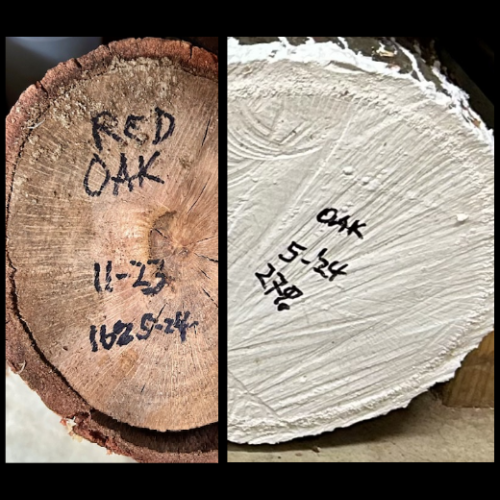
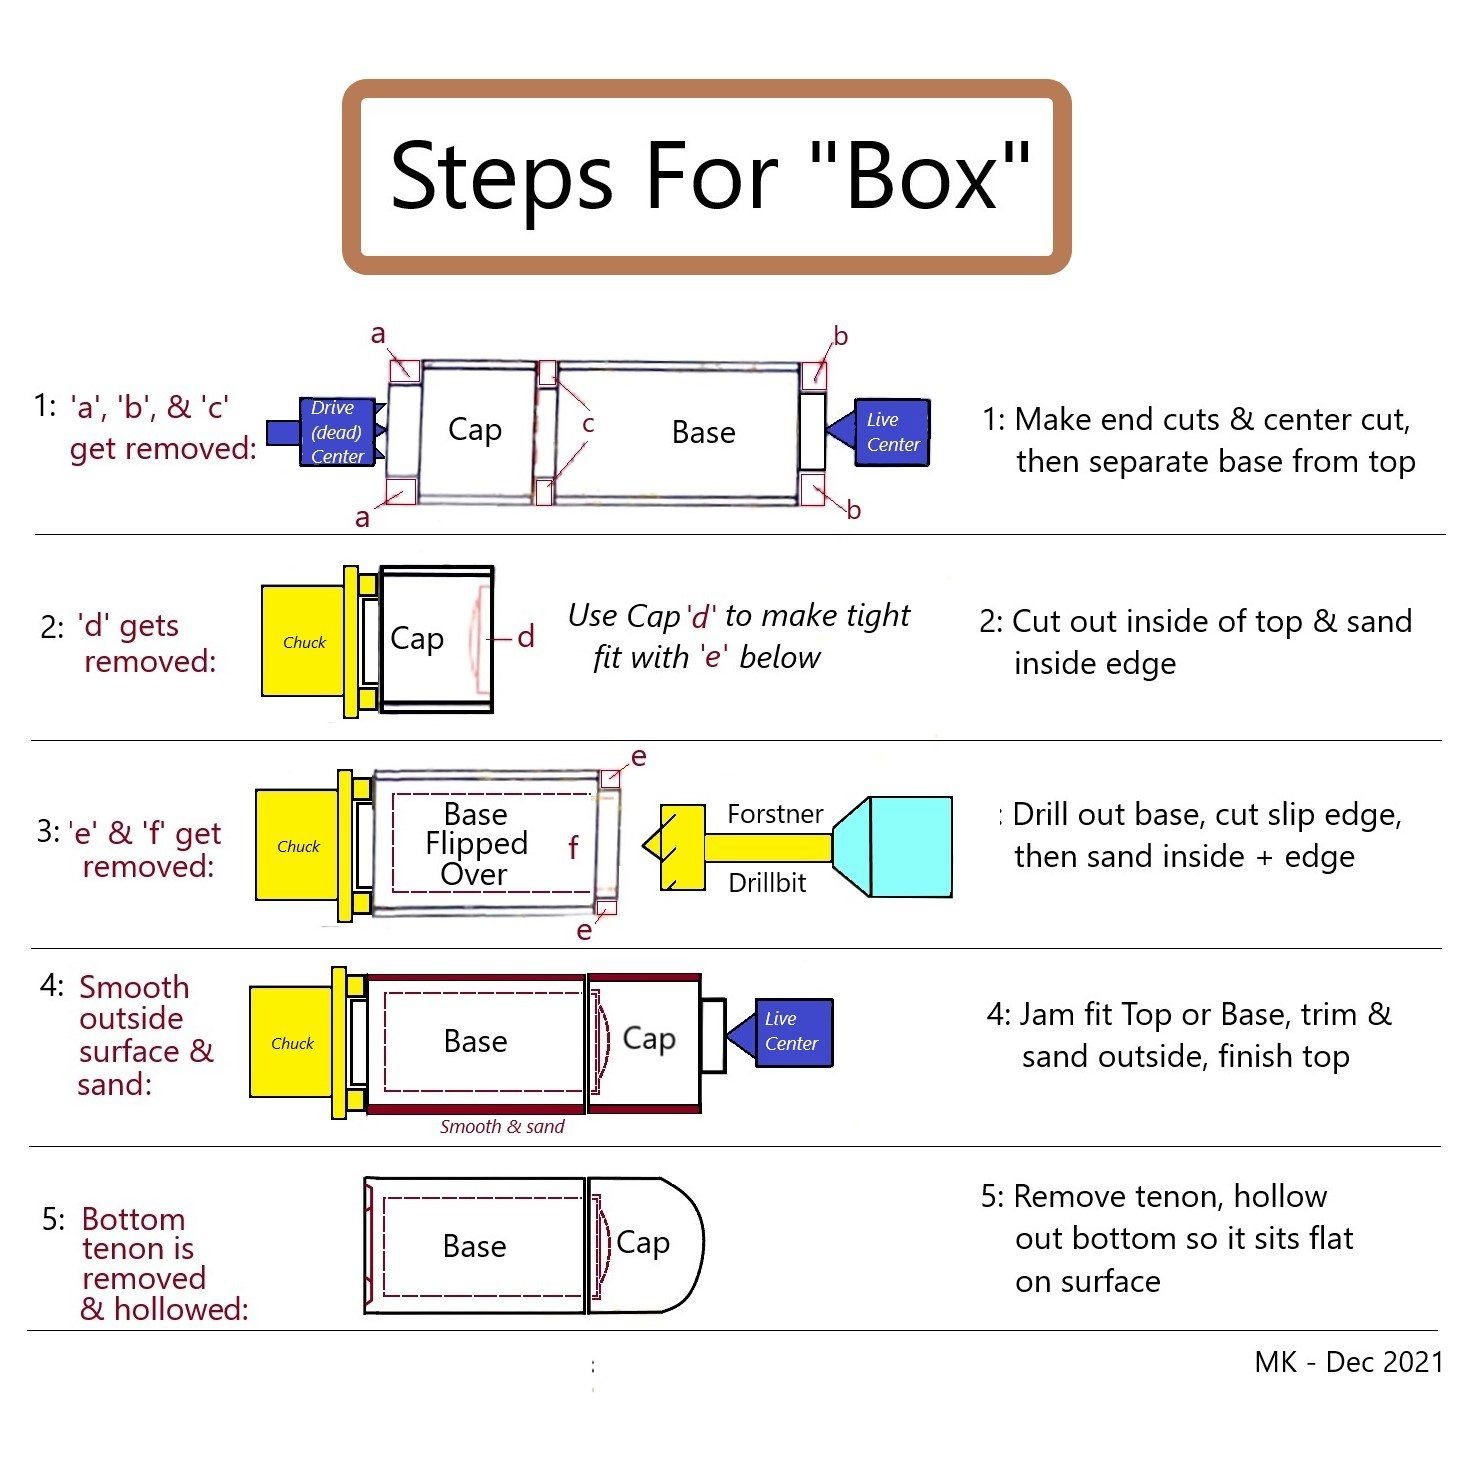
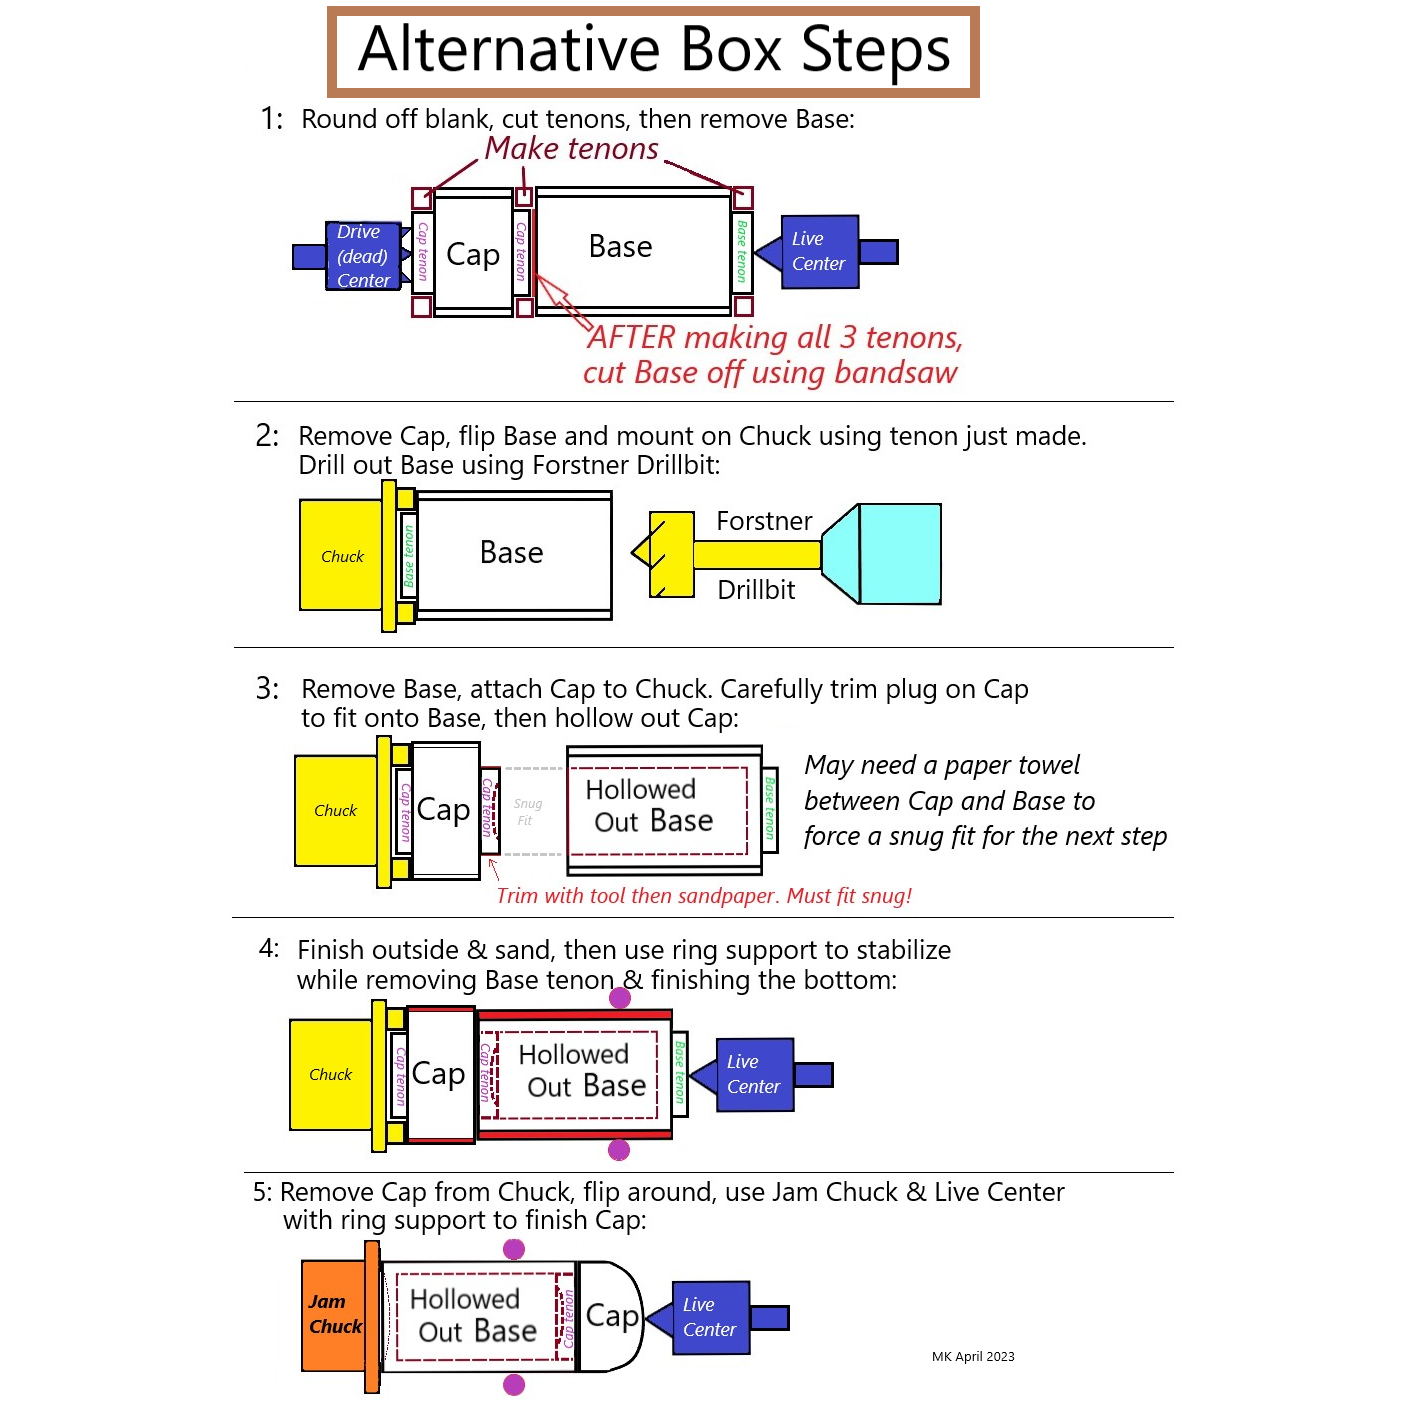
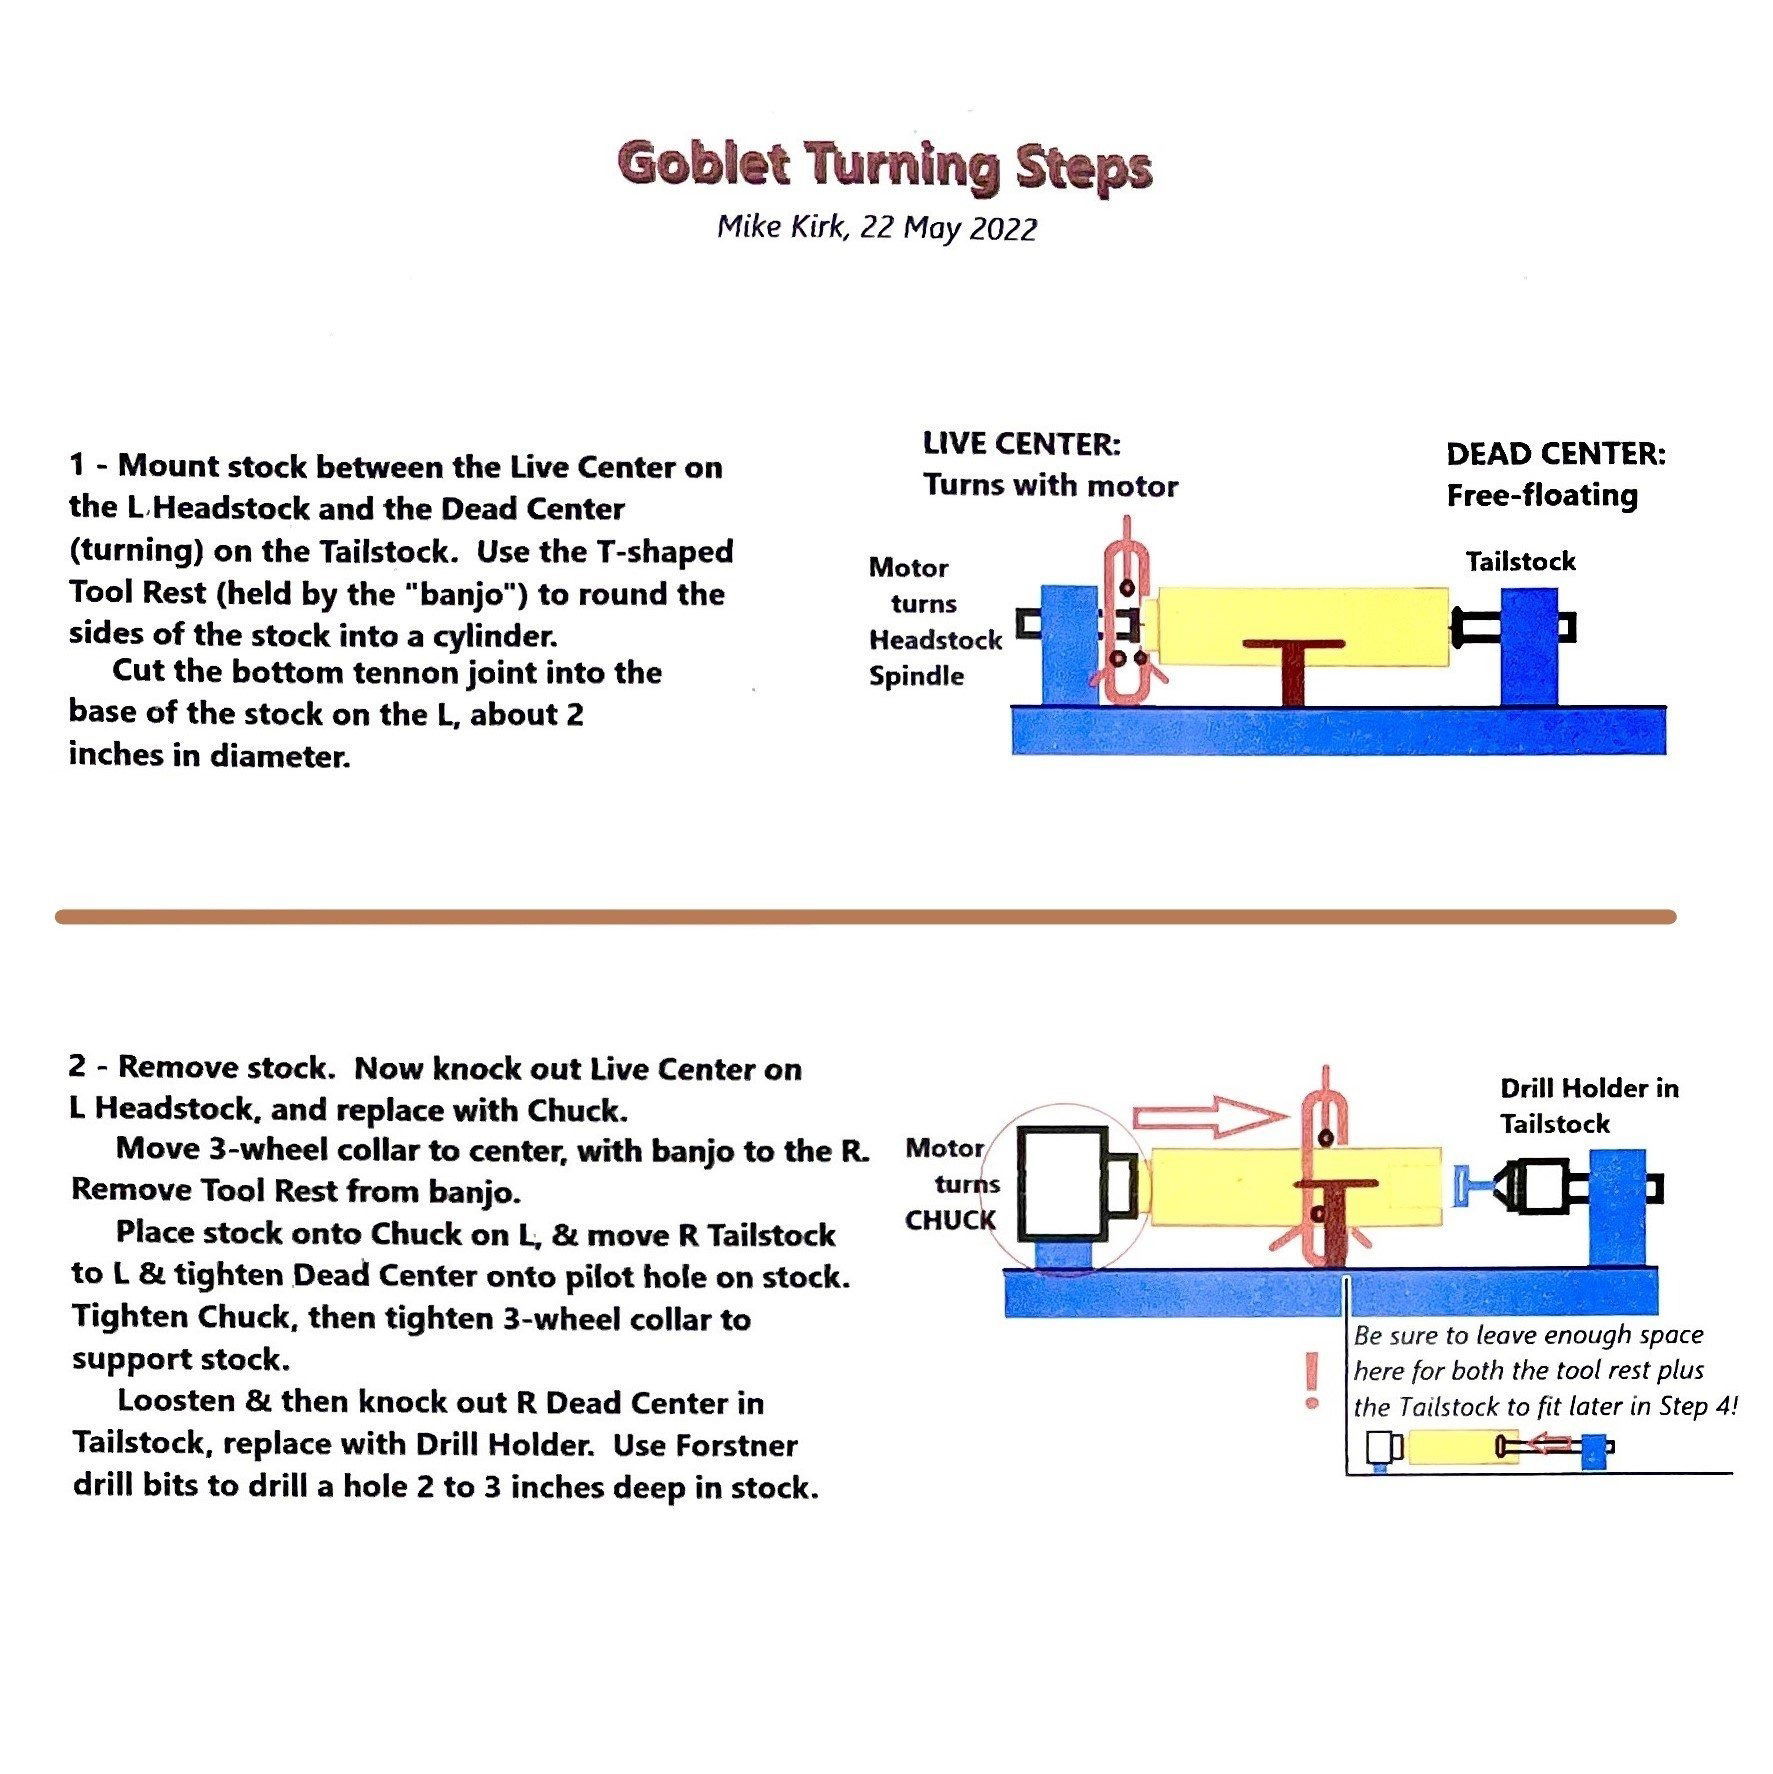
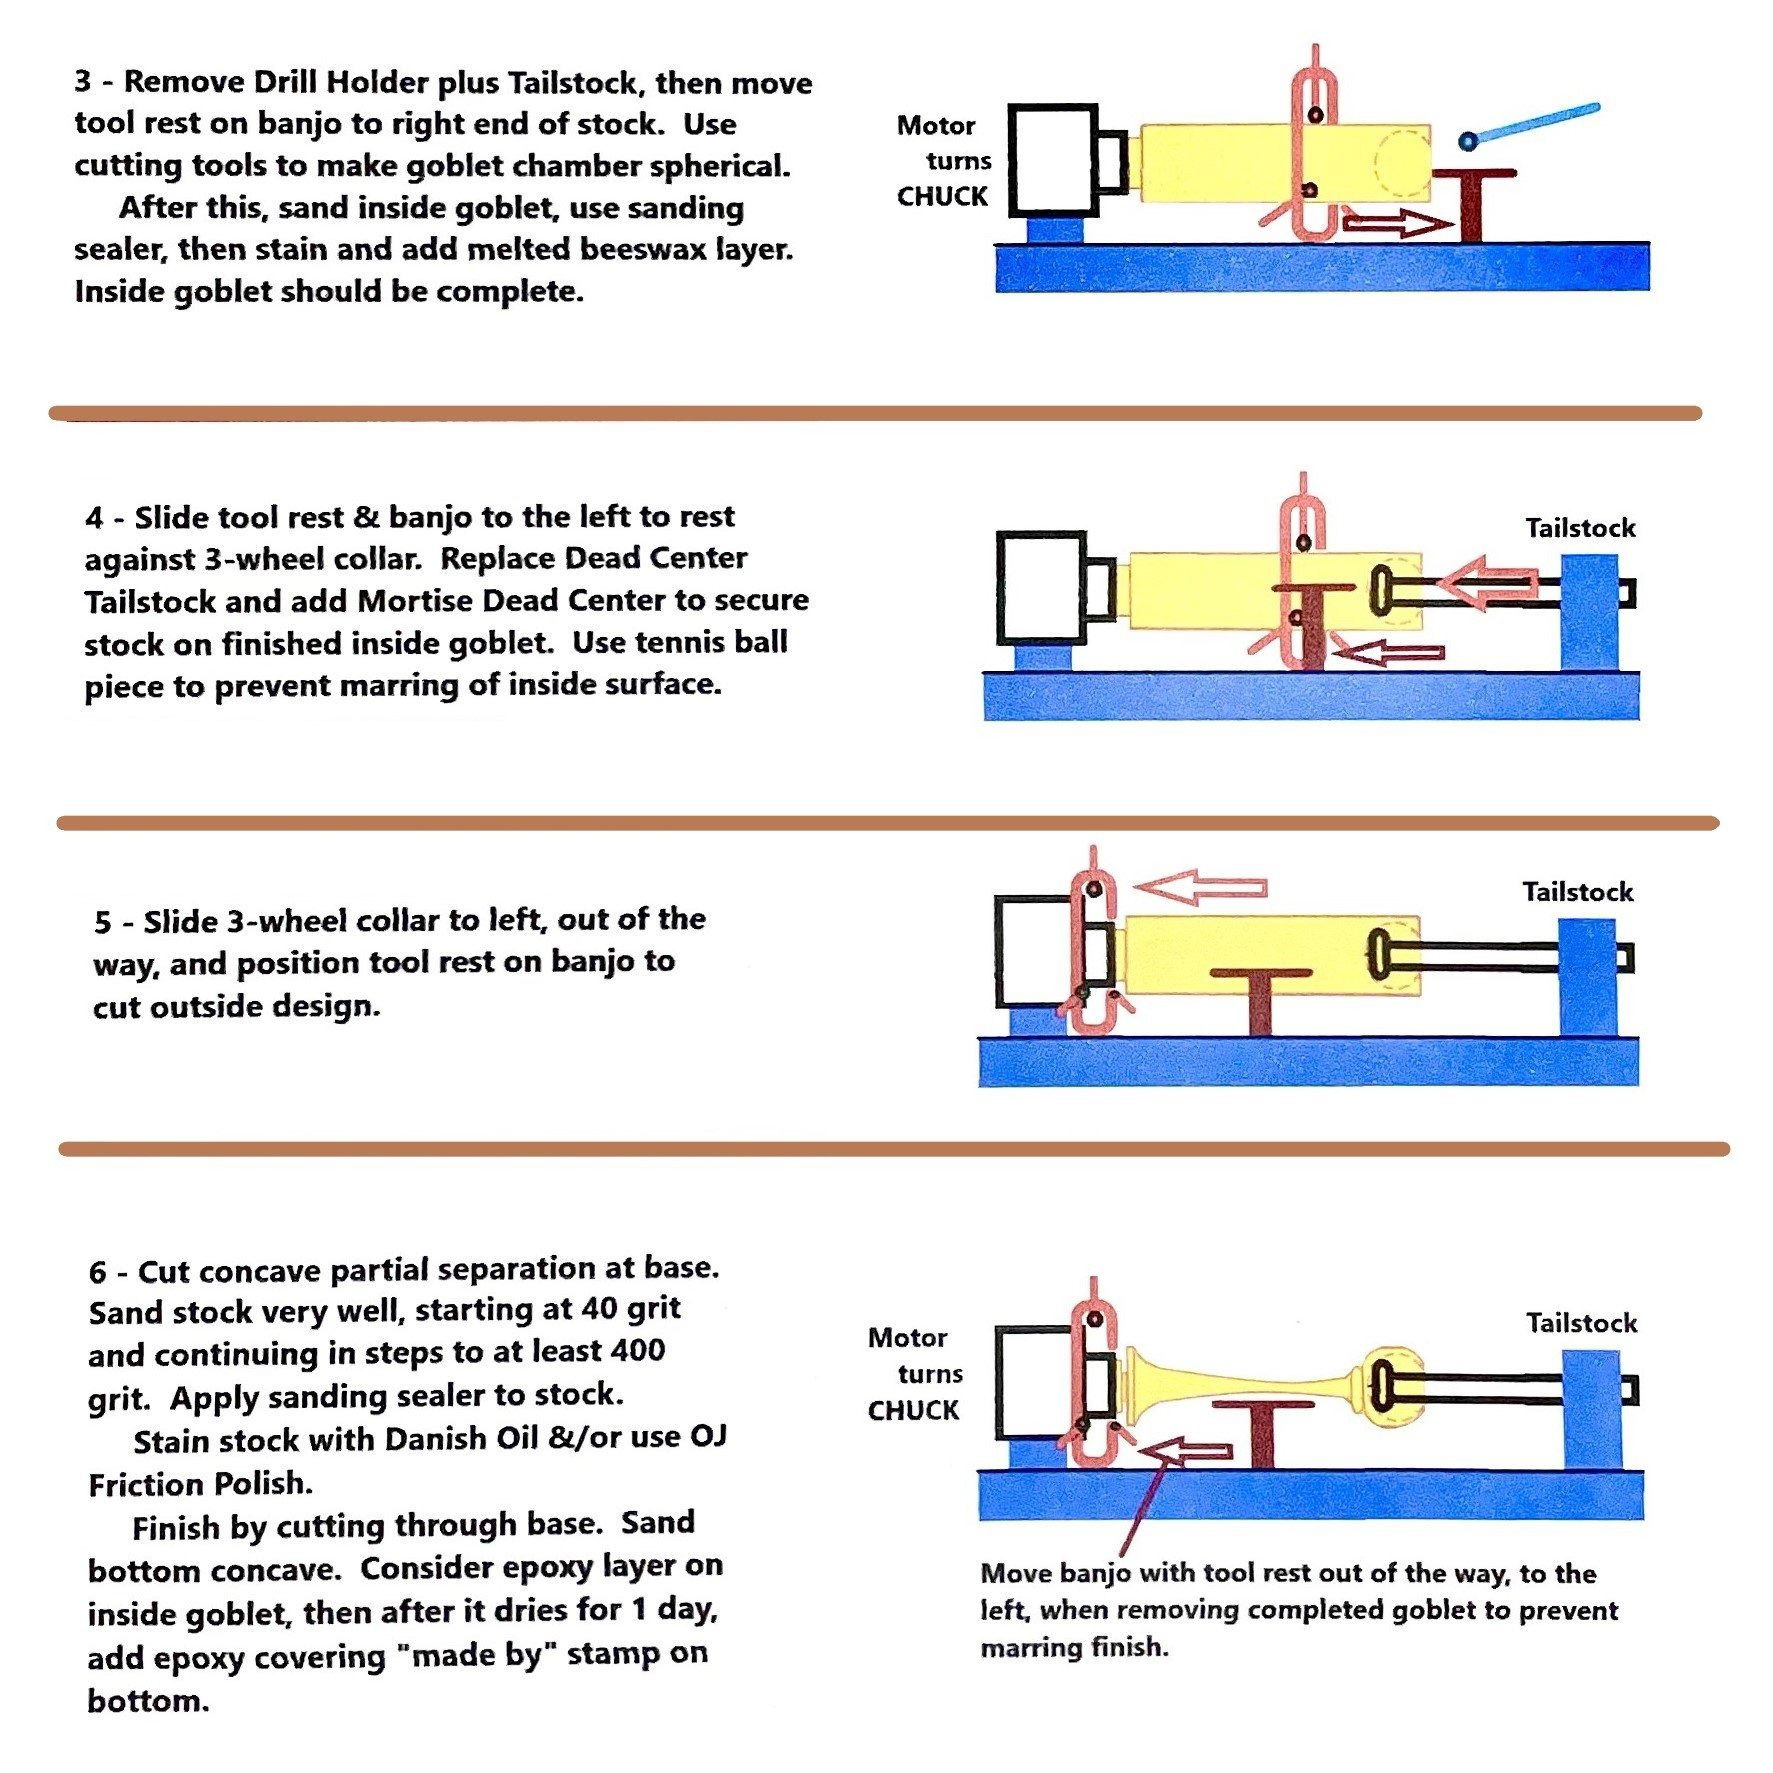
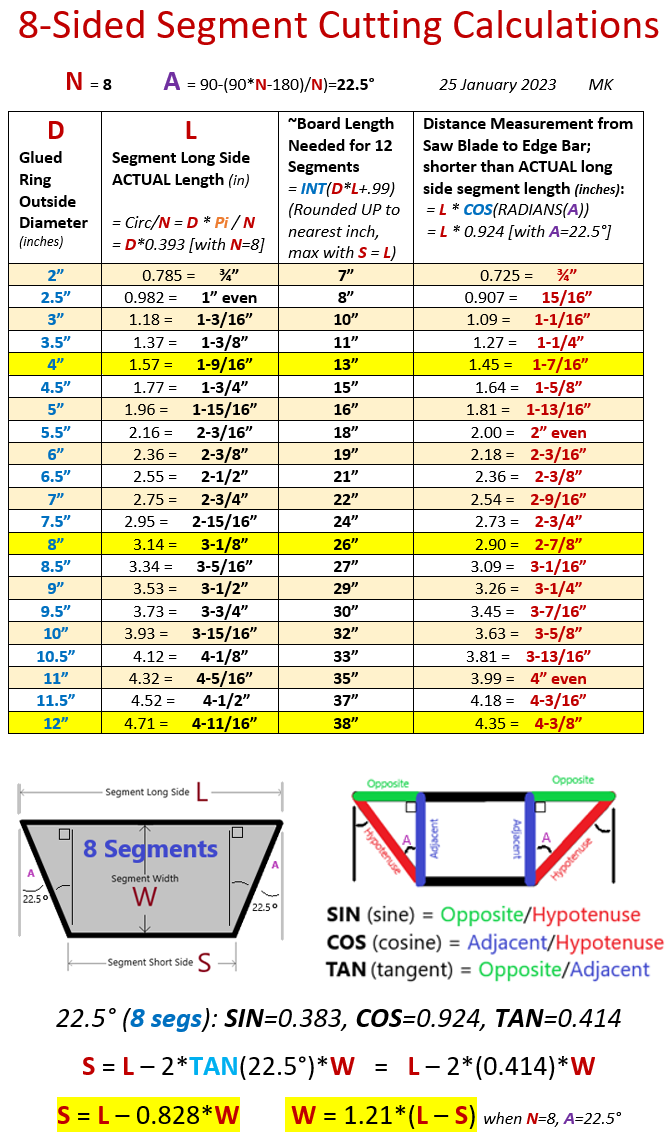
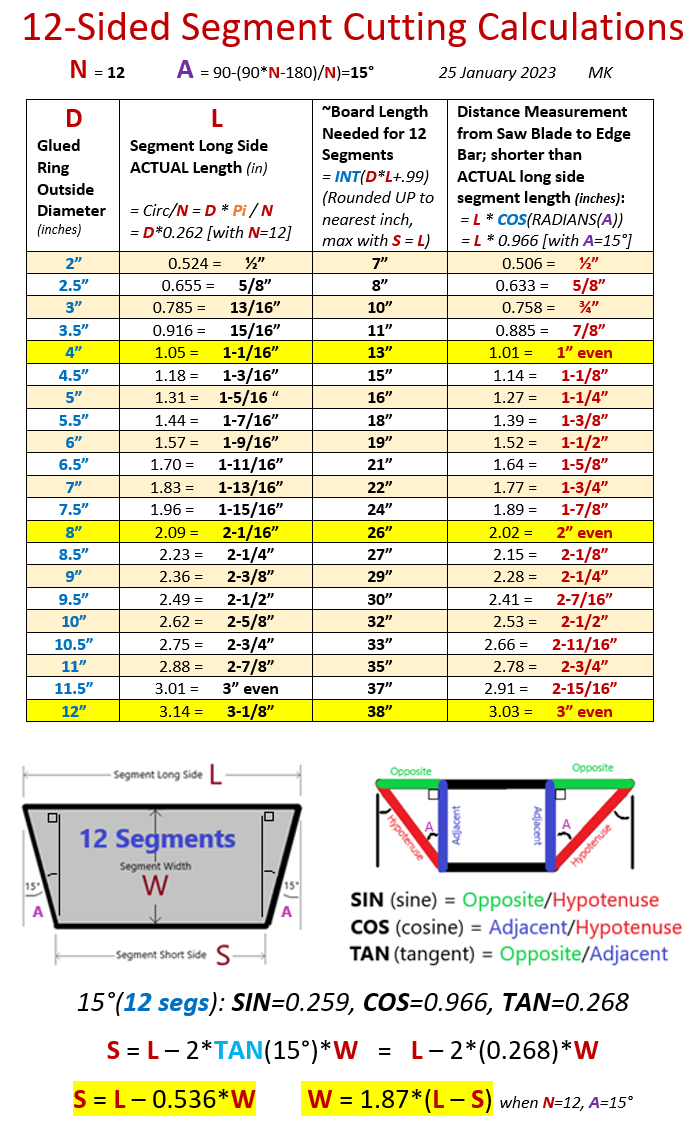
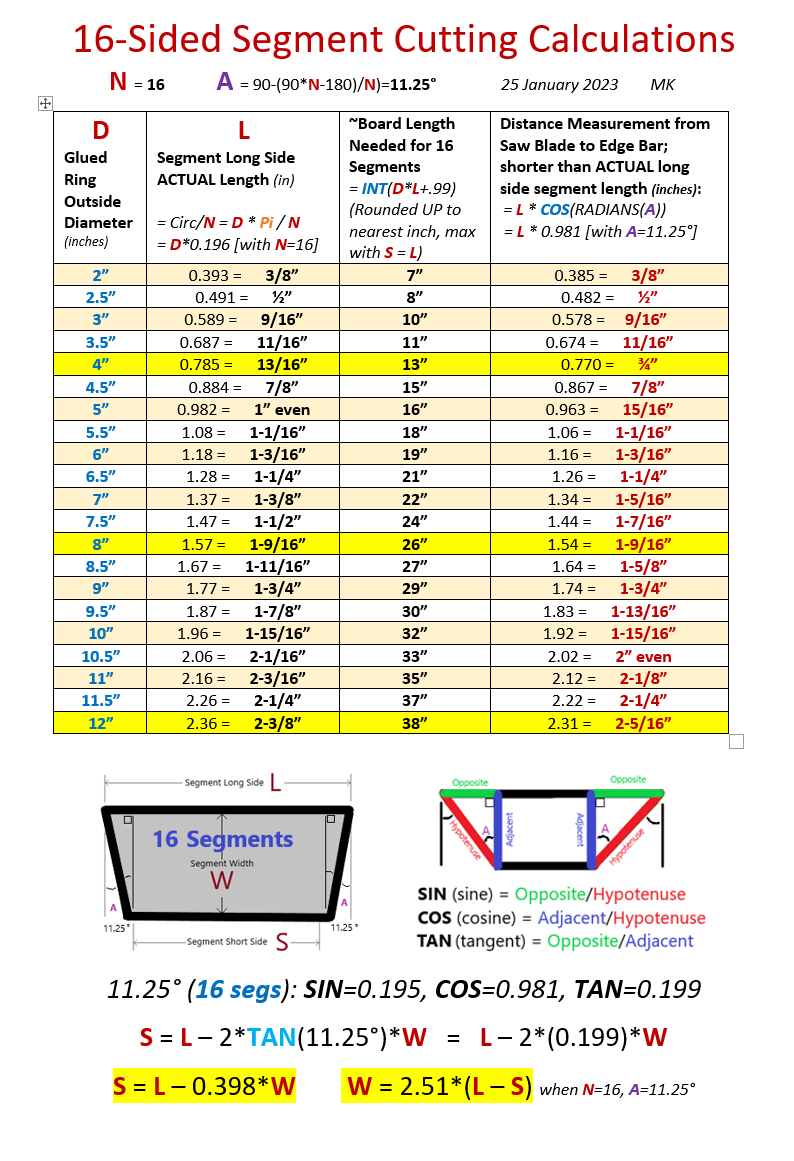
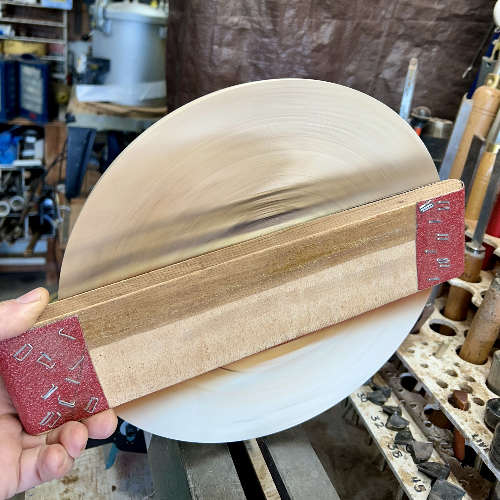
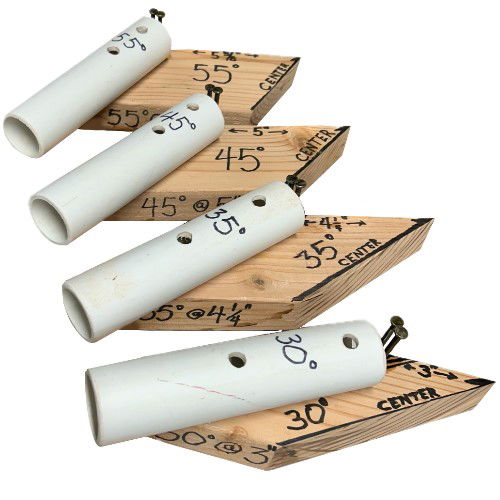
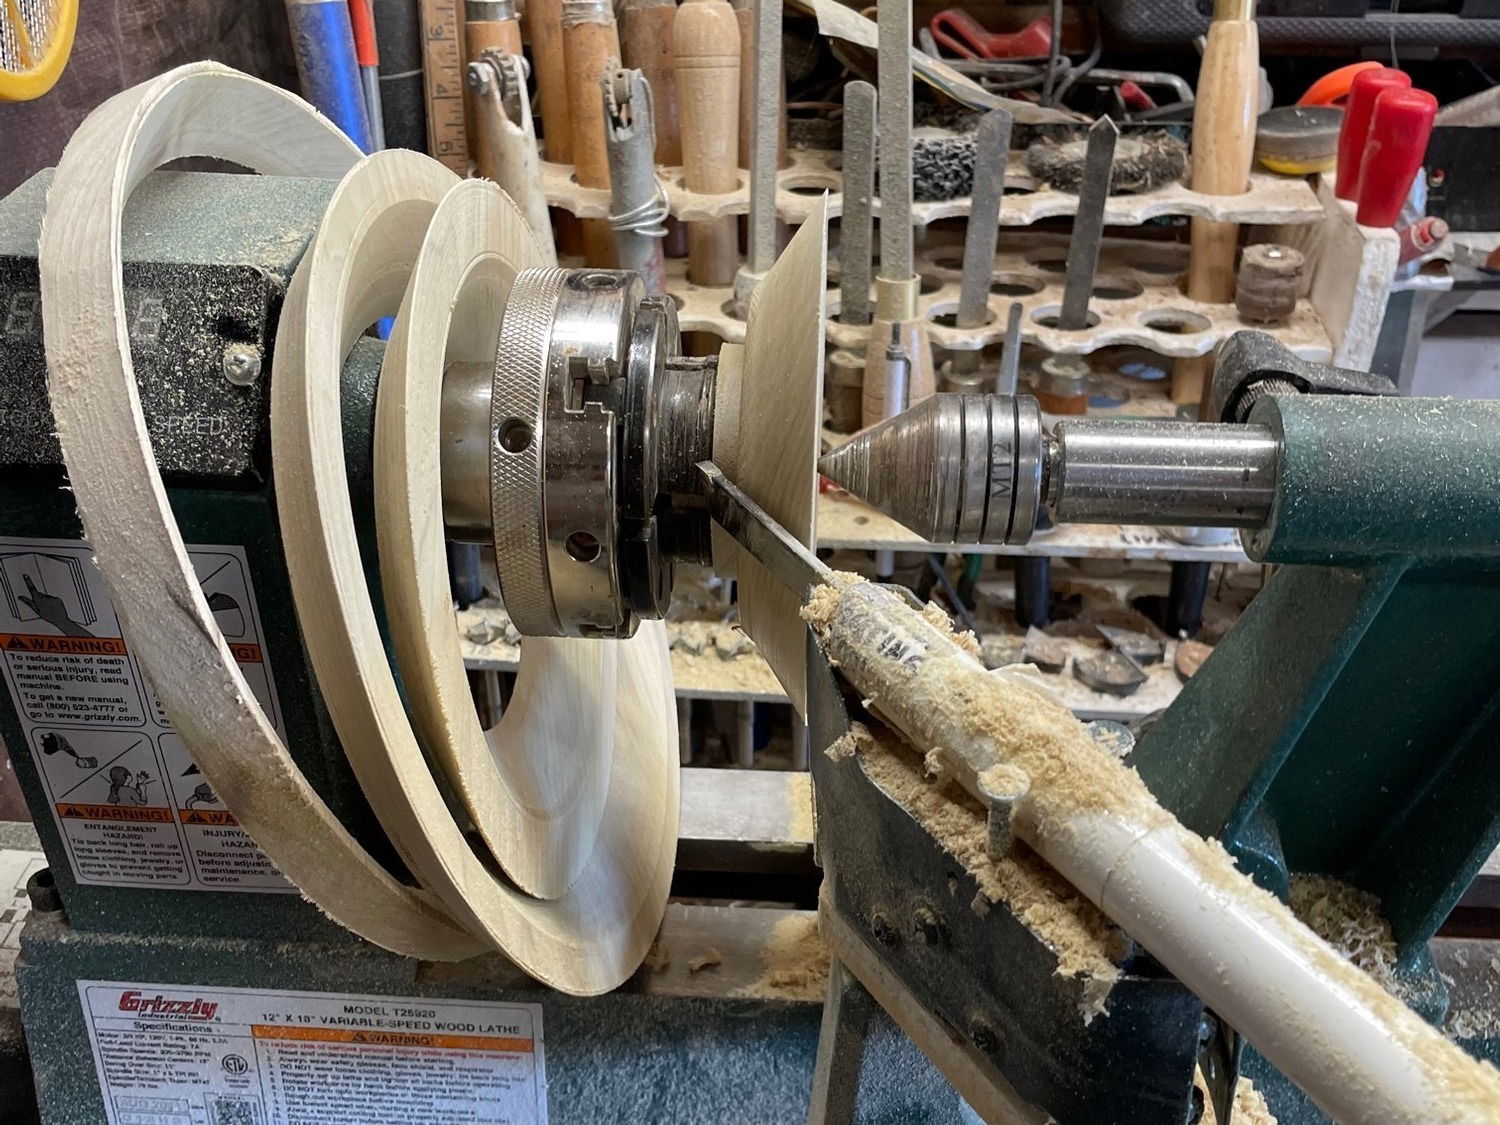
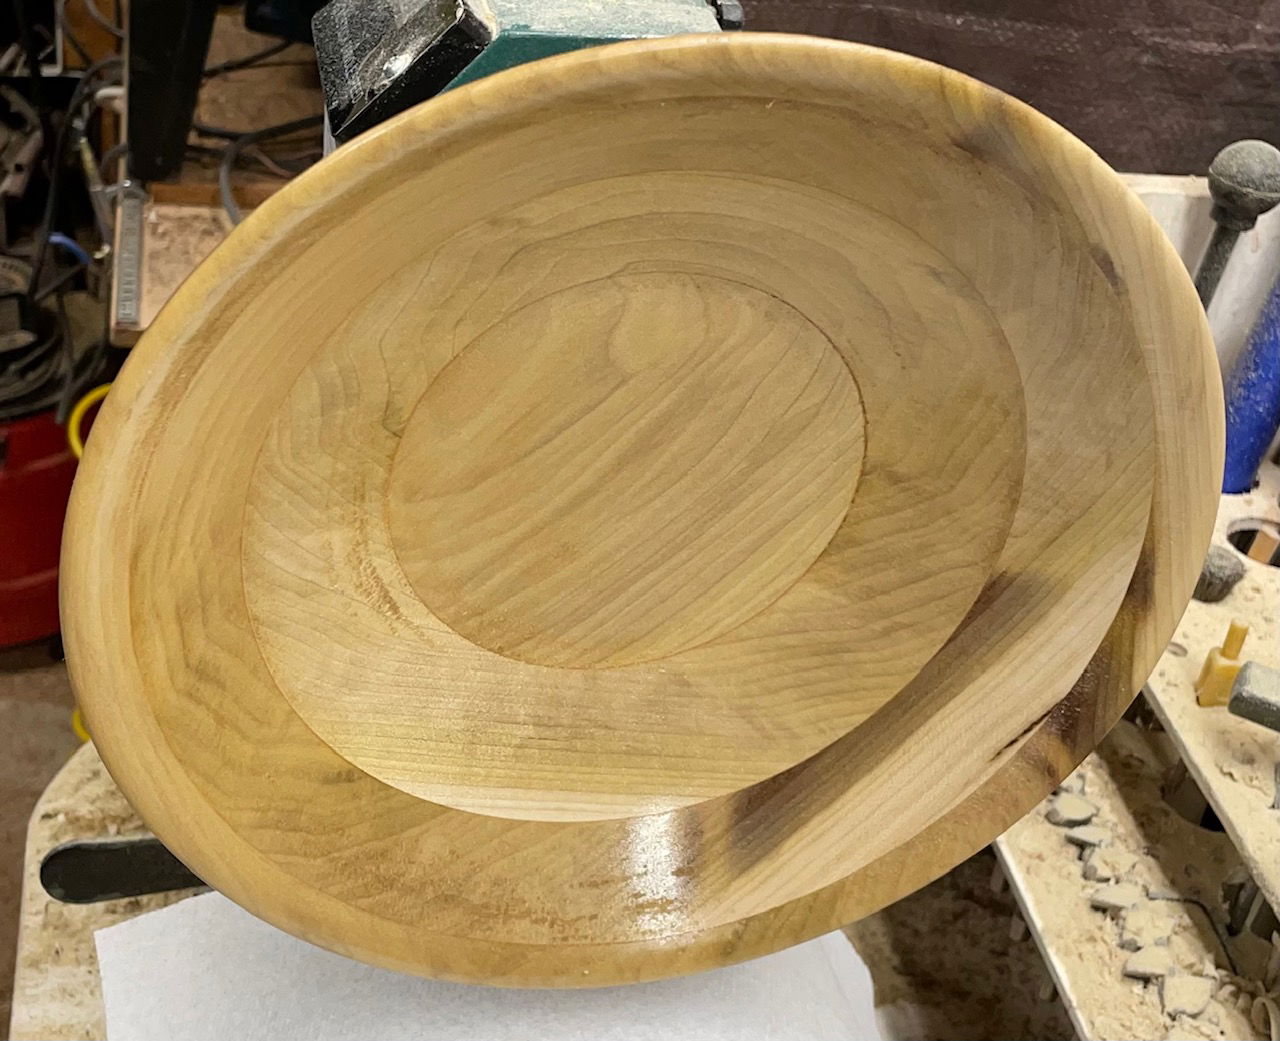
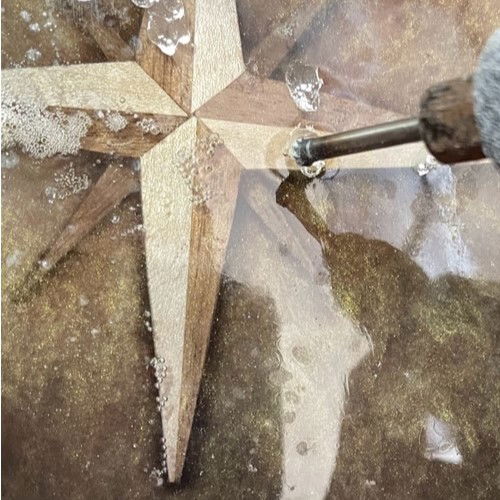
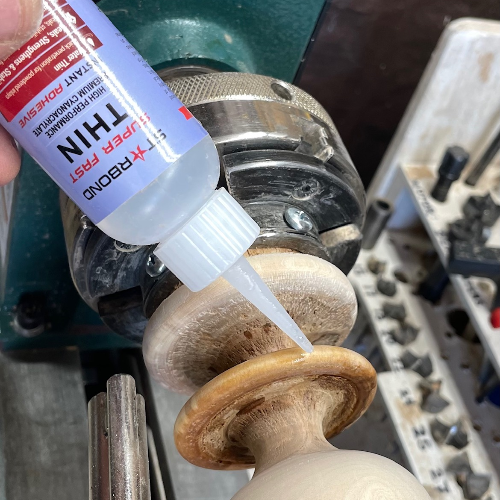
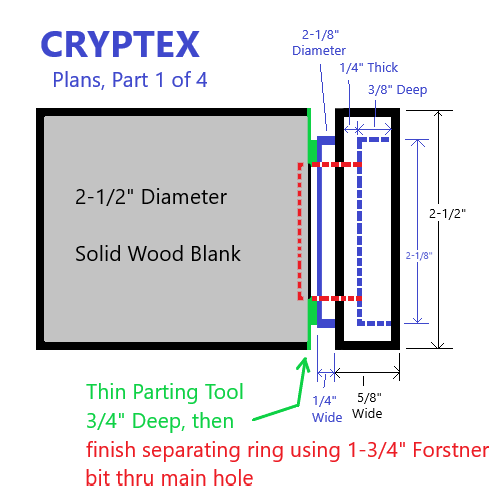
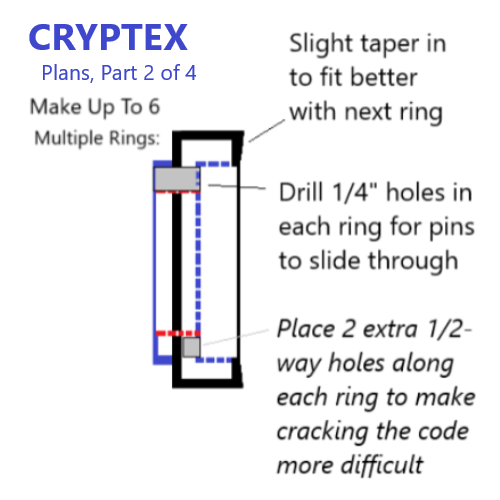
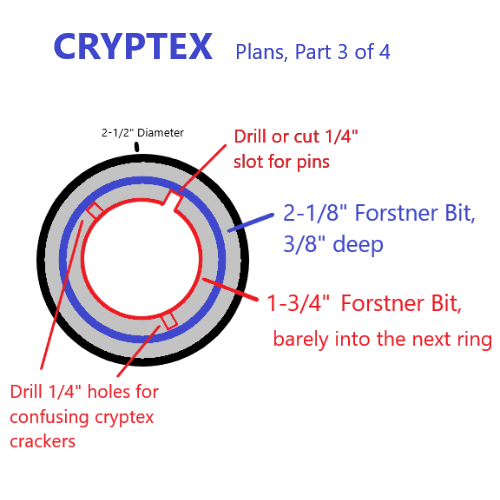
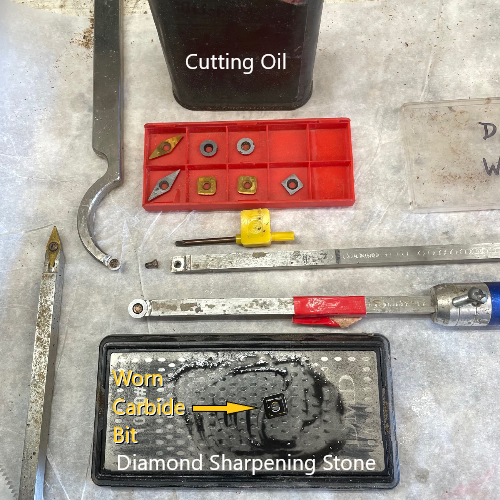
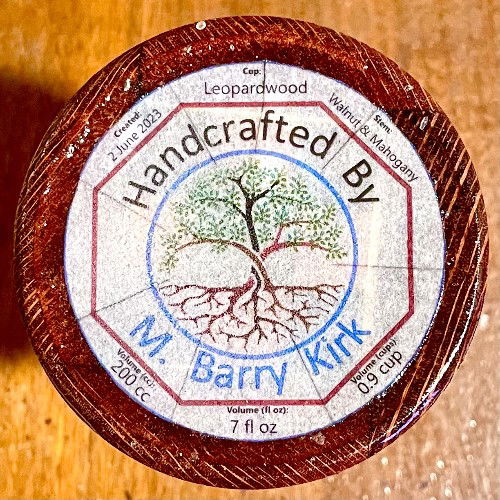
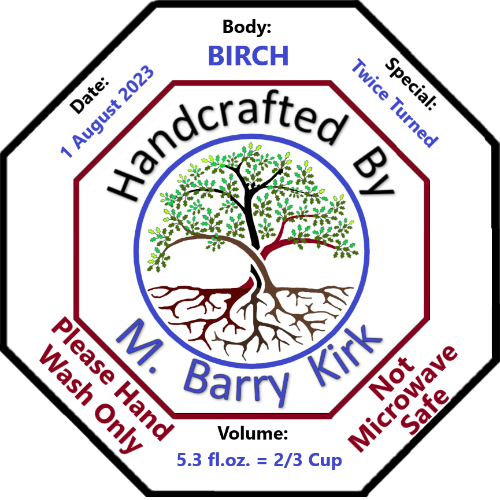
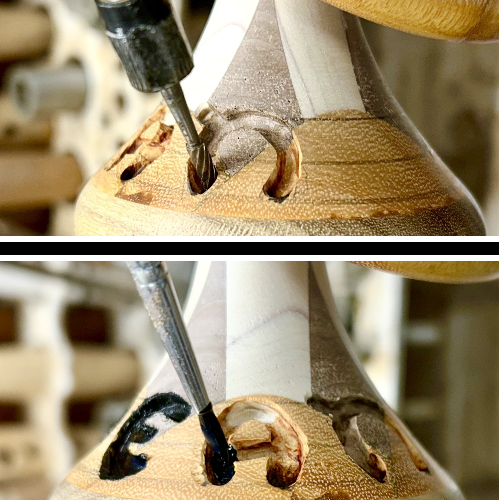
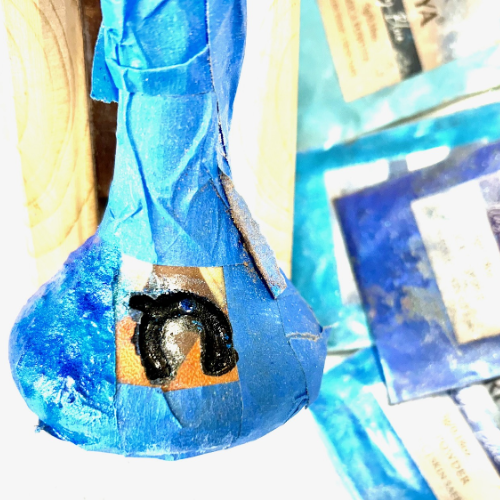
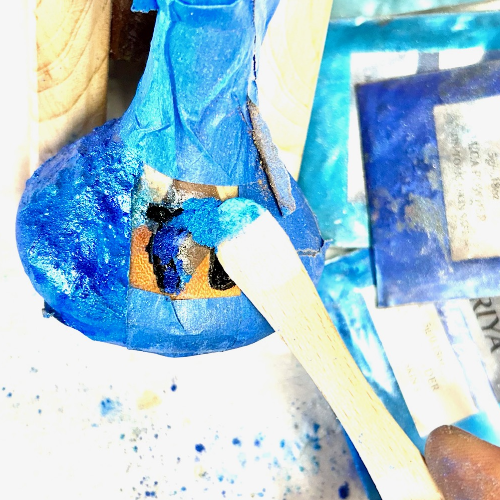
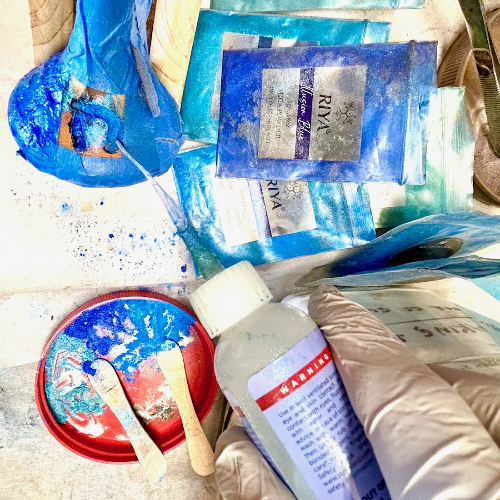
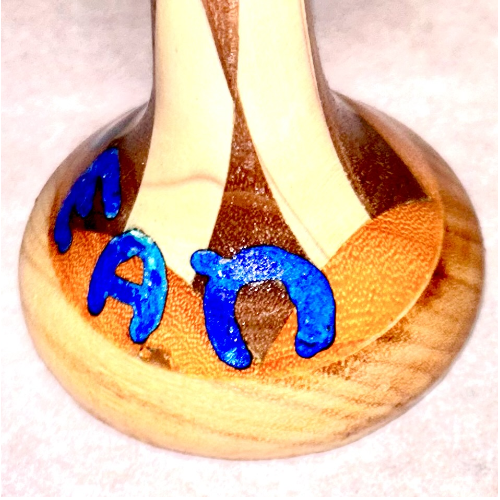
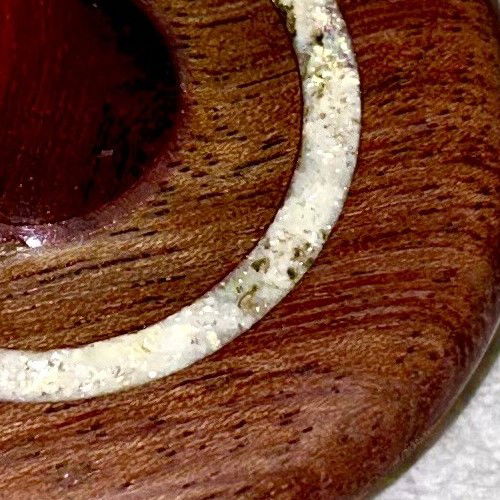
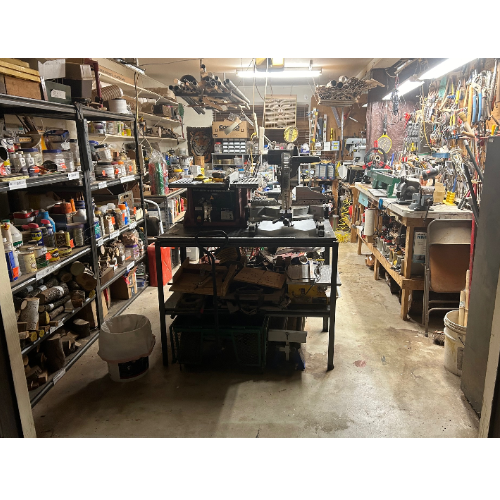
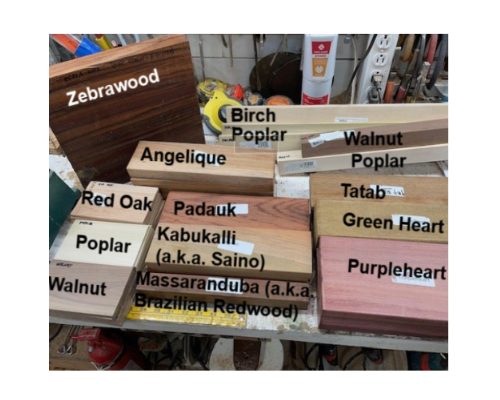
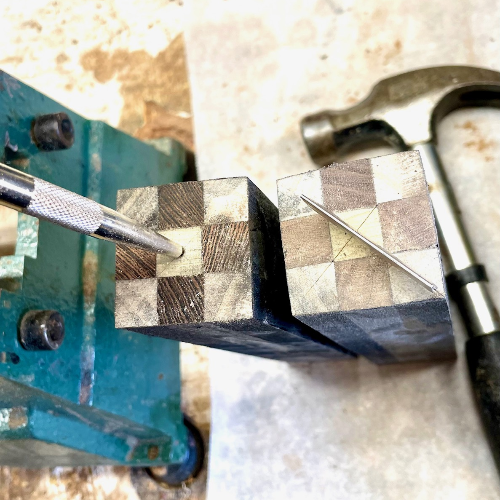
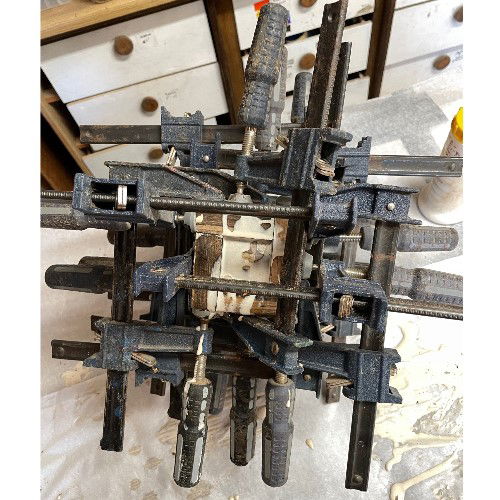
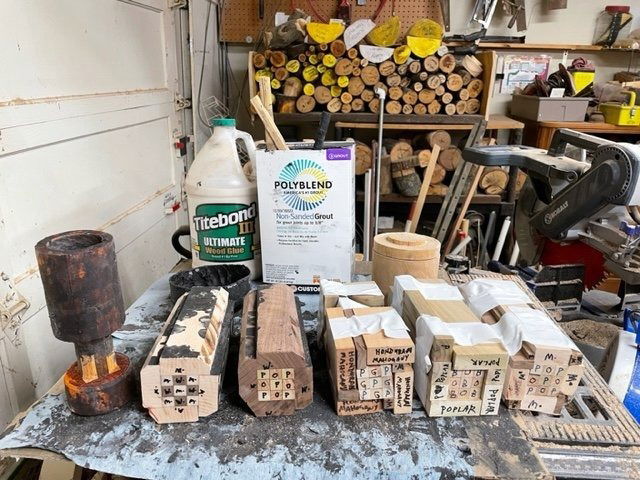
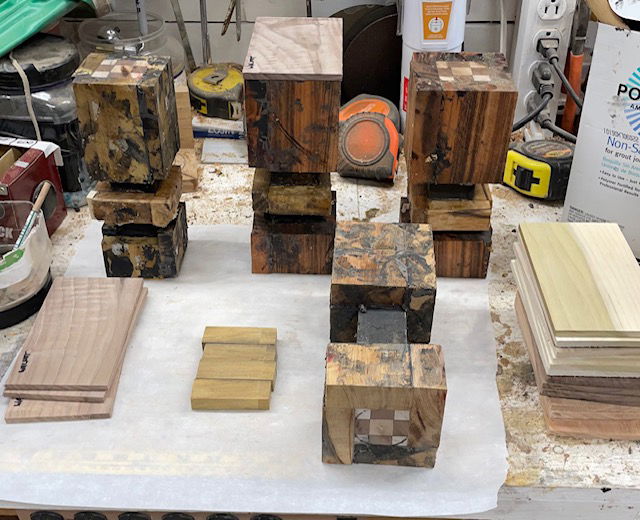
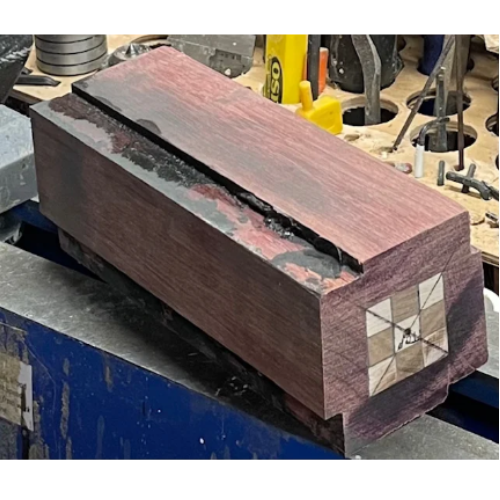
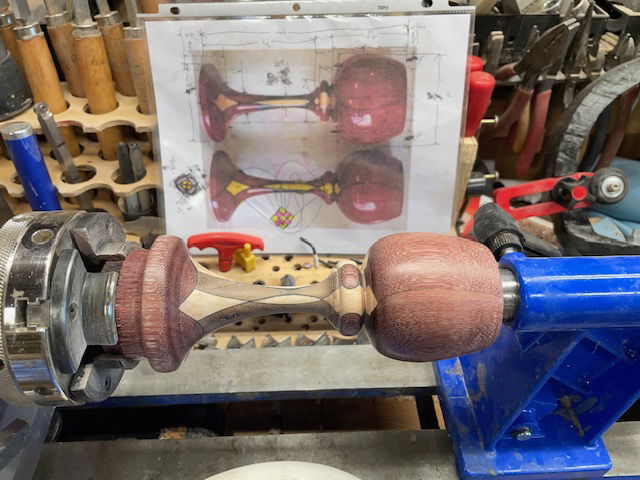
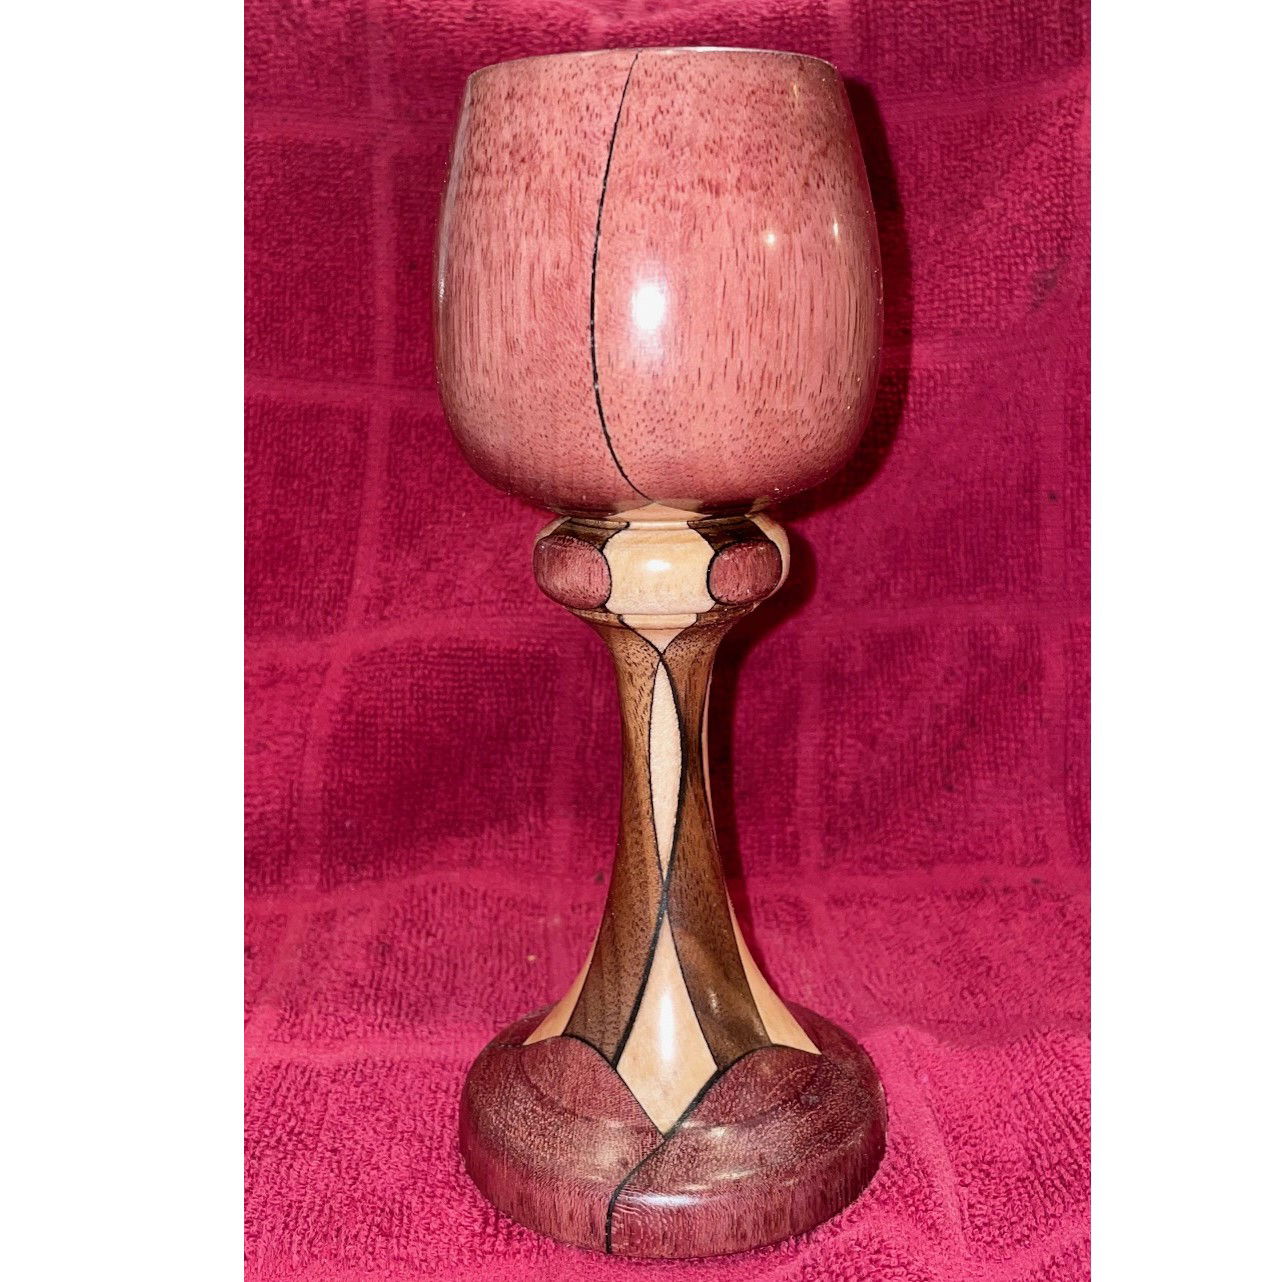
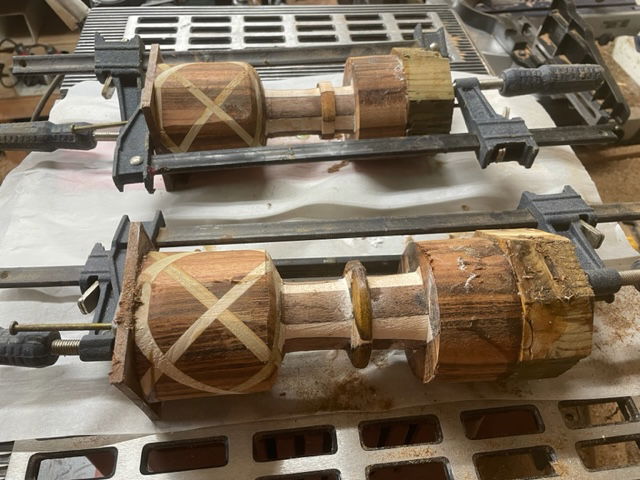
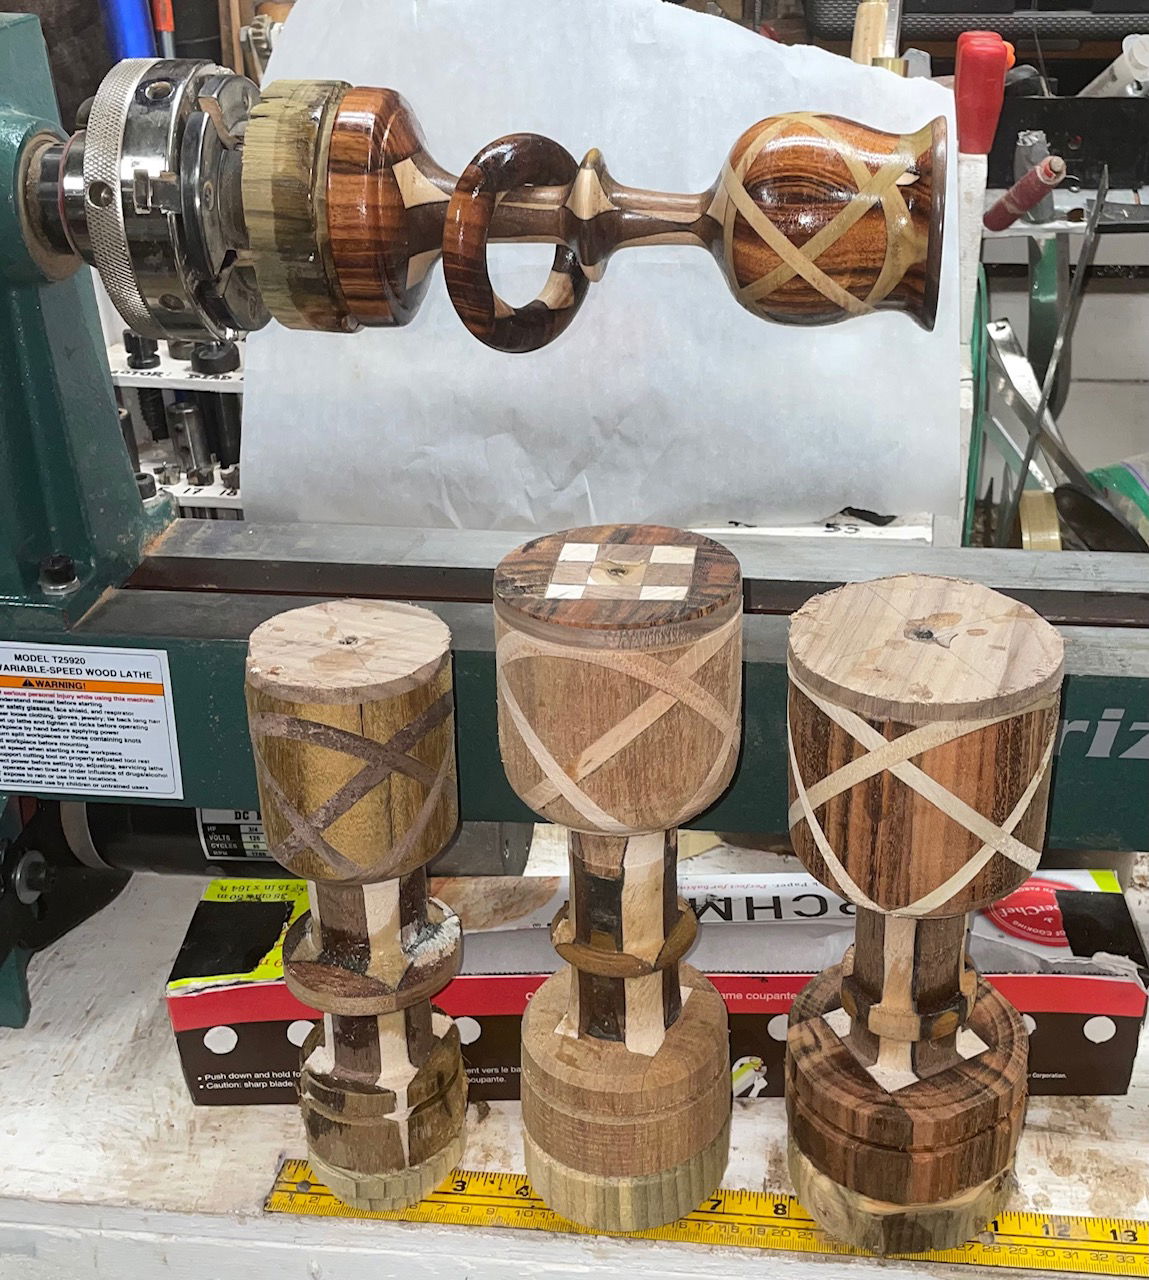
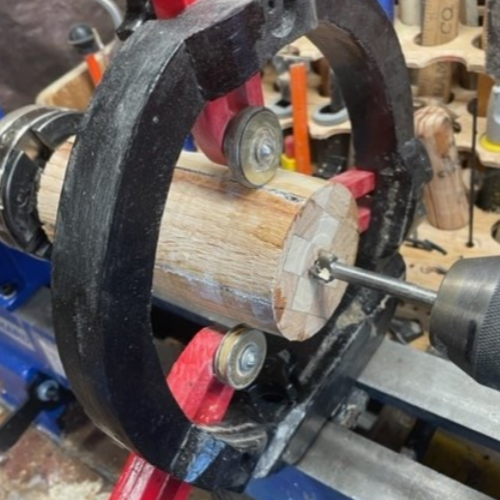
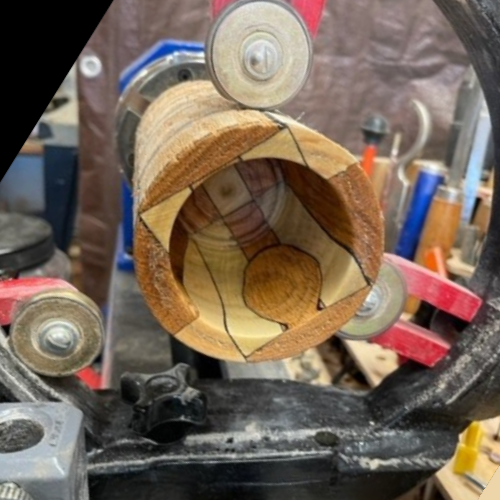
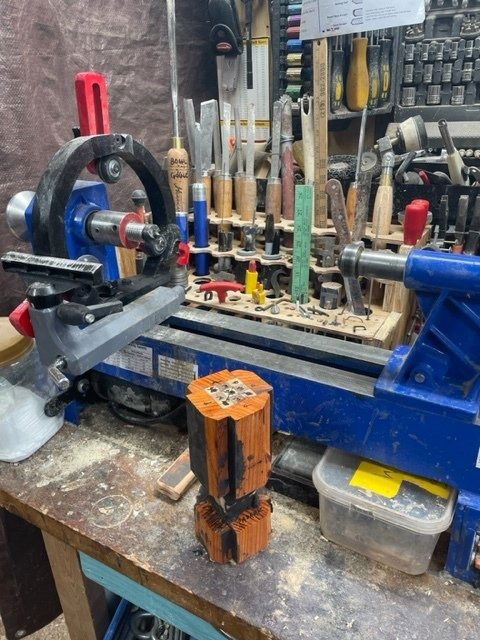
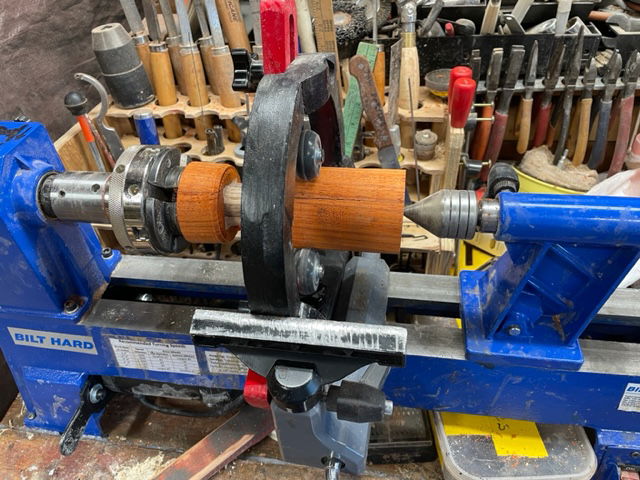
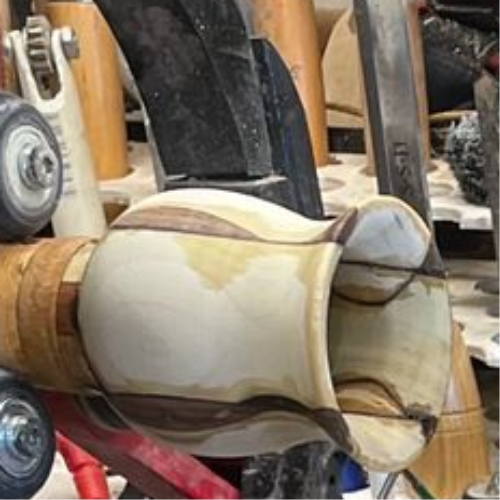
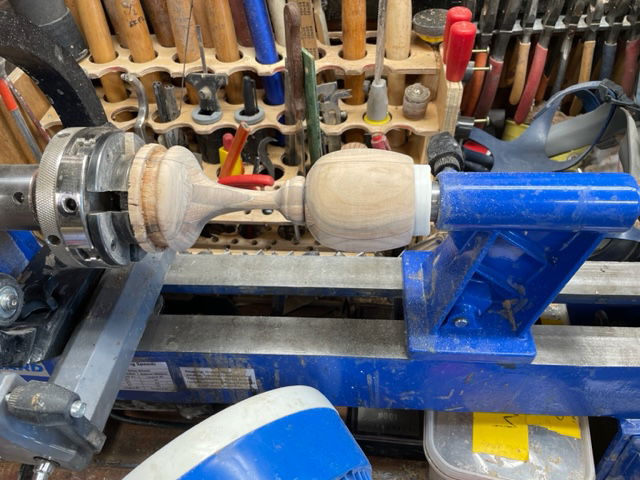
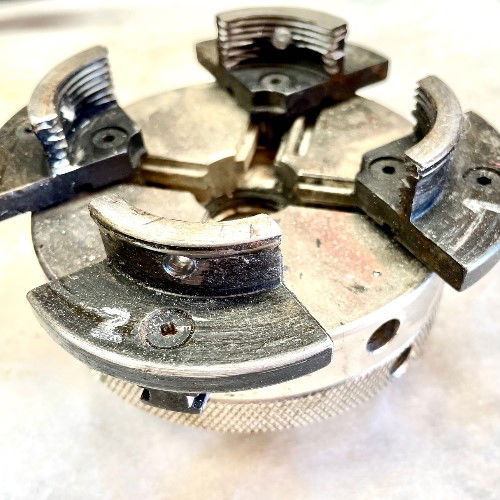
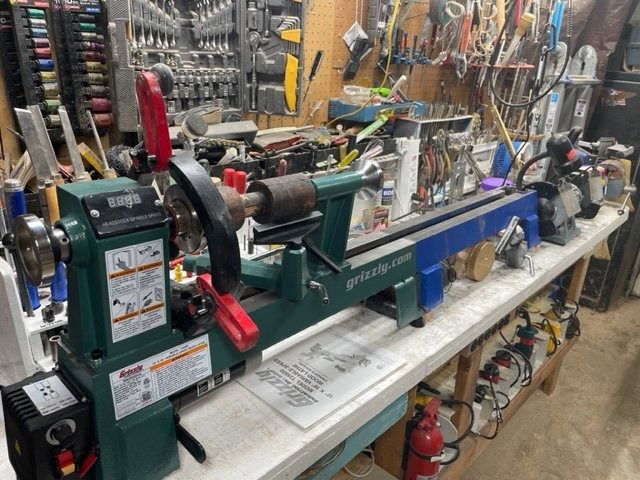
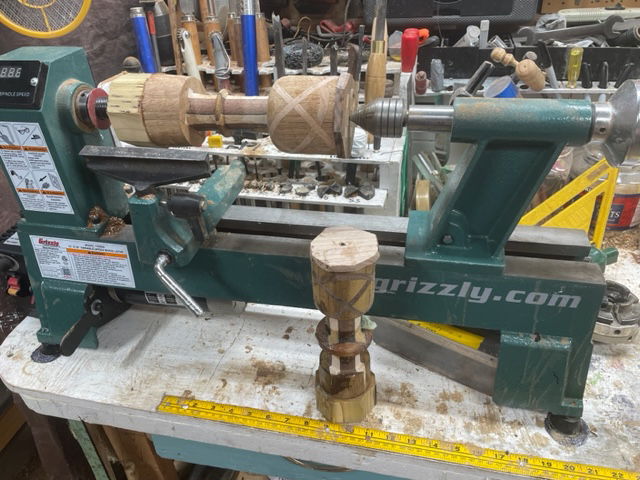
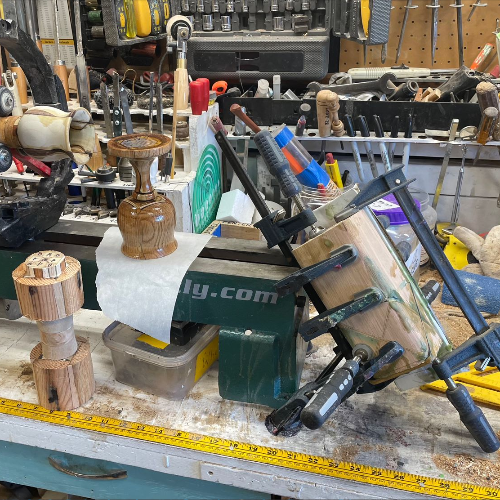
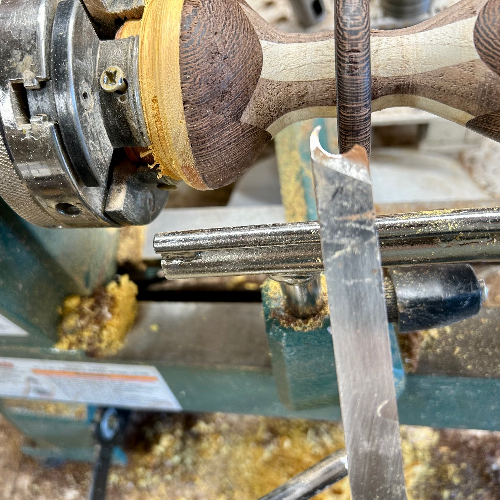
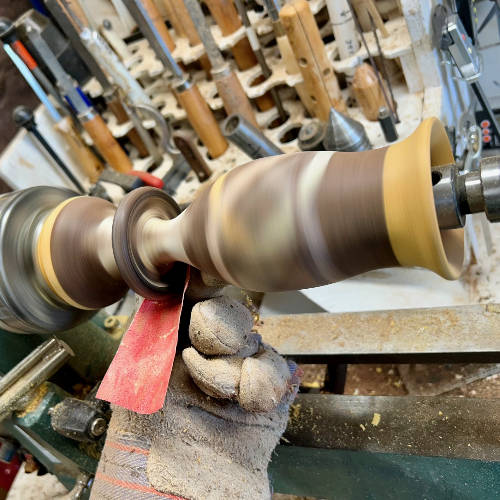
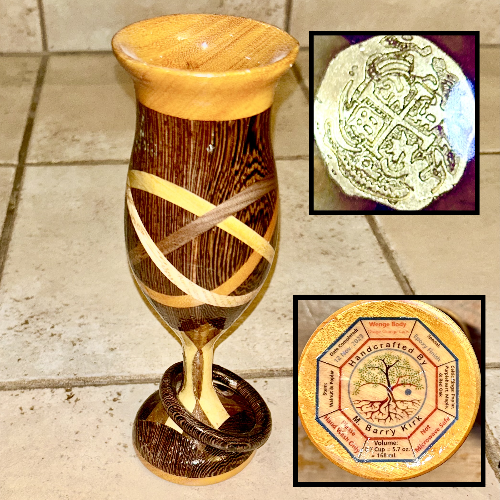
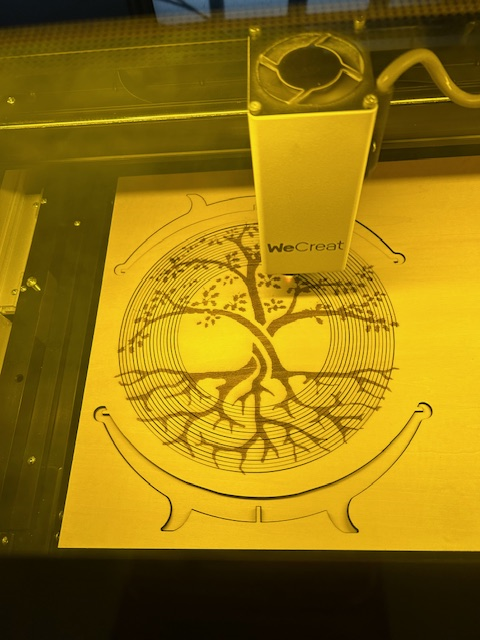
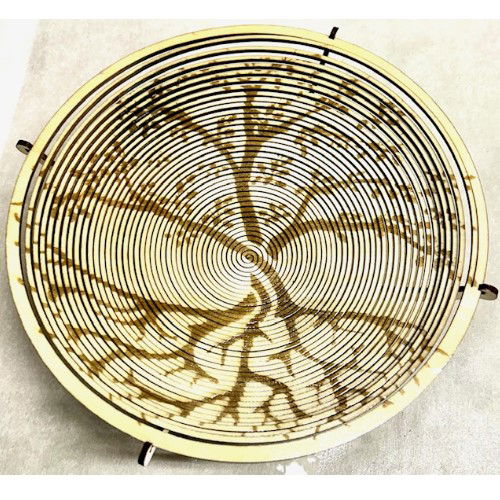
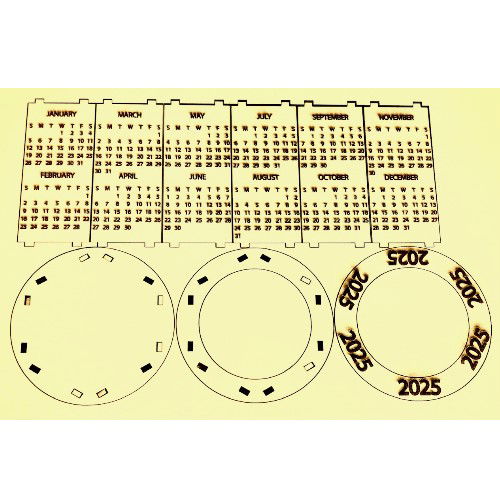
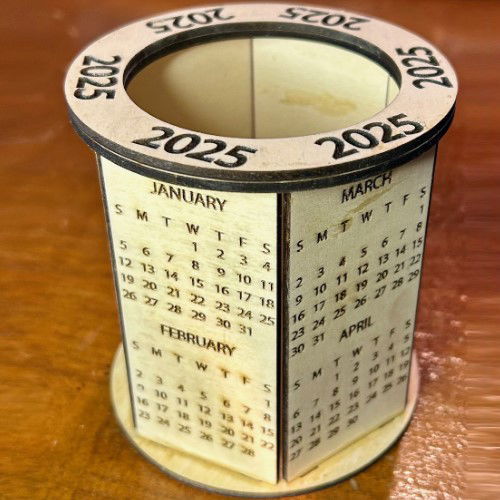
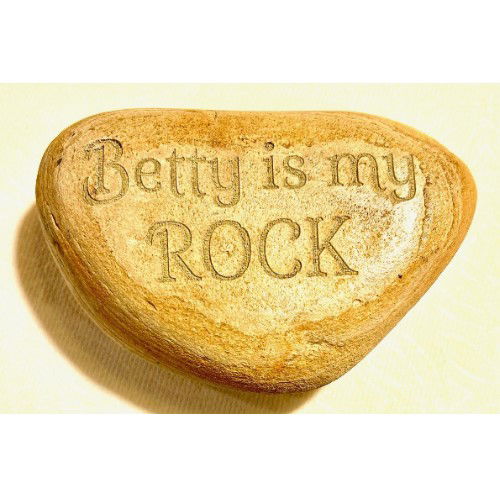
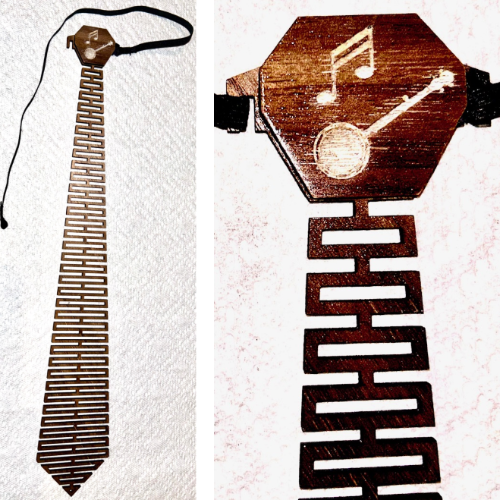
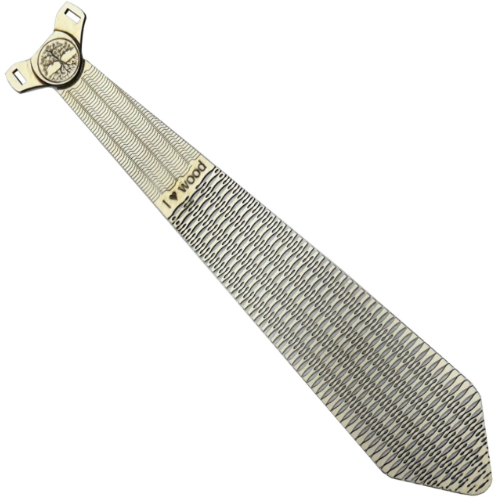
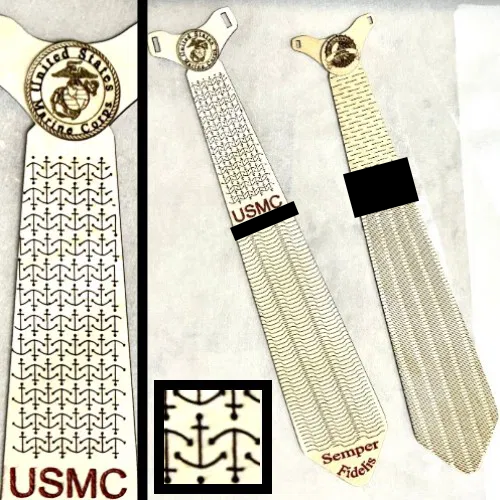
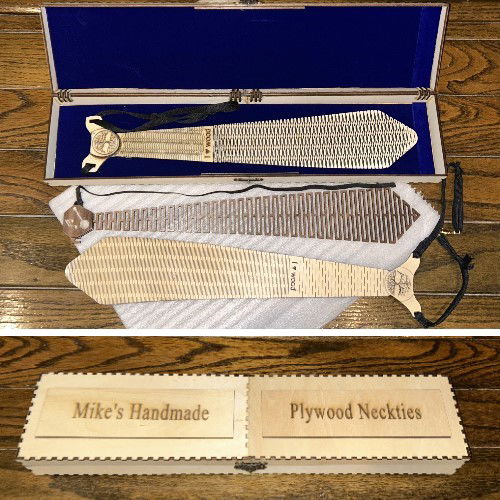
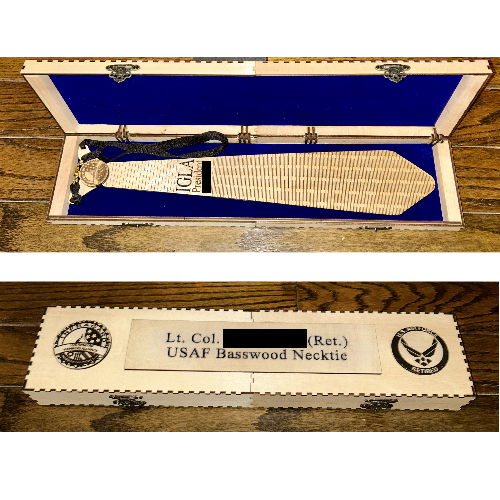
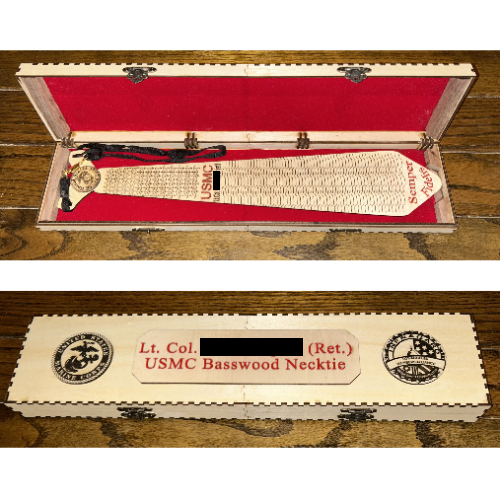
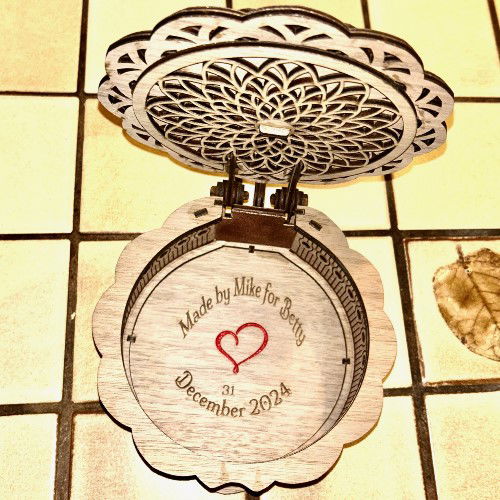
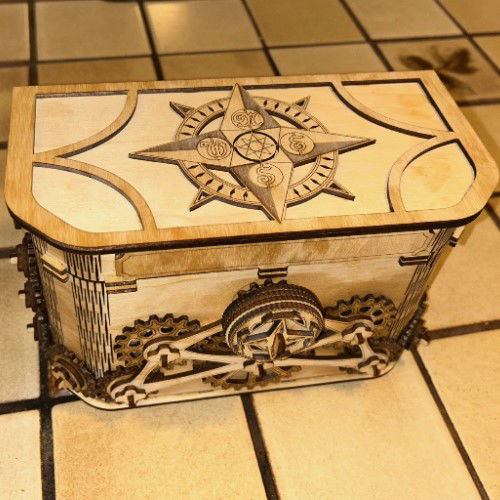
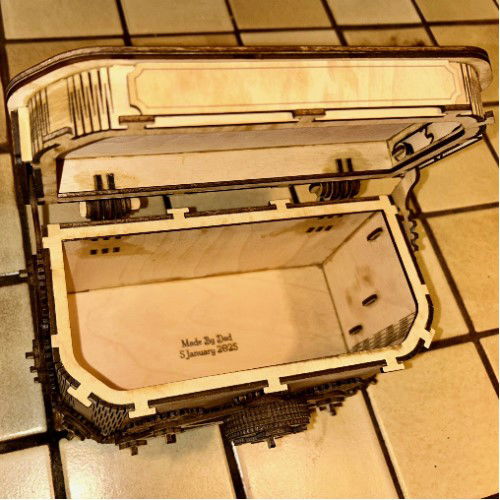
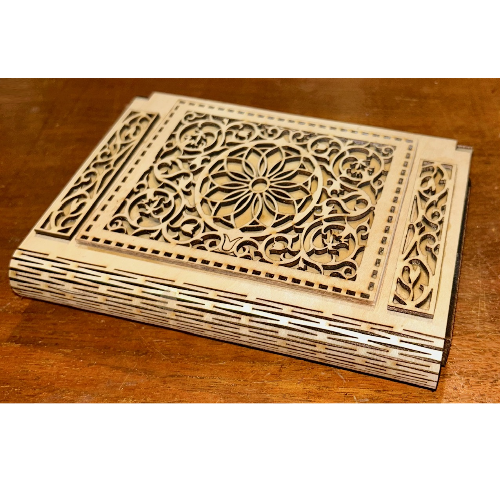
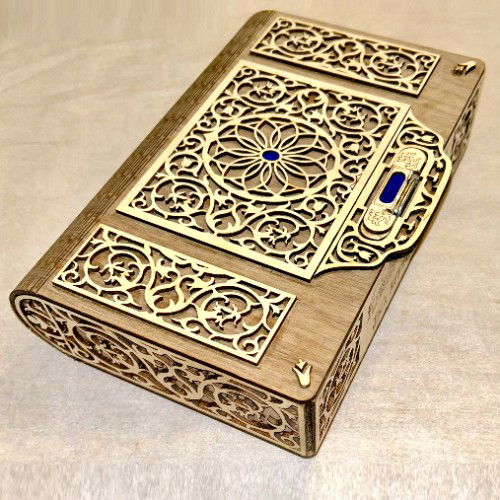
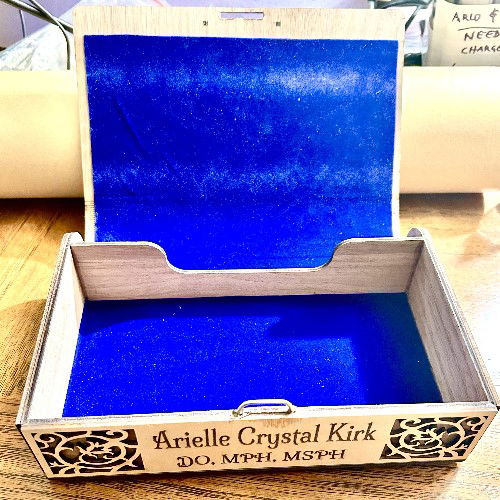
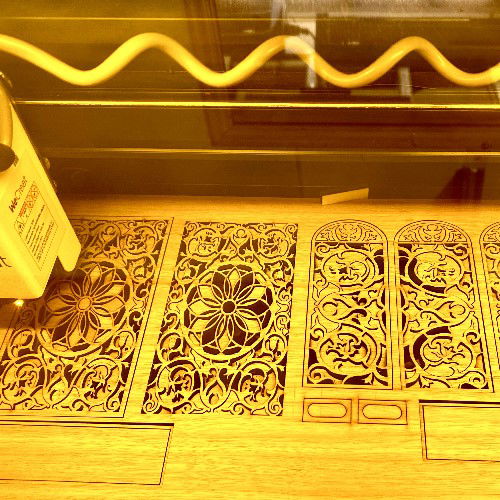
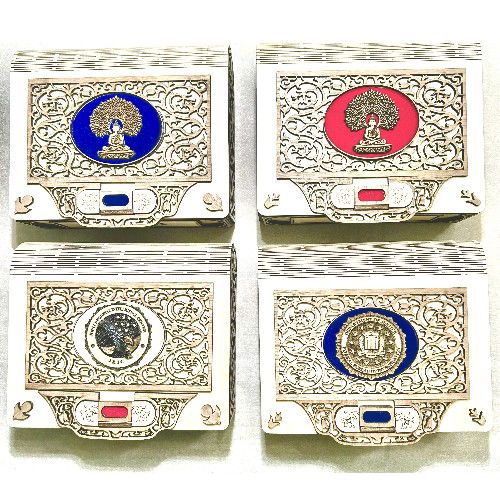
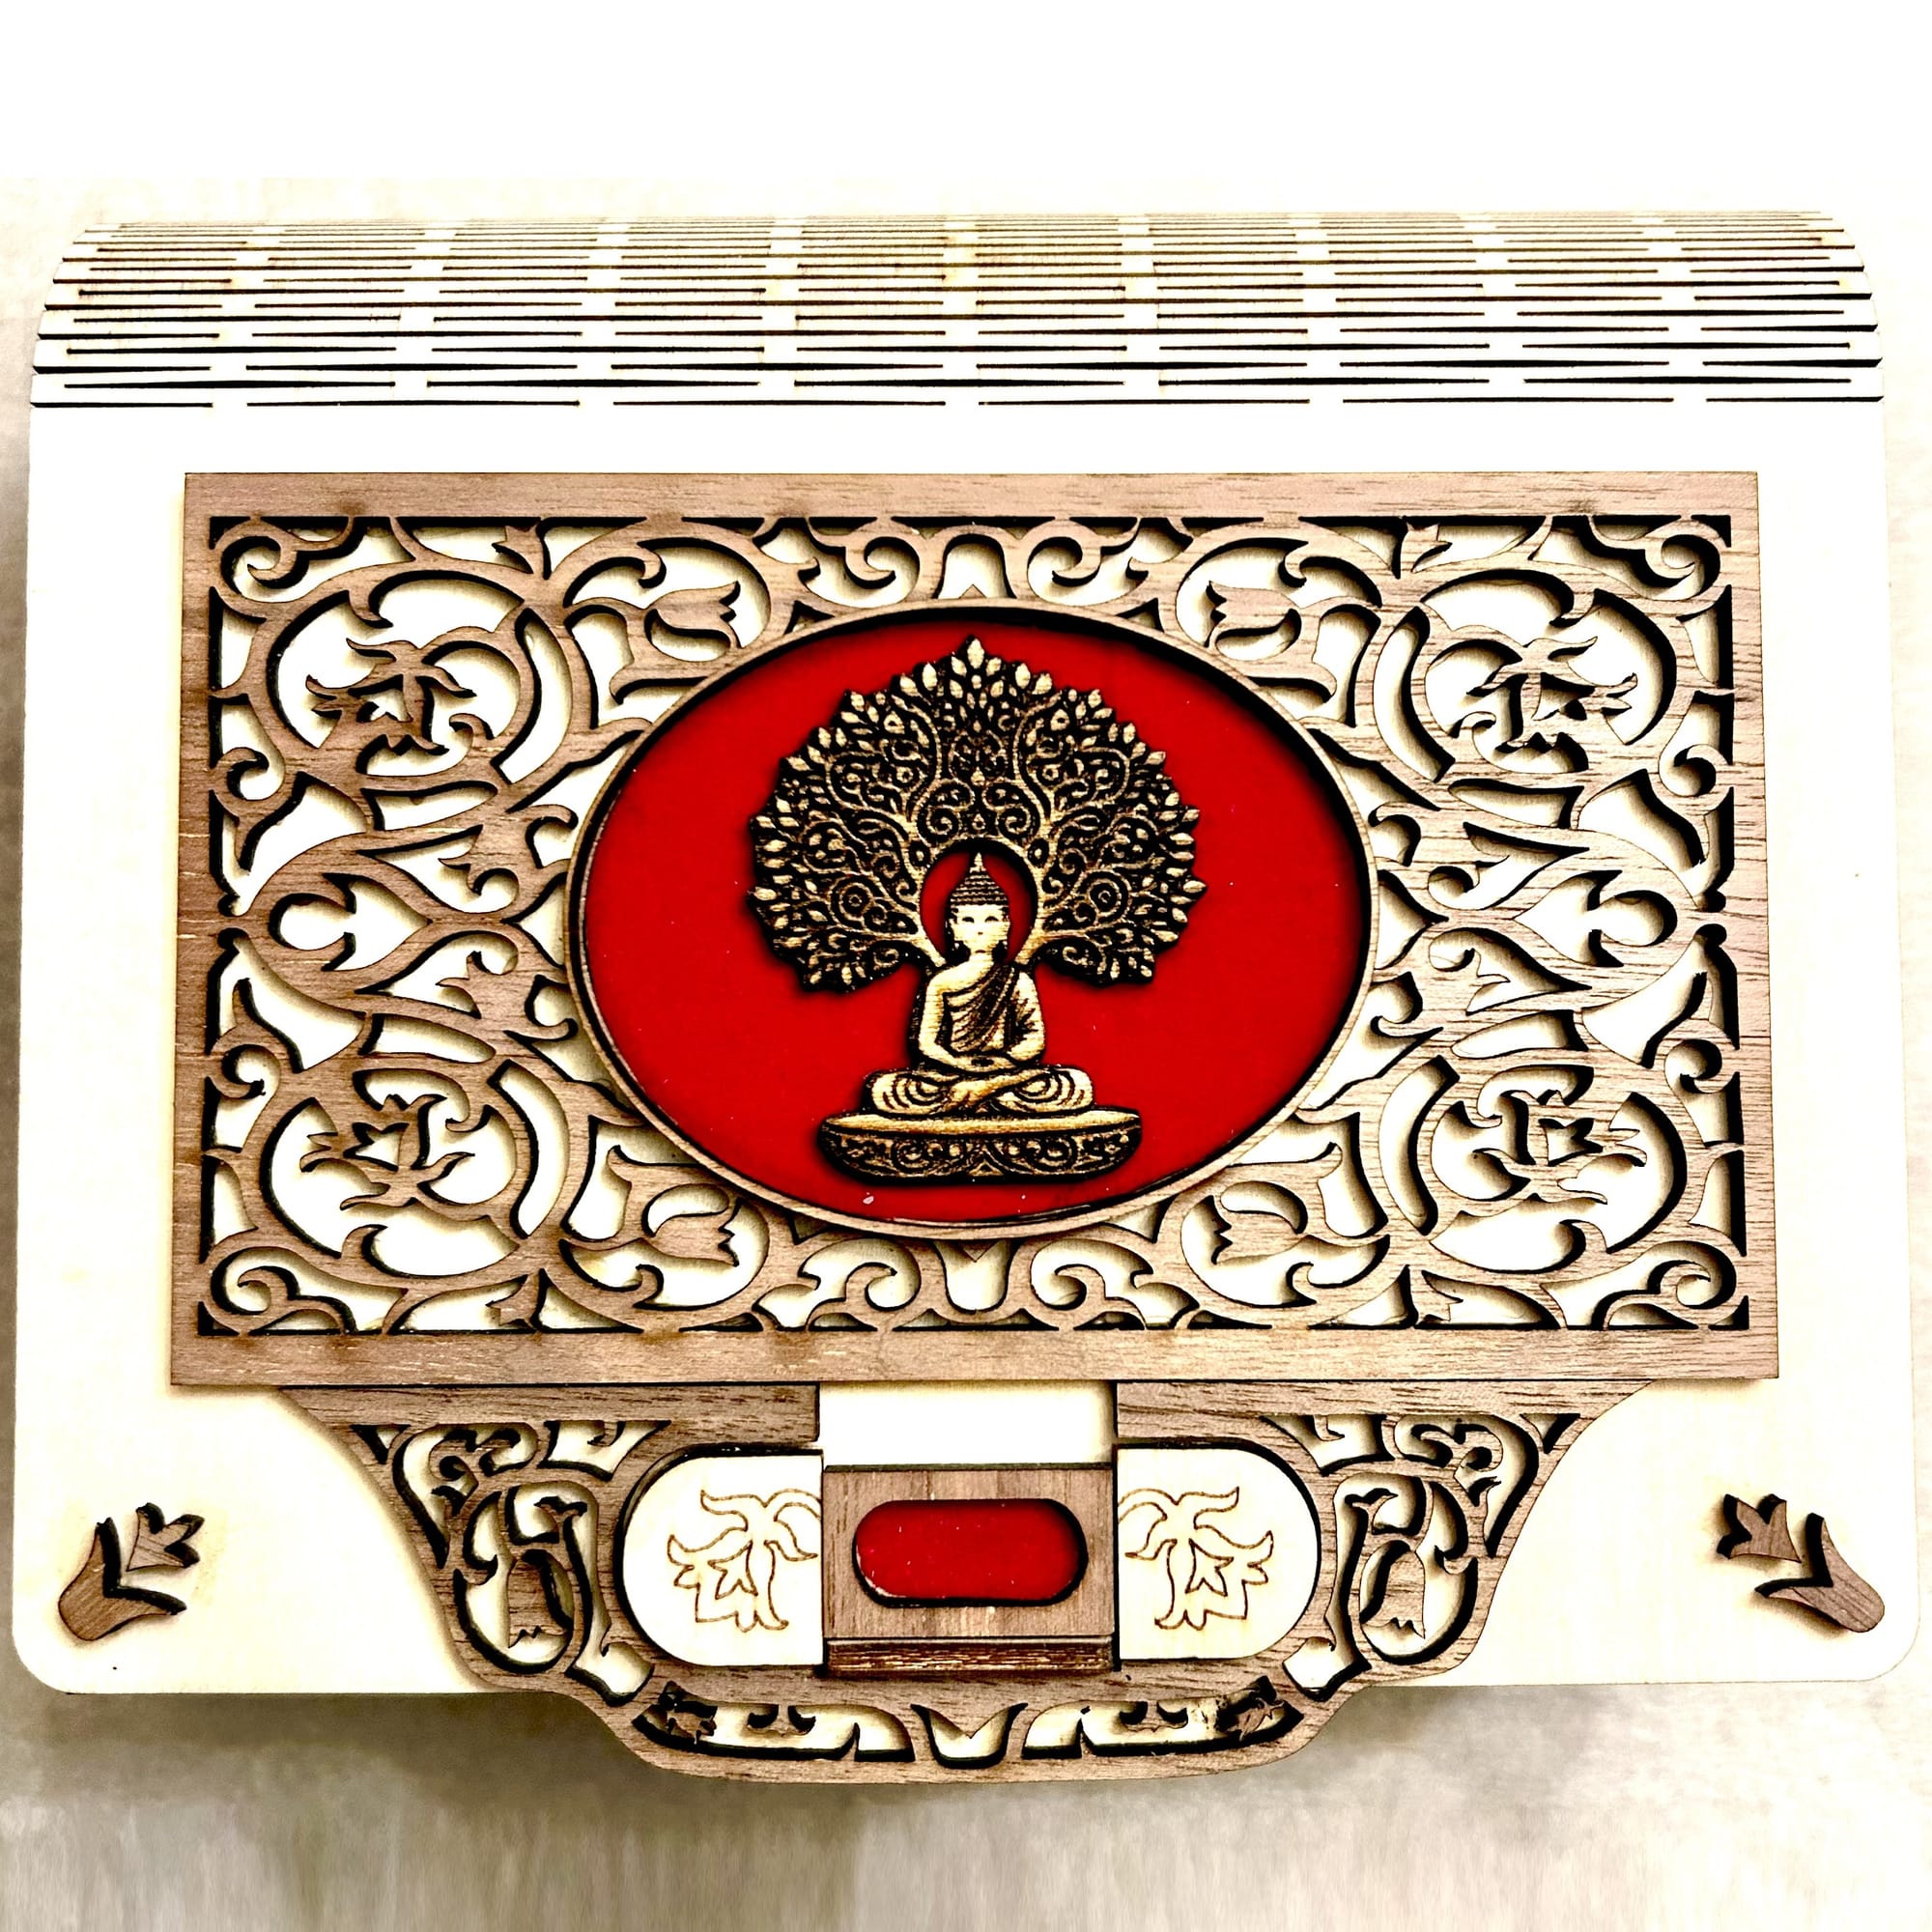
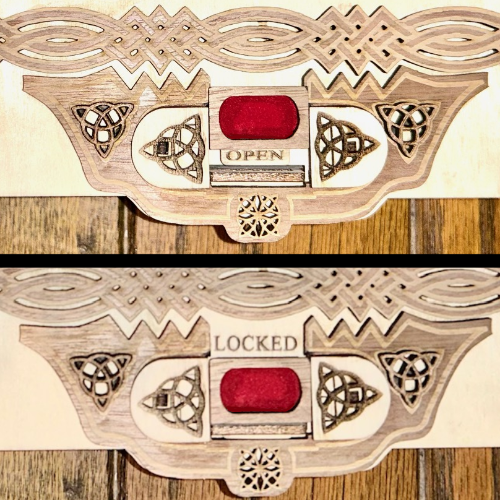
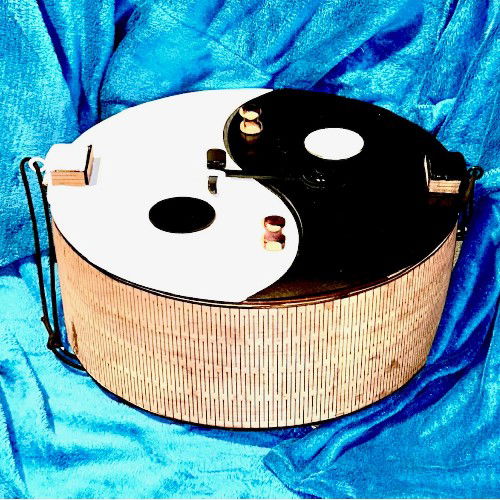
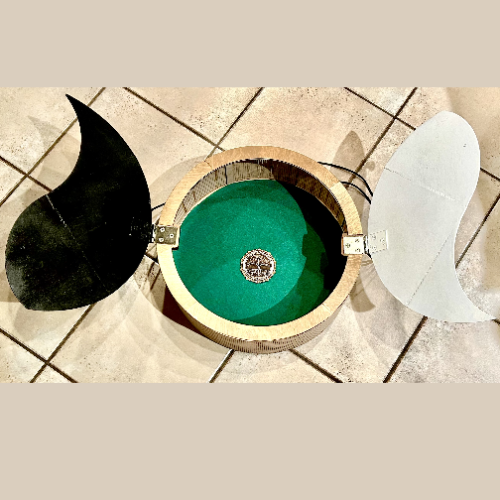
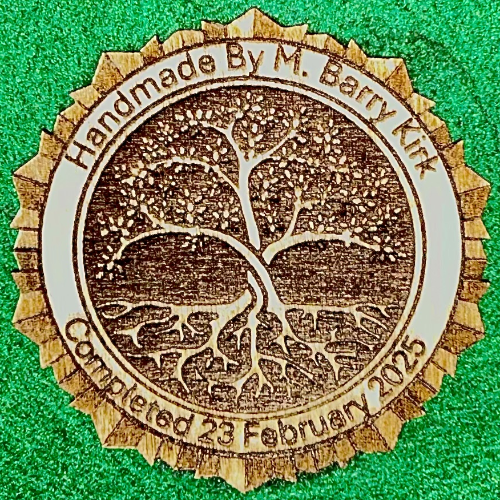
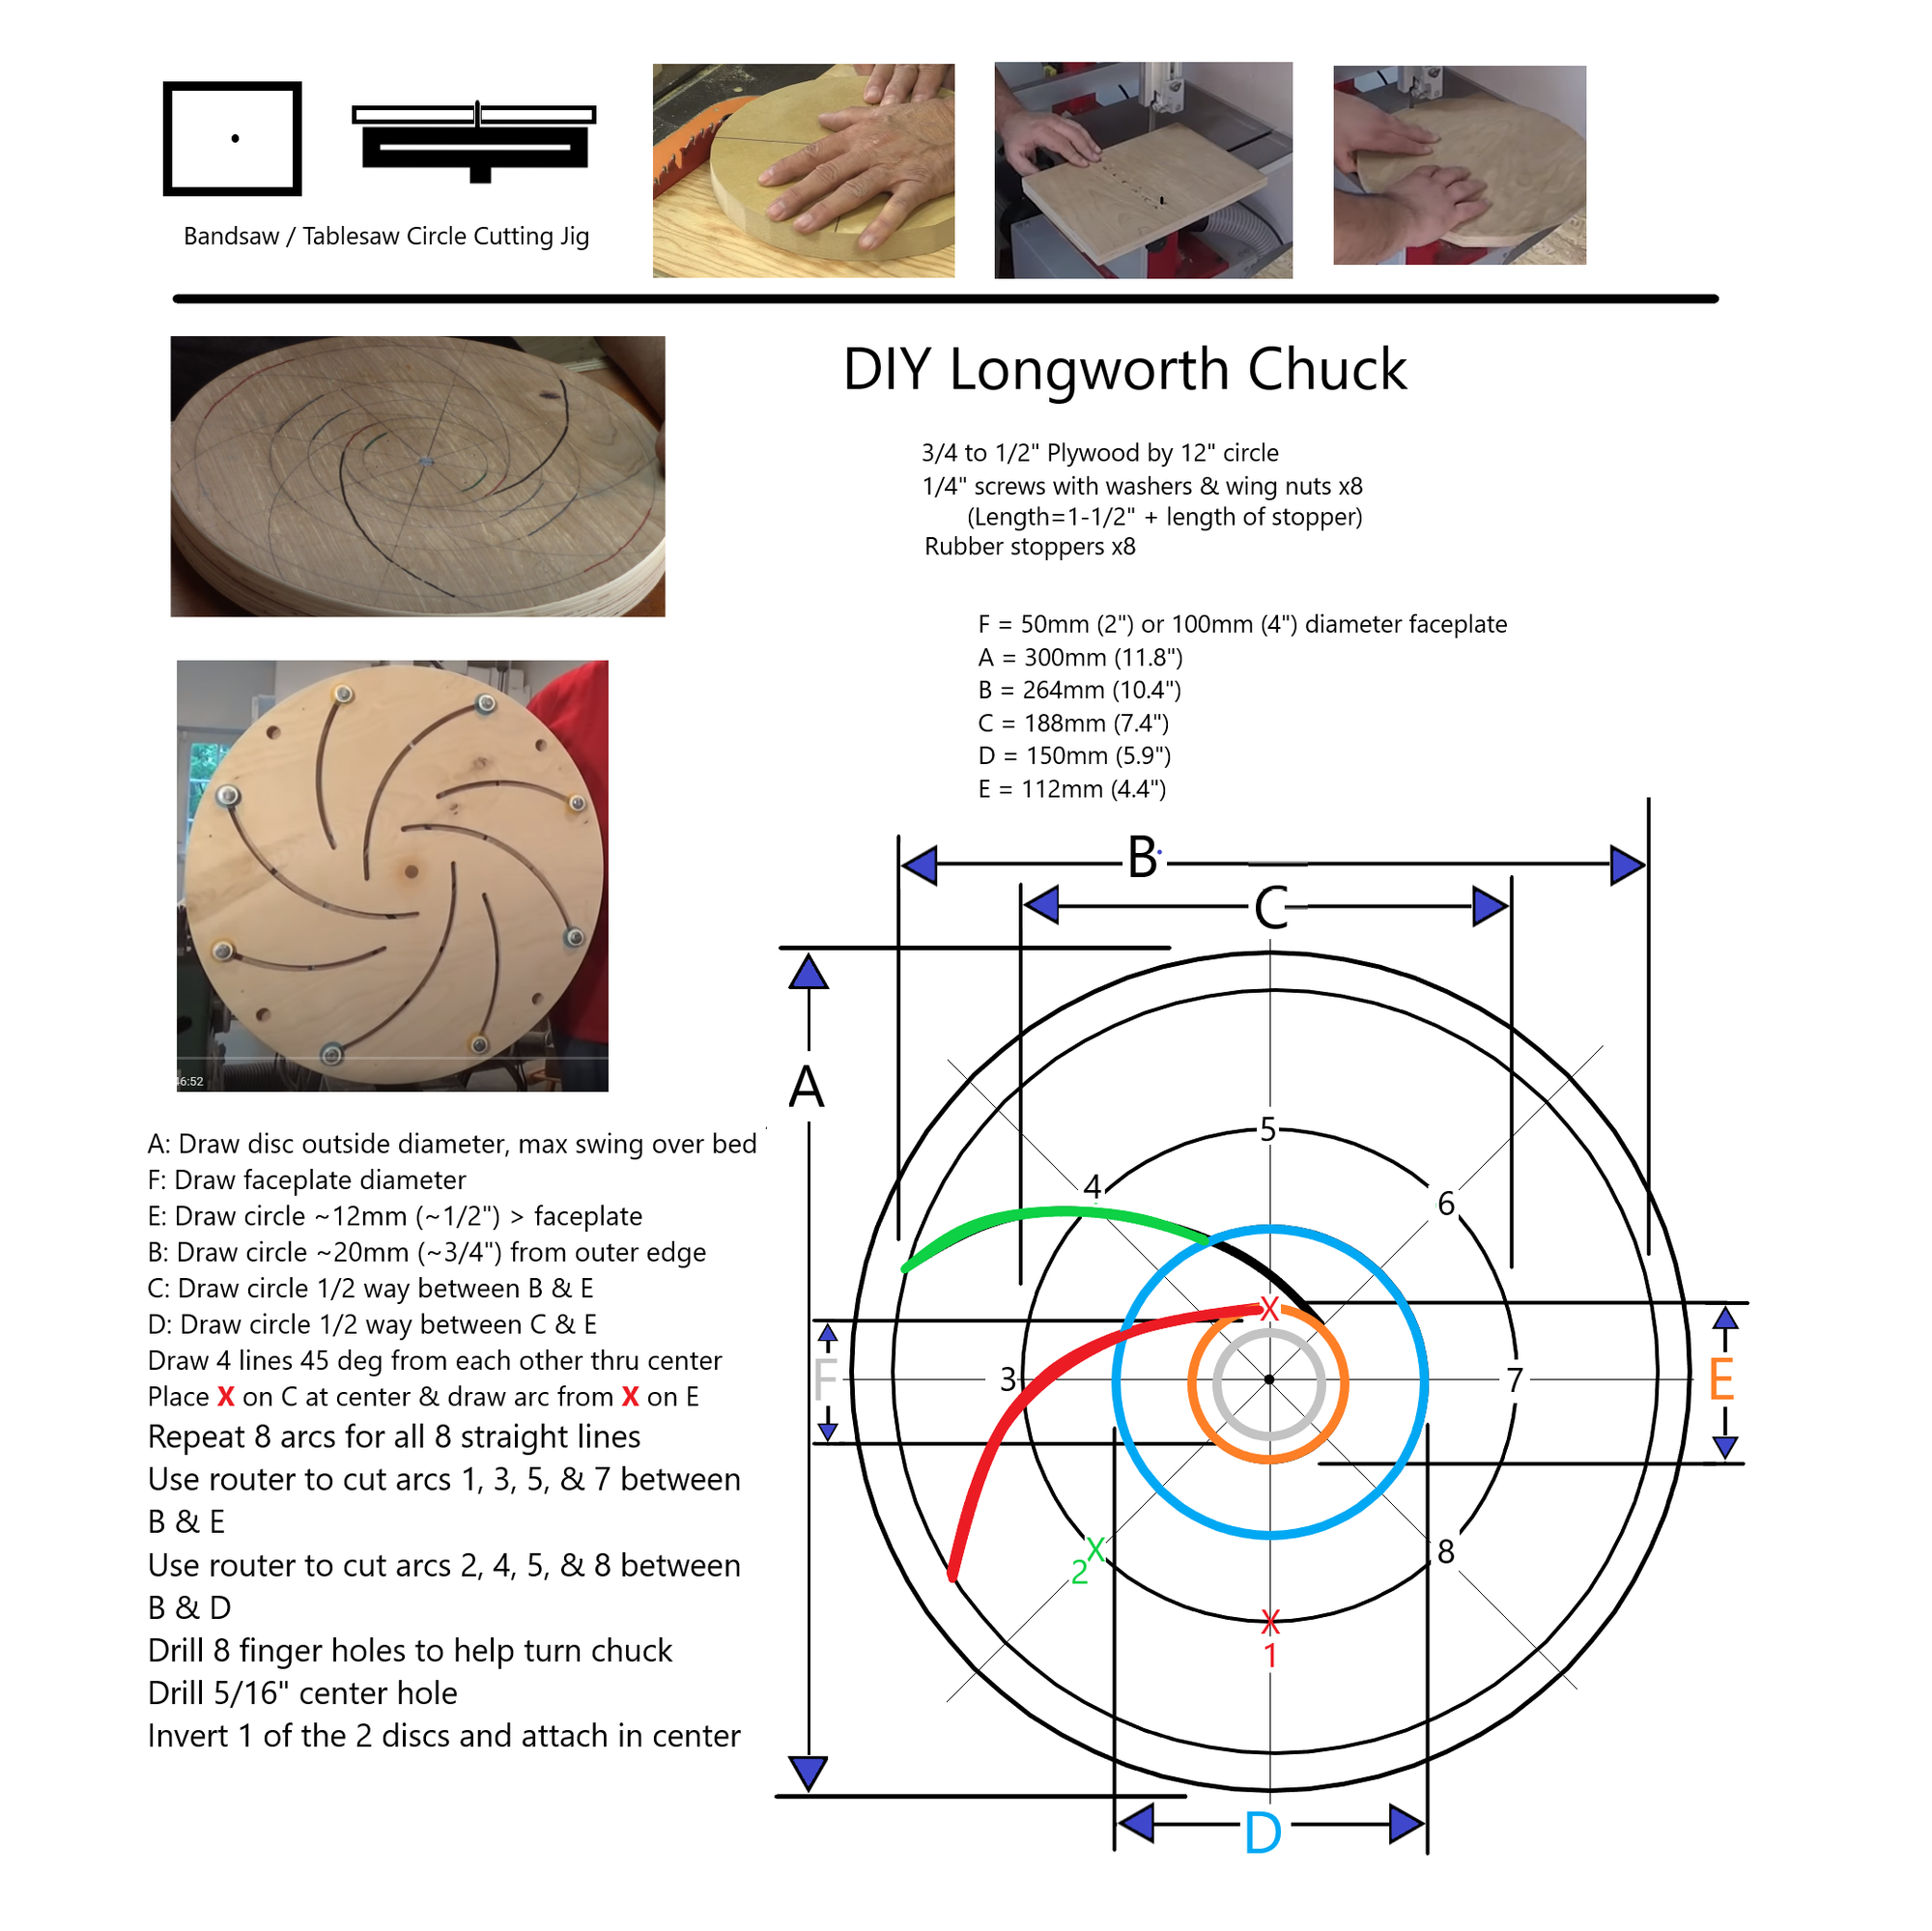
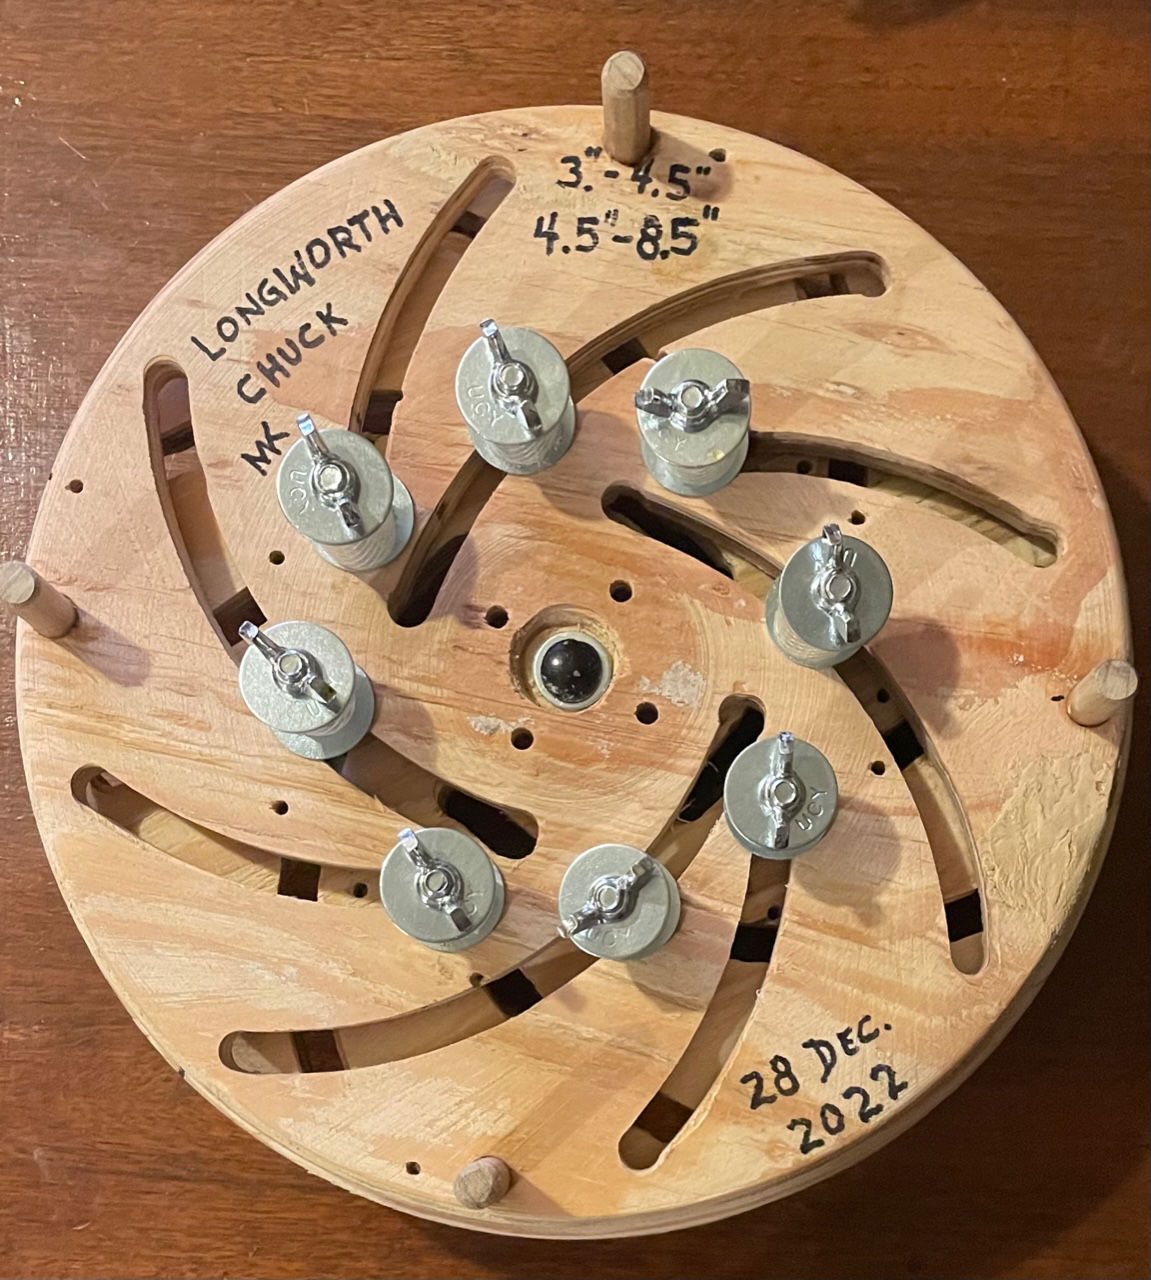
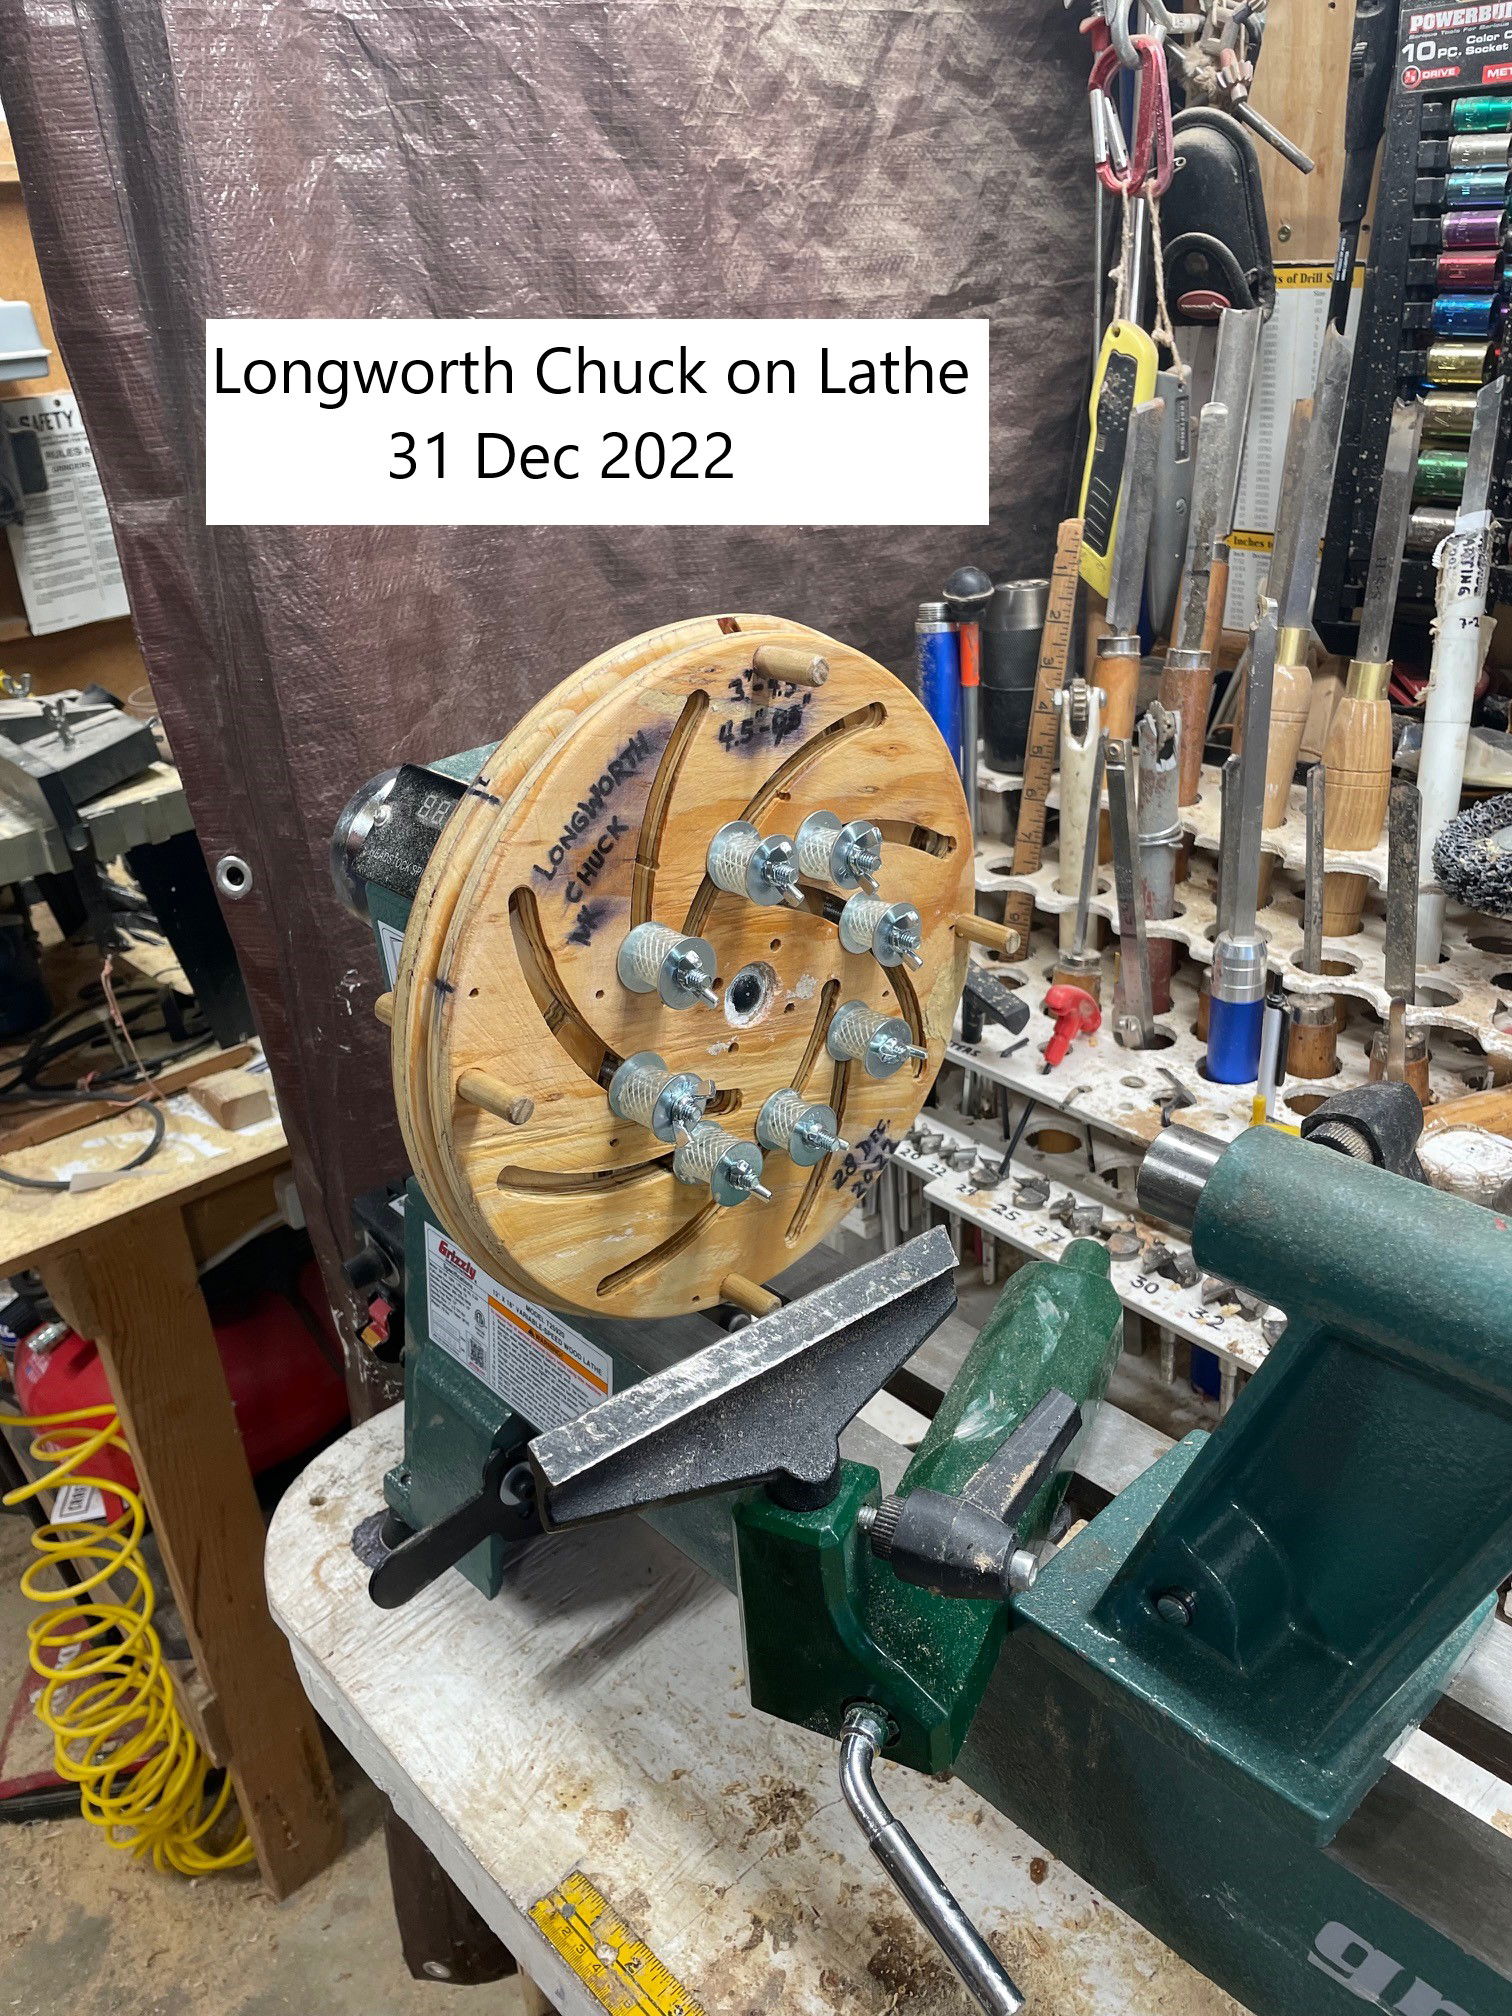
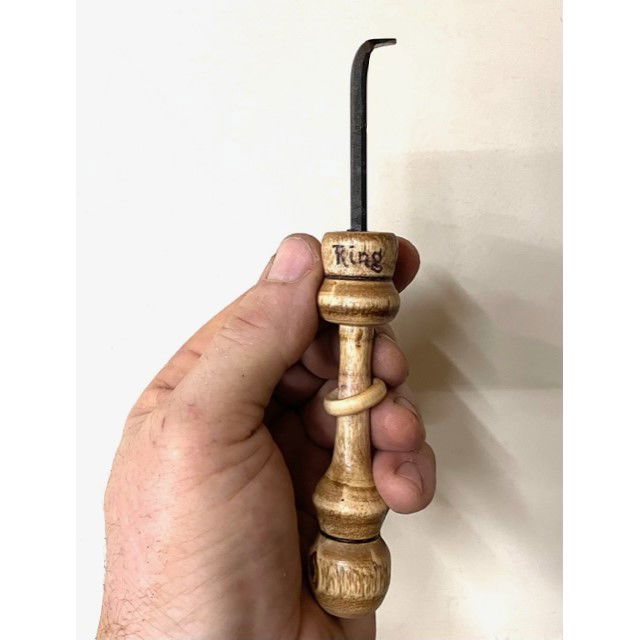
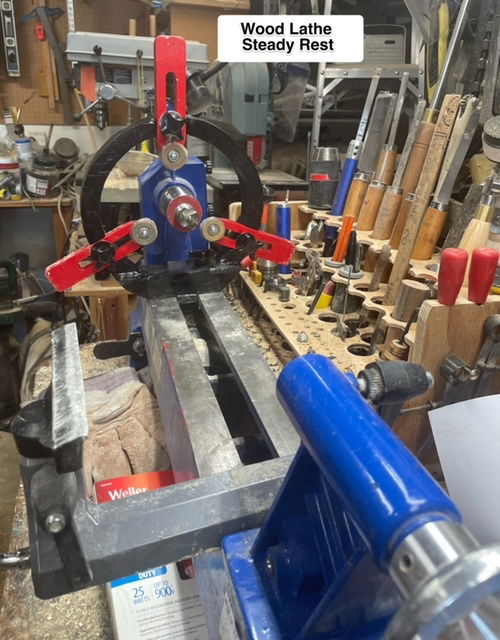
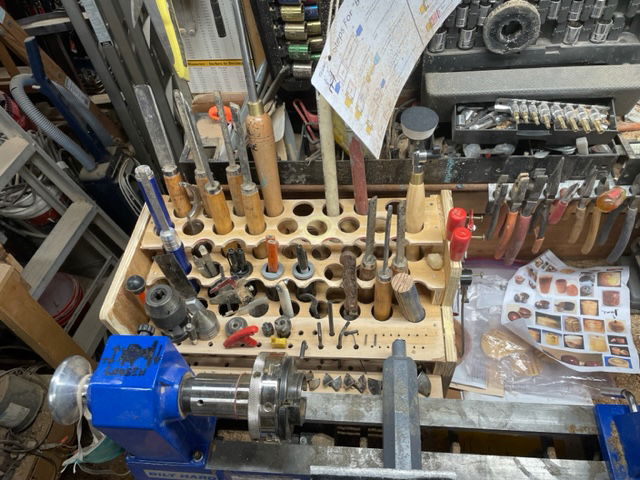
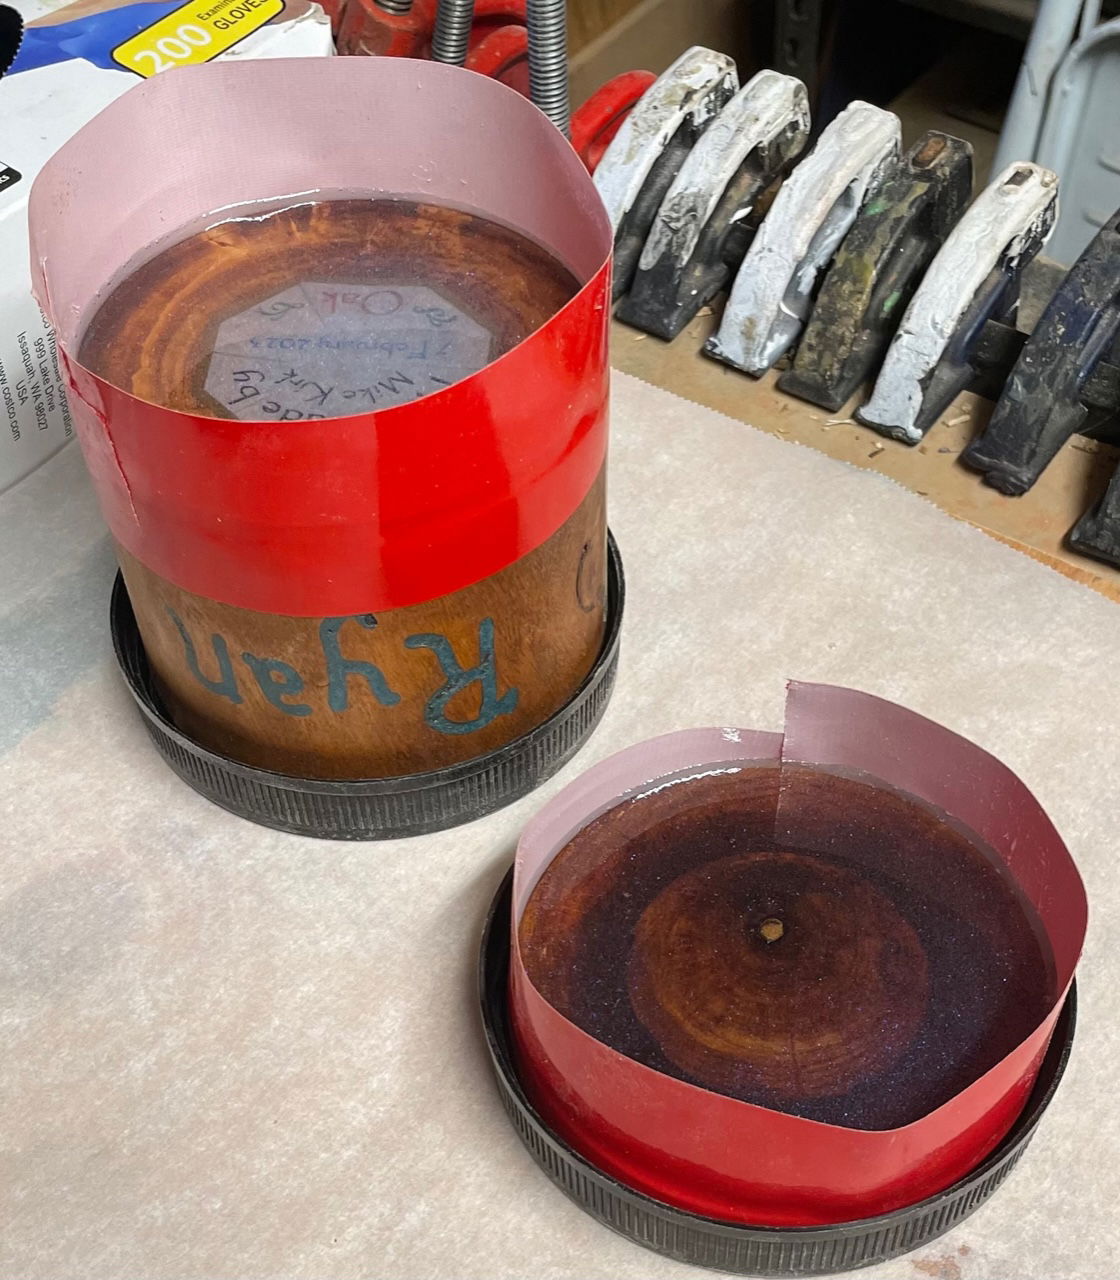
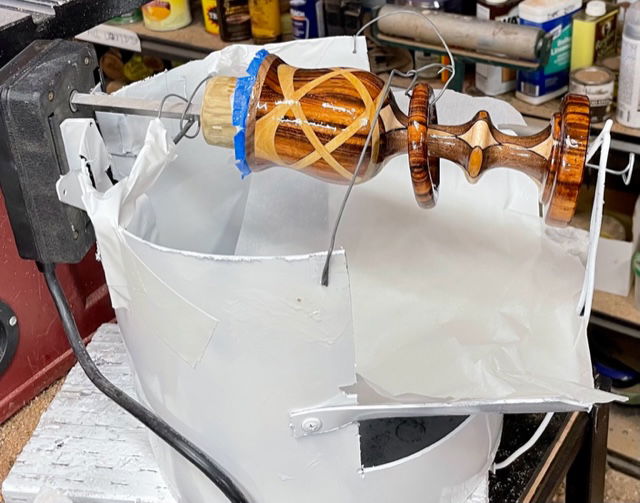
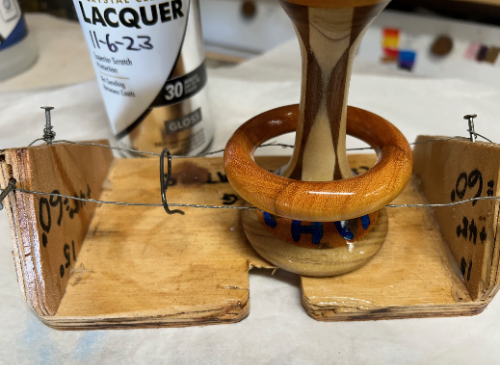
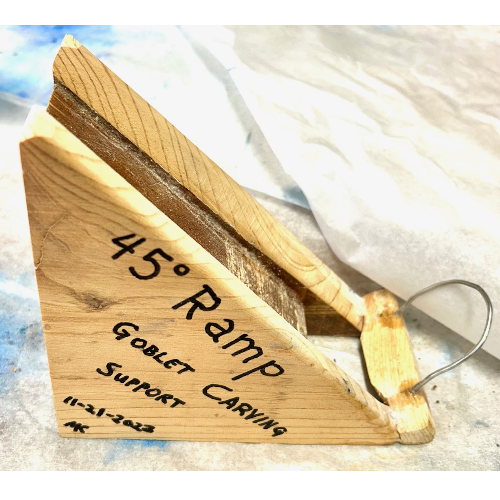
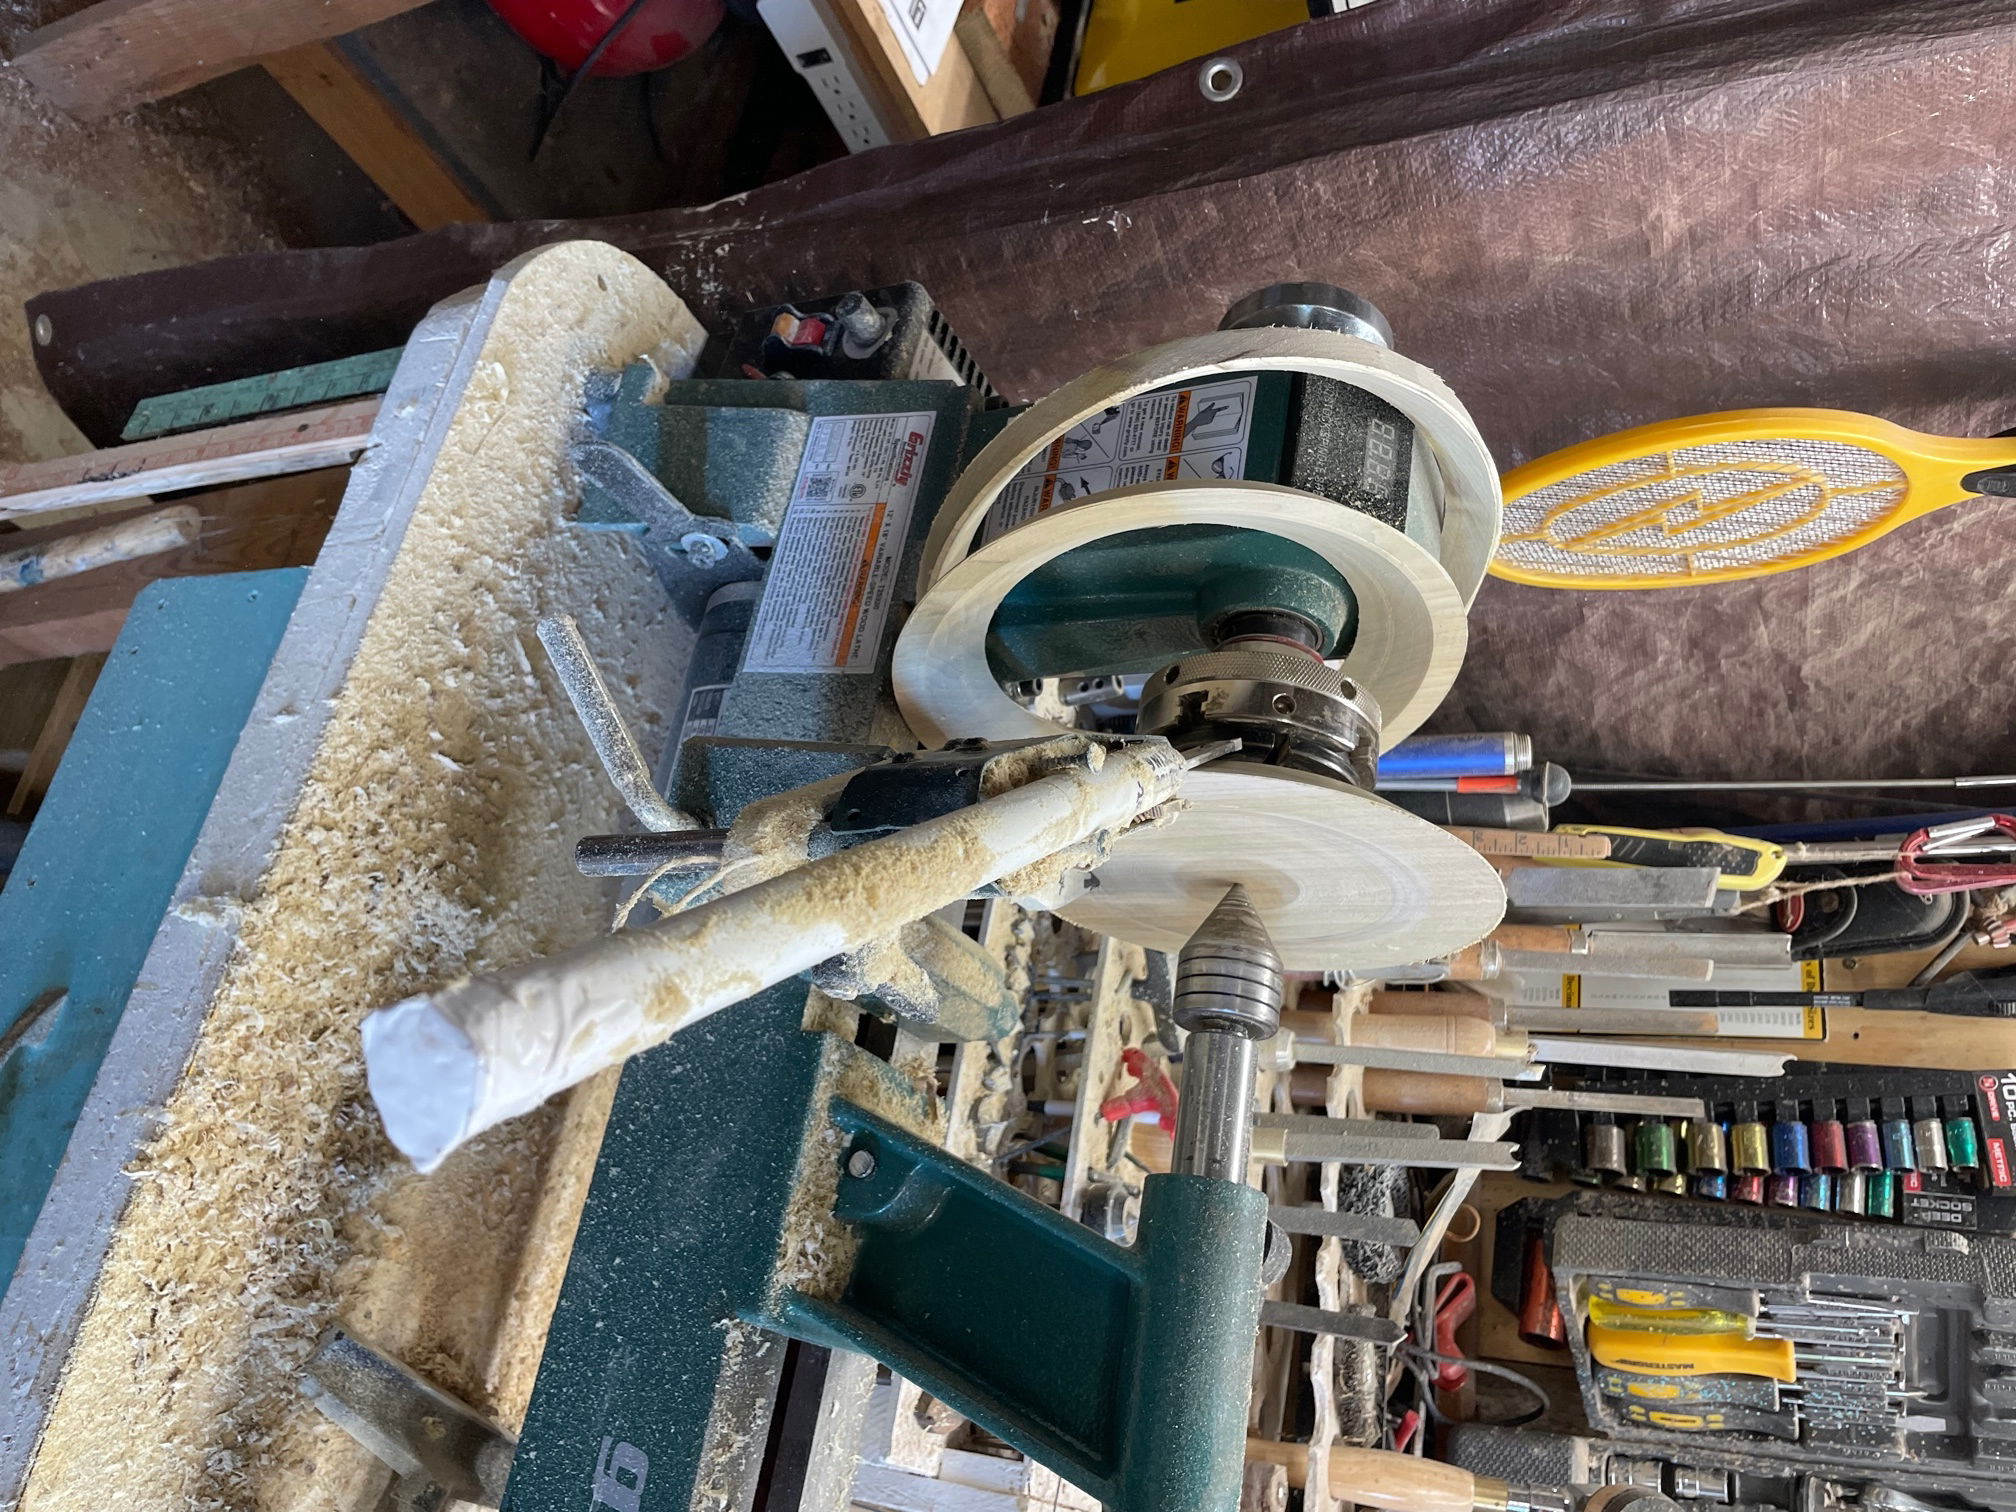
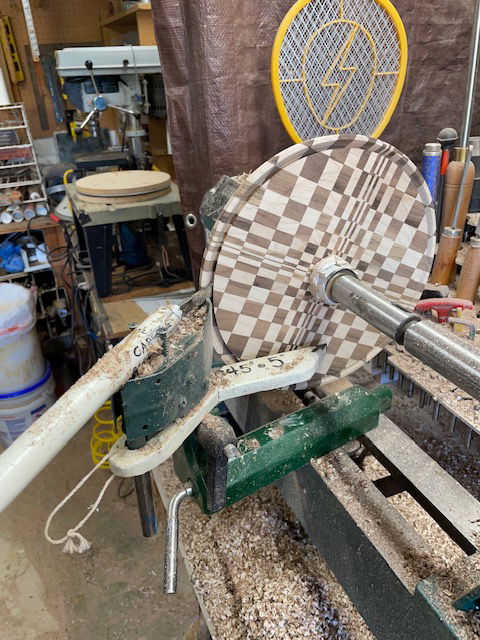
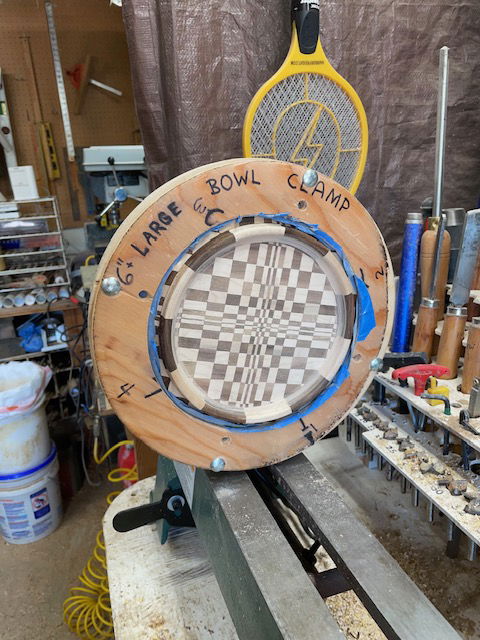
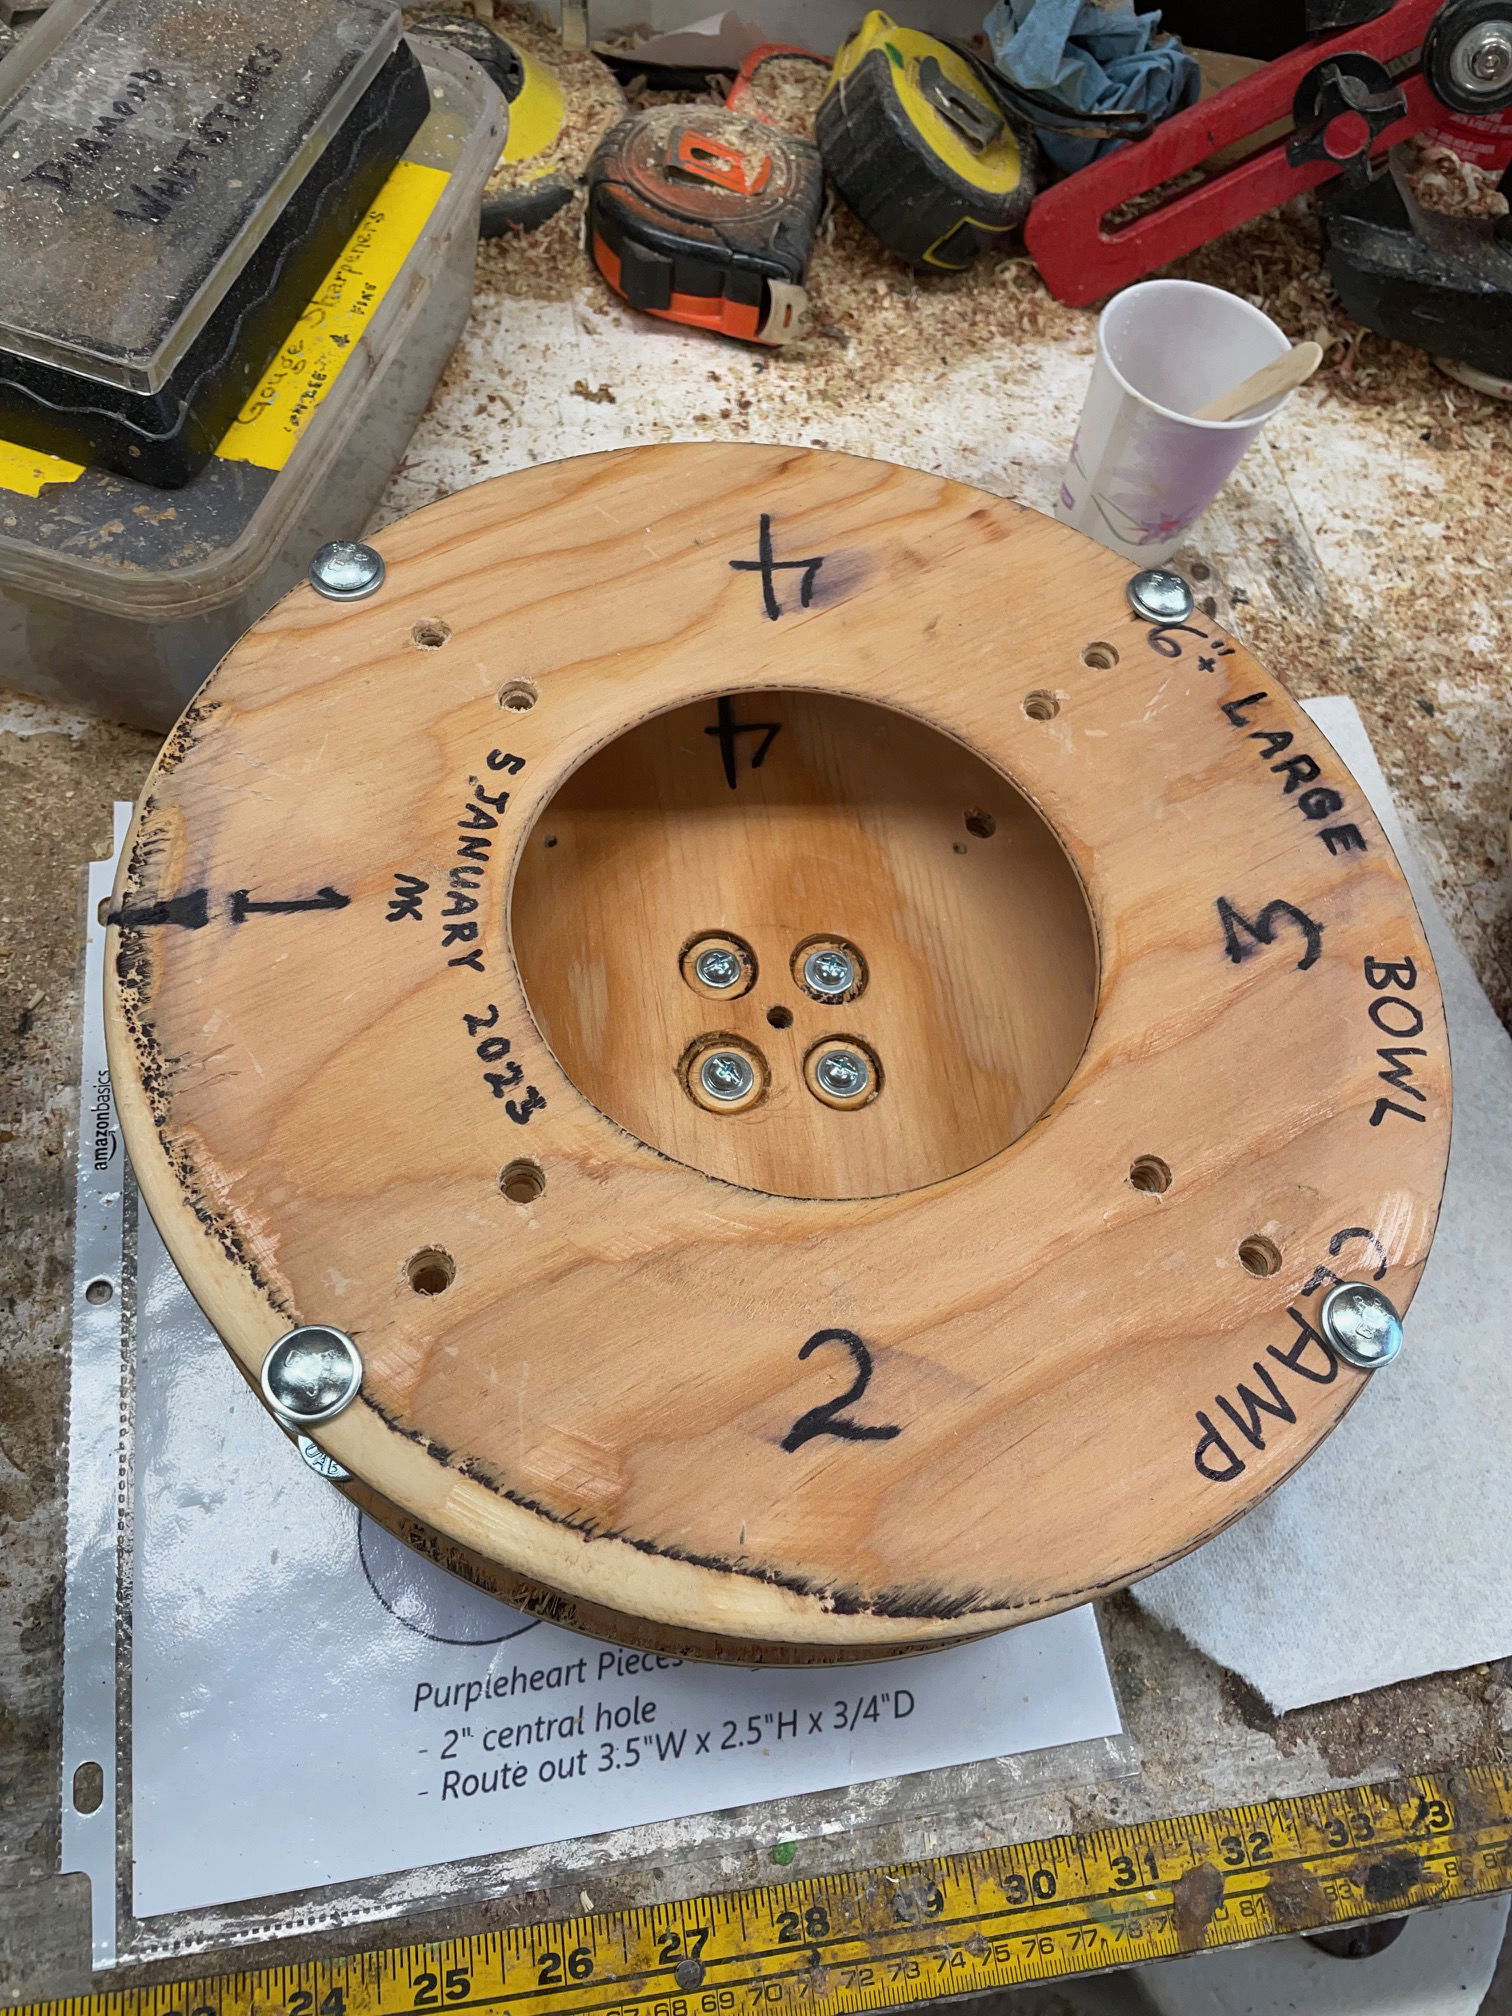
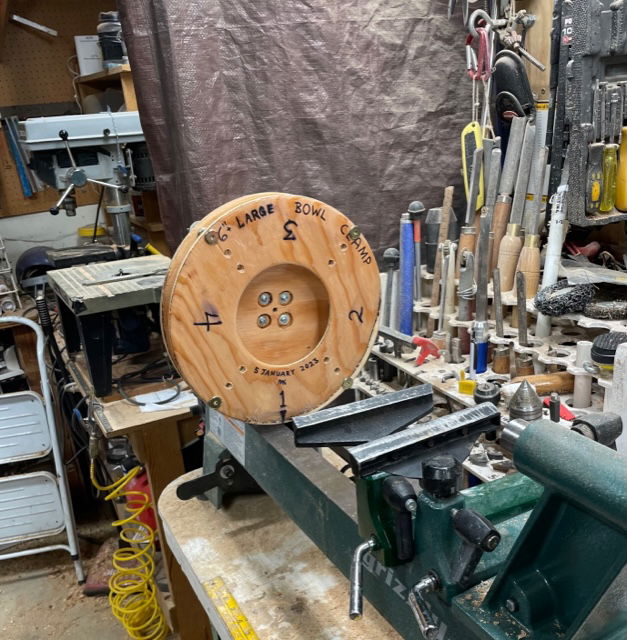
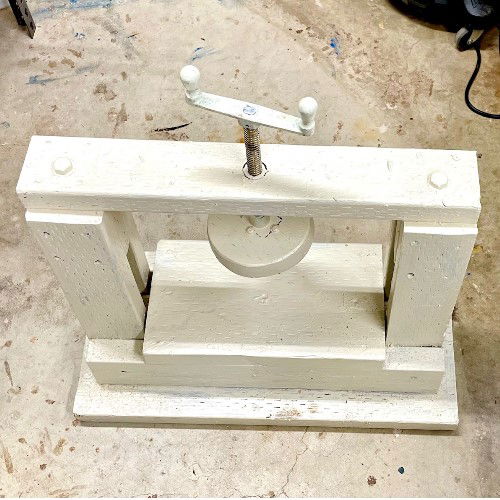
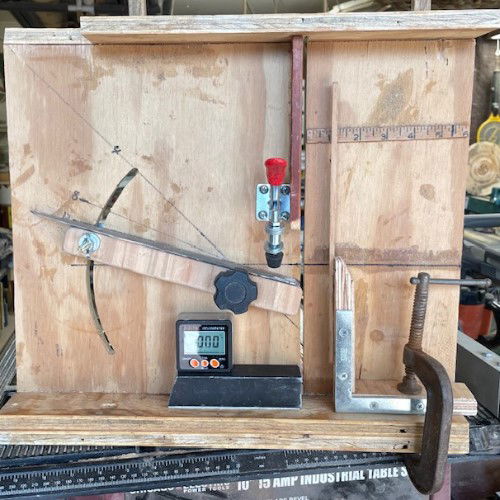
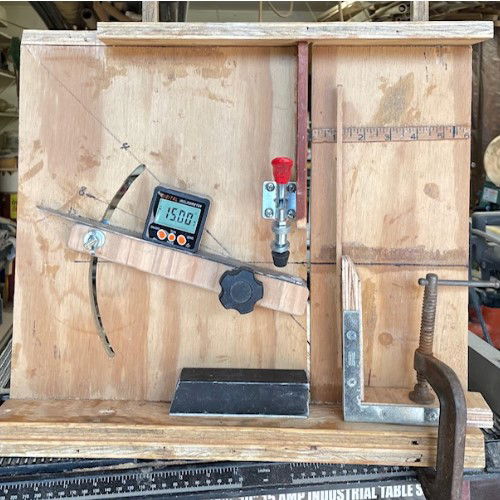
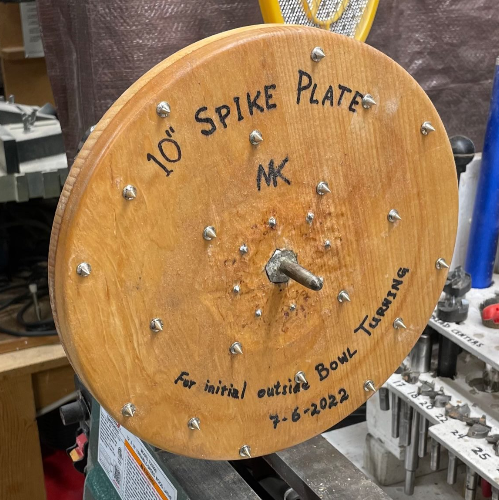
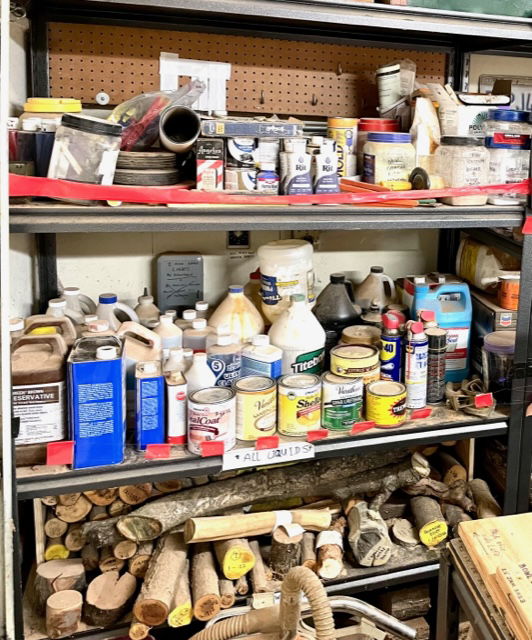
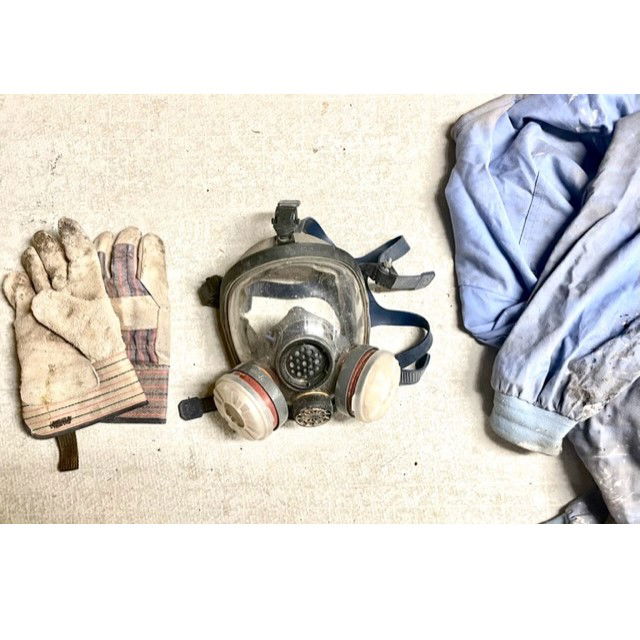
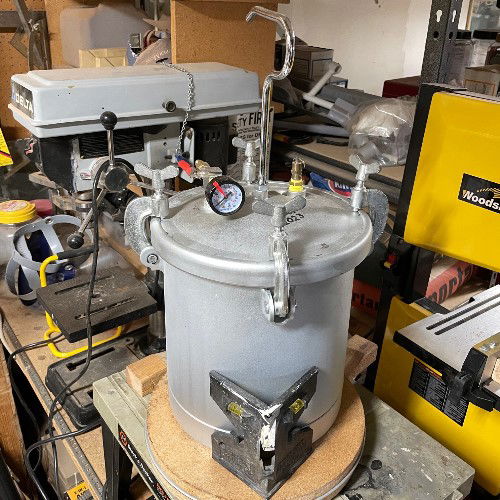
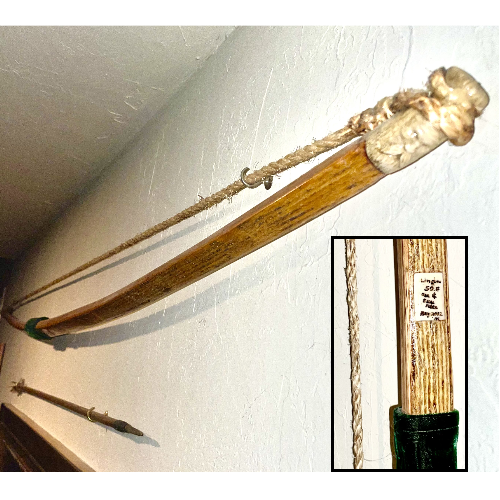
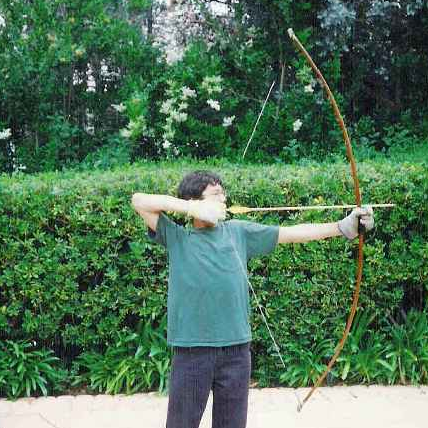
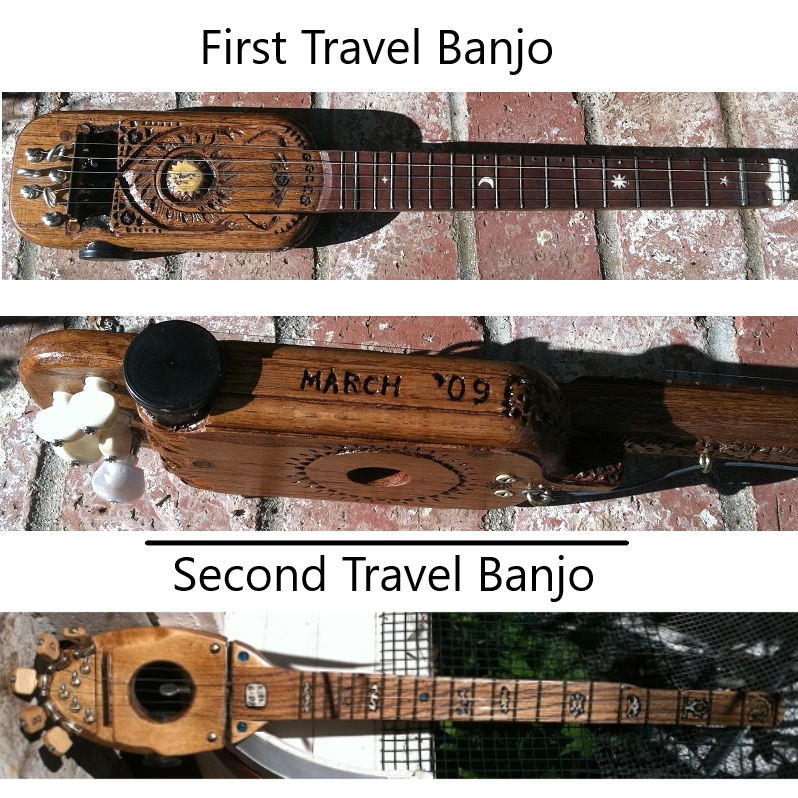
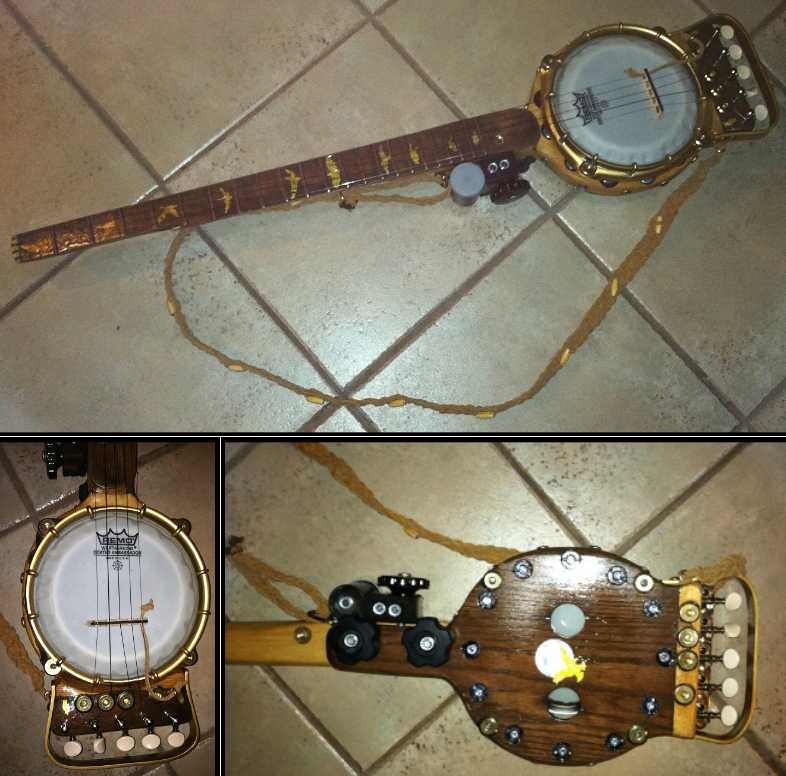
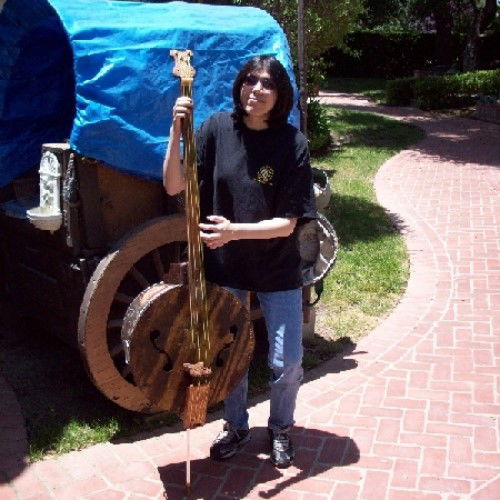
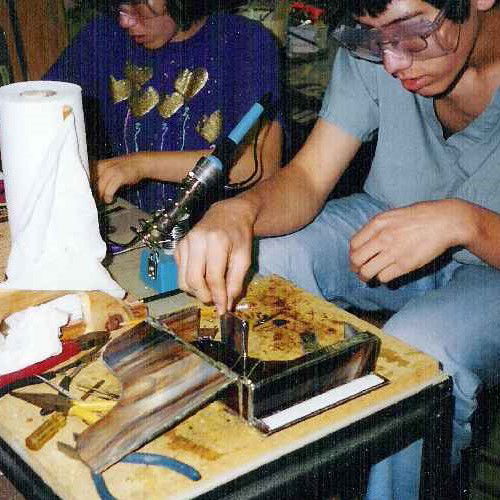
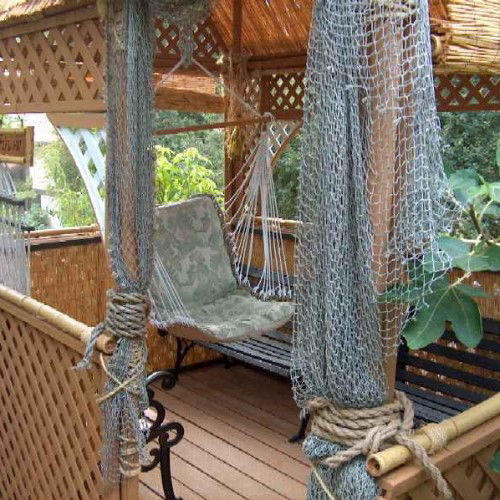
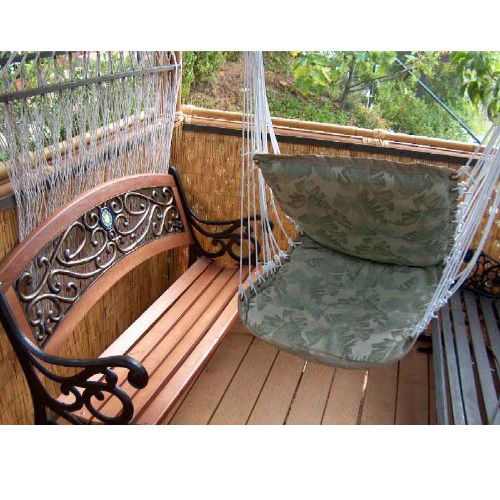
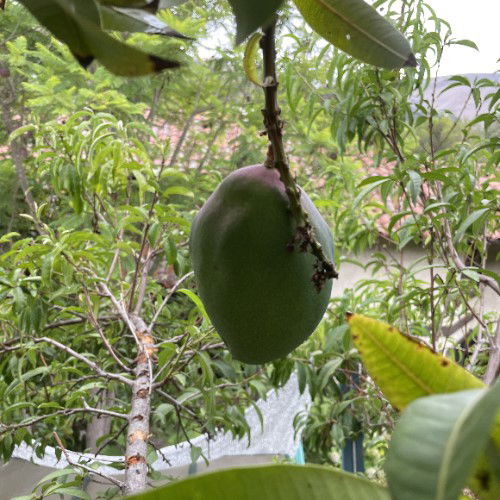
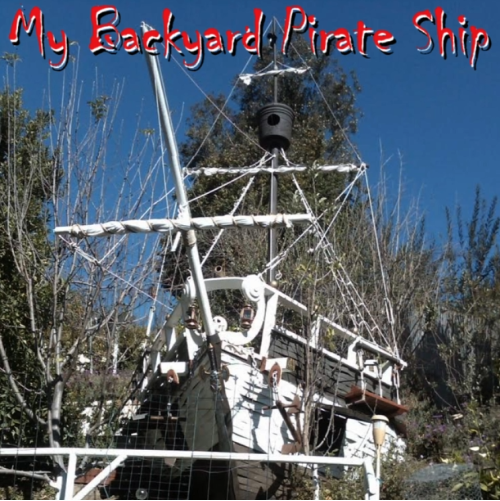
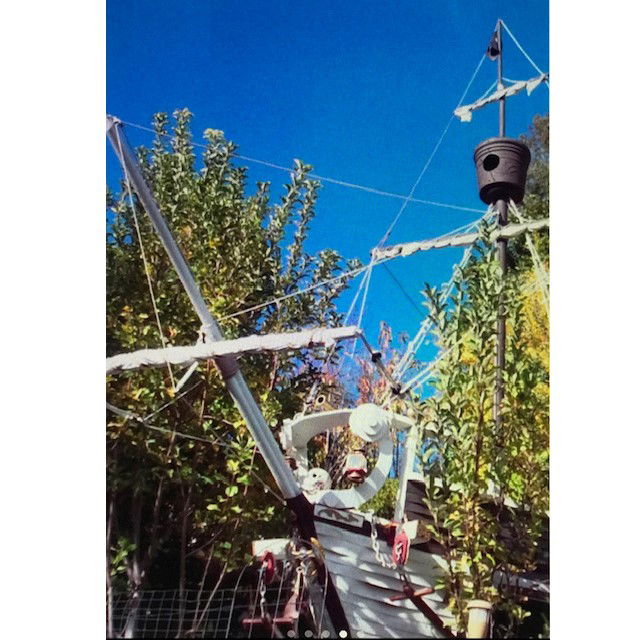
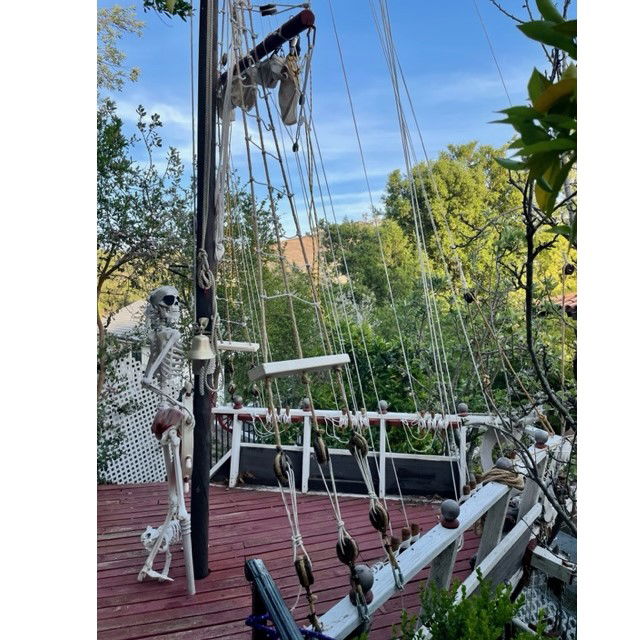
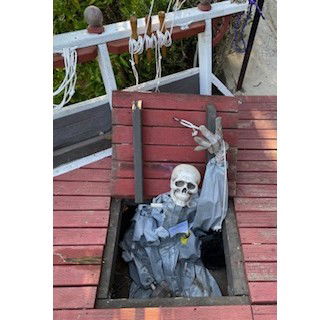
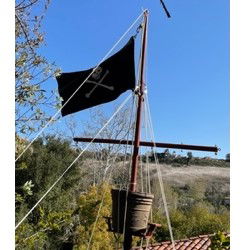
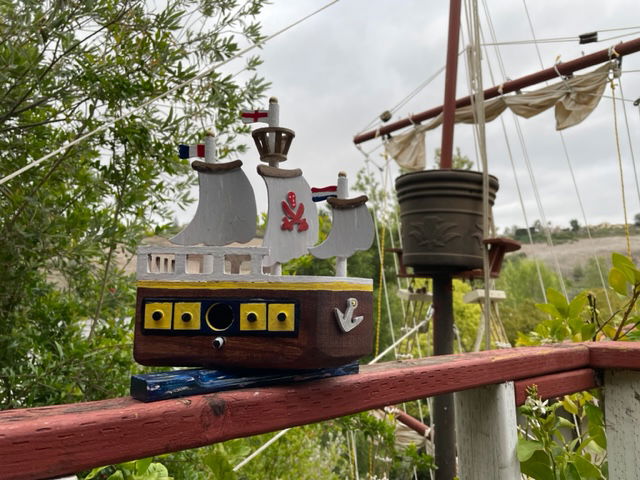
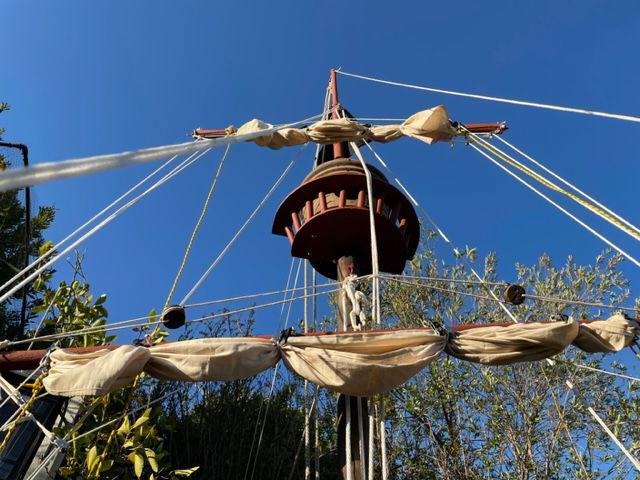
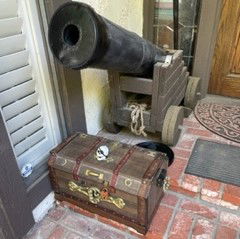
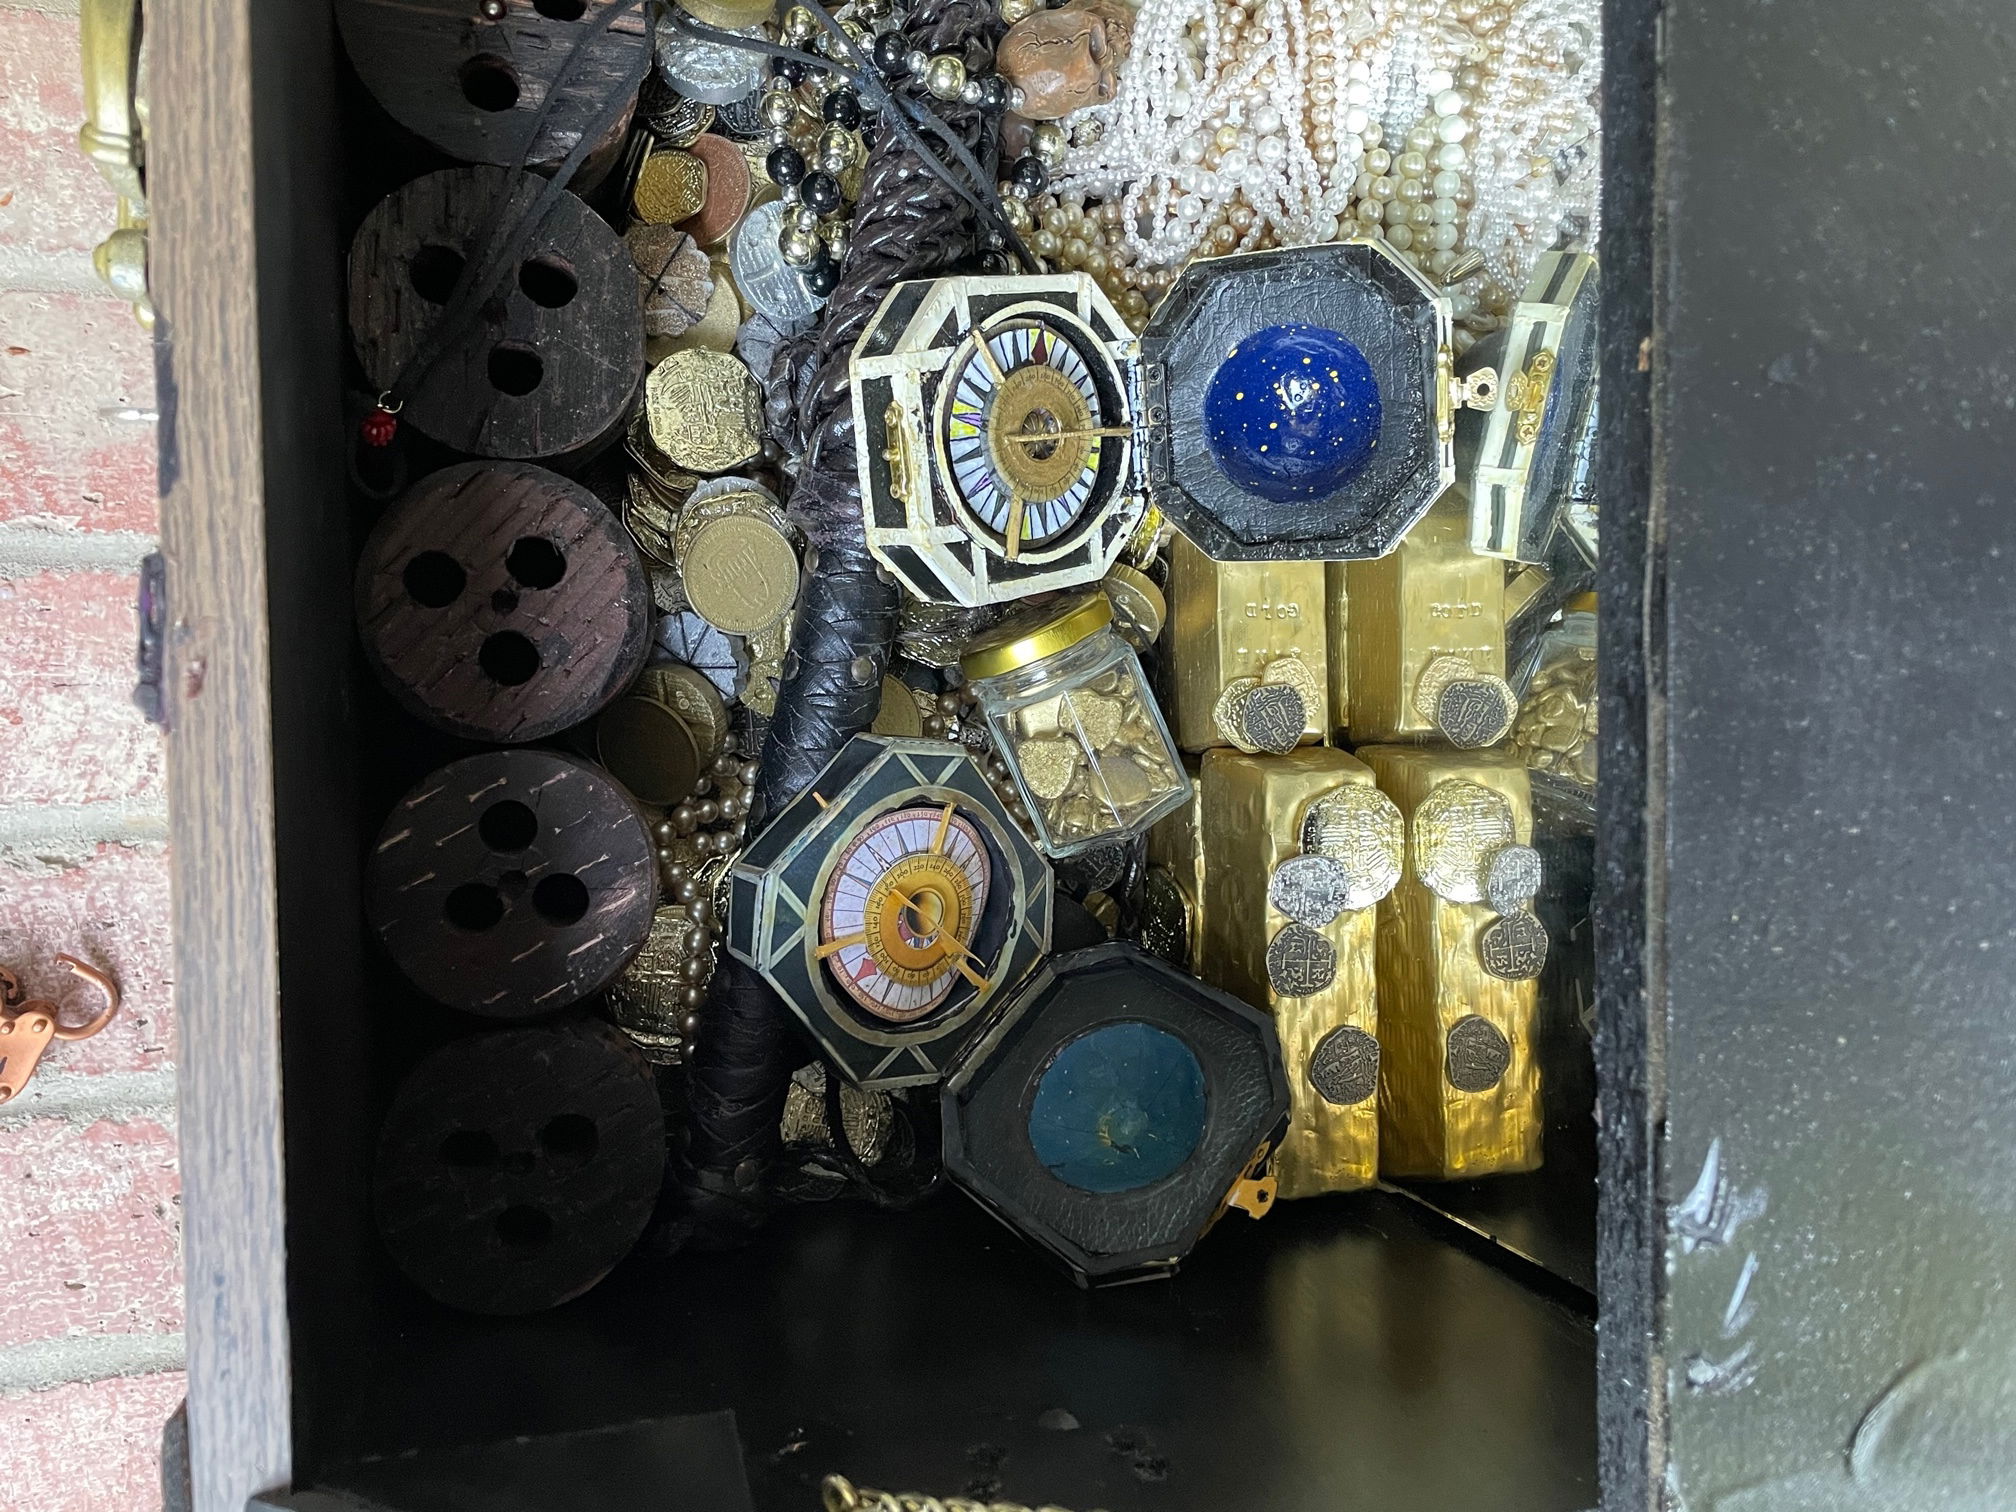
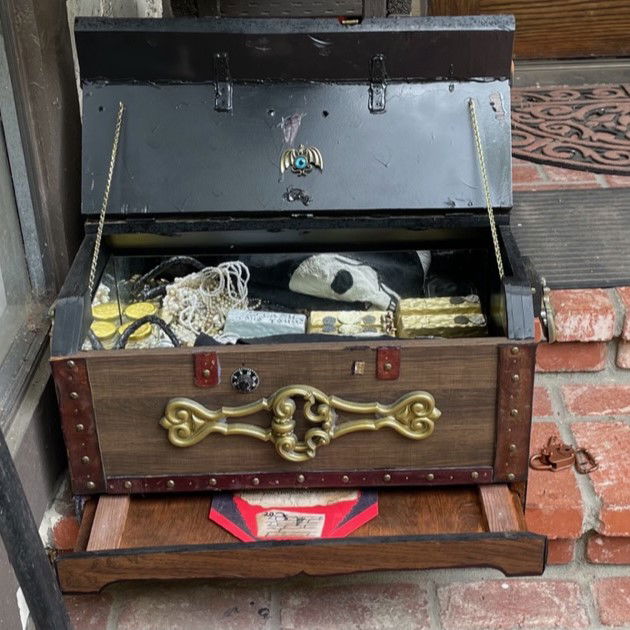
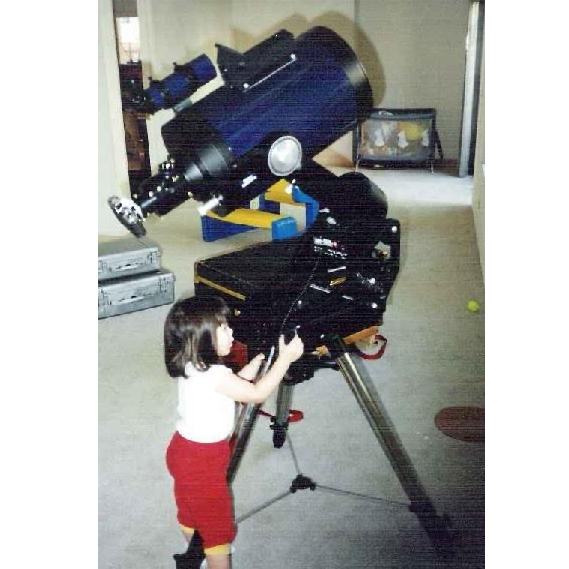
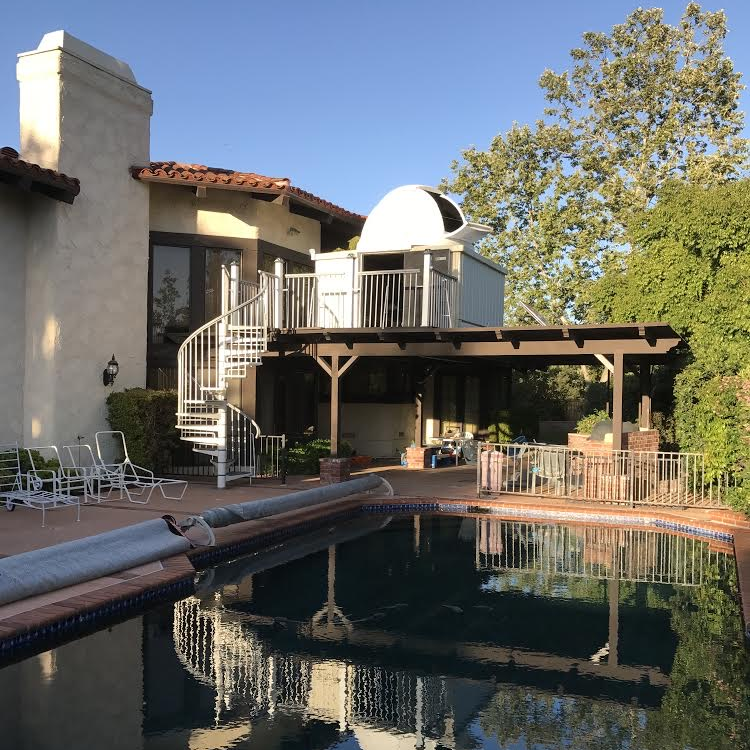
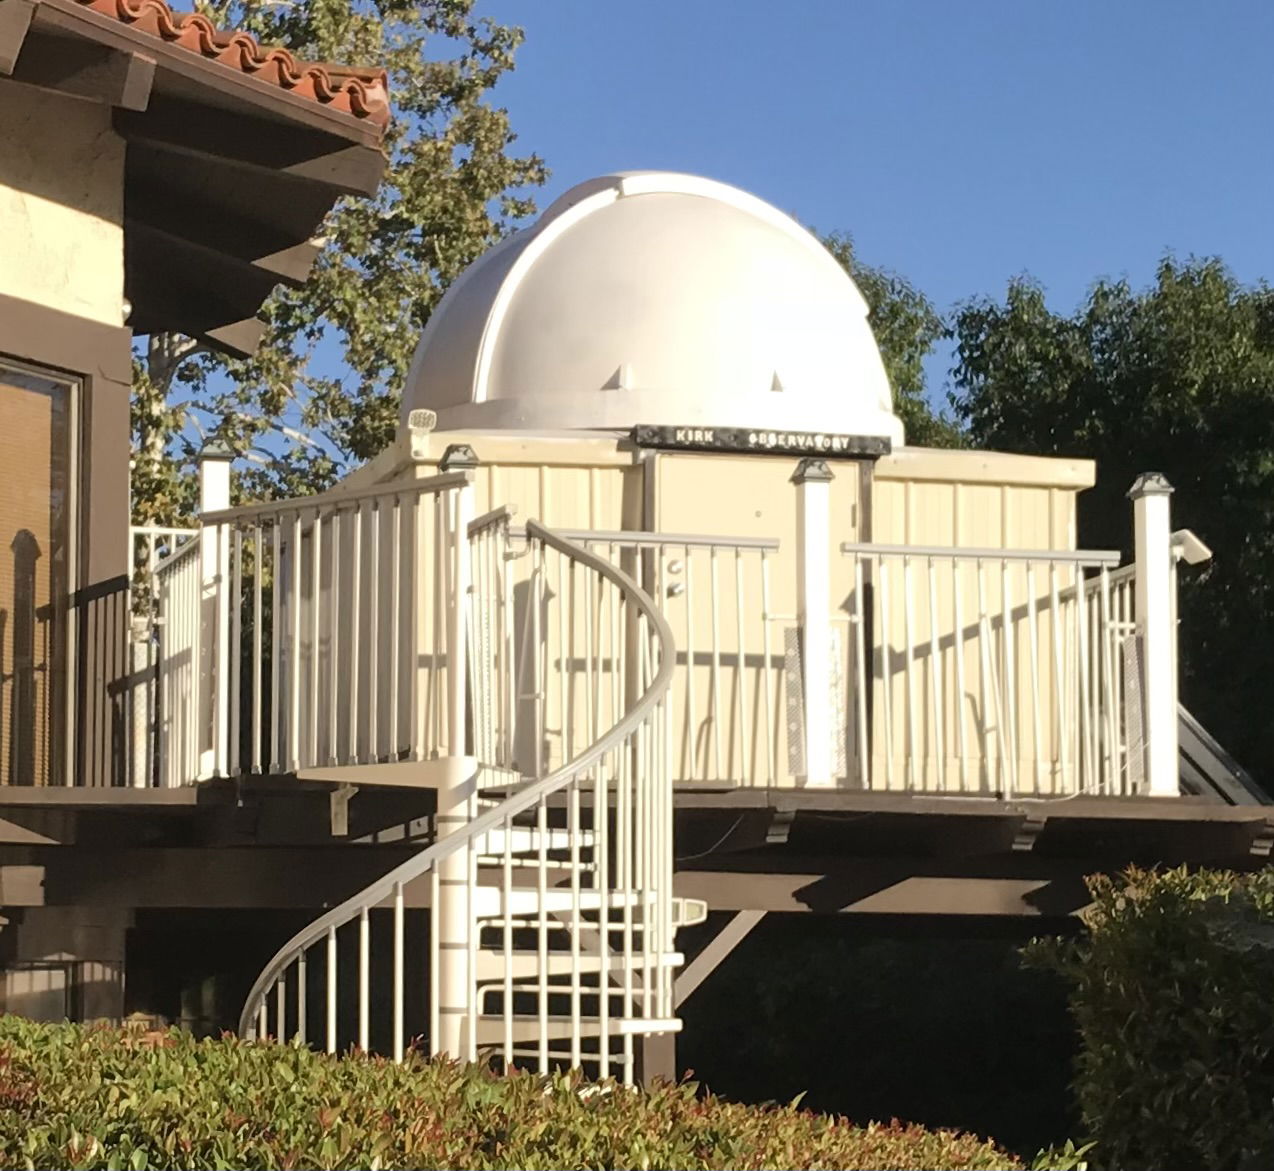
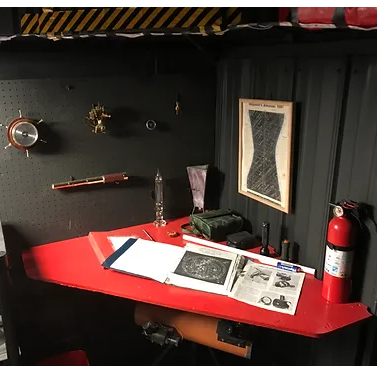
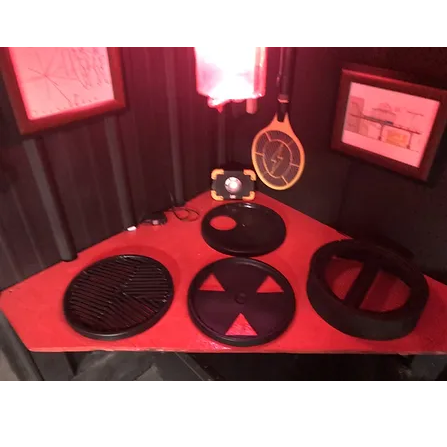